Connect a Workday custom report to Bindbee using Workday Reports-as-a-Service (RaaS), which lets integrations retrieve data from a custom report through a web service URL. Each numbered step below matches one screen in the Bindbee magic link, so you can keep this guide open beside the magic link and work through it in order.
Why Use RaaS?
Benefit
What it means
You control the data
Bindbee receives only the fields and workers included in your report.
Custom and calculated fields
Tenant-specific fields can be added to the report directly.
Read-only by design
Bindbee cannot write data back to Workday through RaaS. This suits organizations that want a read-only integration.
Combine data in one report
Include fields from related Workday objects in a single report.
Before You Begin
For this setup, you will need:
Access to create and share custom reports in Workday
A Workday Integration System User (ISU) that can access the report
A Workday API Client configured for OAuth
The required Workday permissions for the data included in your report
Your Bindbee magic link
If you have not configured these yet:
See 4.1 Create a Workday Integration System User below to create and configure an ISU.
See 4.7 Create a Workday API Client for Integrations below to configure OAuth, Client ID, Client Secret, and Refresh Token.
See 4.5 Grant Permissions to the Security Group below for the Workday domain permissions required for the data you want to access.
Step 1: Allow Bindbee to Access Workday RaaS
Open the Bindbee magic link and click Allow and Continue.
Step 2: Enter Your Workday Web Services Endpoint URL
Open your Workday dashboard.
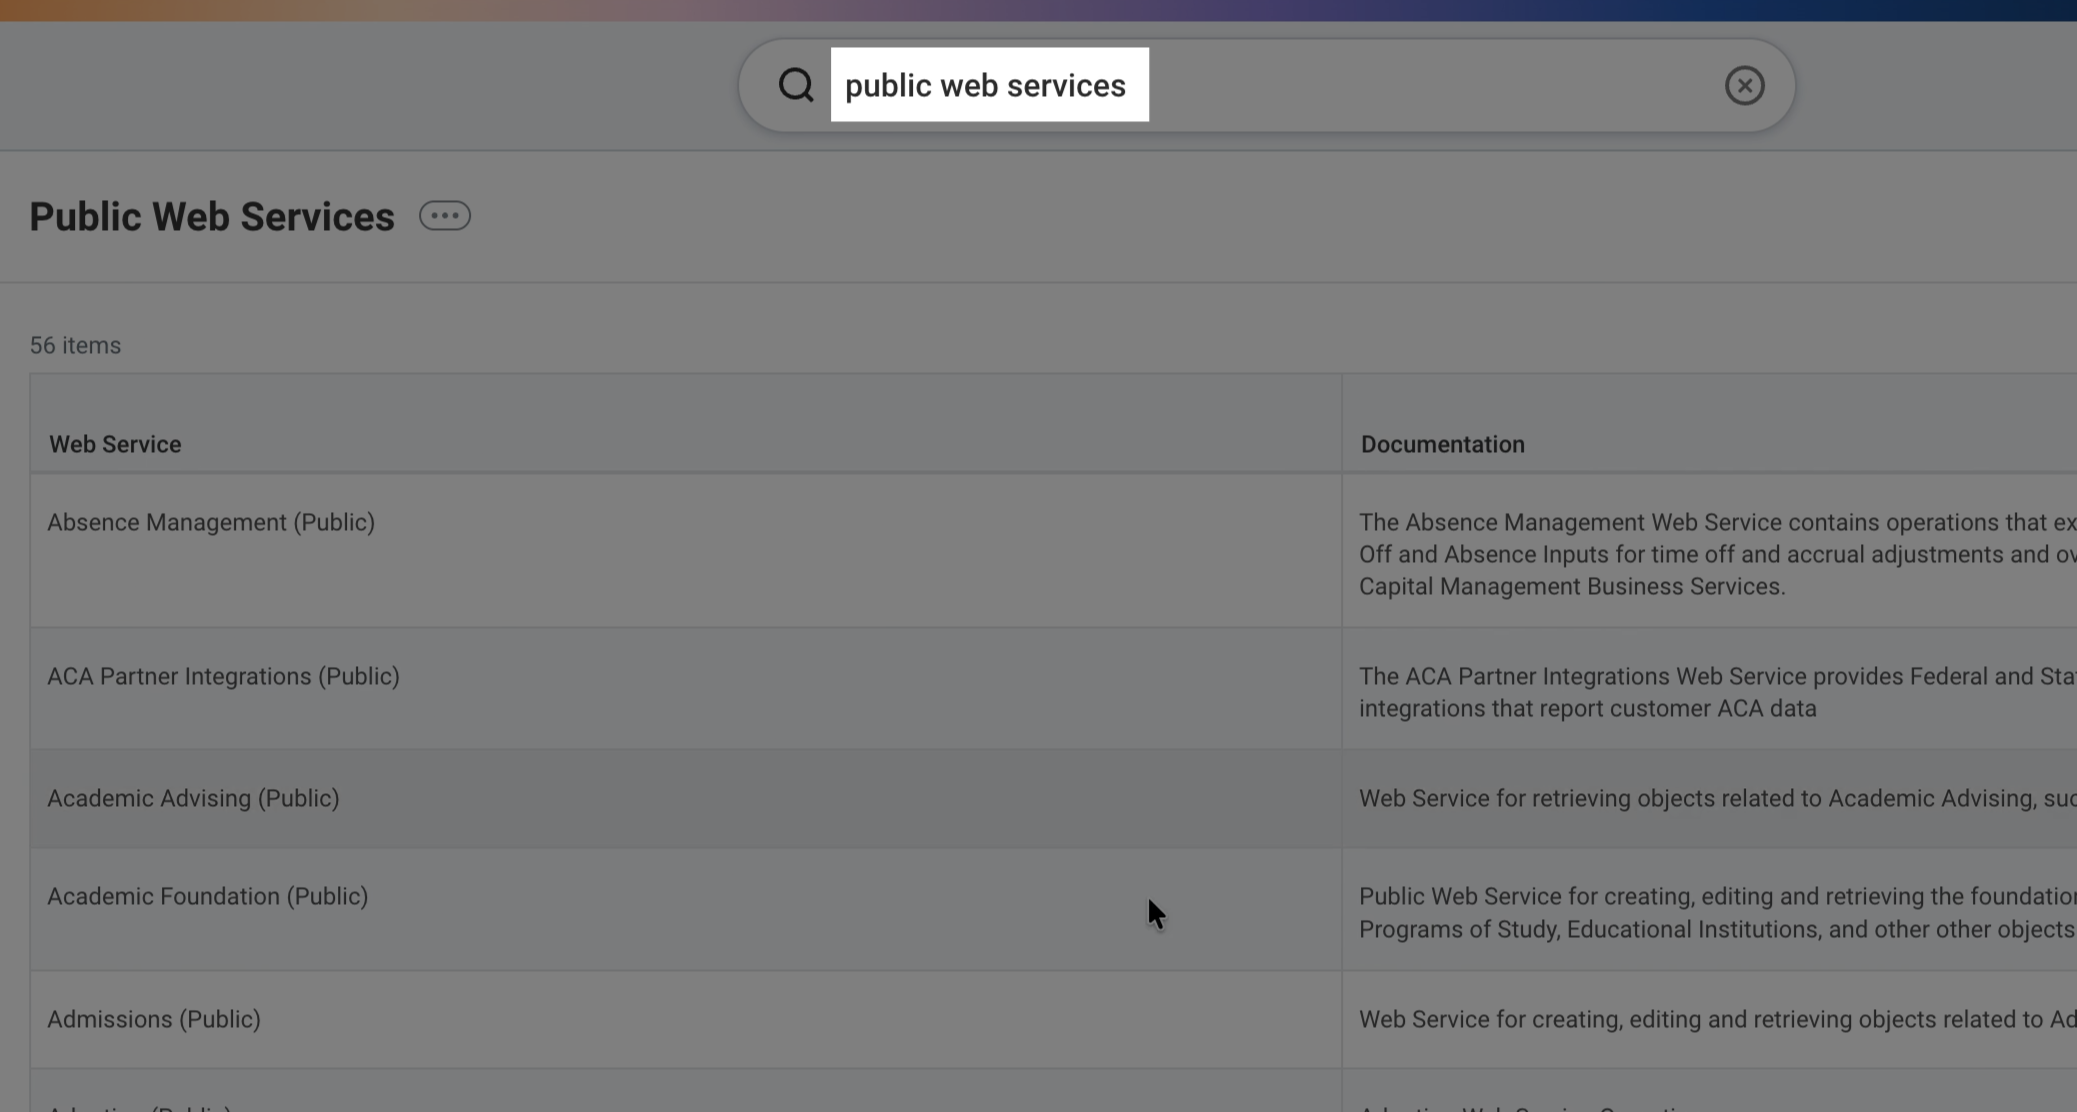
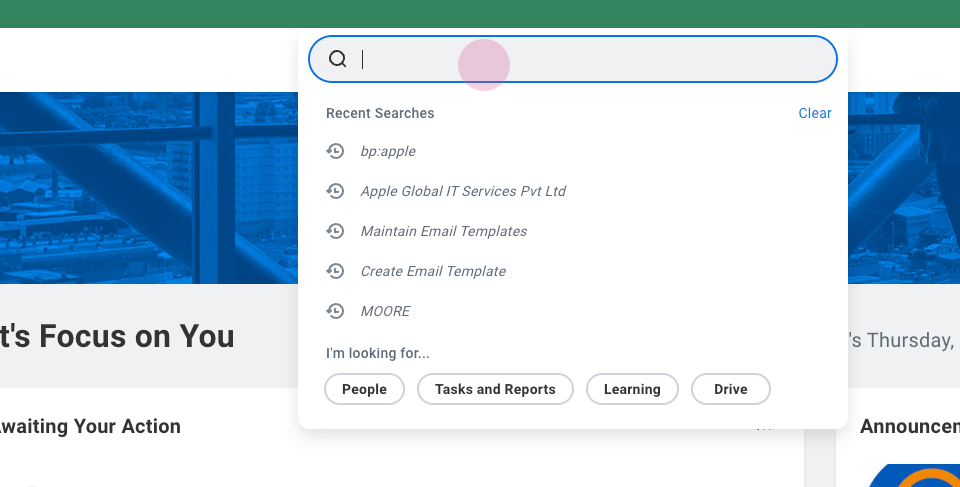
Search for Public Web Services.
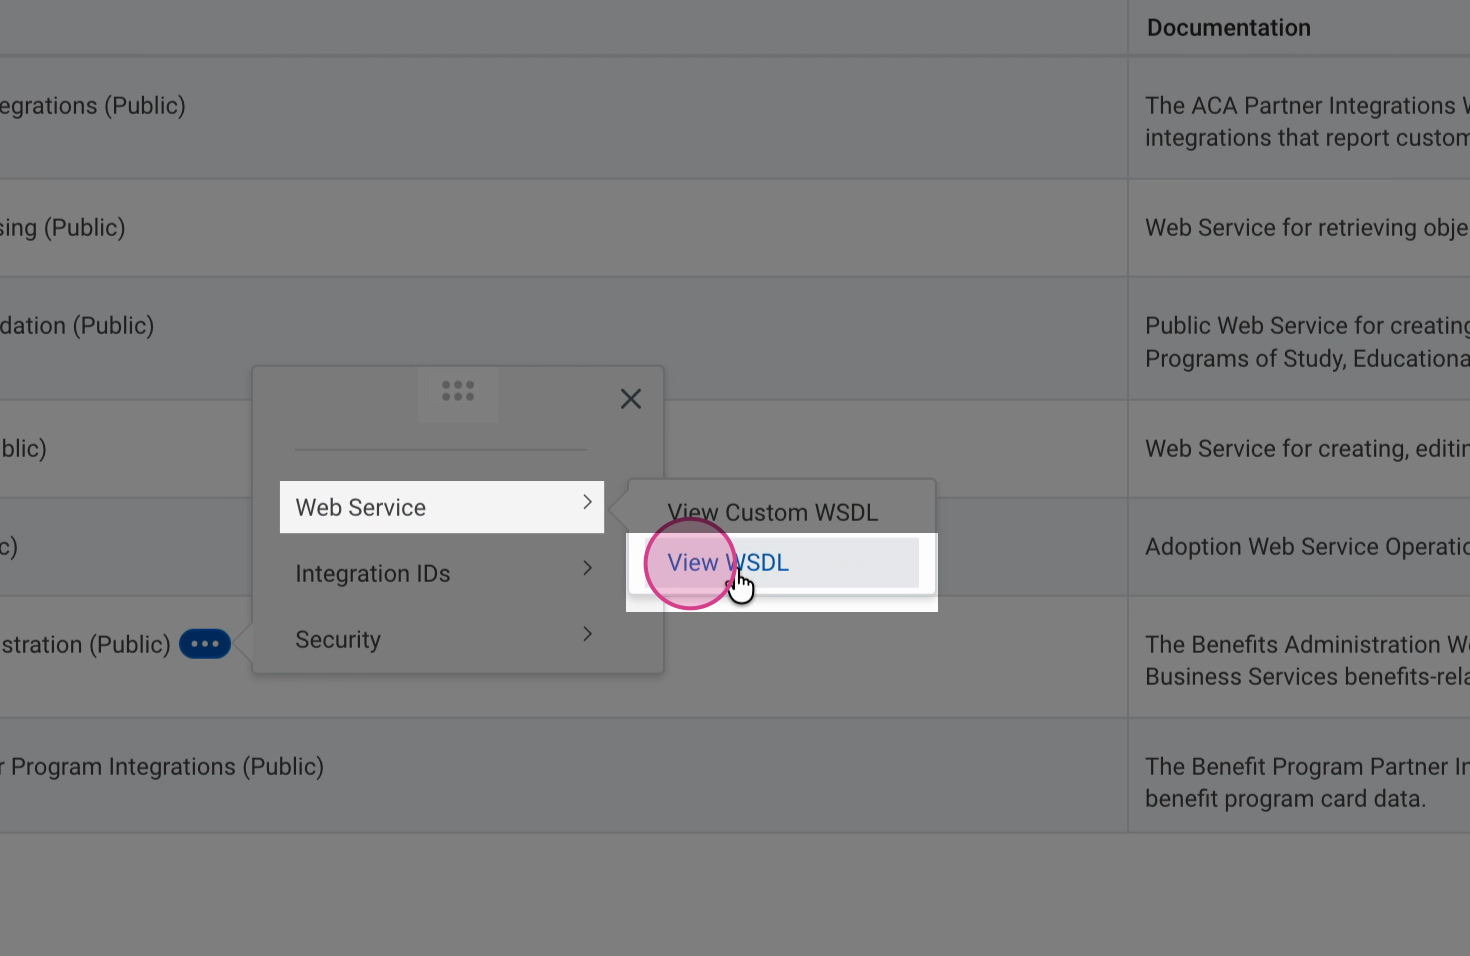
Navigate to Human Resource → Web Service → View WSDL. You can also use Benefit Administration → Web Service → View WSDL, as shown in the screenshot below.
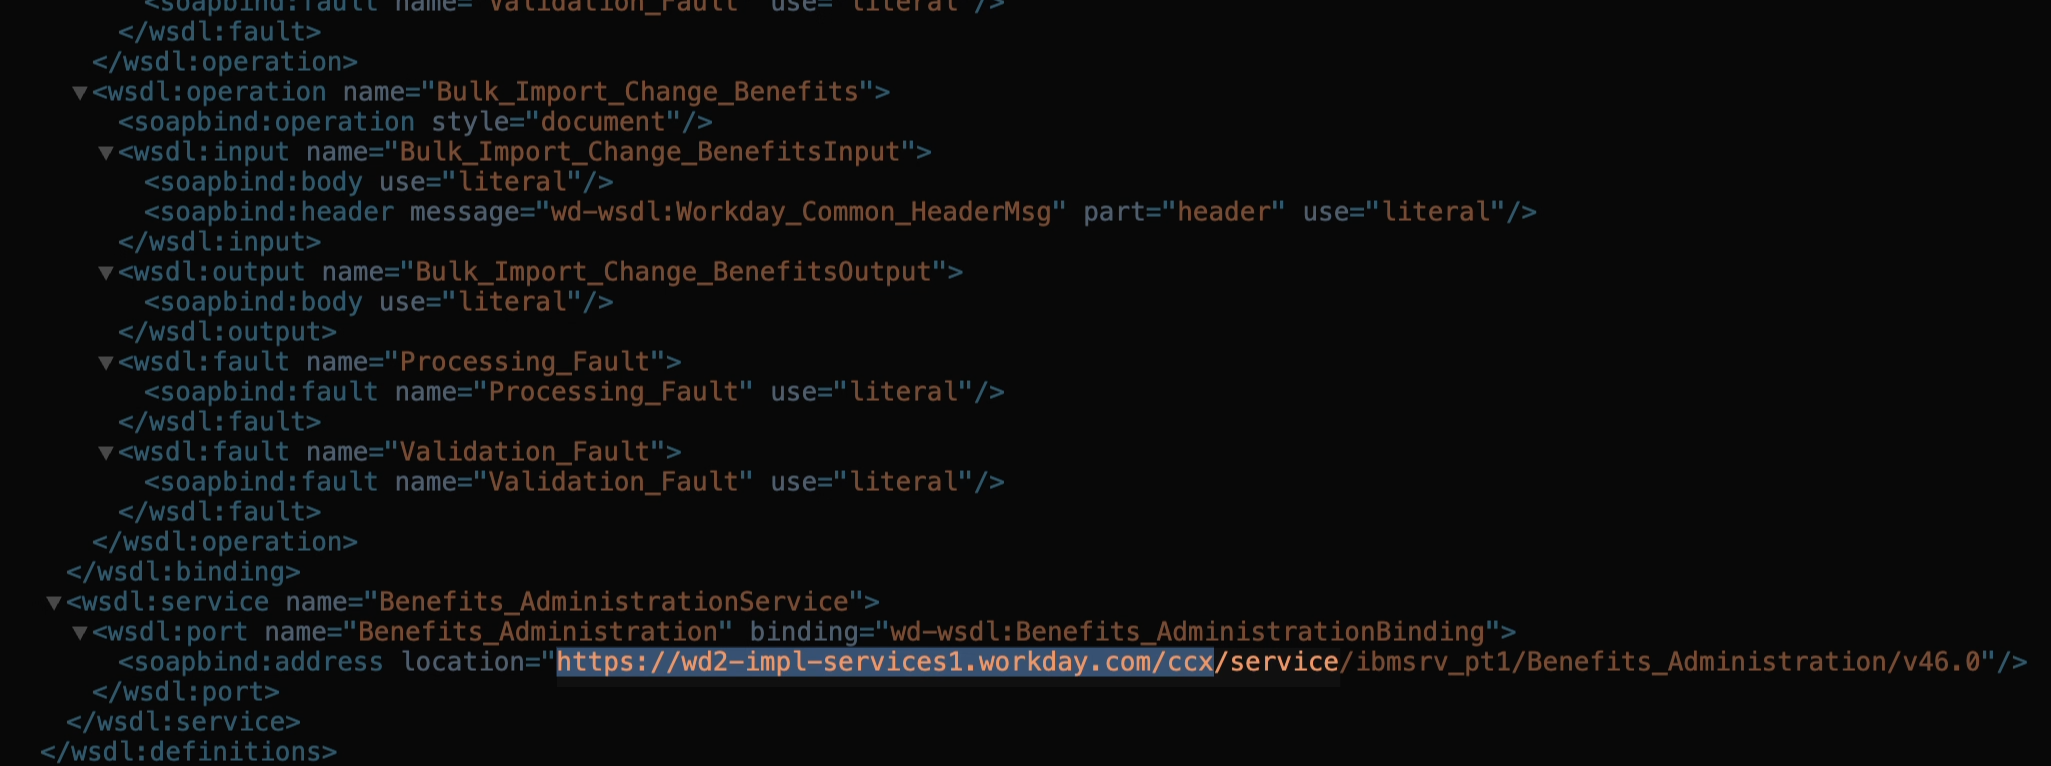
Scroll to the bottom of the WSDL and locate the Workday web service URL.
Copy everything before /service in the URL.
Back in the magic link, paste the value into the Workday Web Services Endpoint URL field and click Continue.
Step 3: Enter Your Workday Tenant Name
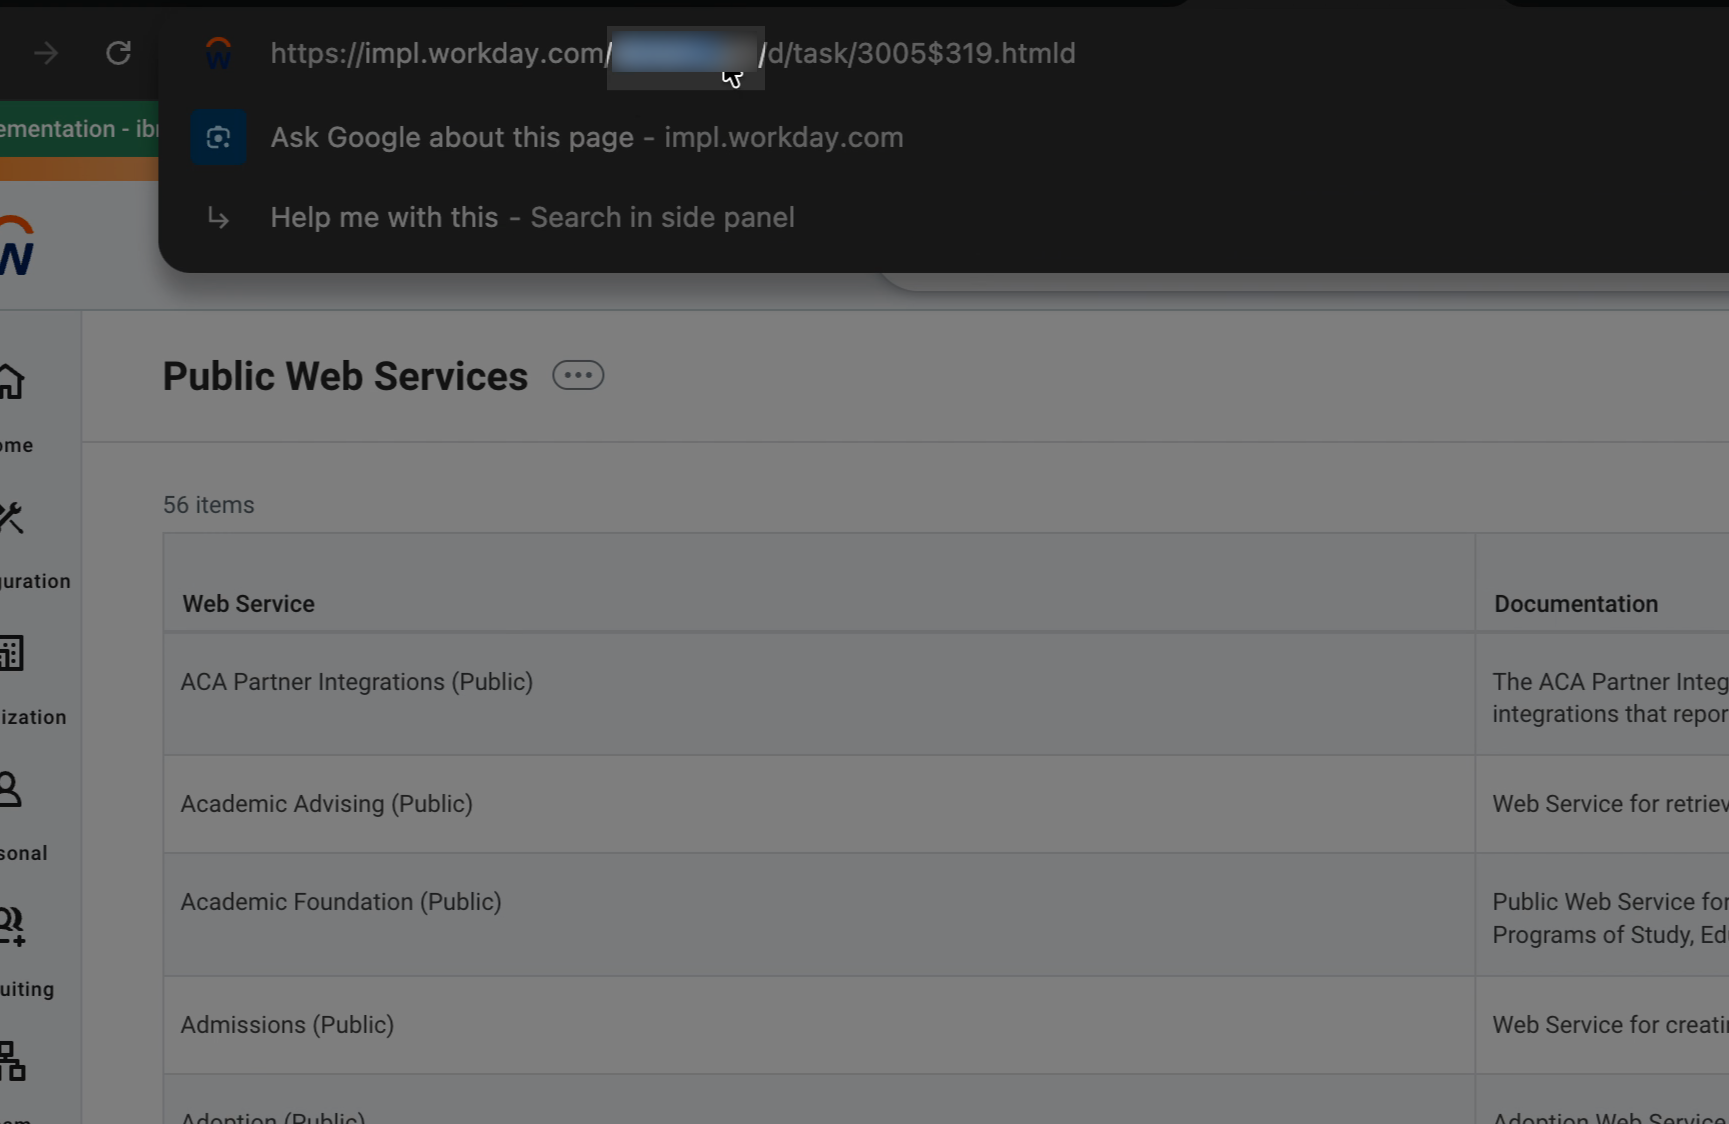
Your tenant name appears in your Workday dashboard URL.
Copy the part after workday.com/ (for example, acme in https://wd5-services1.workday.com/acme) and enter it in the Workday Tenant Name field. Do not enter the full URL.
Step 4: Enter Your Client Credentials and Refresh Token
Bindbee uses a Workday API Client and Refresh Token to authenticate when it runs the RaaS report. RaaS also needs a Workday Integration System User (ISU), a dedicated Workday account that integrations use to access Workday data. The Refresh Token is generated for the ISU, and in Step 5 you will share the custom report with the same ISU.
Set up the ISU with steps 4.1 to 4.6 and the API Client with steps 4.7 to 4.11, then enter the credentials in step 4.12.
Already have an ISU and an API Client for Bindbee? Check 4.8 Verify Report Execution Access and 4.11 Verify the Refresh Token User, then skip to 4.12 Enter the Credentials in Bindbee.
4.1 Create a Workday Integration System User
Go to your Workday Dashboard.
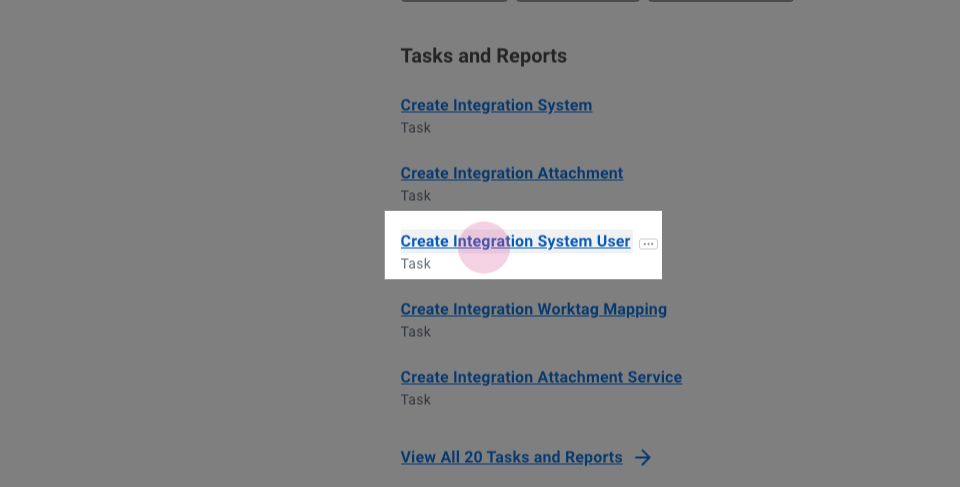
Search for Create Integration System User and select it.
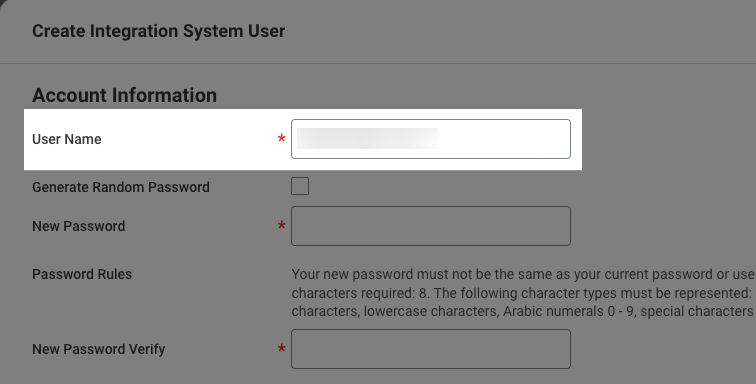
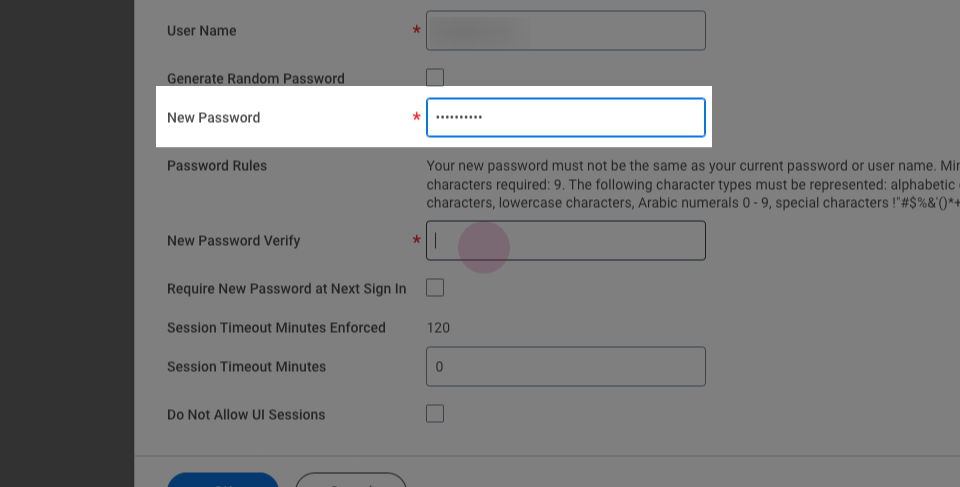
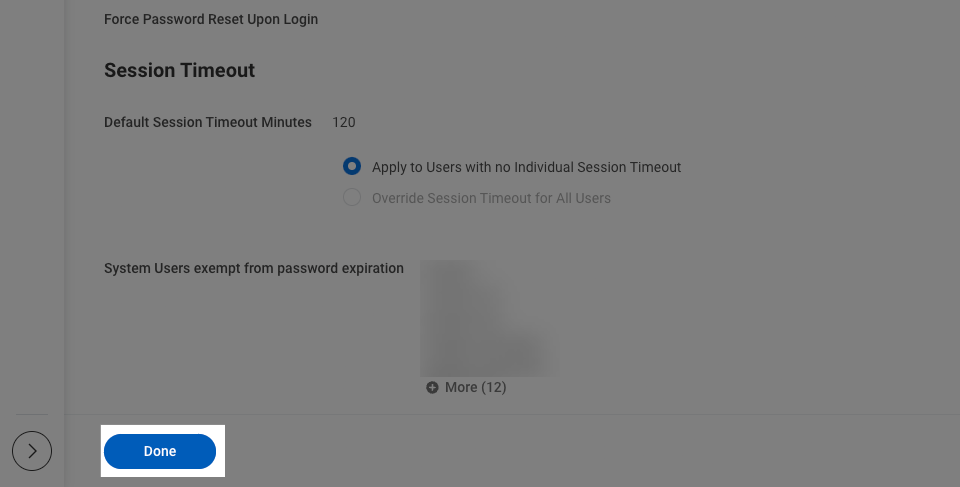
Enter a User Name. Do not select Generate Random Password. Enter a password manually and store it securely.
Review the remaining settings and configure them as follows:
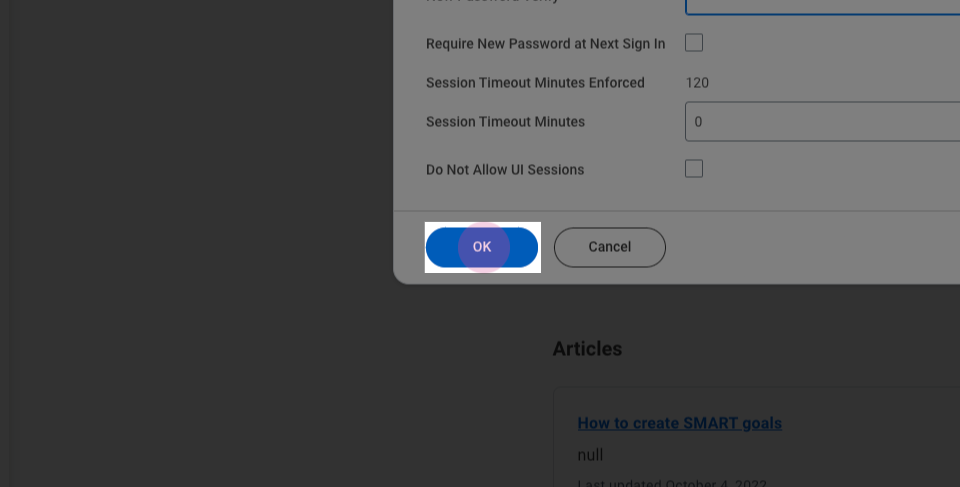
Ensure Require New Password at Next Sign In is not selected.
Keep the Session Timeout Minutes default value of zero to prevent session expiration.
(Optional) Select Do Not Allow UI Sessions to prevent the ISU from signing in to the Workday UI.
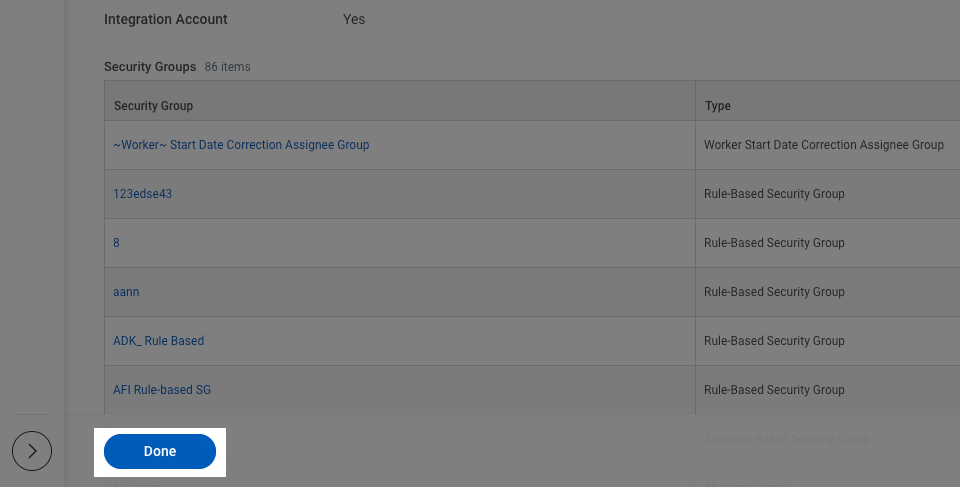
Click OK, then Done.
4.2 Prevent the ISU Password from Expiring
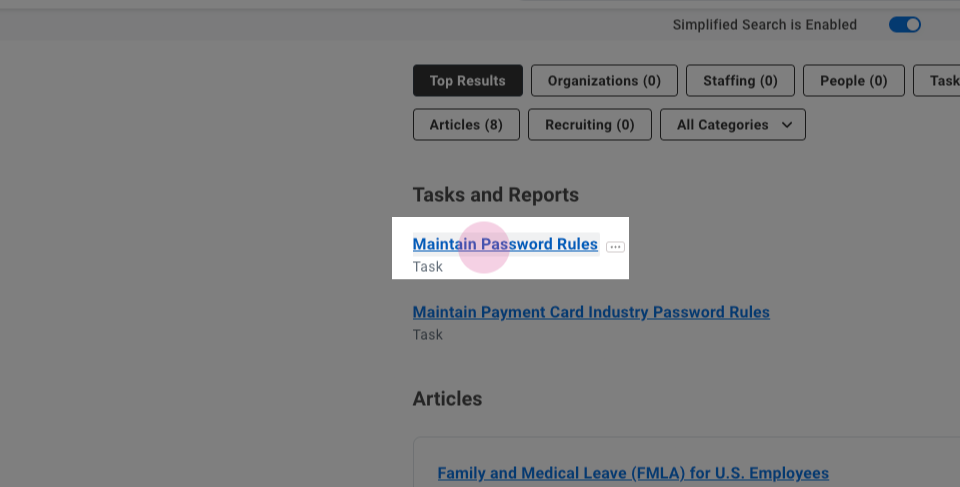
Search for and open Maintain Password Rules.
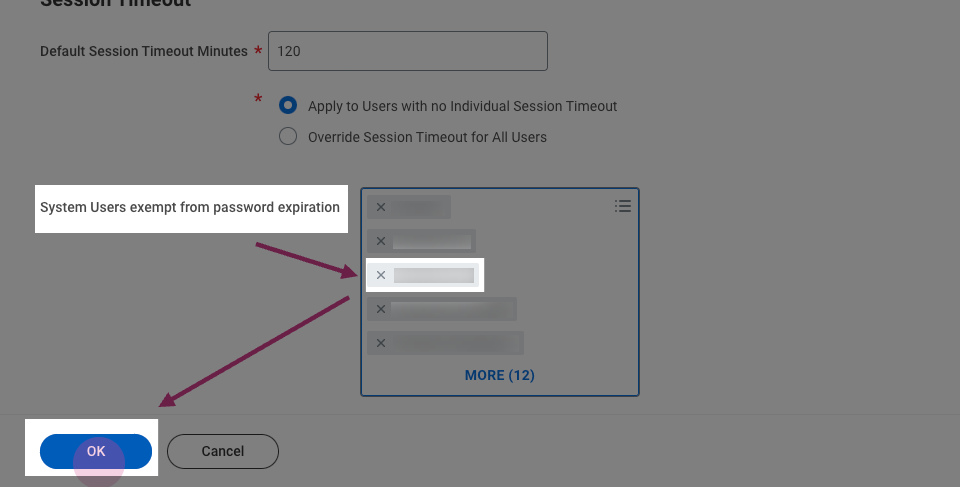
In Select users exempt from password expiration, add the newly created Integration System User and click OK, then Done.
4.3 Create a Security Group
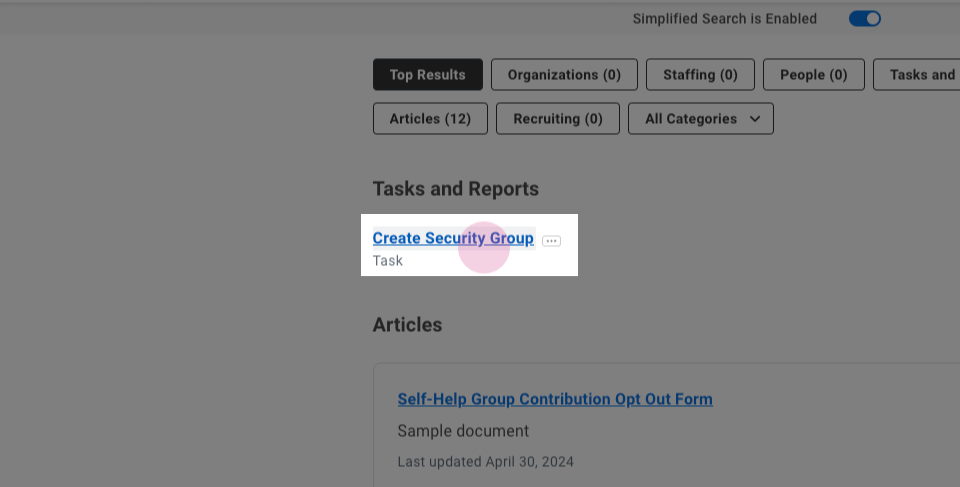
Search for and open Create Security Group.
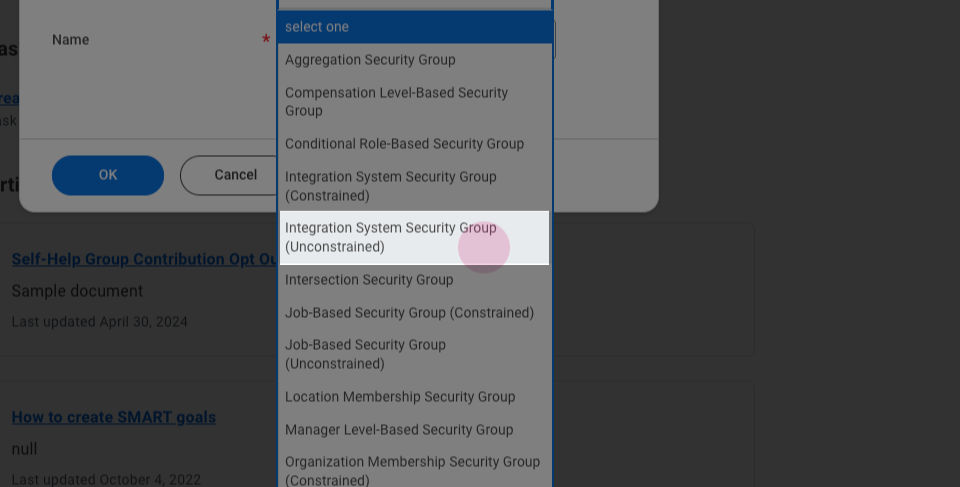
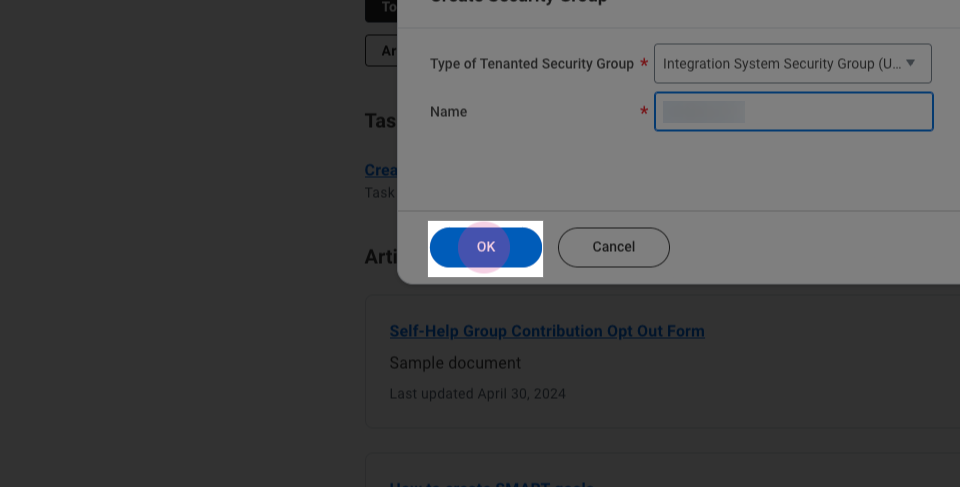
In Type of Tenanted Security Group, select Integration System Security Group (Unconstrained).
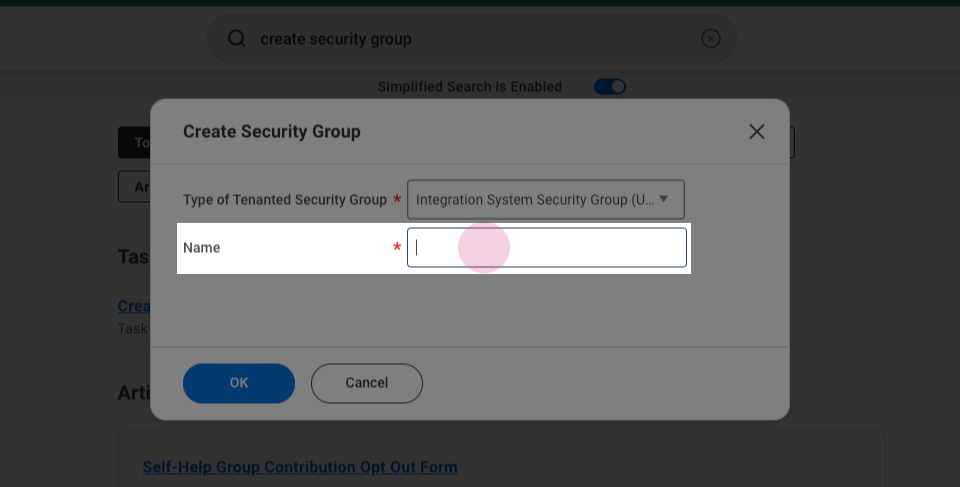
Enter a name for the group and click OK.
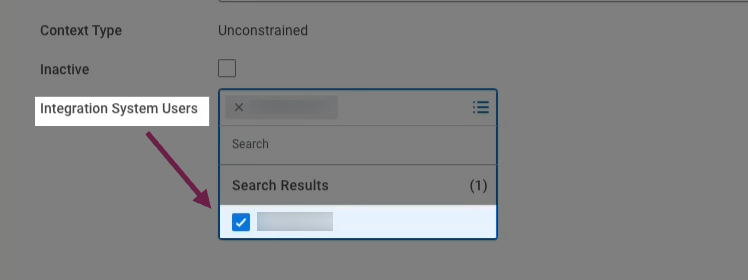
Add the ISU you created to the security group.
Click OK, then Done.
4.4 Manage Authentication Policies
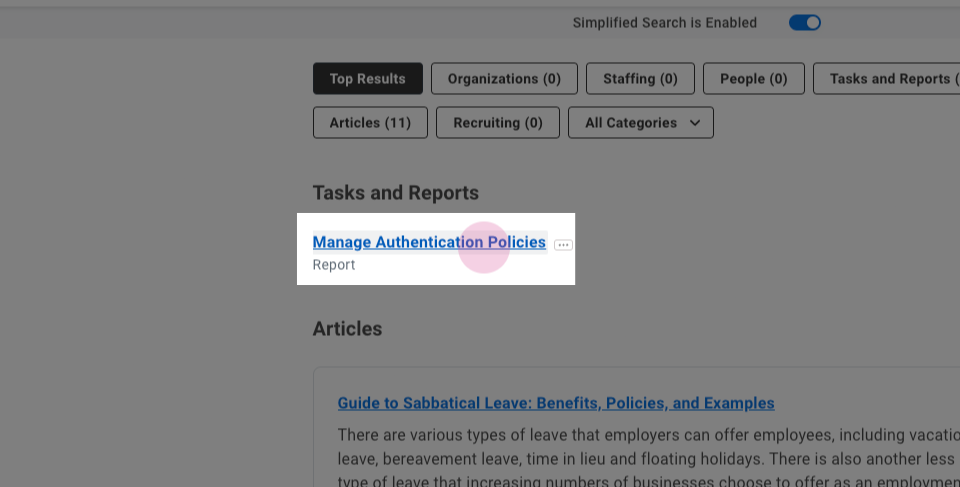
Search for and open Manage Authentication Policies.
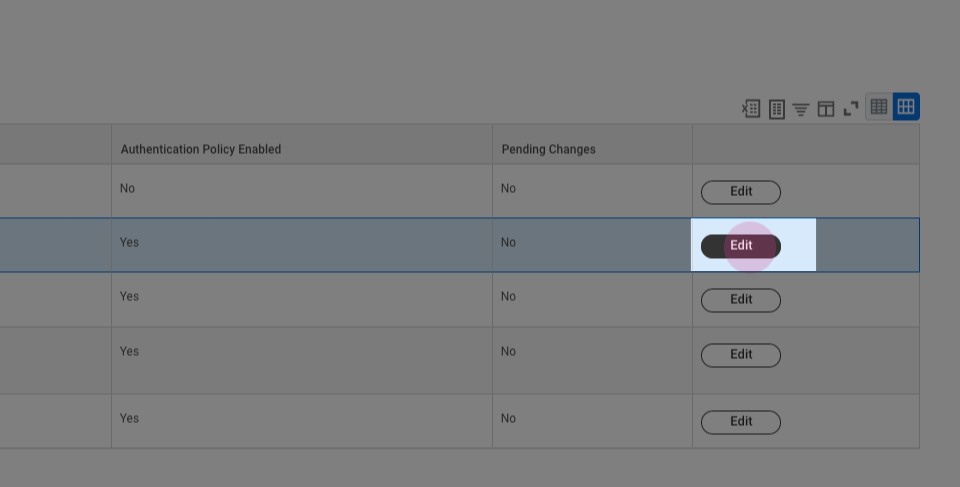
Locate the current authentication policy and click Edit.
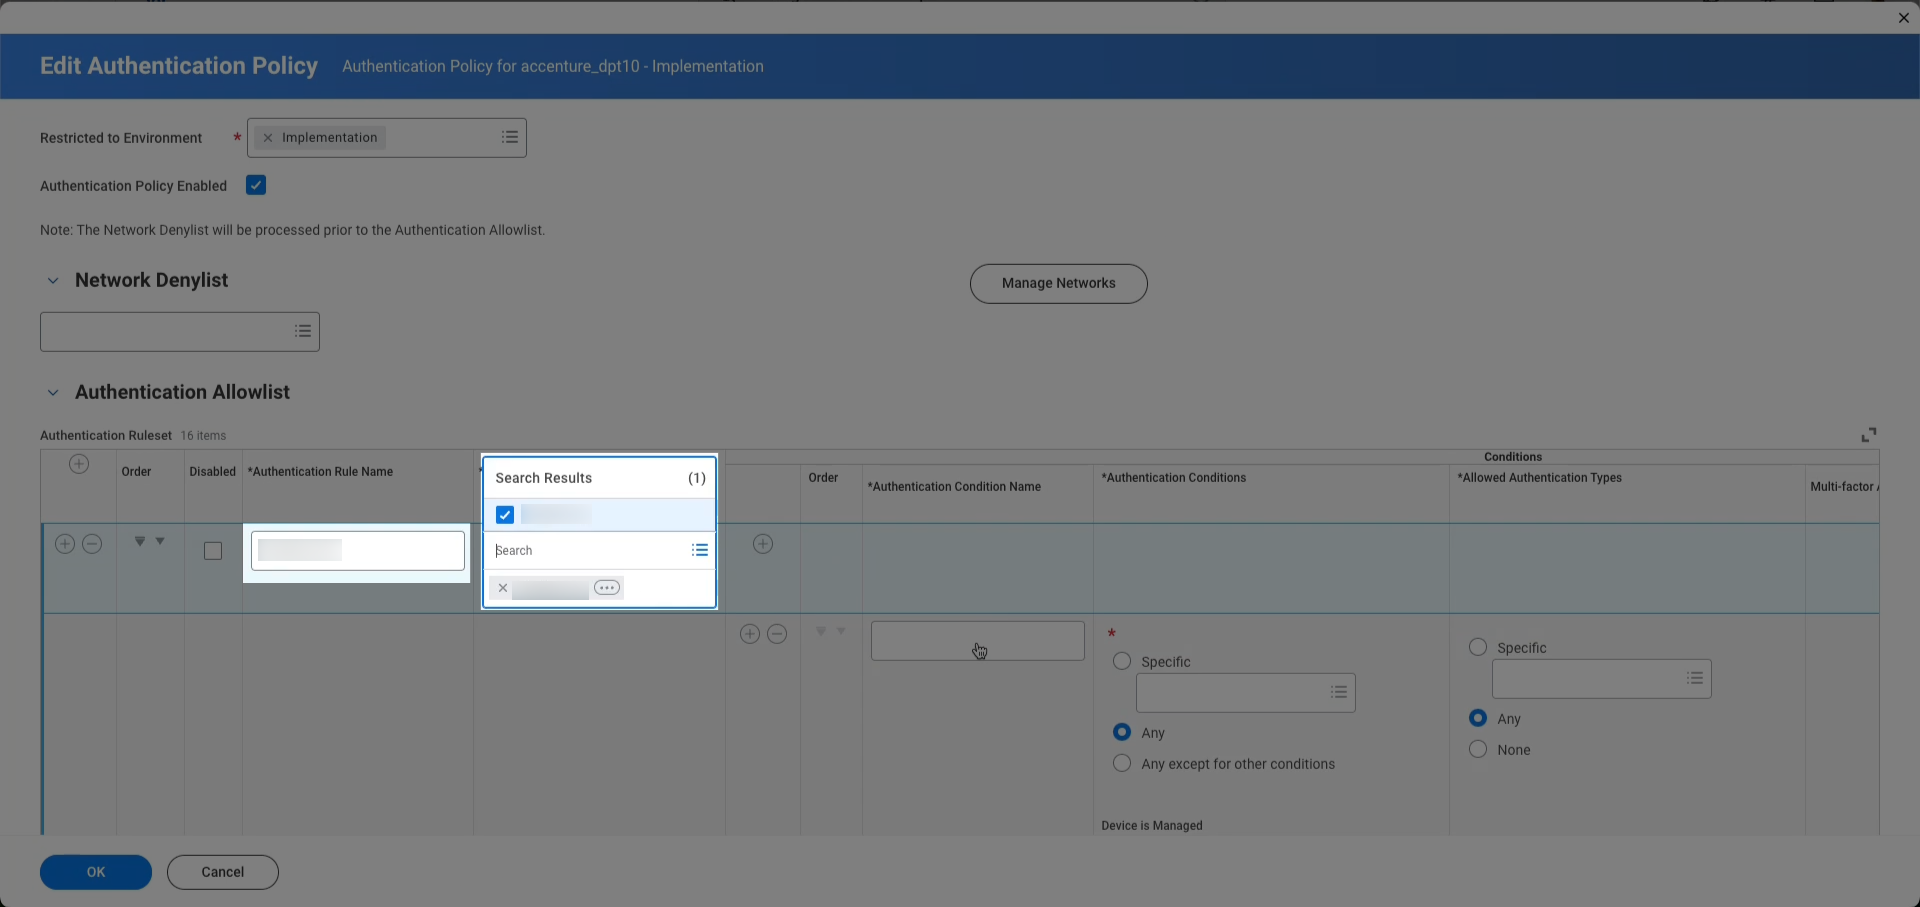
Create a new authentication rule, give it an appropriate name, and add the security group you created earlier.
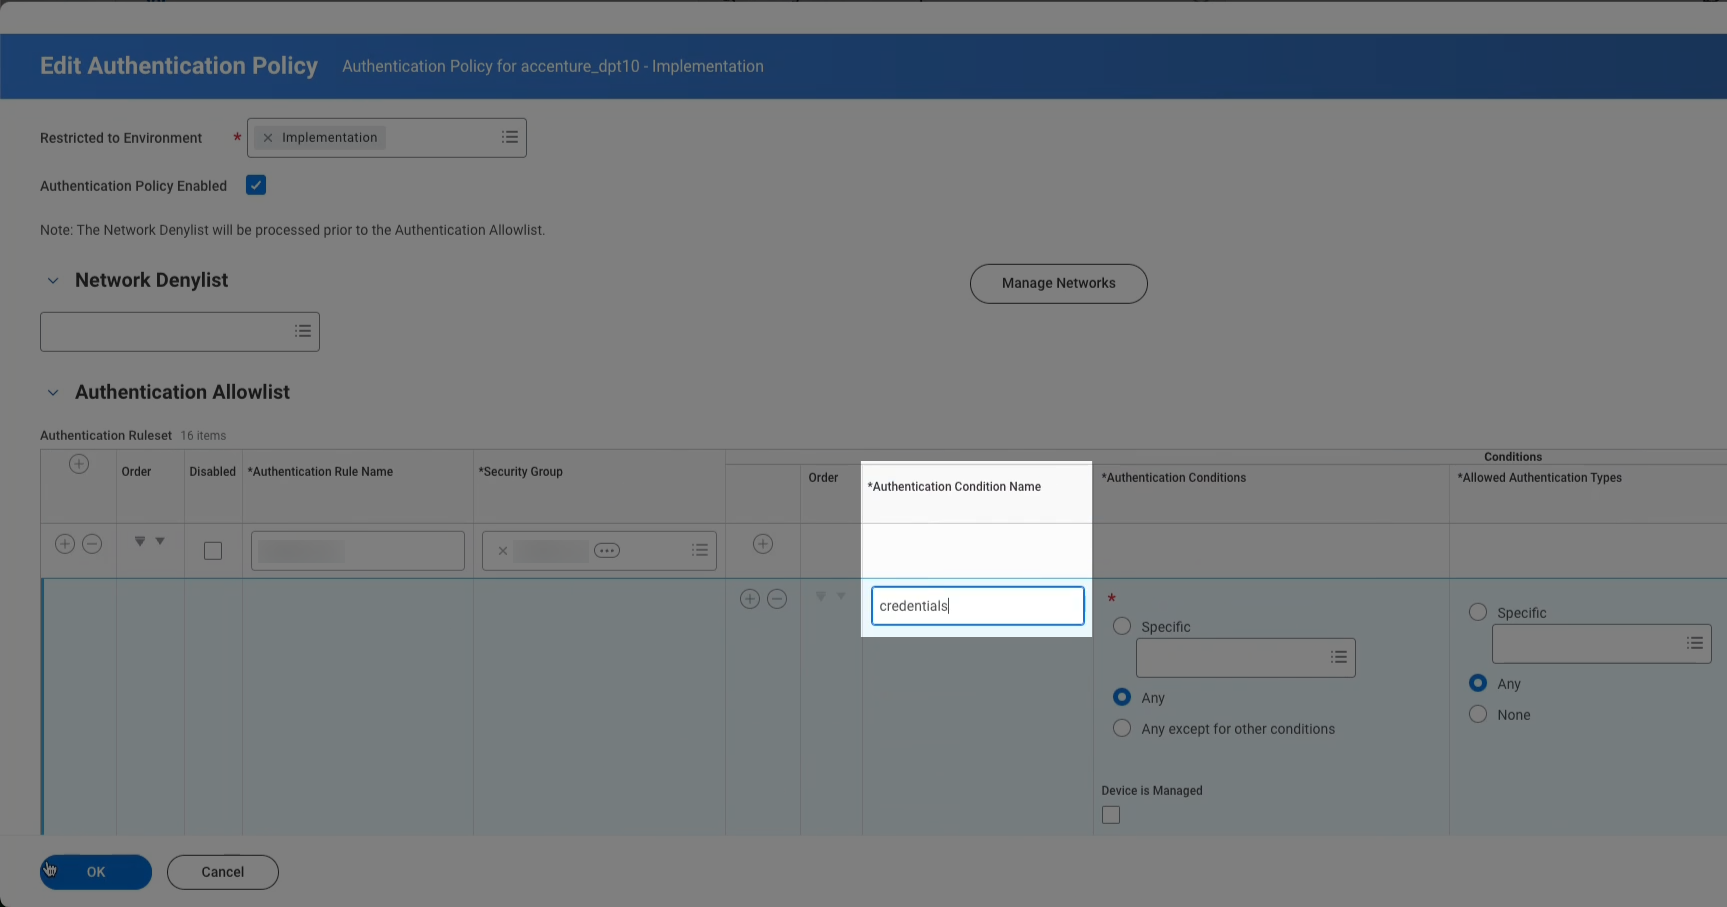
Set the Authentication Condition Name to "credentials" and leave the rest unchanged.
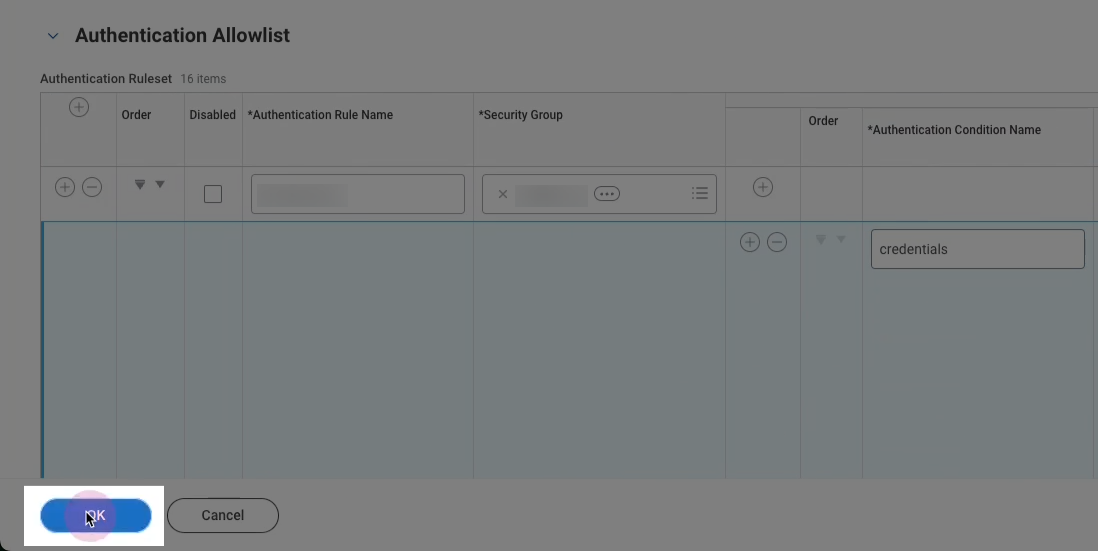
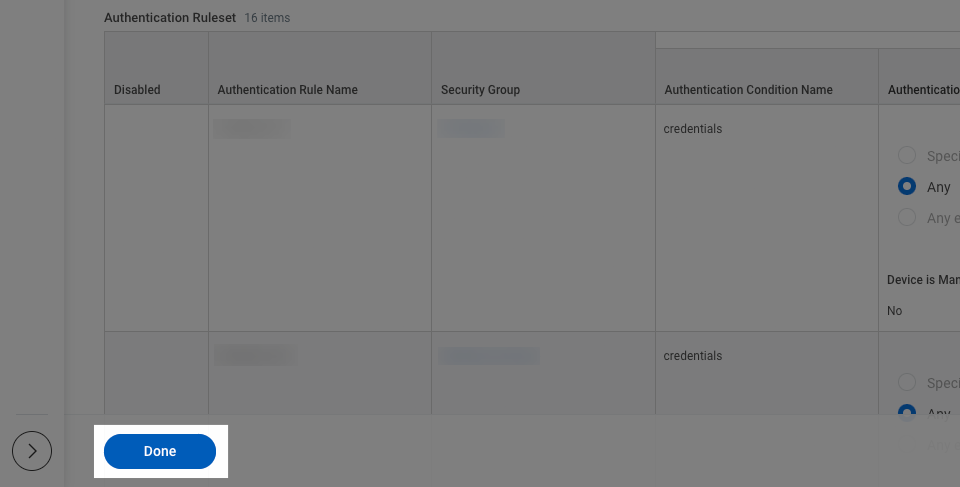
Click OK, then Done.
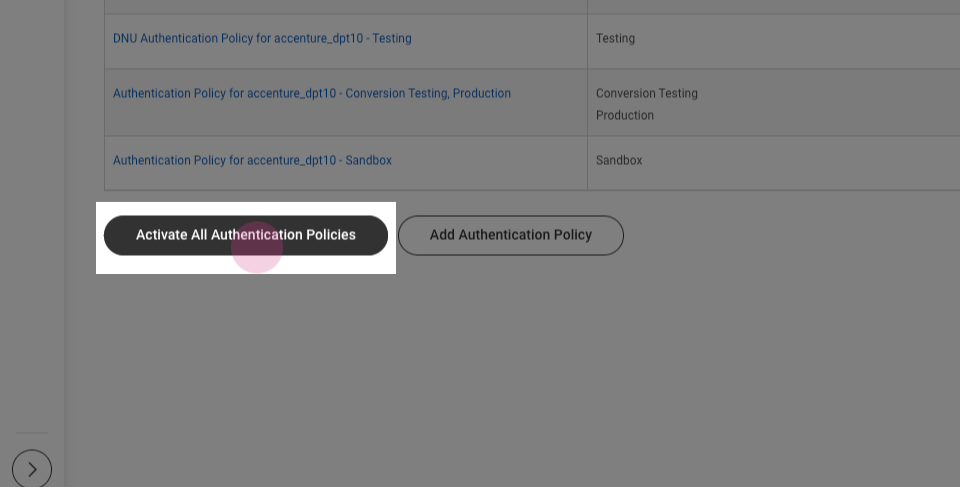
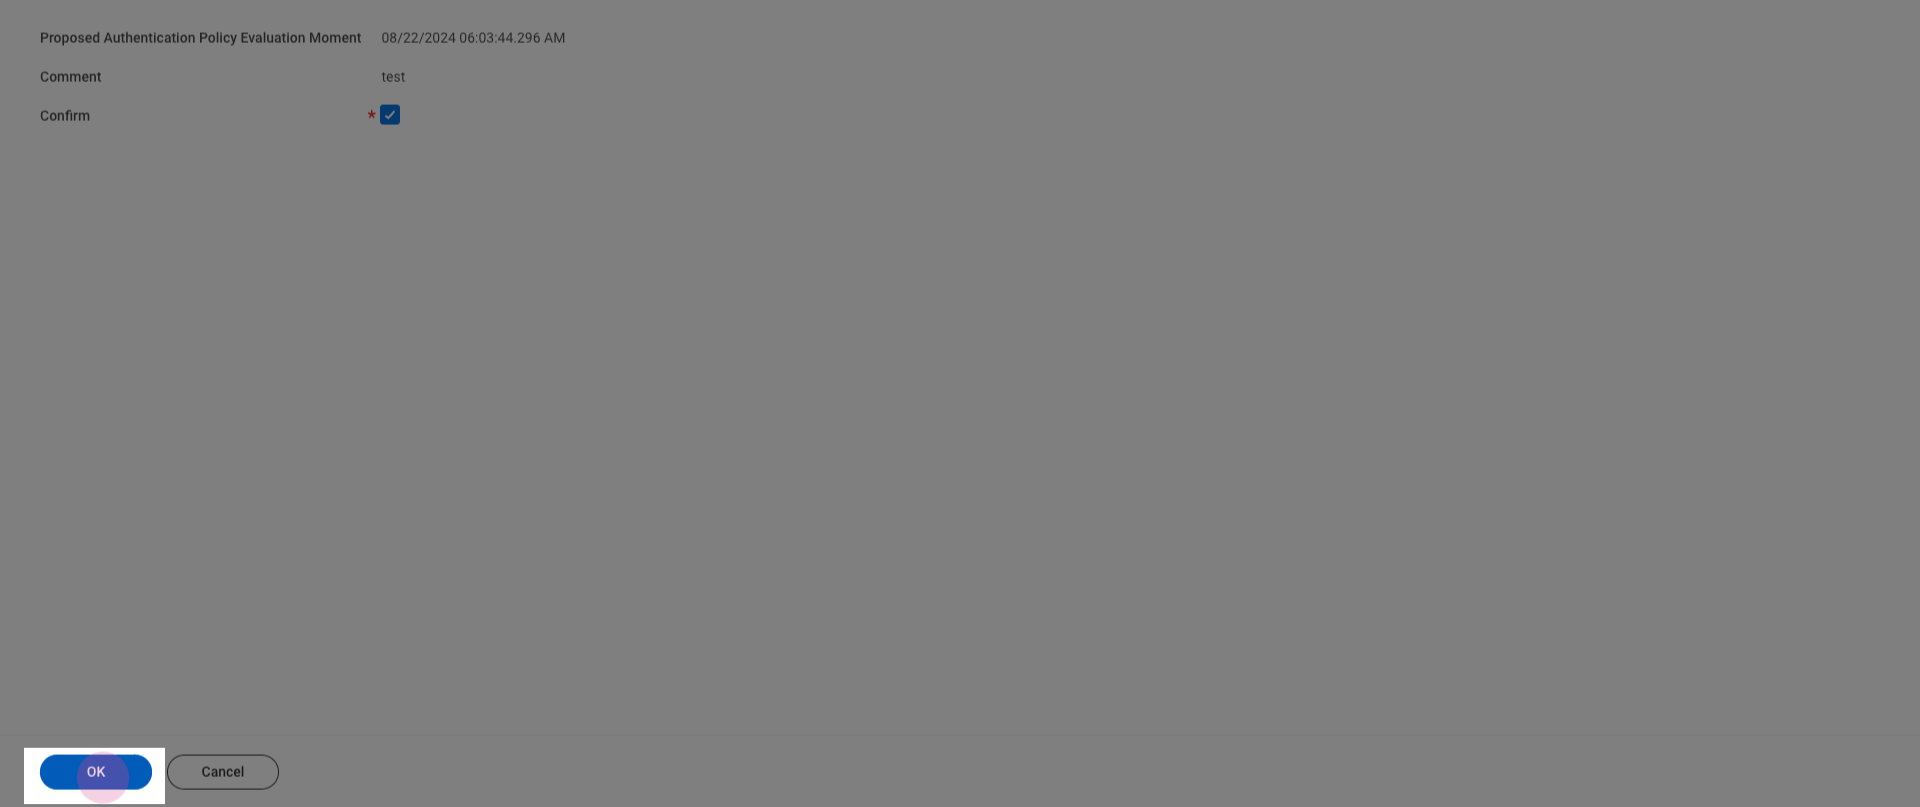
Click Activate All Authentication Policies.
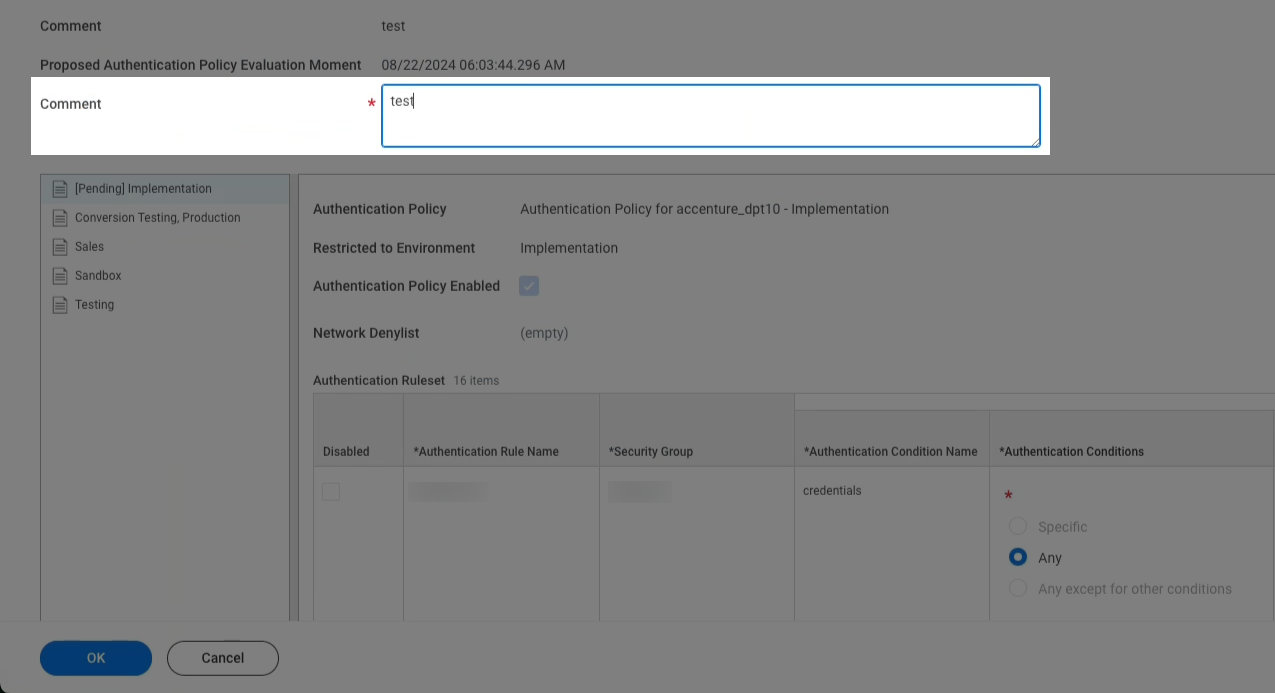
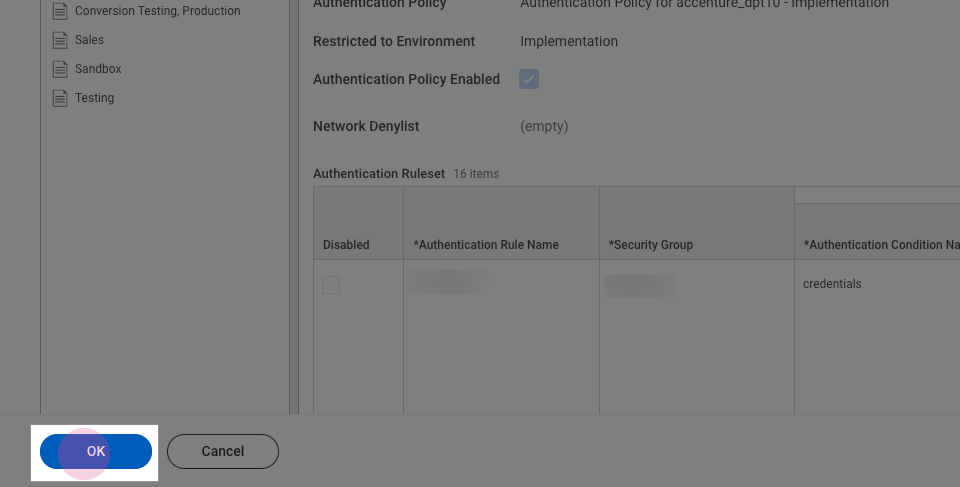
Add a comment and click OK.
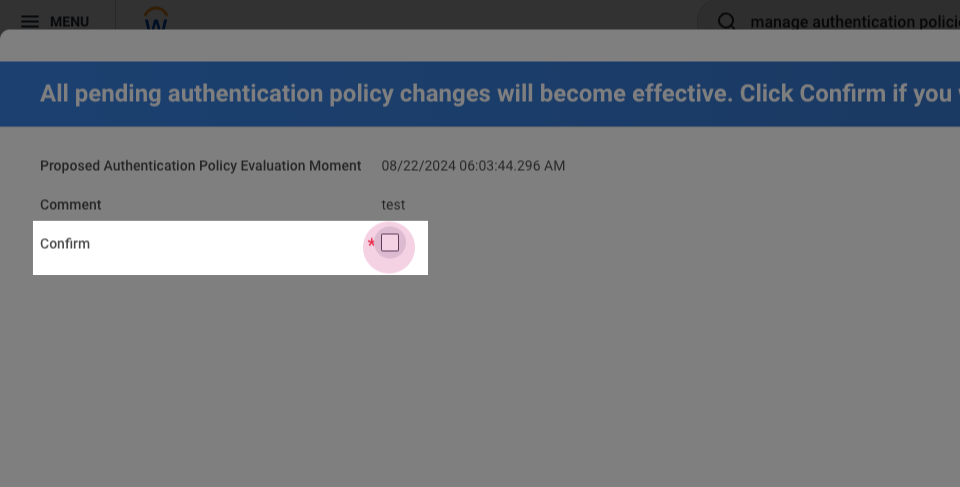
Confirm the selection.
4.5 Grant Permissions to the Security Group
The ISU's security group must have access to the domains required for the data you want to sync or write through Bindbee.
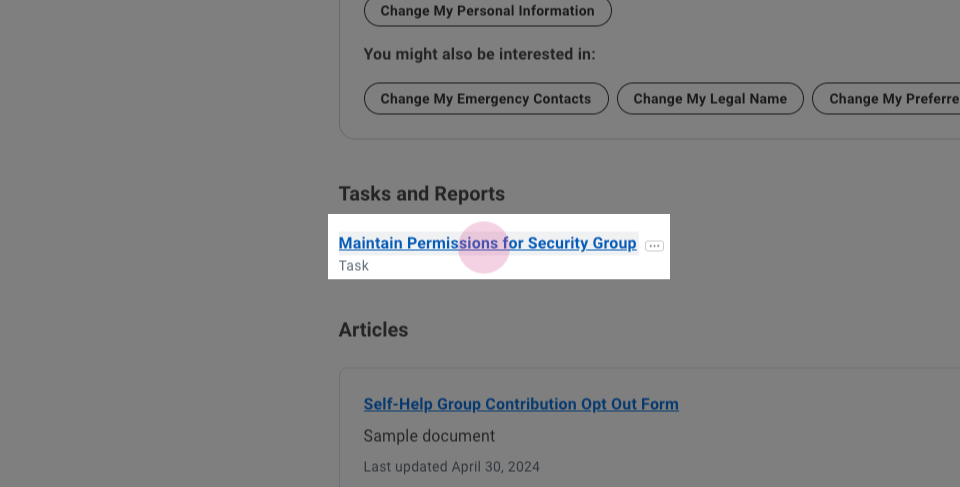
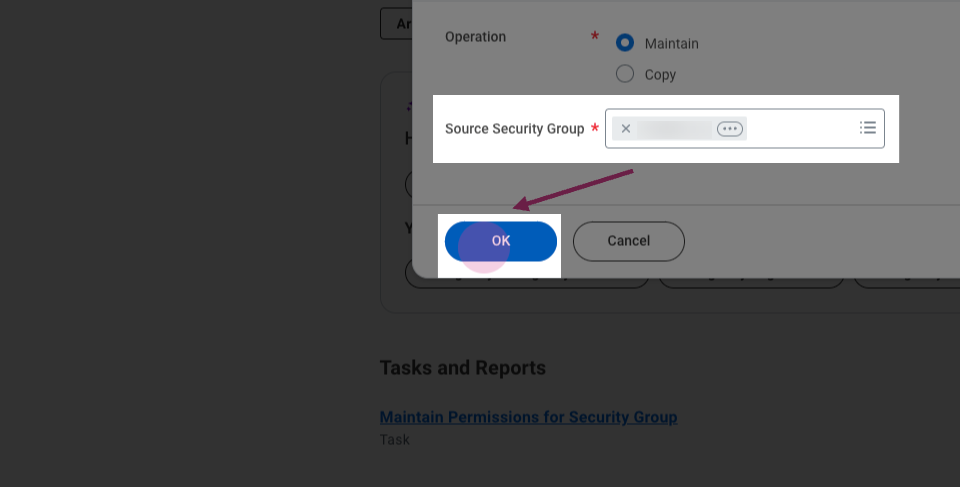
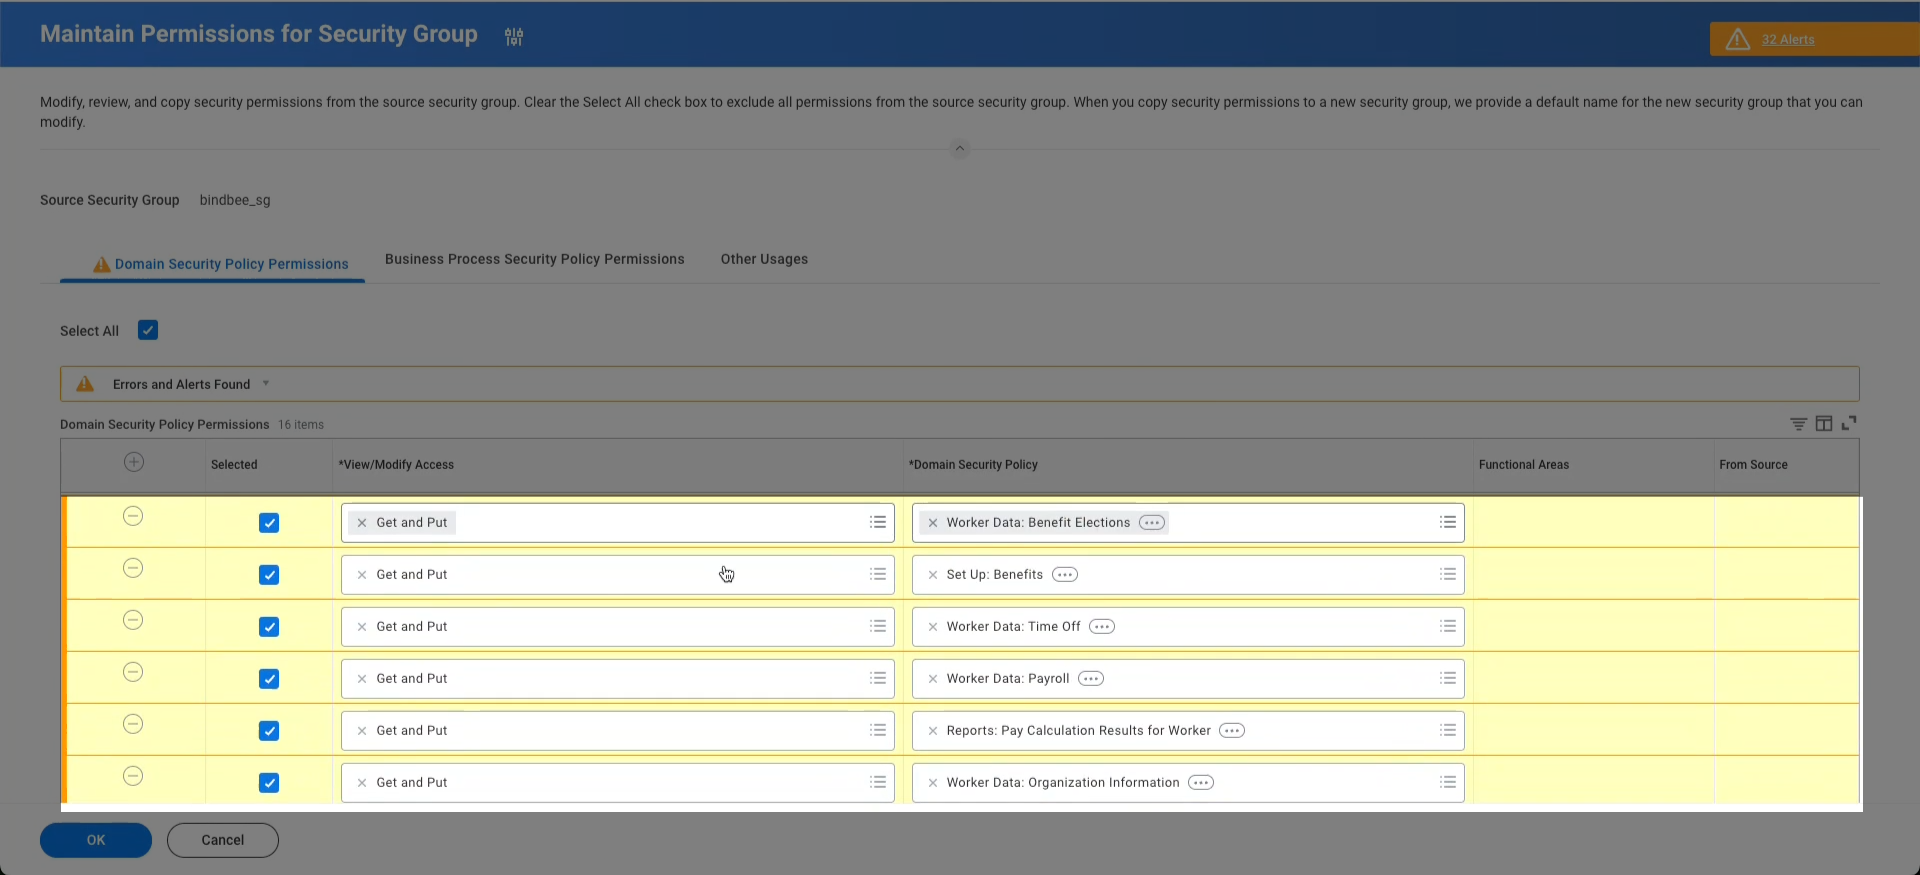
Search for and open Maintain Permissions for Security Group.
Select the security group you created earlier.
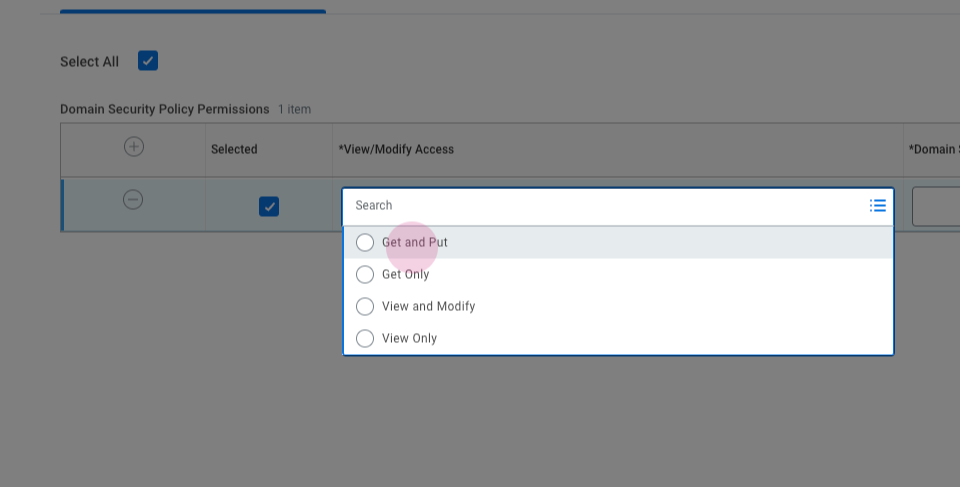
Select Get Only for permissions that Bindbee only needs to read, and Get and Put for permissions required by Bindbee write operations.
Add the domain permissions required for the data you want to sync or write through Bindbee.
Workday uses Domain Security Policies to control which data an Integration System User (ISU) can access or modify. These permissions are required whether you connect to Bindbee using ISU username/password authentication or OAuth with a Workday API Client.
The tables below list the permissions Bindbee needs for each data model and write operation. Add the ones that match the data you want to sync.
Workday tenants can have different security configurations. Grant only the permissions required for the data you plan to sync or write through Bindbee. Use Get Only for read access and Get and Put where write access is required.
Read Permissions
Company, Organization, Group, and Pay Group
Access Required
Domain Security Policy
Get Only
Manage: Organization Integration
Employee
The following permissions are used to access employee profile and related personal information.
Access Required
Domain Security Policy
Used For
Get Only
Worker Data: Public Worker Reports
Minimum worker permission required for the integration
Get Only
Person Data: Name
Employee names
Get Only
Person Data: Personal Data
Employee personal information
Get Only
Person Data: Home Contact Information
Home address, home email, and home phone
Get Only
Person Data: Work Contact Information
Work address, work email, and work phone
Get Only
Person Data: Work Address
Employee work address
Get Only
Person Data: ID Information
Employee identification information, including National Identifiers such as SSN where available
Get Only
Person Data: Date of Birth
Employee date of birth
Get Only
Person Data: Gender
Employee gender
Get Only
Worker Data: Workers
Worker information, including data used with Custom Objects
Get Only
Worker Data: Current Staffing Information
Employment status and current staffing information
Depending on your tenant configuration and the employee data you need, additional Person Data permissions may also be required. Open Additional Workday domains and subdomains below.
Employment
Access Required
Domain Security Policy
Used For
Get Only
Worker Data: All Positions
Worker position information
Get Only
Worker Data: Current Staffing Information
Current employment and employment status
Get Only
Worker Data: Employment Data
Employment information
Get Only
Worker Data: Organization Information
Organization information associated with workers
Get Only
Worker Data: All Worker’s Positions Past and Present
Historical and current worker positions
Get Only
Worker Data: All Worker’s Positions
Historical employments
Workday domain names can vary between tenant configurations. If one of the position-related domains above is not available, review the equivalent position domain available in your tenant.
Compensation
Access Required
Domain Security Policy
Get Only
Worker Data: Compensation
Get Only
Worker Data: Compensation by Organization
Depending on the historical compensation data you need, Worker Data: Compensation - All Worker’s Positions Past and Present may also be required.
Payroll Run, Employee Payroll Run, and Payroll Codes
Access Required
Domain Security Policy
Get Only
Reports: Pay Calculation Results for Worker (Results)
Get Only
Worker Data: Payroll
Get Only
Integration Build
Bank Information
Access Required
Domain Security Policy
Get Only
Worker Data: Payroll (Payment Elections)
Time Off
Access Required
Domain Security Policy
Get Only
Worker Data: Time Off
Get Only
Worker Data: Time Off (Accrual and Time Off Adjustments/Overrides by Batch ID)
Time Off Balances
Access Required
Domain Security Policy
Get Only
Worker Data: Time Off (Time Off Balances)
Benefits, Employer Benefits, Dependents, and Dependent Benefits
Access Required
Domain Security Policy
Get Only
Set Up: Benefits
Get Only
Worker Data: Benefit Elections
Get Only
Worker Data: Beneficiaries and Dependents
Timesheet Entries
Access Required
Domain Security Policy
Get Only
Process: Export Time Blocks
Additional Workday domains and subdomains (if data is still missing)
Workday security configuration can vary across tenants. If the expected data is still unavailable after granting the permissions above, or if a listed domain is not available in your tenant, review the related domains and subdomains below.
Enable only the domains and subdomains relevant to the data you need to access.
Person Data: Personal Data
Related permissions include:
Person Data: Citizenship Status
Person Data: Disabilities
Person Data: ID Information
Person Data: National ID Identification
Person Data: Marital Status
Person Data: Date of Birth
Person Data: Gender
Person Data: Government IDs
Person Data: Personal Information
Person Data: Photo
Person Data: Home Contact Information
Related permissions include:
Person Data: Home Address
Person Data: Home Email
Person Data: Home Instant Messenger
Person Data: Home Phone
Person Data: Home Web Address
Person Data: Work Contact Information
Related permissions include:
Person Data: Work Address
Person Data: Work Email
Person Data: Work Instant Messenger
Person Data: Work Phone
Person Data: Work Web Address
Person Data: Public Work Email Address
Worker Data: Time Off
Related permissions include:
Worker Data: Time Off (Time Off)
Worker Data: Time Off (Accrual and Time Off Adjustments/Overrides by Batch ID)
Worker Data: Time Off (Time Off Balances)
Worker Data: Time Off (Time Off Balances Manager View)
Worker Data: Time Off (Time Off Manager View)
Additional Domains
Depending on the data you need, the following additional domains may also be required:
Worker Data: All Worker’s Positions Past and Present
Worker Data: Payroll (Payment Elections)
Worker Data: Compensation - All Worker’s Positions Past and Present
Reports: Pay Calculation Results for Worker (Results)
Write permissions (only if Bindbee writes data back to Workday)
Write permissions are optional and are only required if you plan to create or update data in Workday through Bindbee.
Create Employees
The following domain permissions are used for employee creation:
Access Required
Domain Security Policy
Get Only
Job Requisition Data
Get Only
Manage: Location
Get and Put
Pre Hire: Personal Data
Get and Put
Person Data: Personal Information
Employee creation also requires Business Process Security Policy access.
Additional Business Process Setup for Creating Employees
In addition to the Domain Security Policies above, employee creation requires access to the Hire Business Process Security Policy.
Search for Edit Business Process Security Policy.
Enter Hire as the Business Process Type.
Add the Integration System Security Group in the section where the Initiating Action is Hire Employee (Web Service).
Click OK, then Done.
Create Timesheet Entries
Access Required
Domain Security Policy
Get and Put
Process: Put Reported Time Blocks for Worker
Create Employee Payroll Runs
Access Required
Domain Security Policy
Get and Put
Worker Data: Payroll (Payroll Input)
Get and Put
Worker Data: Payroll Interface (Payroll Input by Worker)
Create Time Off
Access Required
Domain Security Policy
Get and Put
Worker Data: Time Off (Accrual and Time Off Adjustments/Overrides by Batch ID)
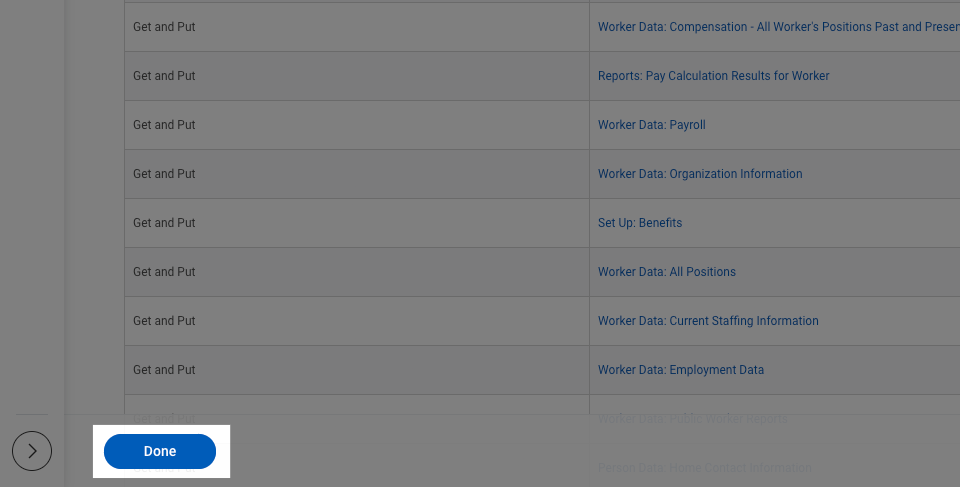
Click OK, then Done.
4.6 Activate Pending Security Policy Changes
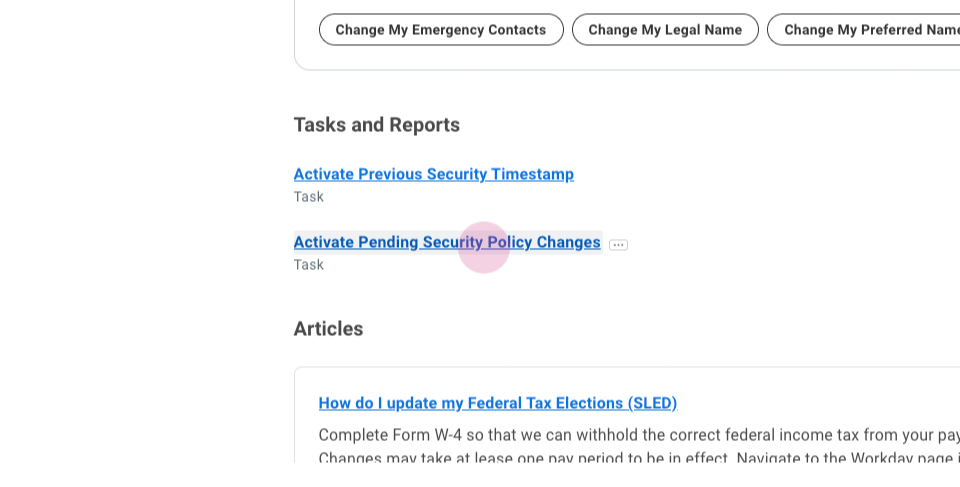
Search for and open Activate Pending Security Policy Changes.
Enter a comment and click OK.
Next, create the API Client that Bindbee uses for OAuth, then collect its Client ID, Client Secret and Refresh Token.
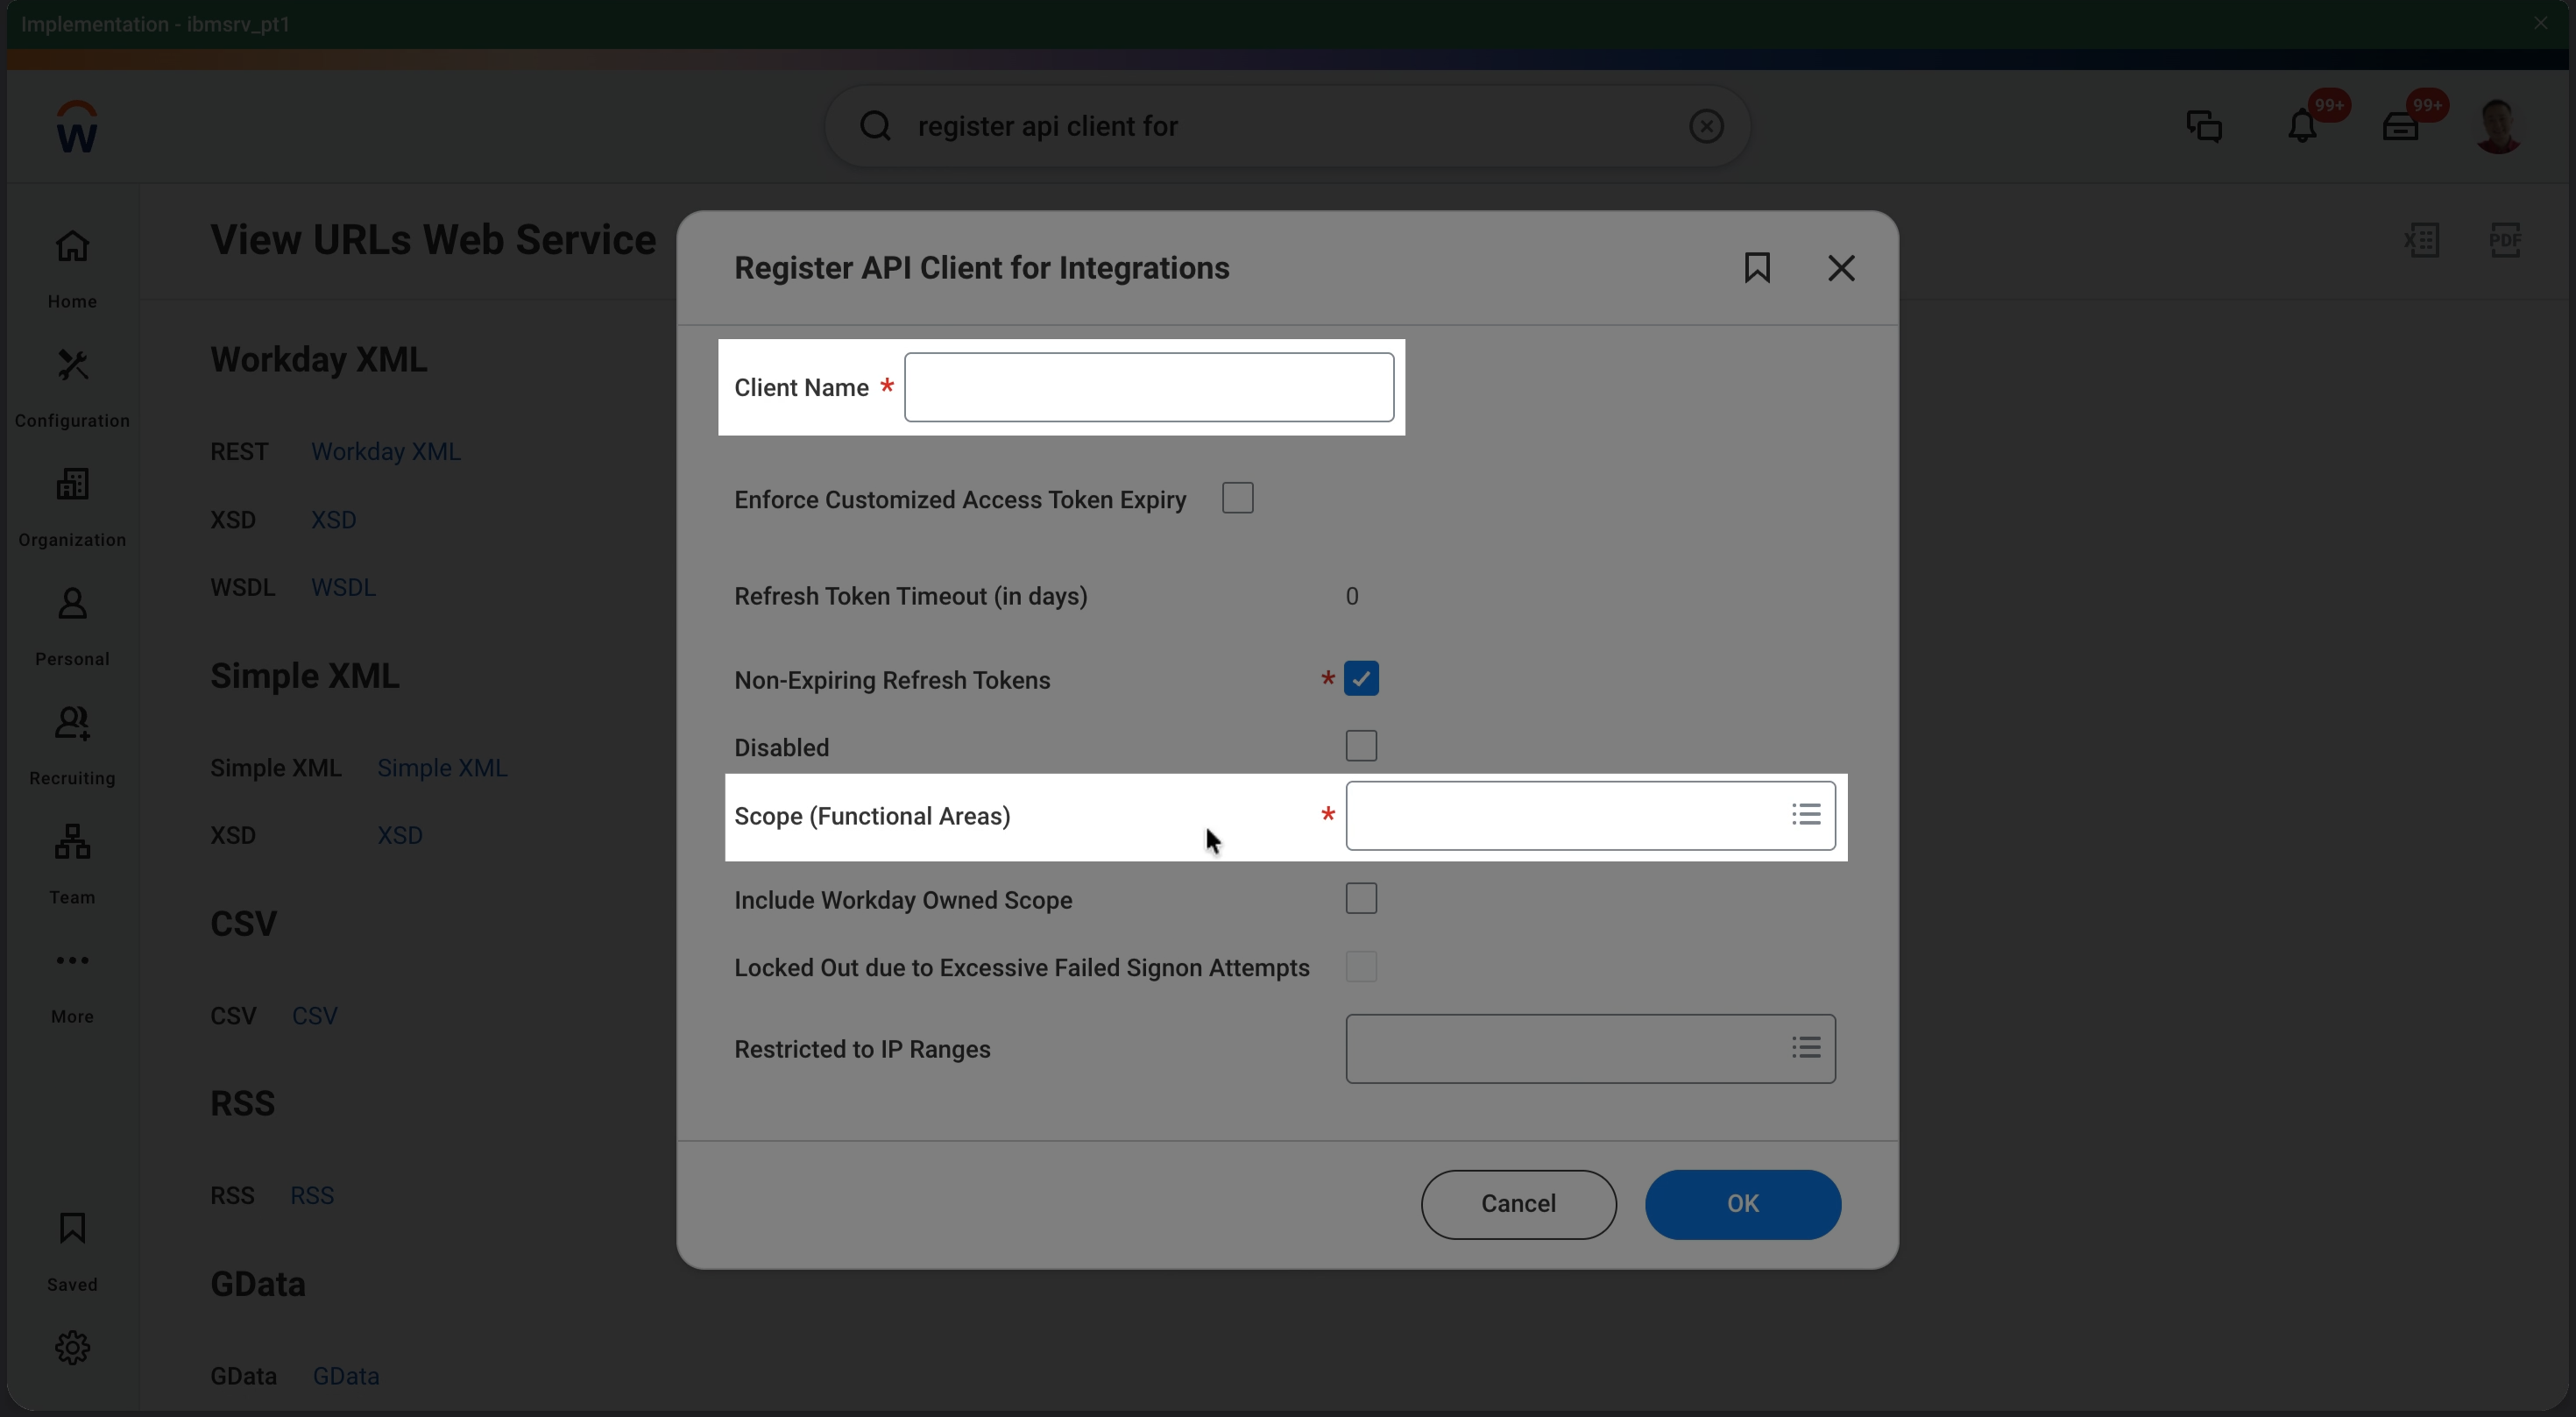
4.7 Create a Workday API Client for Integrations
If you do not already have an API client configured, search for and open Register API Client for Integrations in Workday. If you already have an API client for this integration, you can skip this section.
Enter a recognizable client name, such as Bindbee Integration.
For Workday RaaS, you do not need the standard API Client scopes. Instead, add the functional area of the Report Execution domain, as described in 4.8 Verify Report Execution Access below.
After creating the API client, securely copy and store the Client Secret, as it is displayed at the time of creation and cannot be viewed again after you leave the page.
API client scopes determine the functional areas the API client can access. The Integration System User (ISU) used for the integration must also have the required security permissions for the corresponding data. You will select this ISU later when generating the refresh token.
4.8 Verify Report Execution Access
The API Client used for the RaaS connection must include the functional area associated with Workday's Report Execution domain.
To verify this:
Search for and open View Domain.
Enter Report Execution as the domain and click OK.
Note the Functional Area associated with the domain.
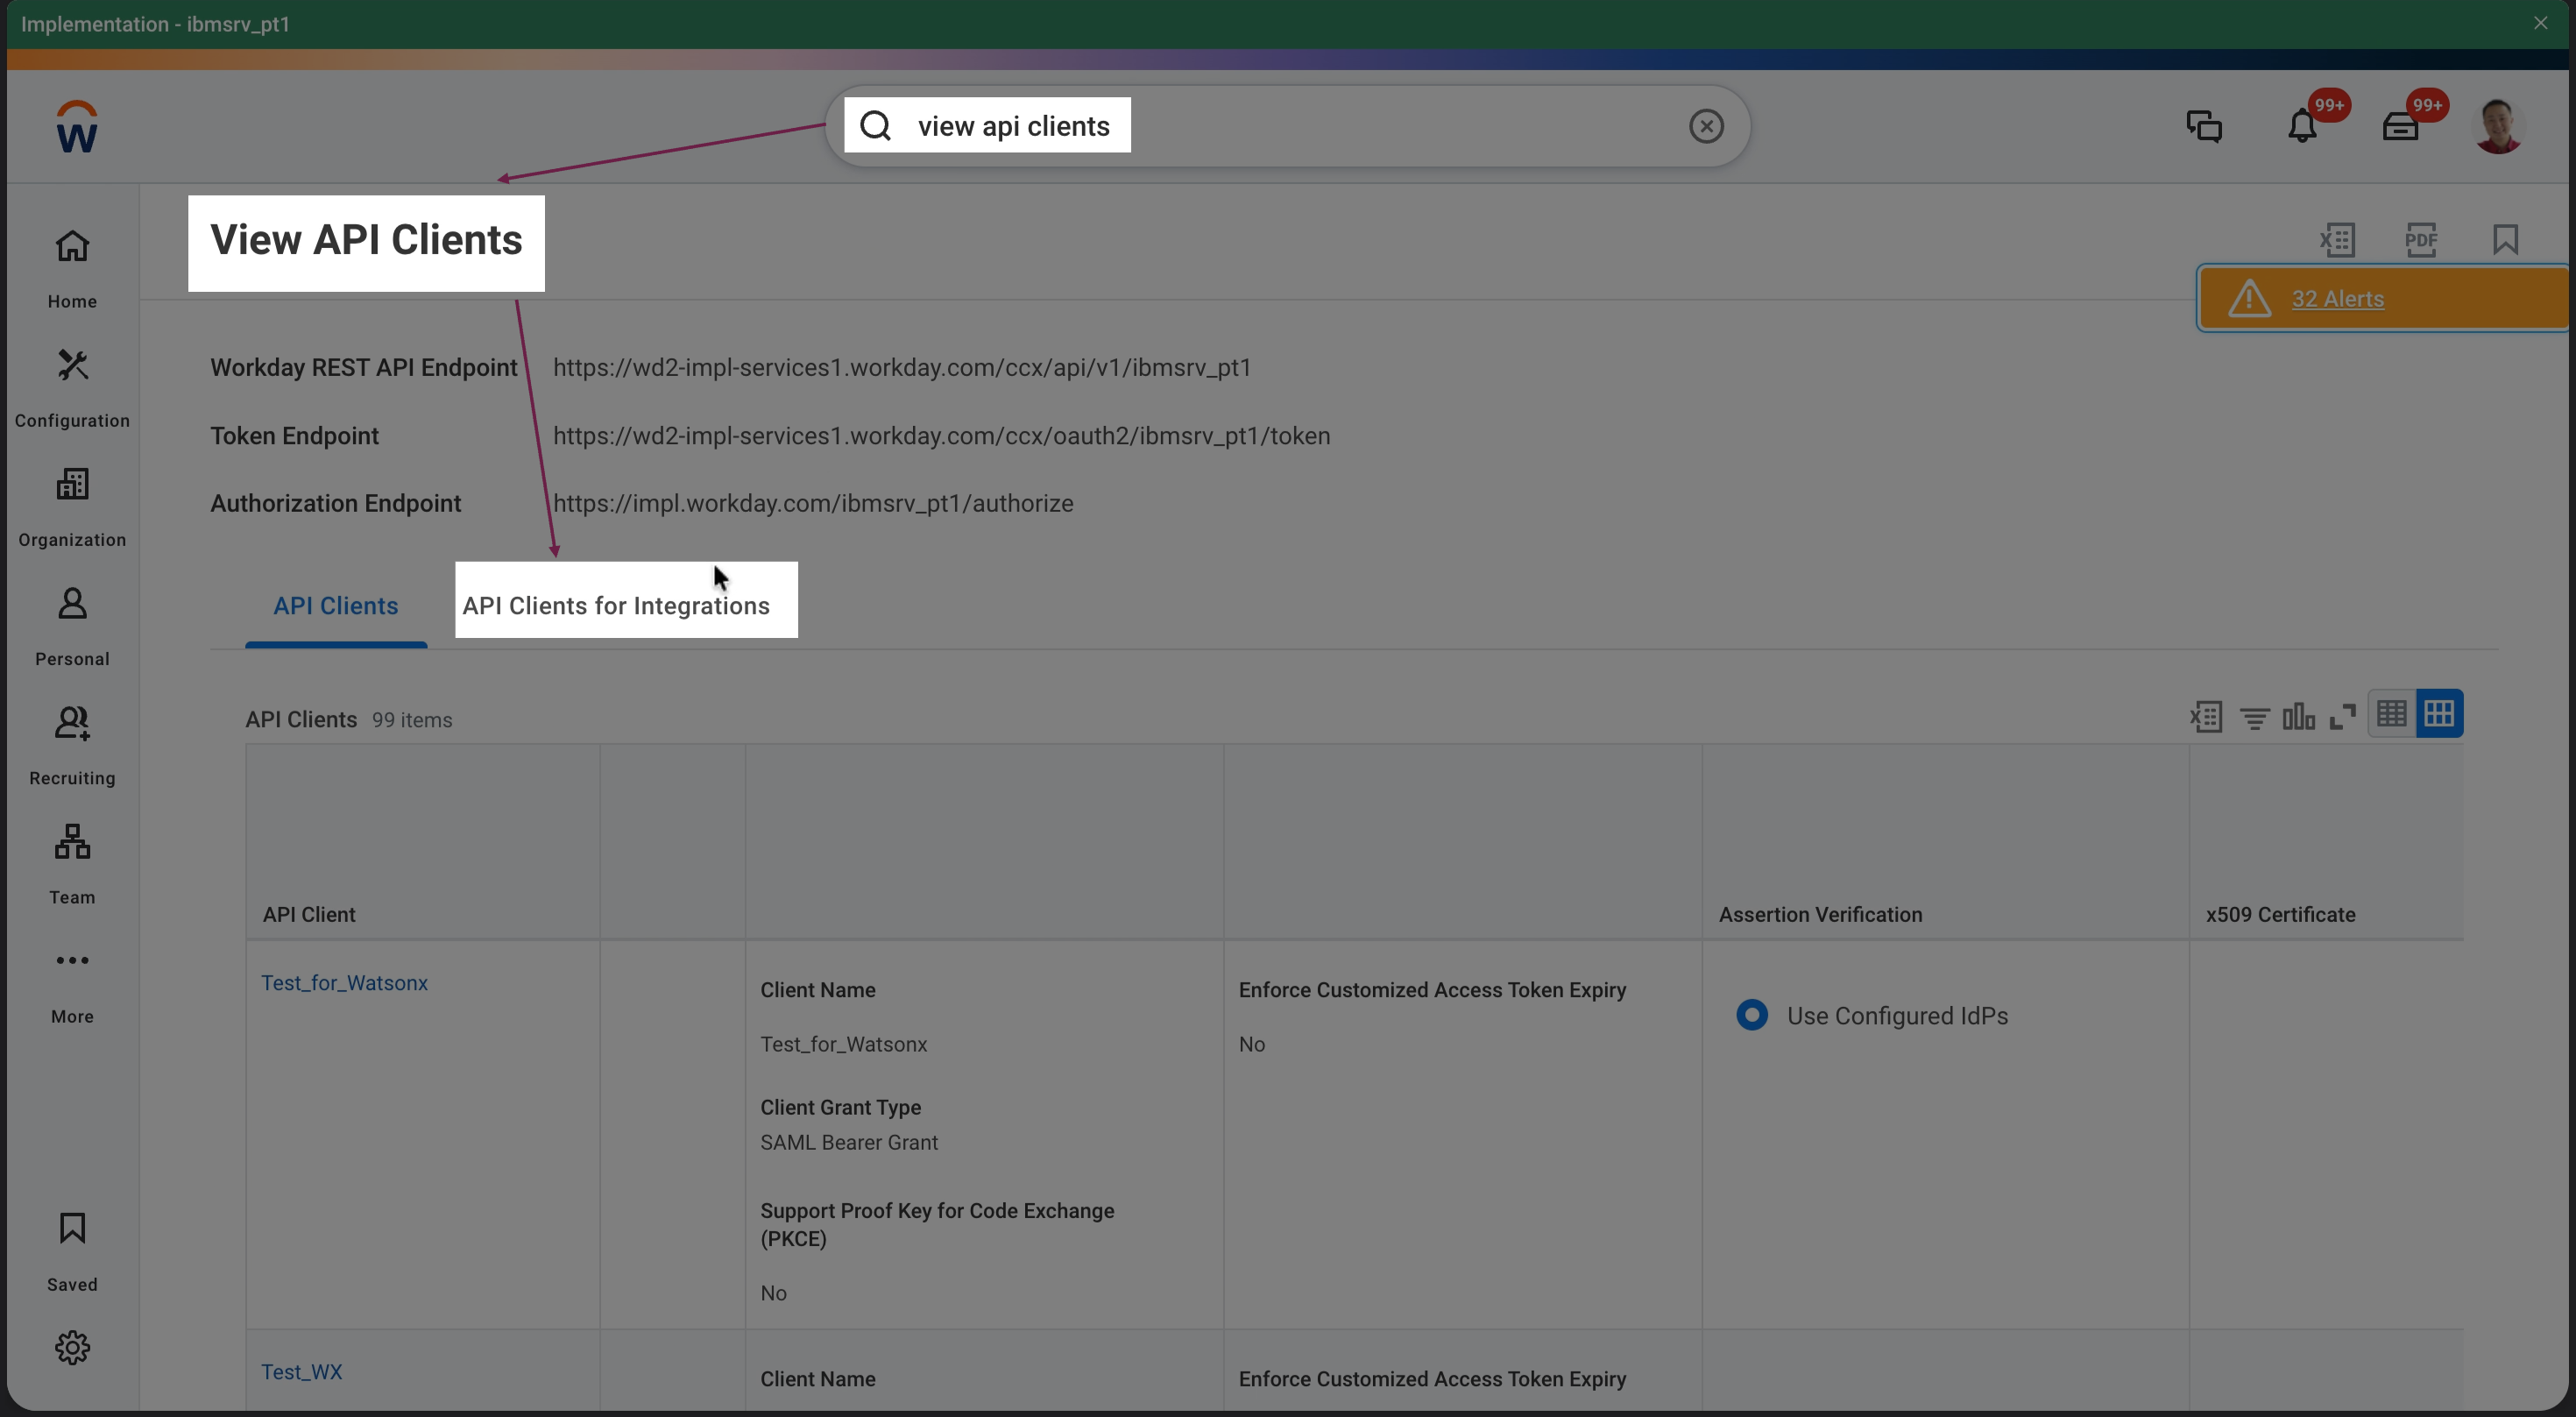
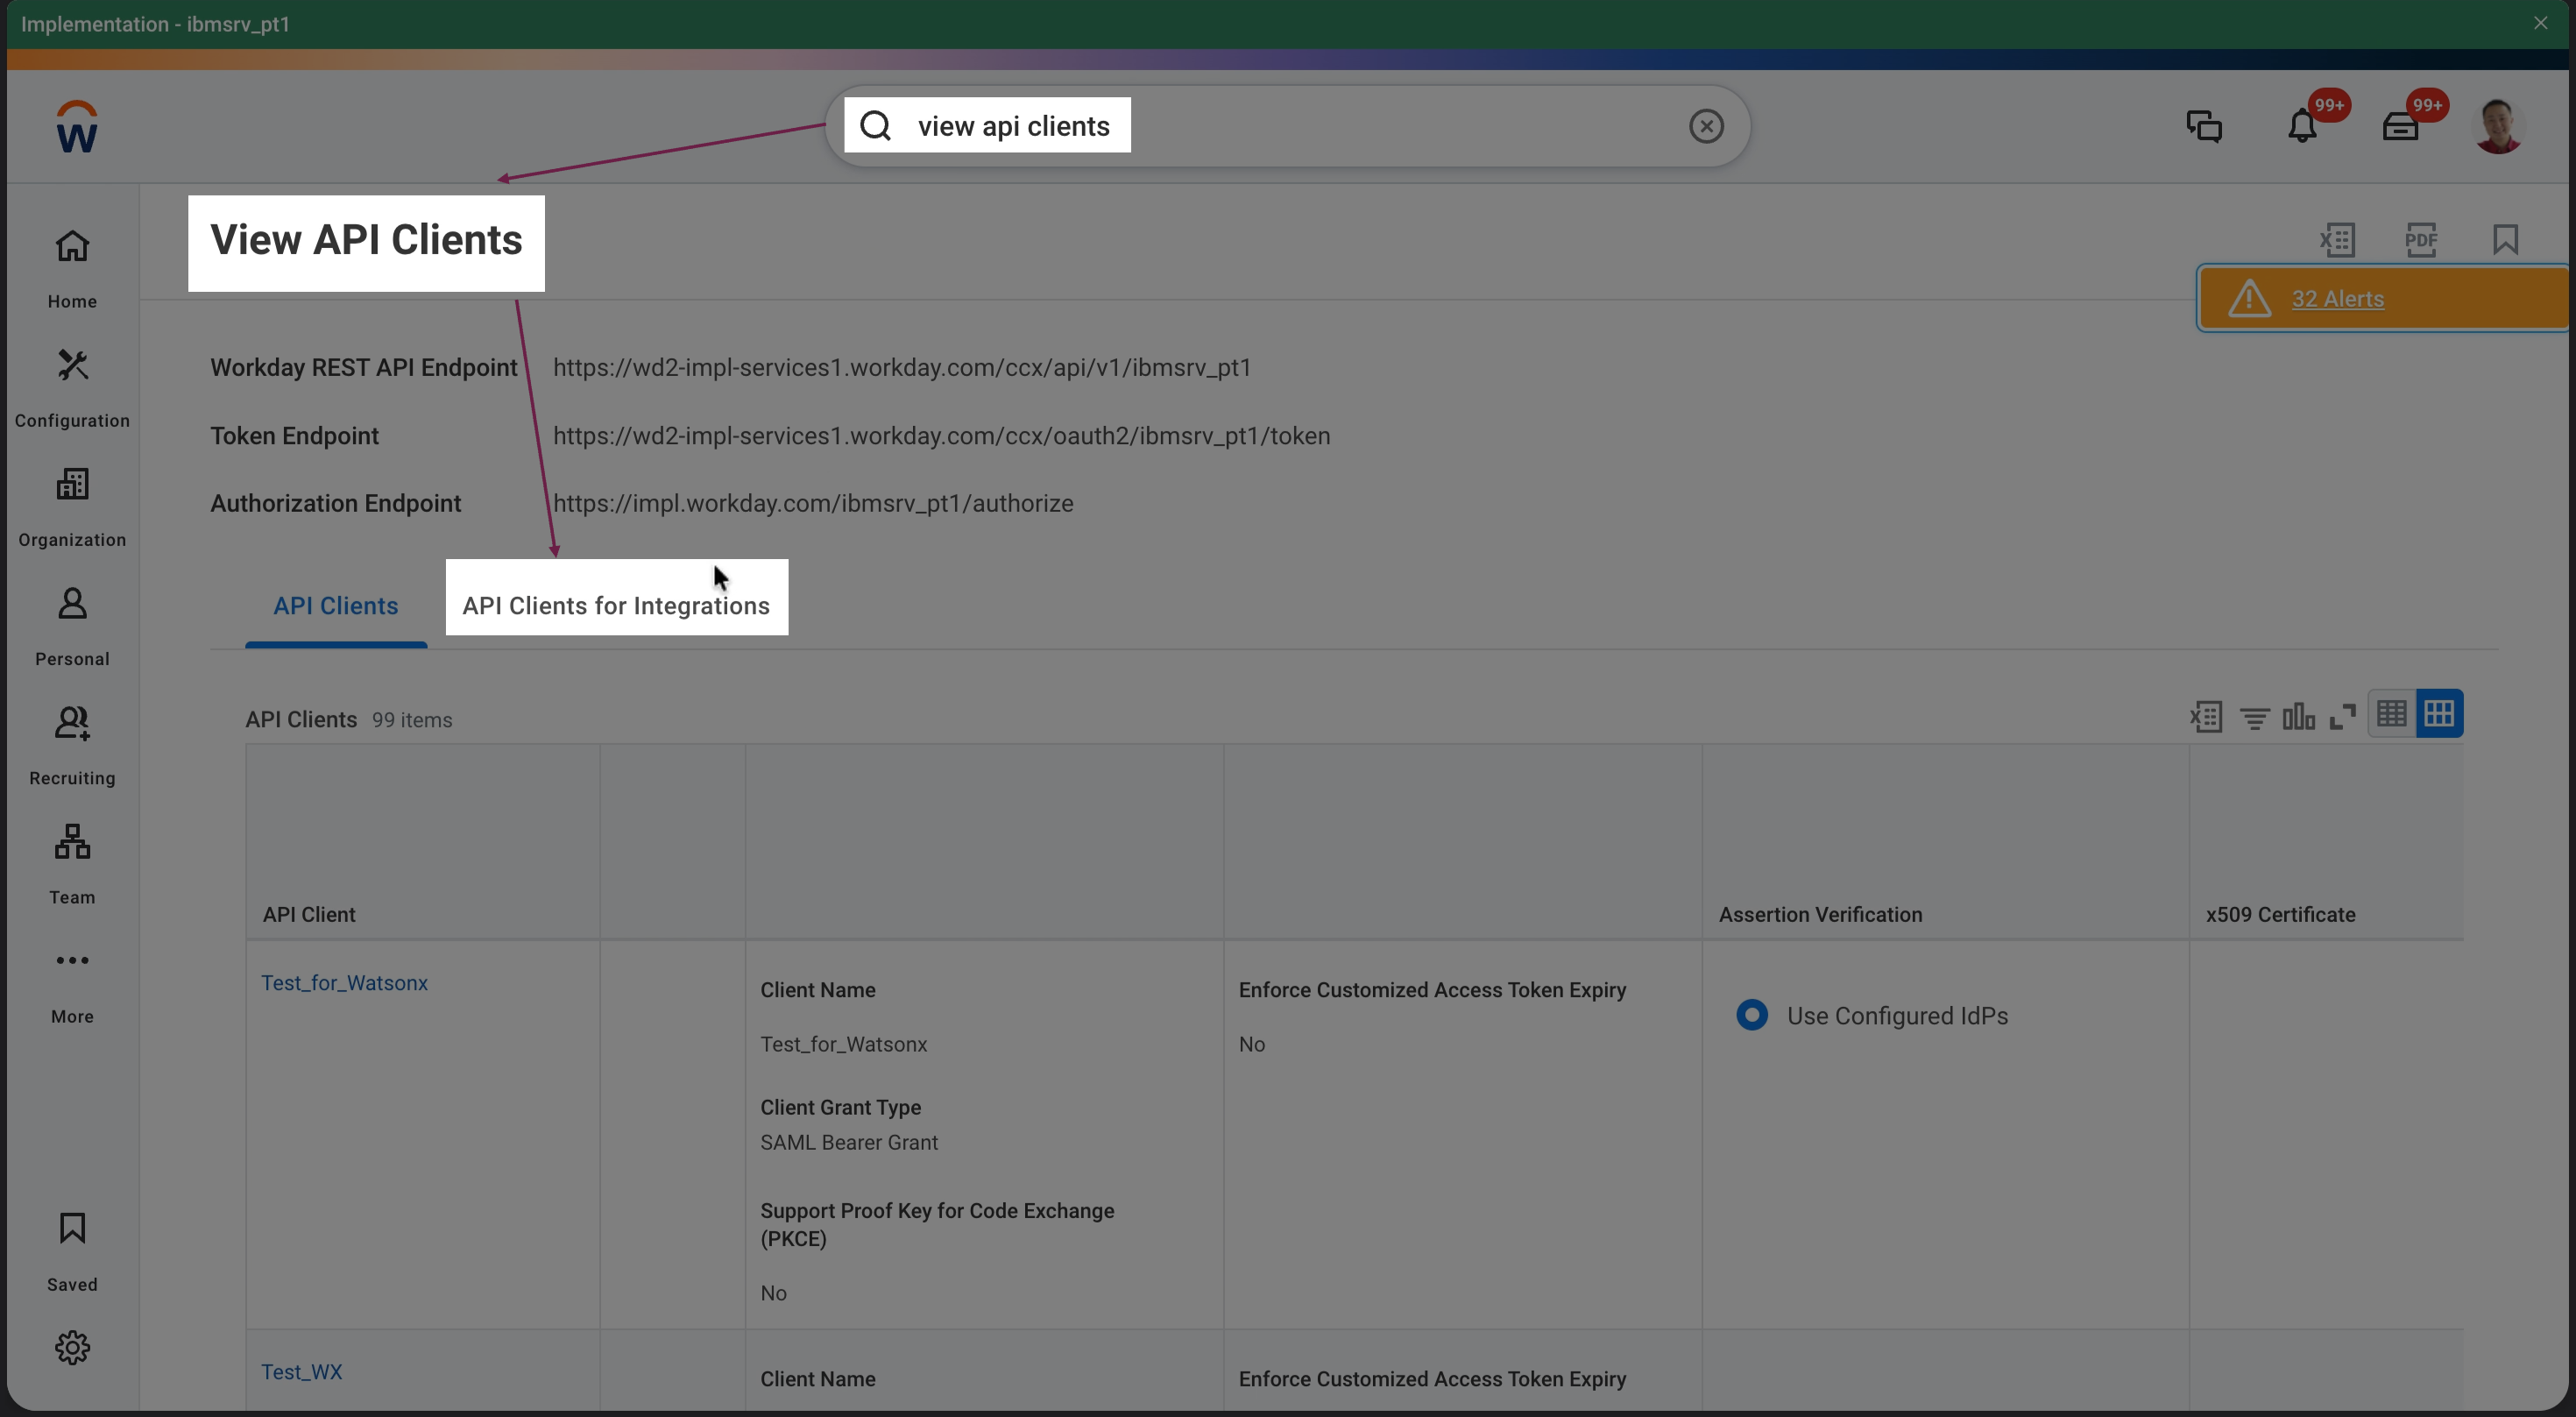
Go to View API Clients → API Clients for Integrations.
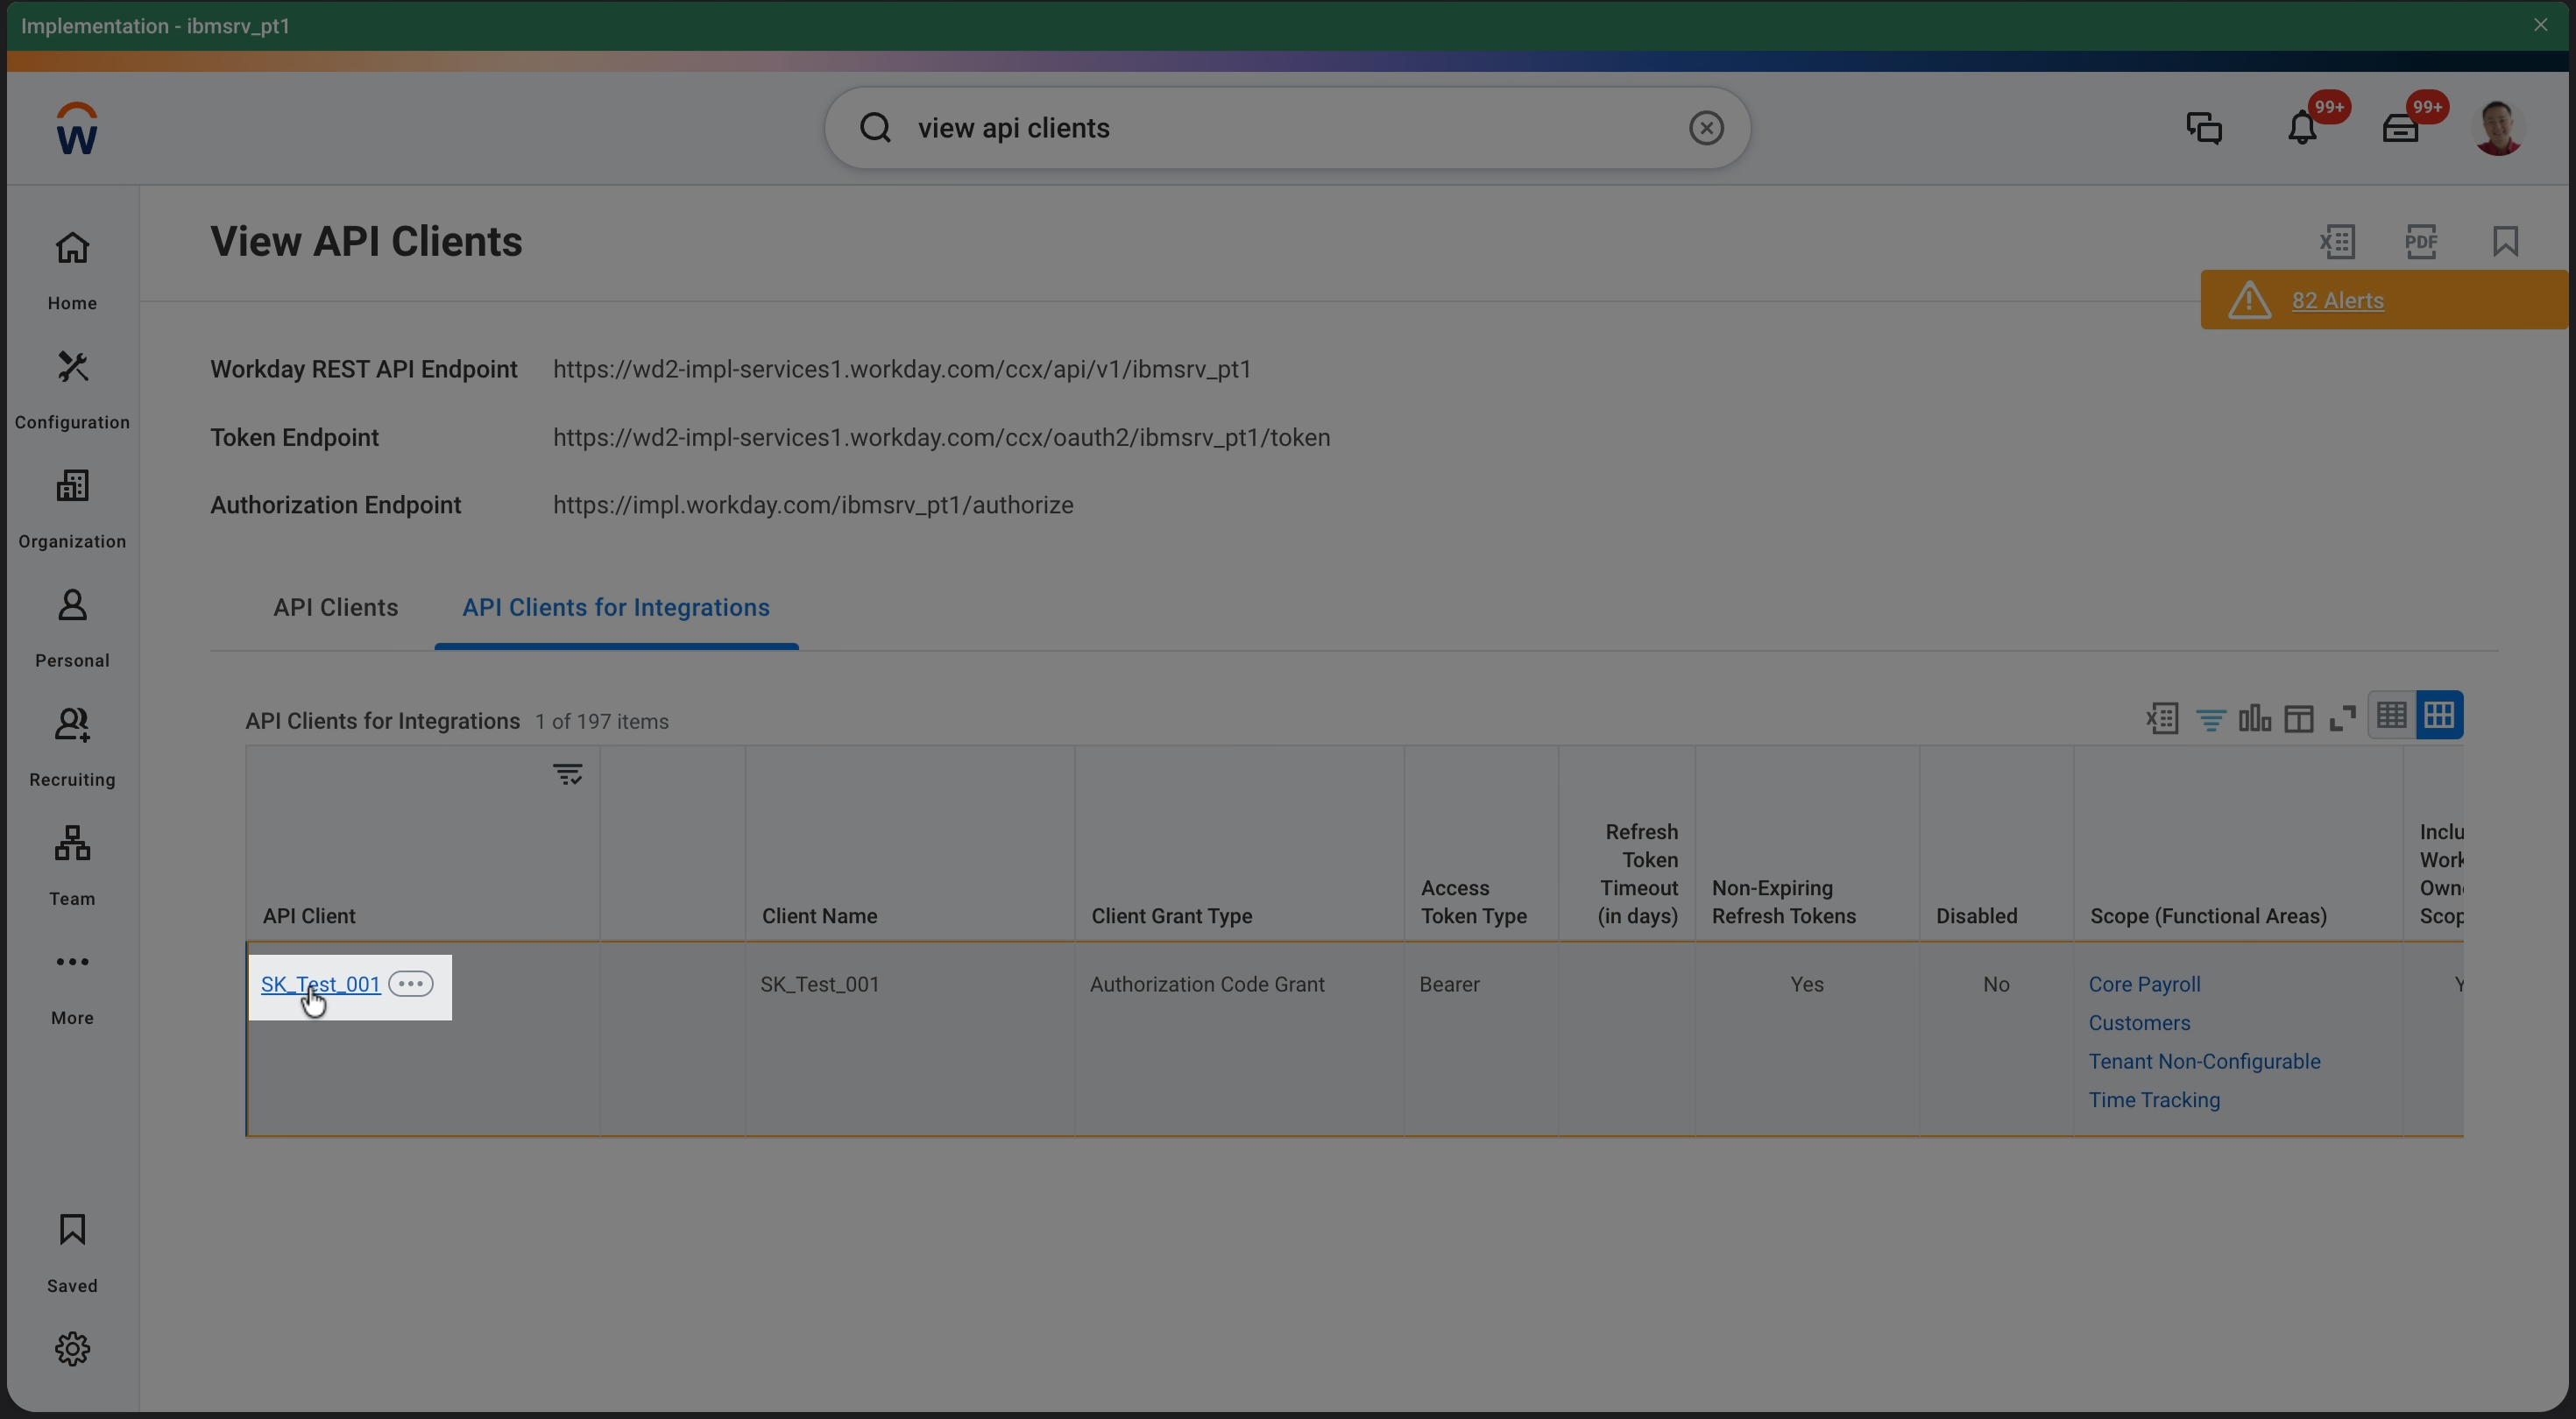
Open the API Client being used for the Bindbee integration.
Check whether the functional area identified above is included under Scope (Functional Areas).
If it is missing, edit the API Client and add the required functional area.
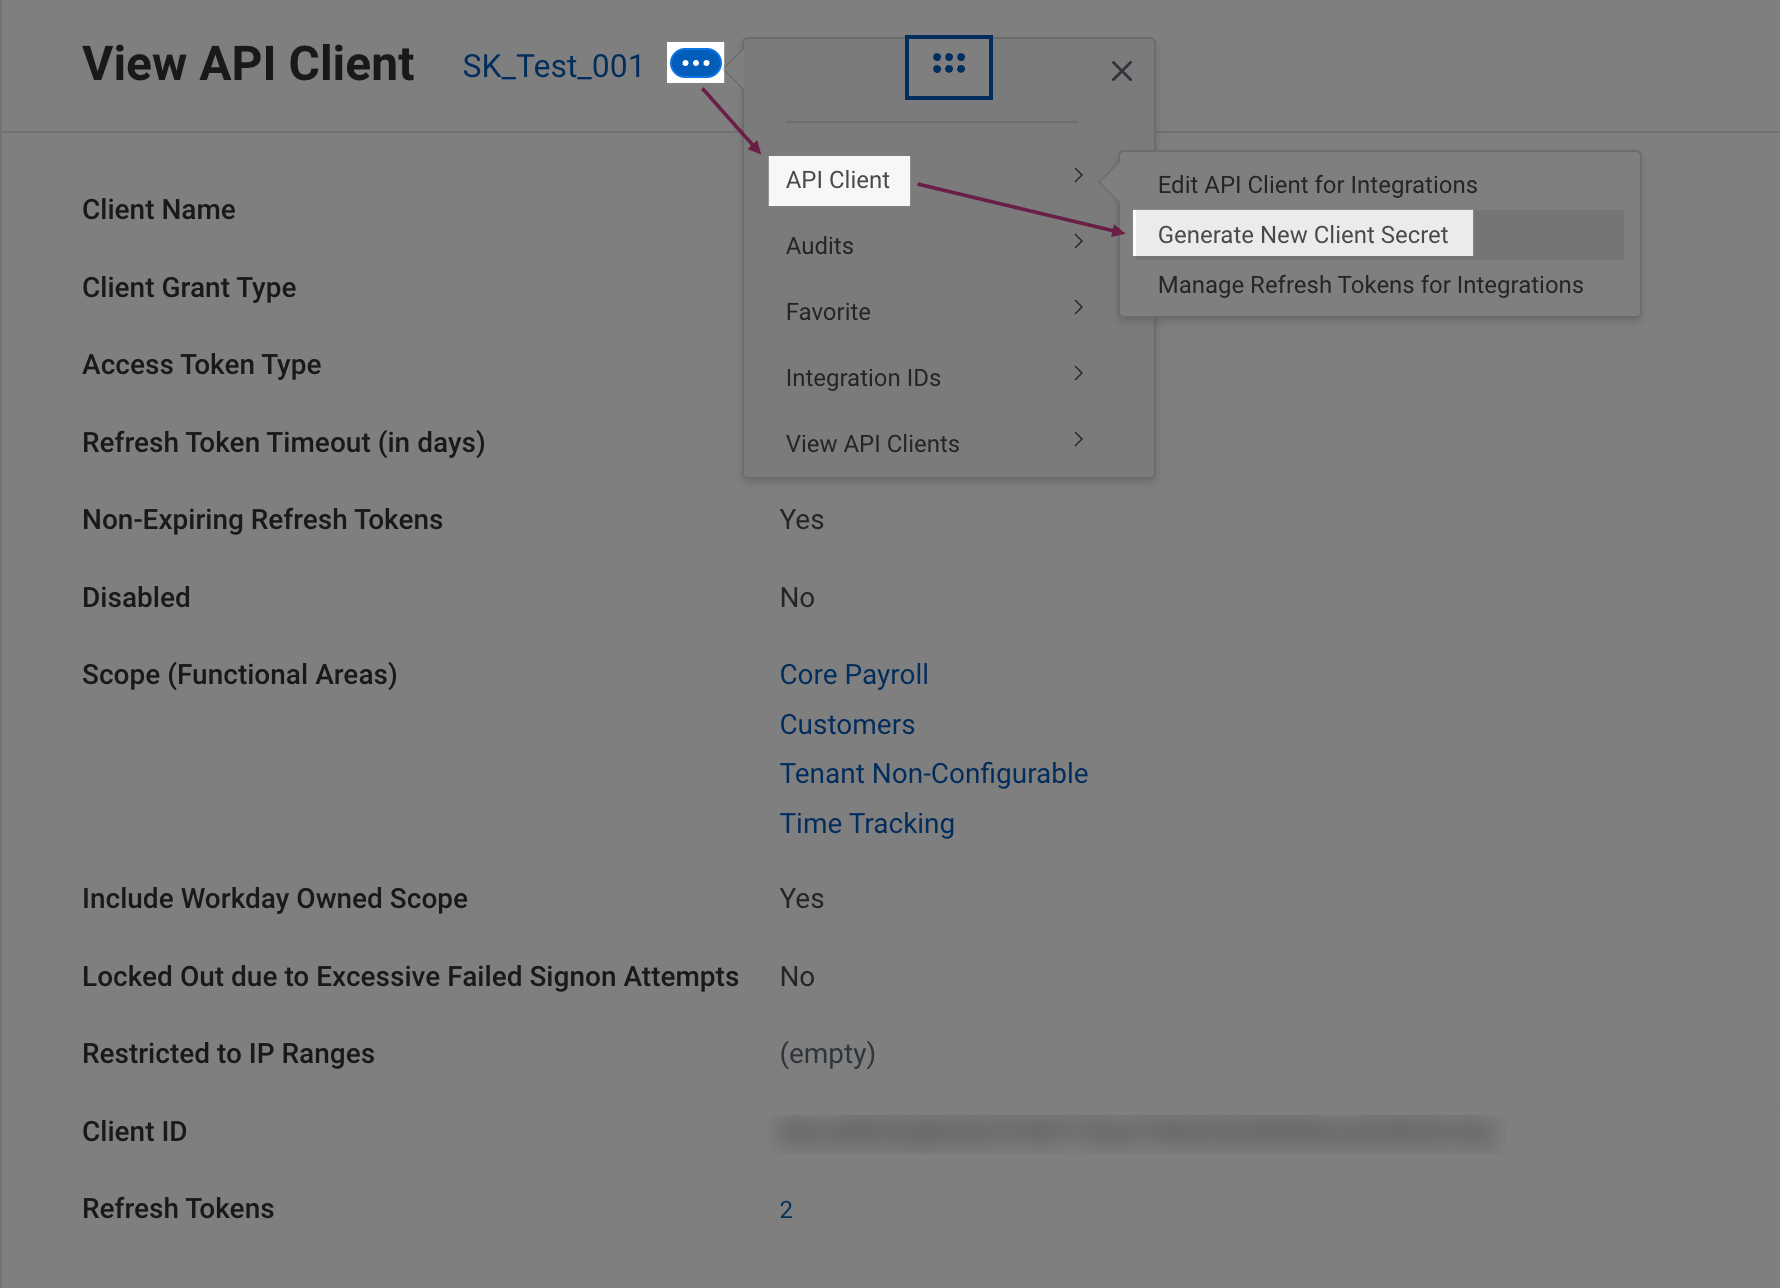
To edit the API Client, click the ellipsis (...) next to its name and select:
API Client → Edit API Client for Integrations
You can add the required functional area here.
4.9 Get the Client ID and Client Secret
Go to View API Clients and open the API Clients for Integrations tab. Locate your API client.
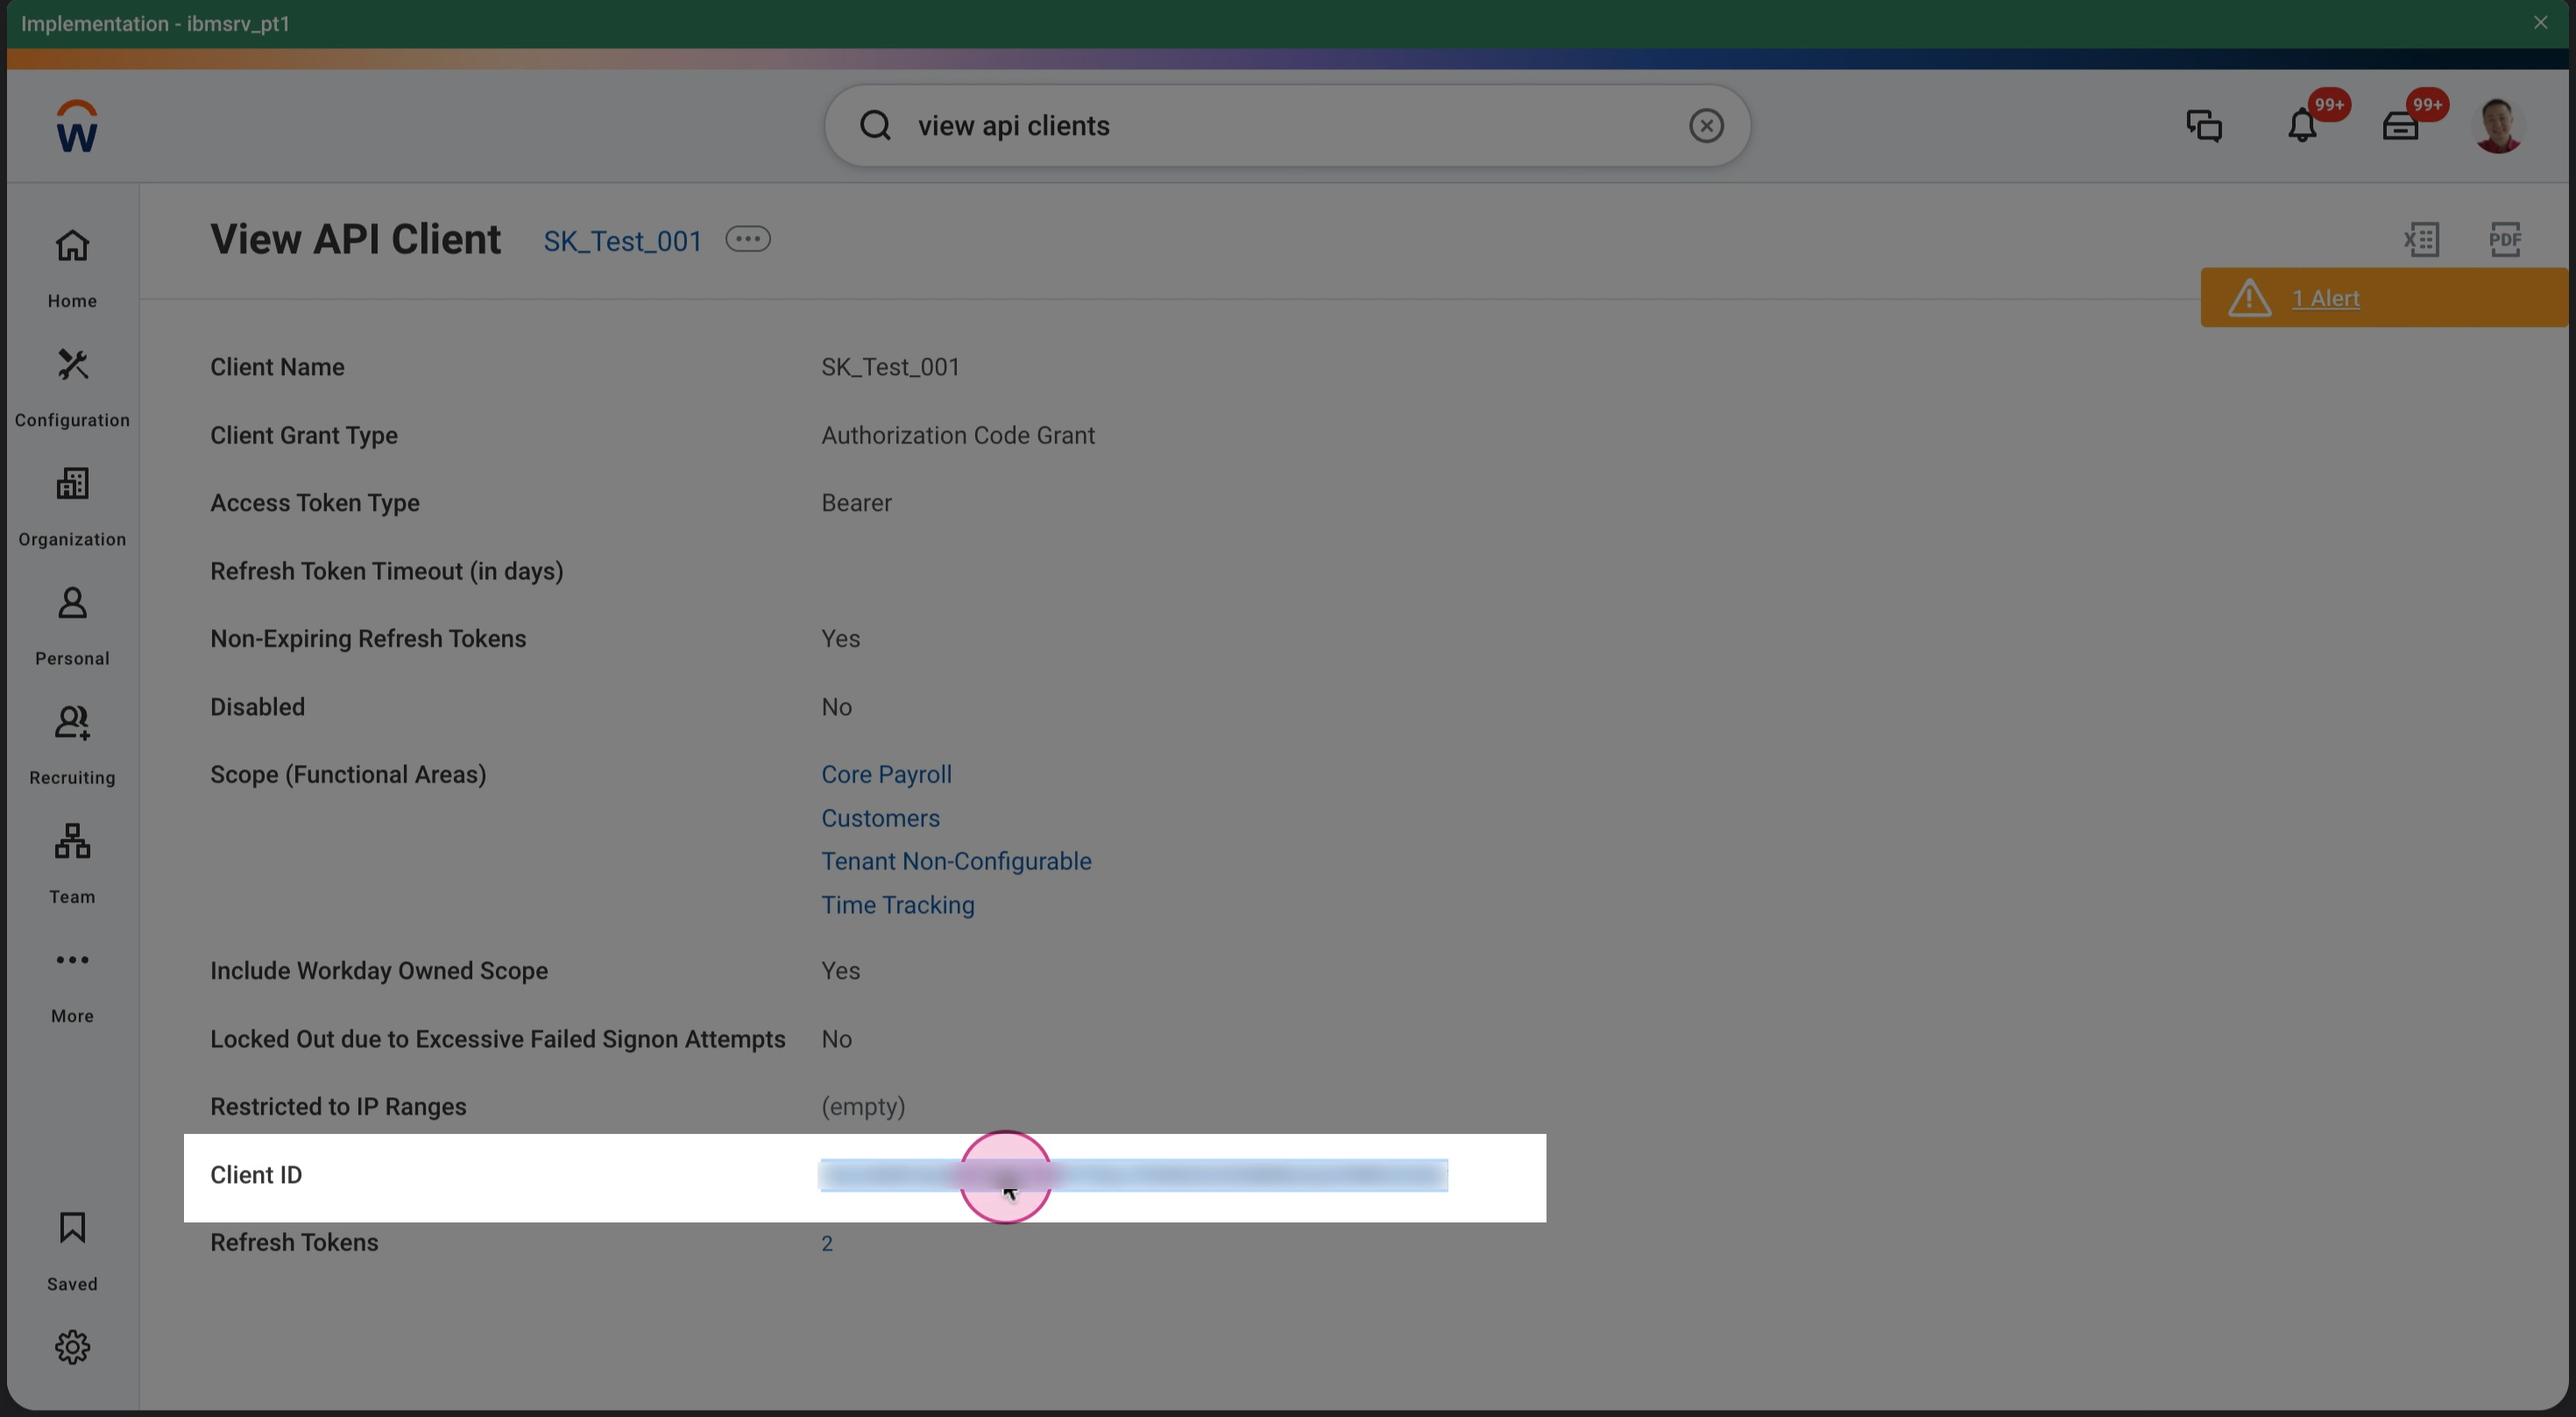
Click the name of the API client. The Client ID will be displayed on the API client details page.
If you no longer have the Client Secret saved, use Generate New Client Secret to generate a new one.
4.10 Get the Refresh Token
Go to View API Clients and open the API Clients for Integrations tab. Search for the API client you created earlier.
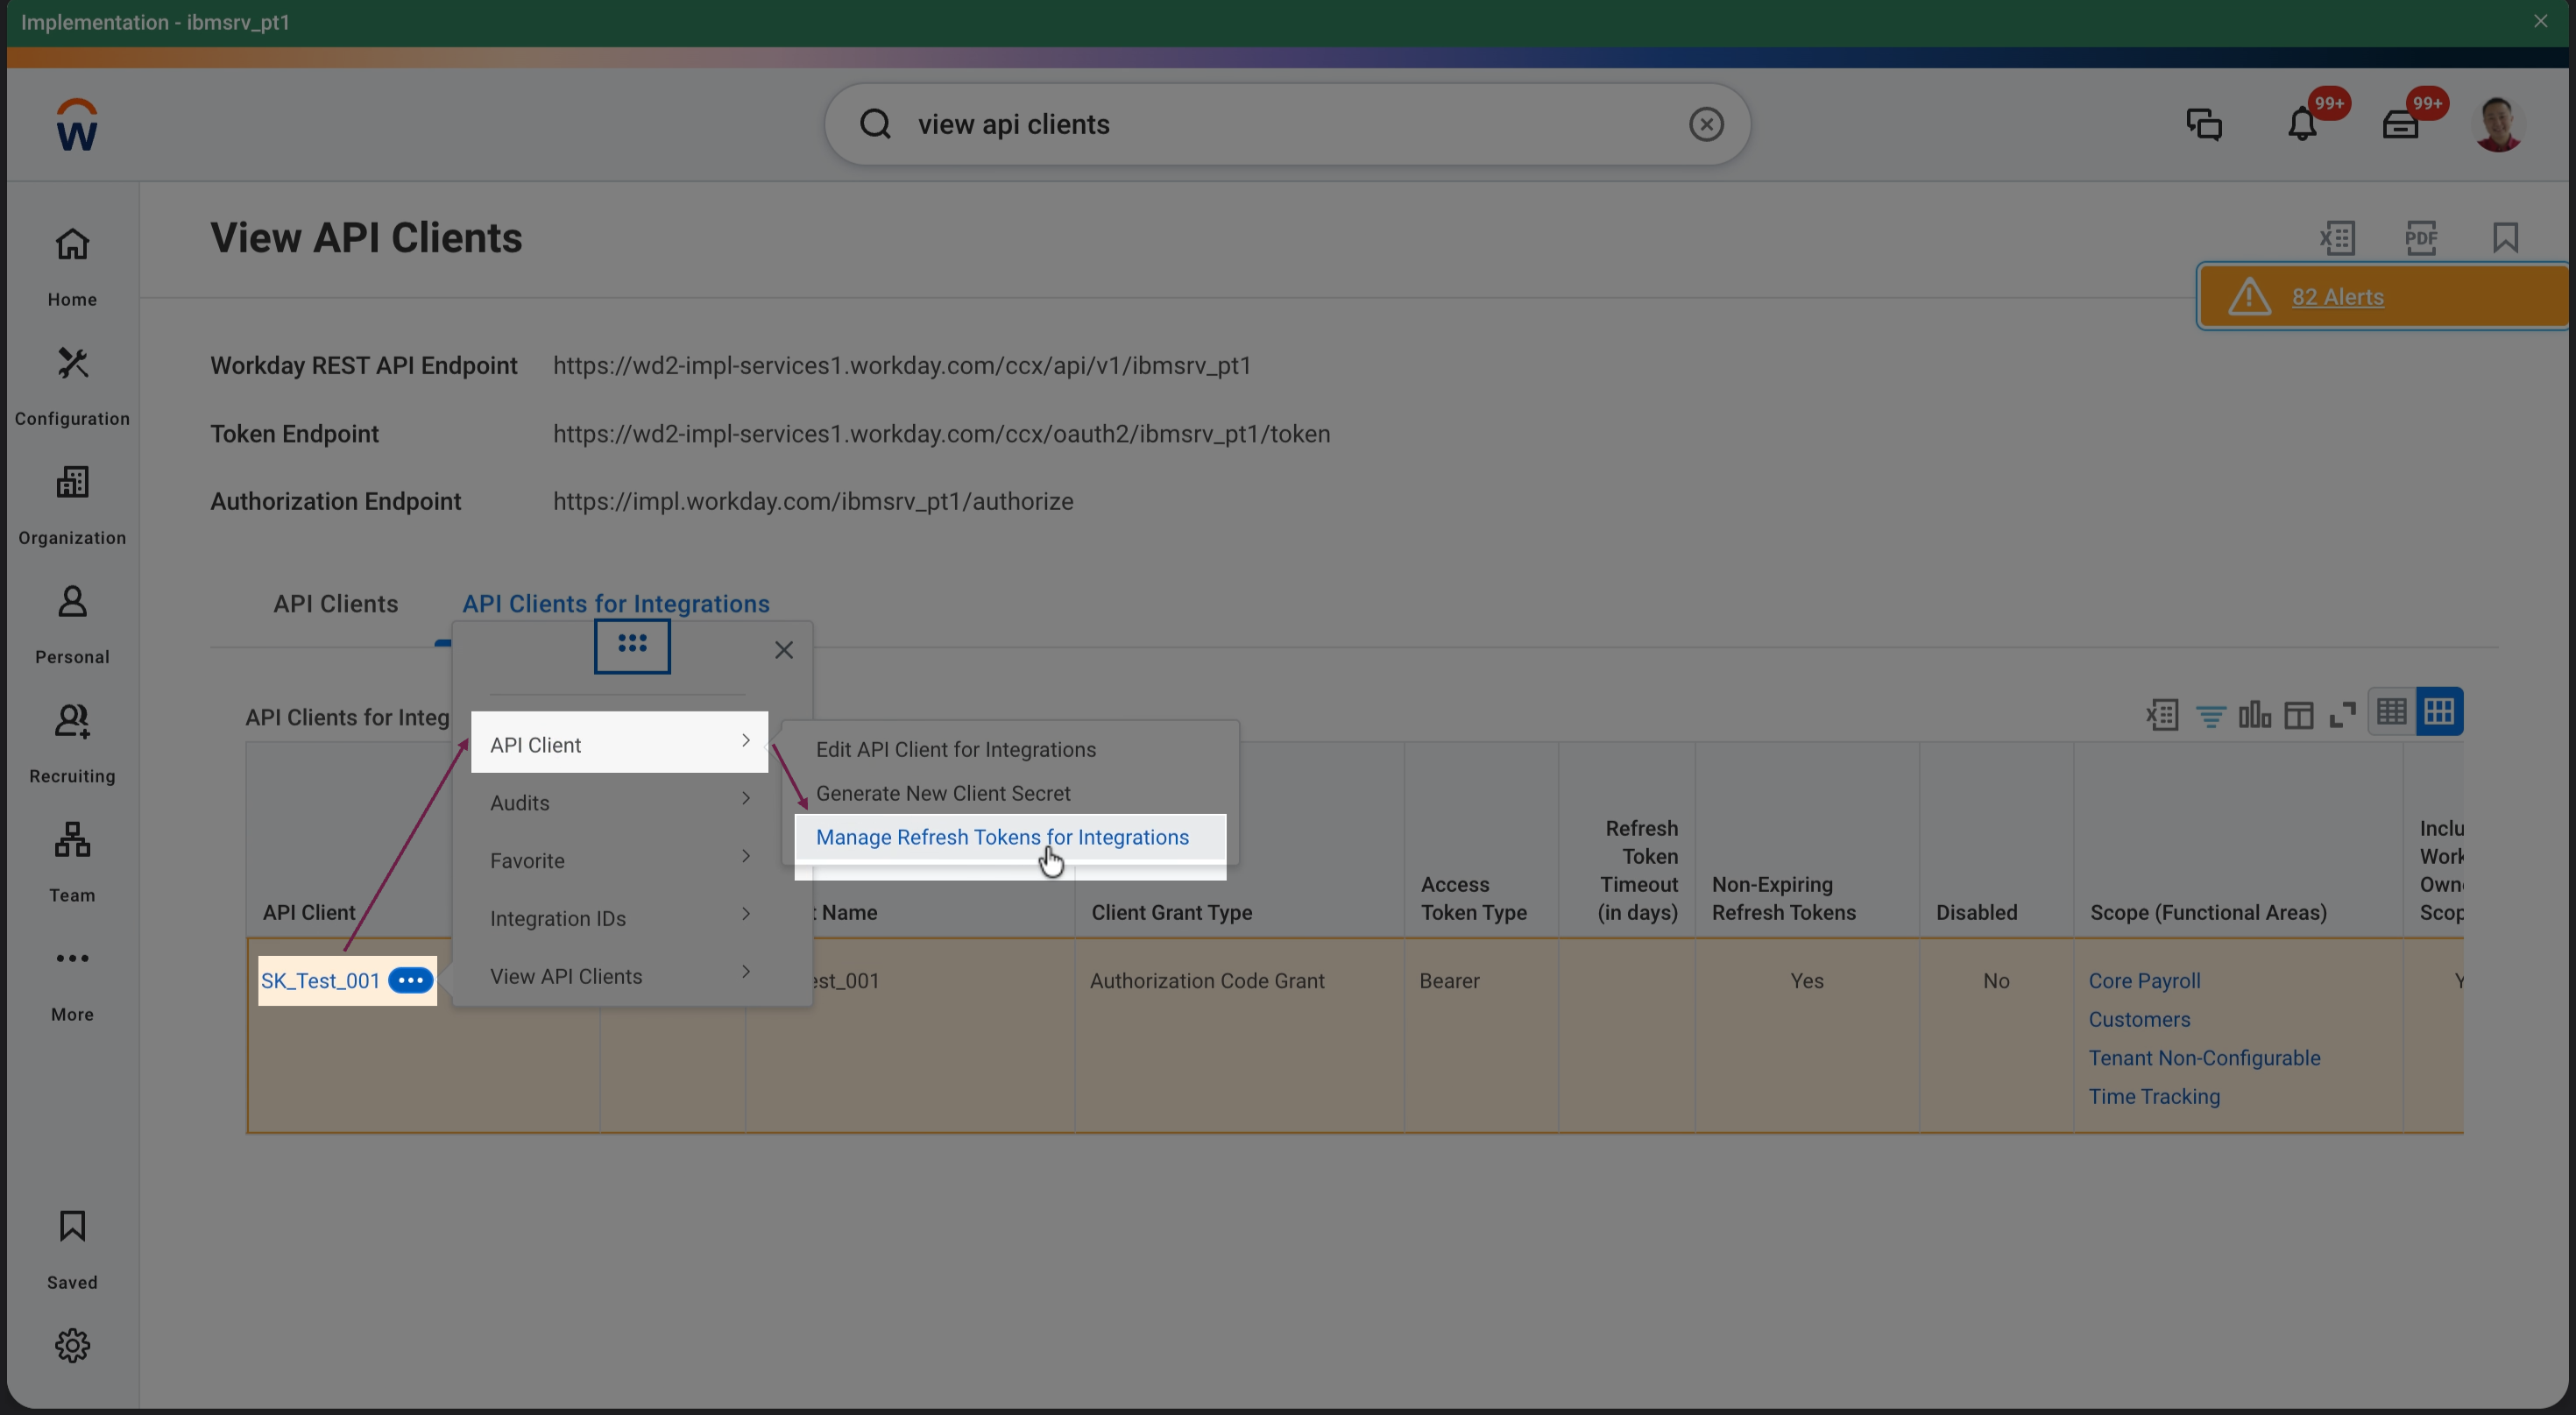
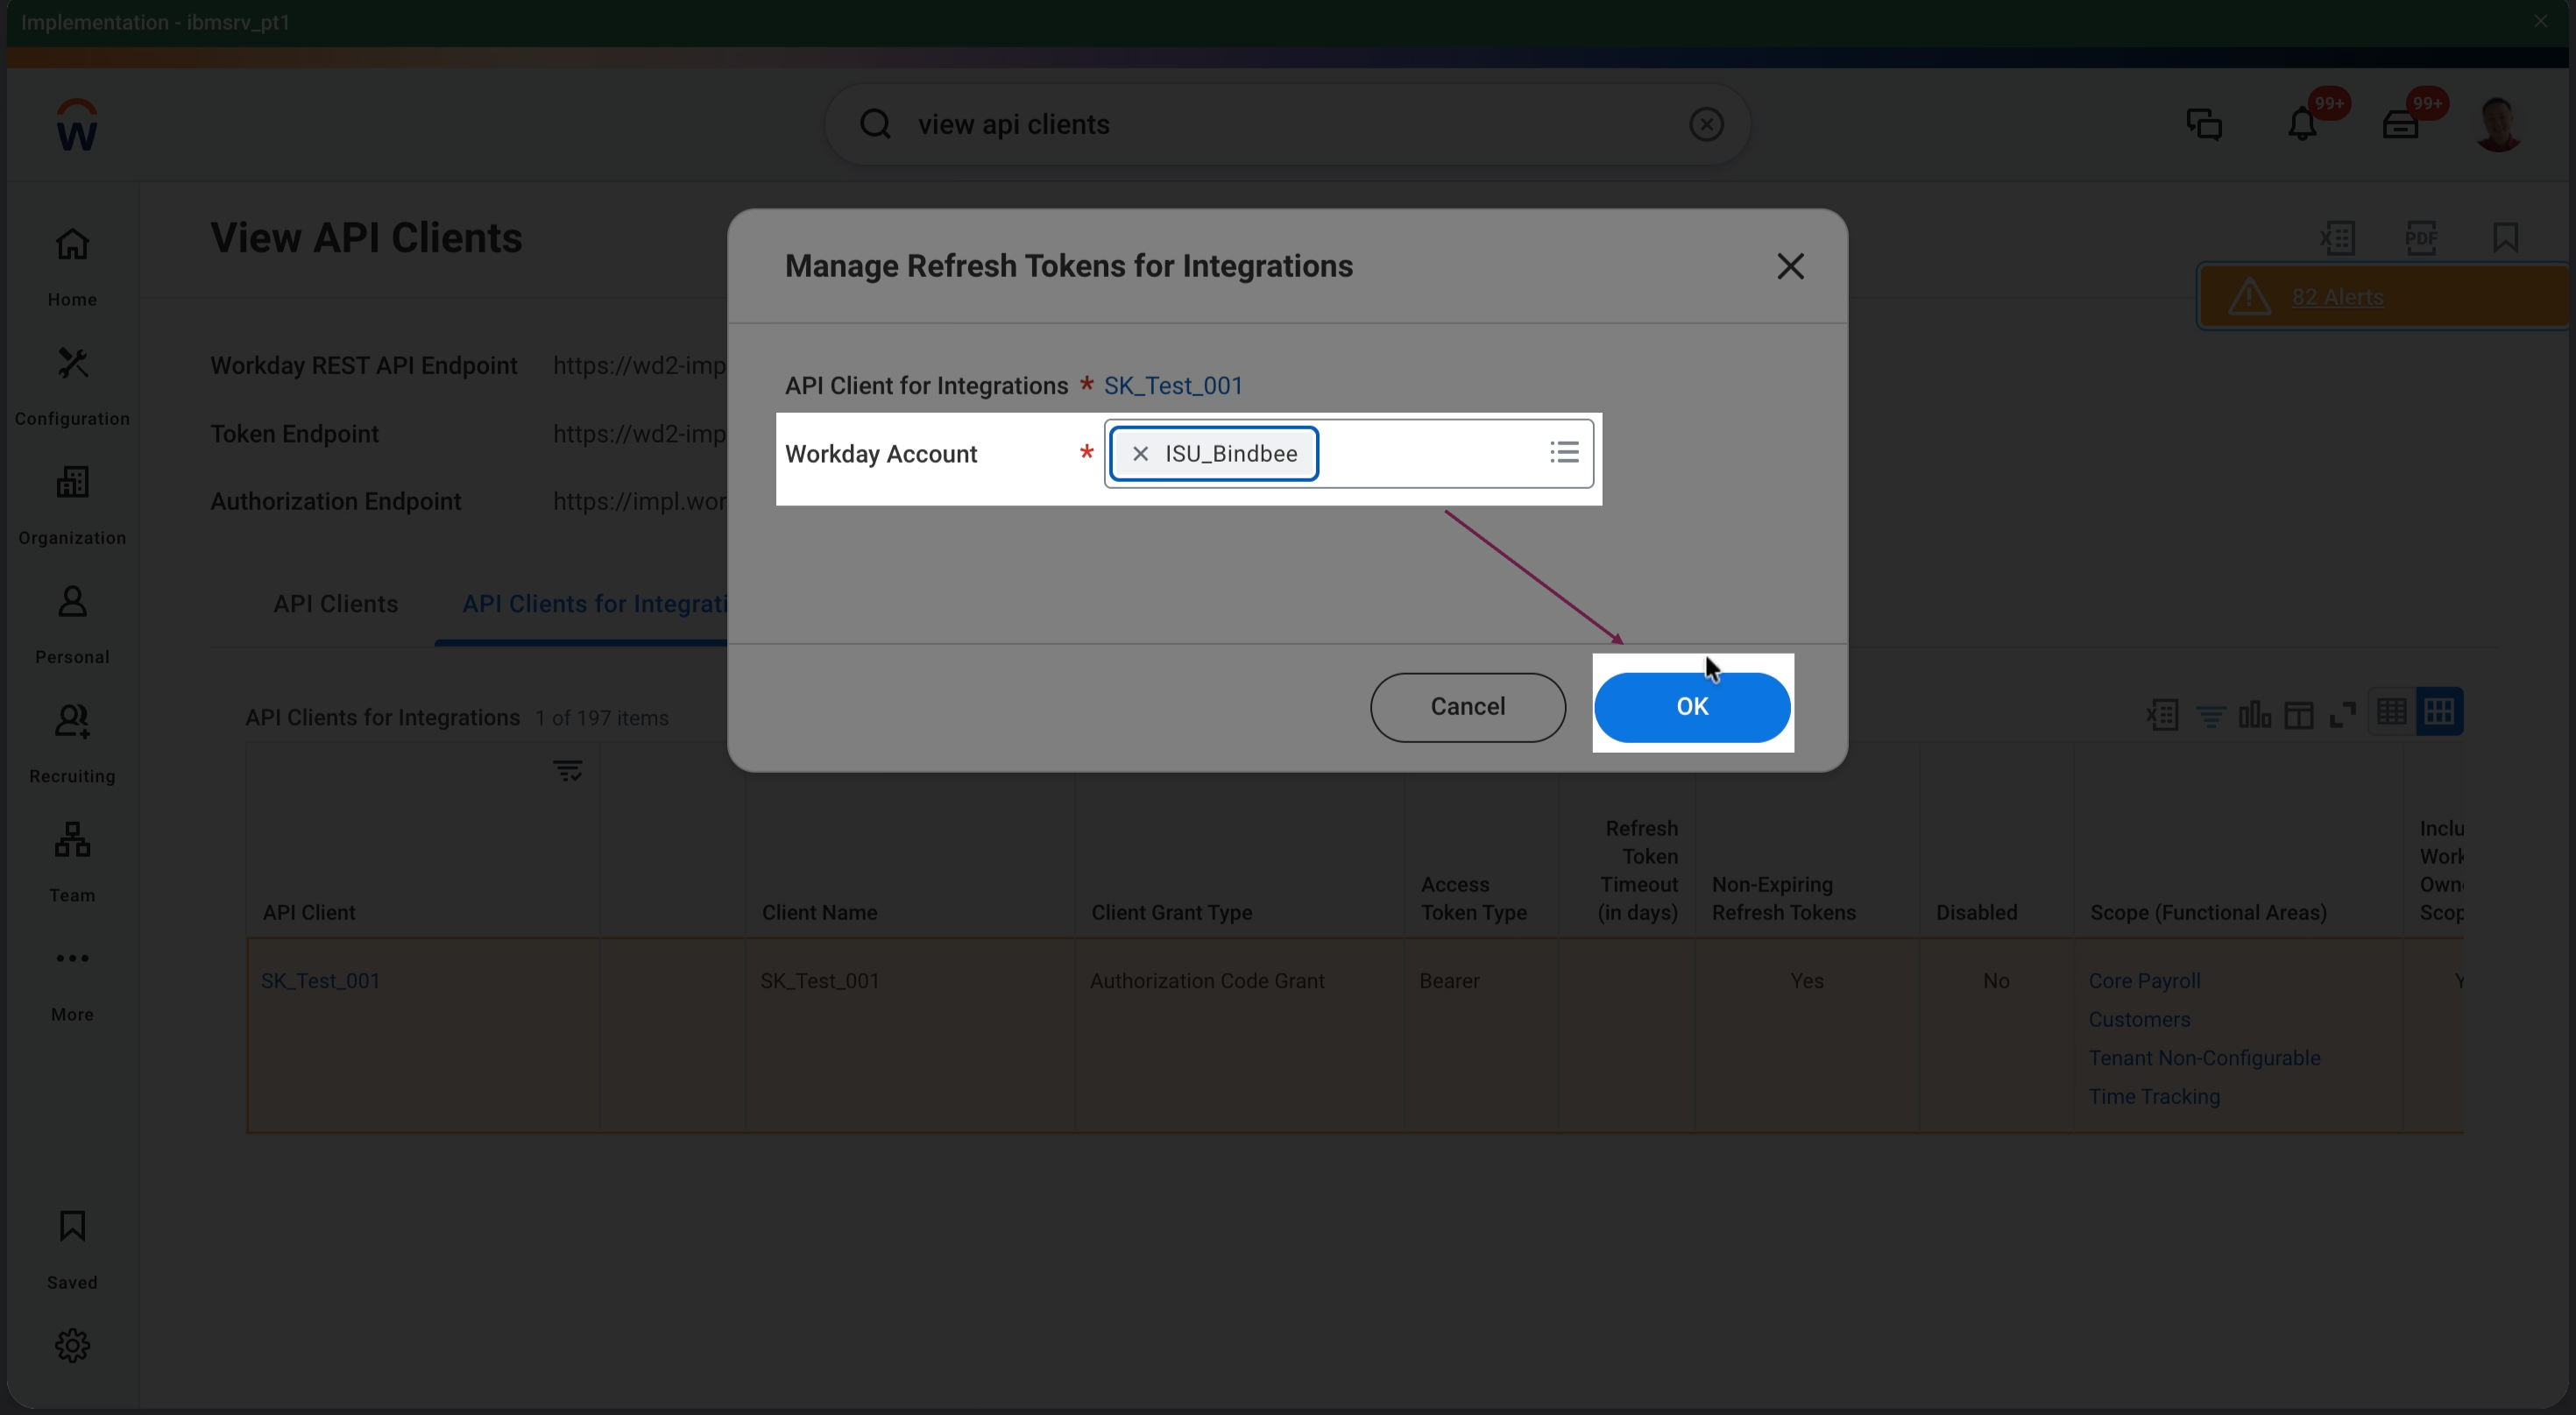
Click the three-dot menu next to your API client, then select API Client → Manage Refresh Tokens for Integrations.
In the Workday Account field, select the Integration System User (ISU) configured for this integration. If you do not have an ISU set up for this integration, see 4.1 Create a Workday Integration System User above.
Note: Ensure that the selected ISU has the required security permissions. Missing permissions may cause certain fields or records to be unavailable even when the appropriate API client scopes are selected.
The full list of permissions is in 4.5 Grant Permissions to the Security Group above.
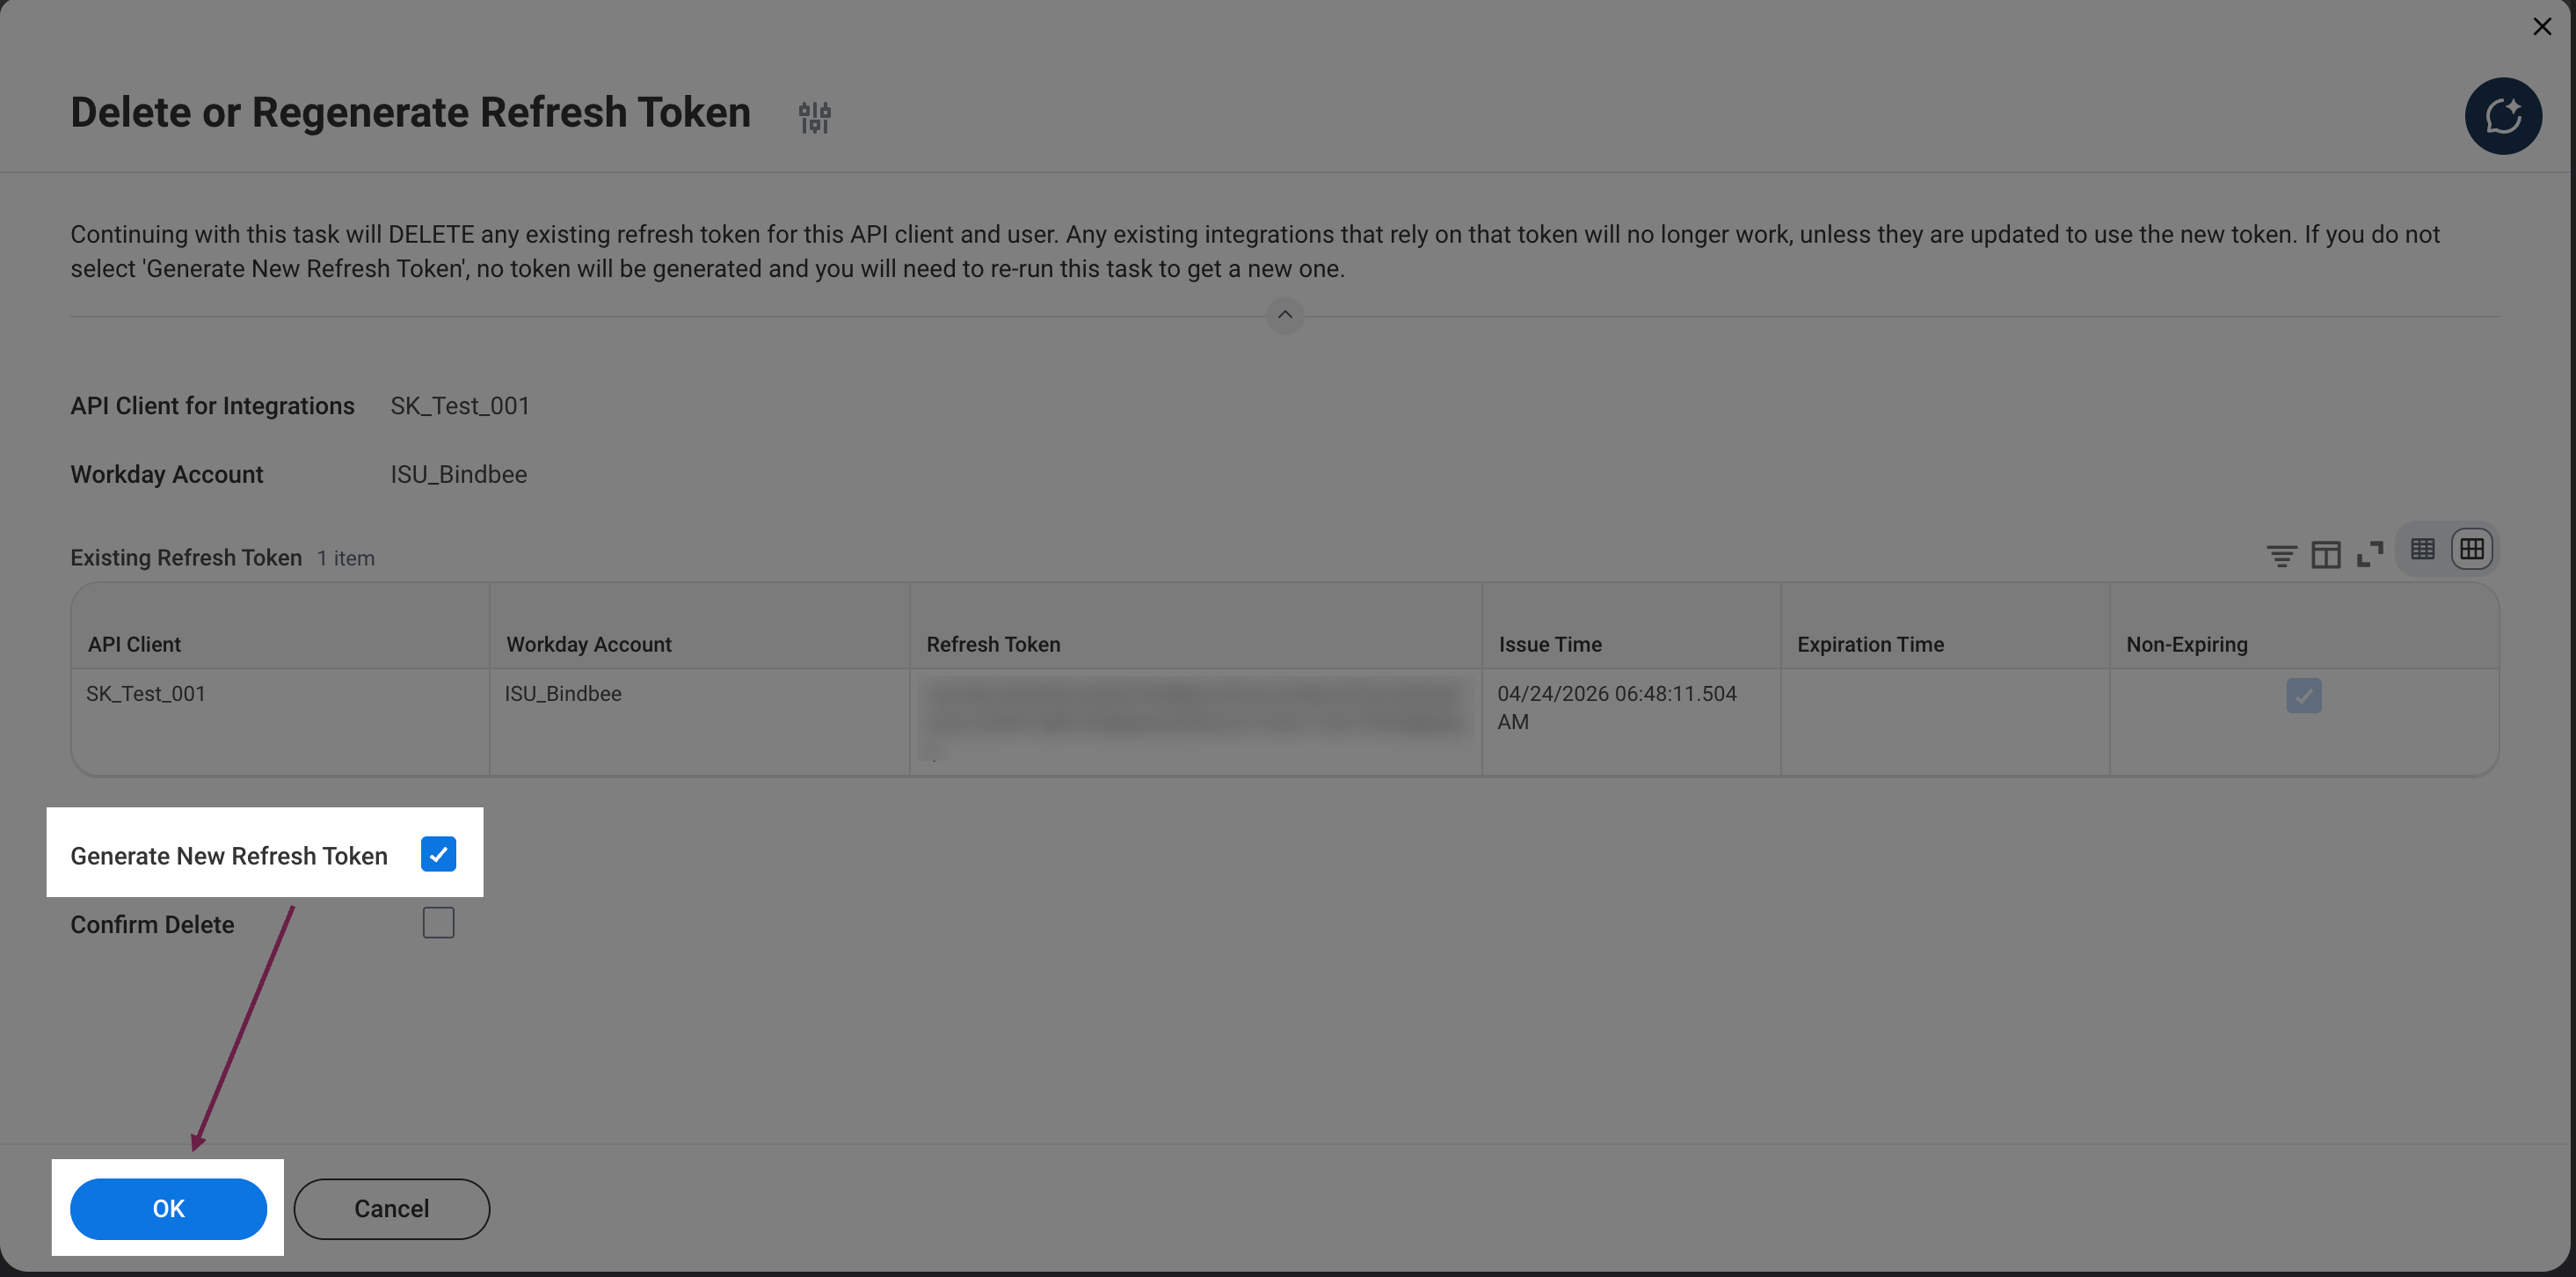
We recommend generating a dedicated refresh token for this integration. Select Generate New Refresh Token, then click OK.
Copy the Refresh Token and store it securely. You will need it when setting up your Workday connection.
4.11 Verify the Refresh Token User
The Refresh Token must be generated for the Workday account that will run the RaaS report.
When generating or managing the Refresh Token under Manage Refresh Tokens for Integrations, make sure the appropriate authorized user is selected in the Workday Account field.
Select the ISU you created in 4.1. You will share the custom report with this same ISU in 5.2.
For complete instructions on generating a Refresh Token and retrieving your Client ID and Client Secret, see 4.9 Get the Client ID and Client Secret and 4.10 Get the Refresh Token above.
4.12 Enter the Credentials in Bindbee
Back in the magic link, enter the credentials from your Workday API Client:
Refresh Token
Client ID
Client Secret
Click Continue.
Step 5: Enter Your Report URL
Create a custom report in Workday, share it with your ISU and copy its JSON URL (steps 5.1 to 5.3). Then paste the URL into the magic link in step 5.4.
5.1 Create a Workday Custom Report
Create the Report
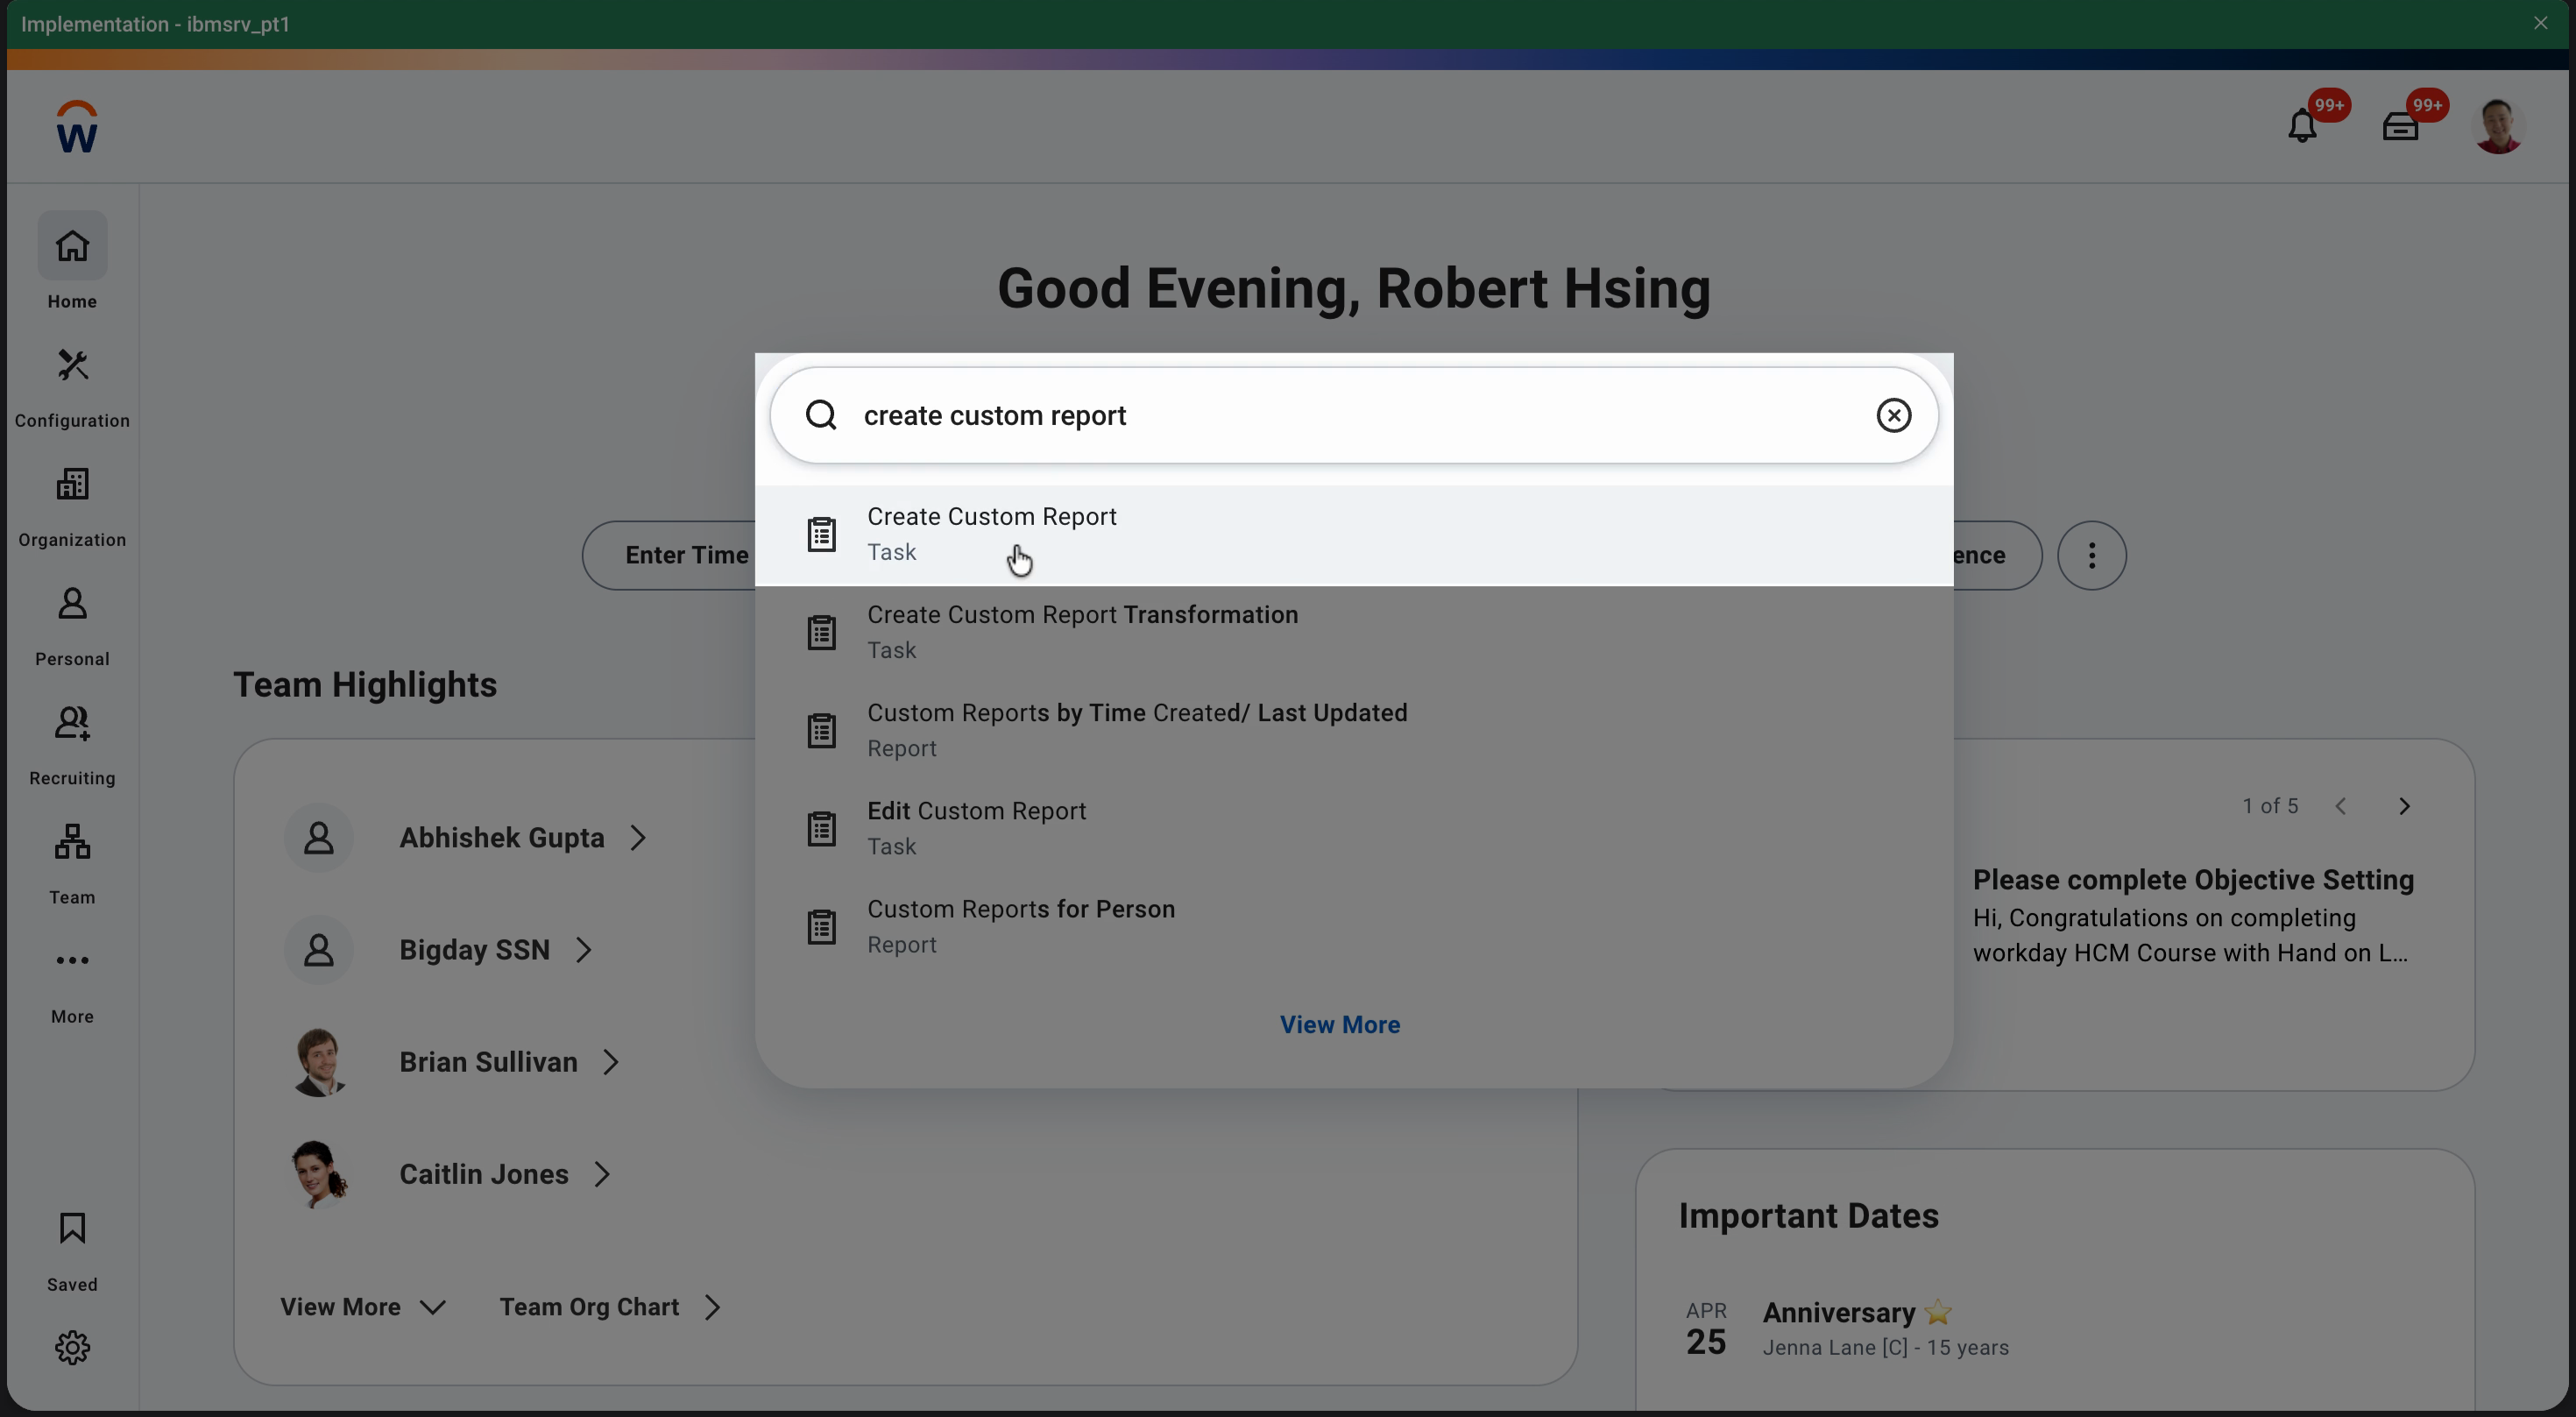
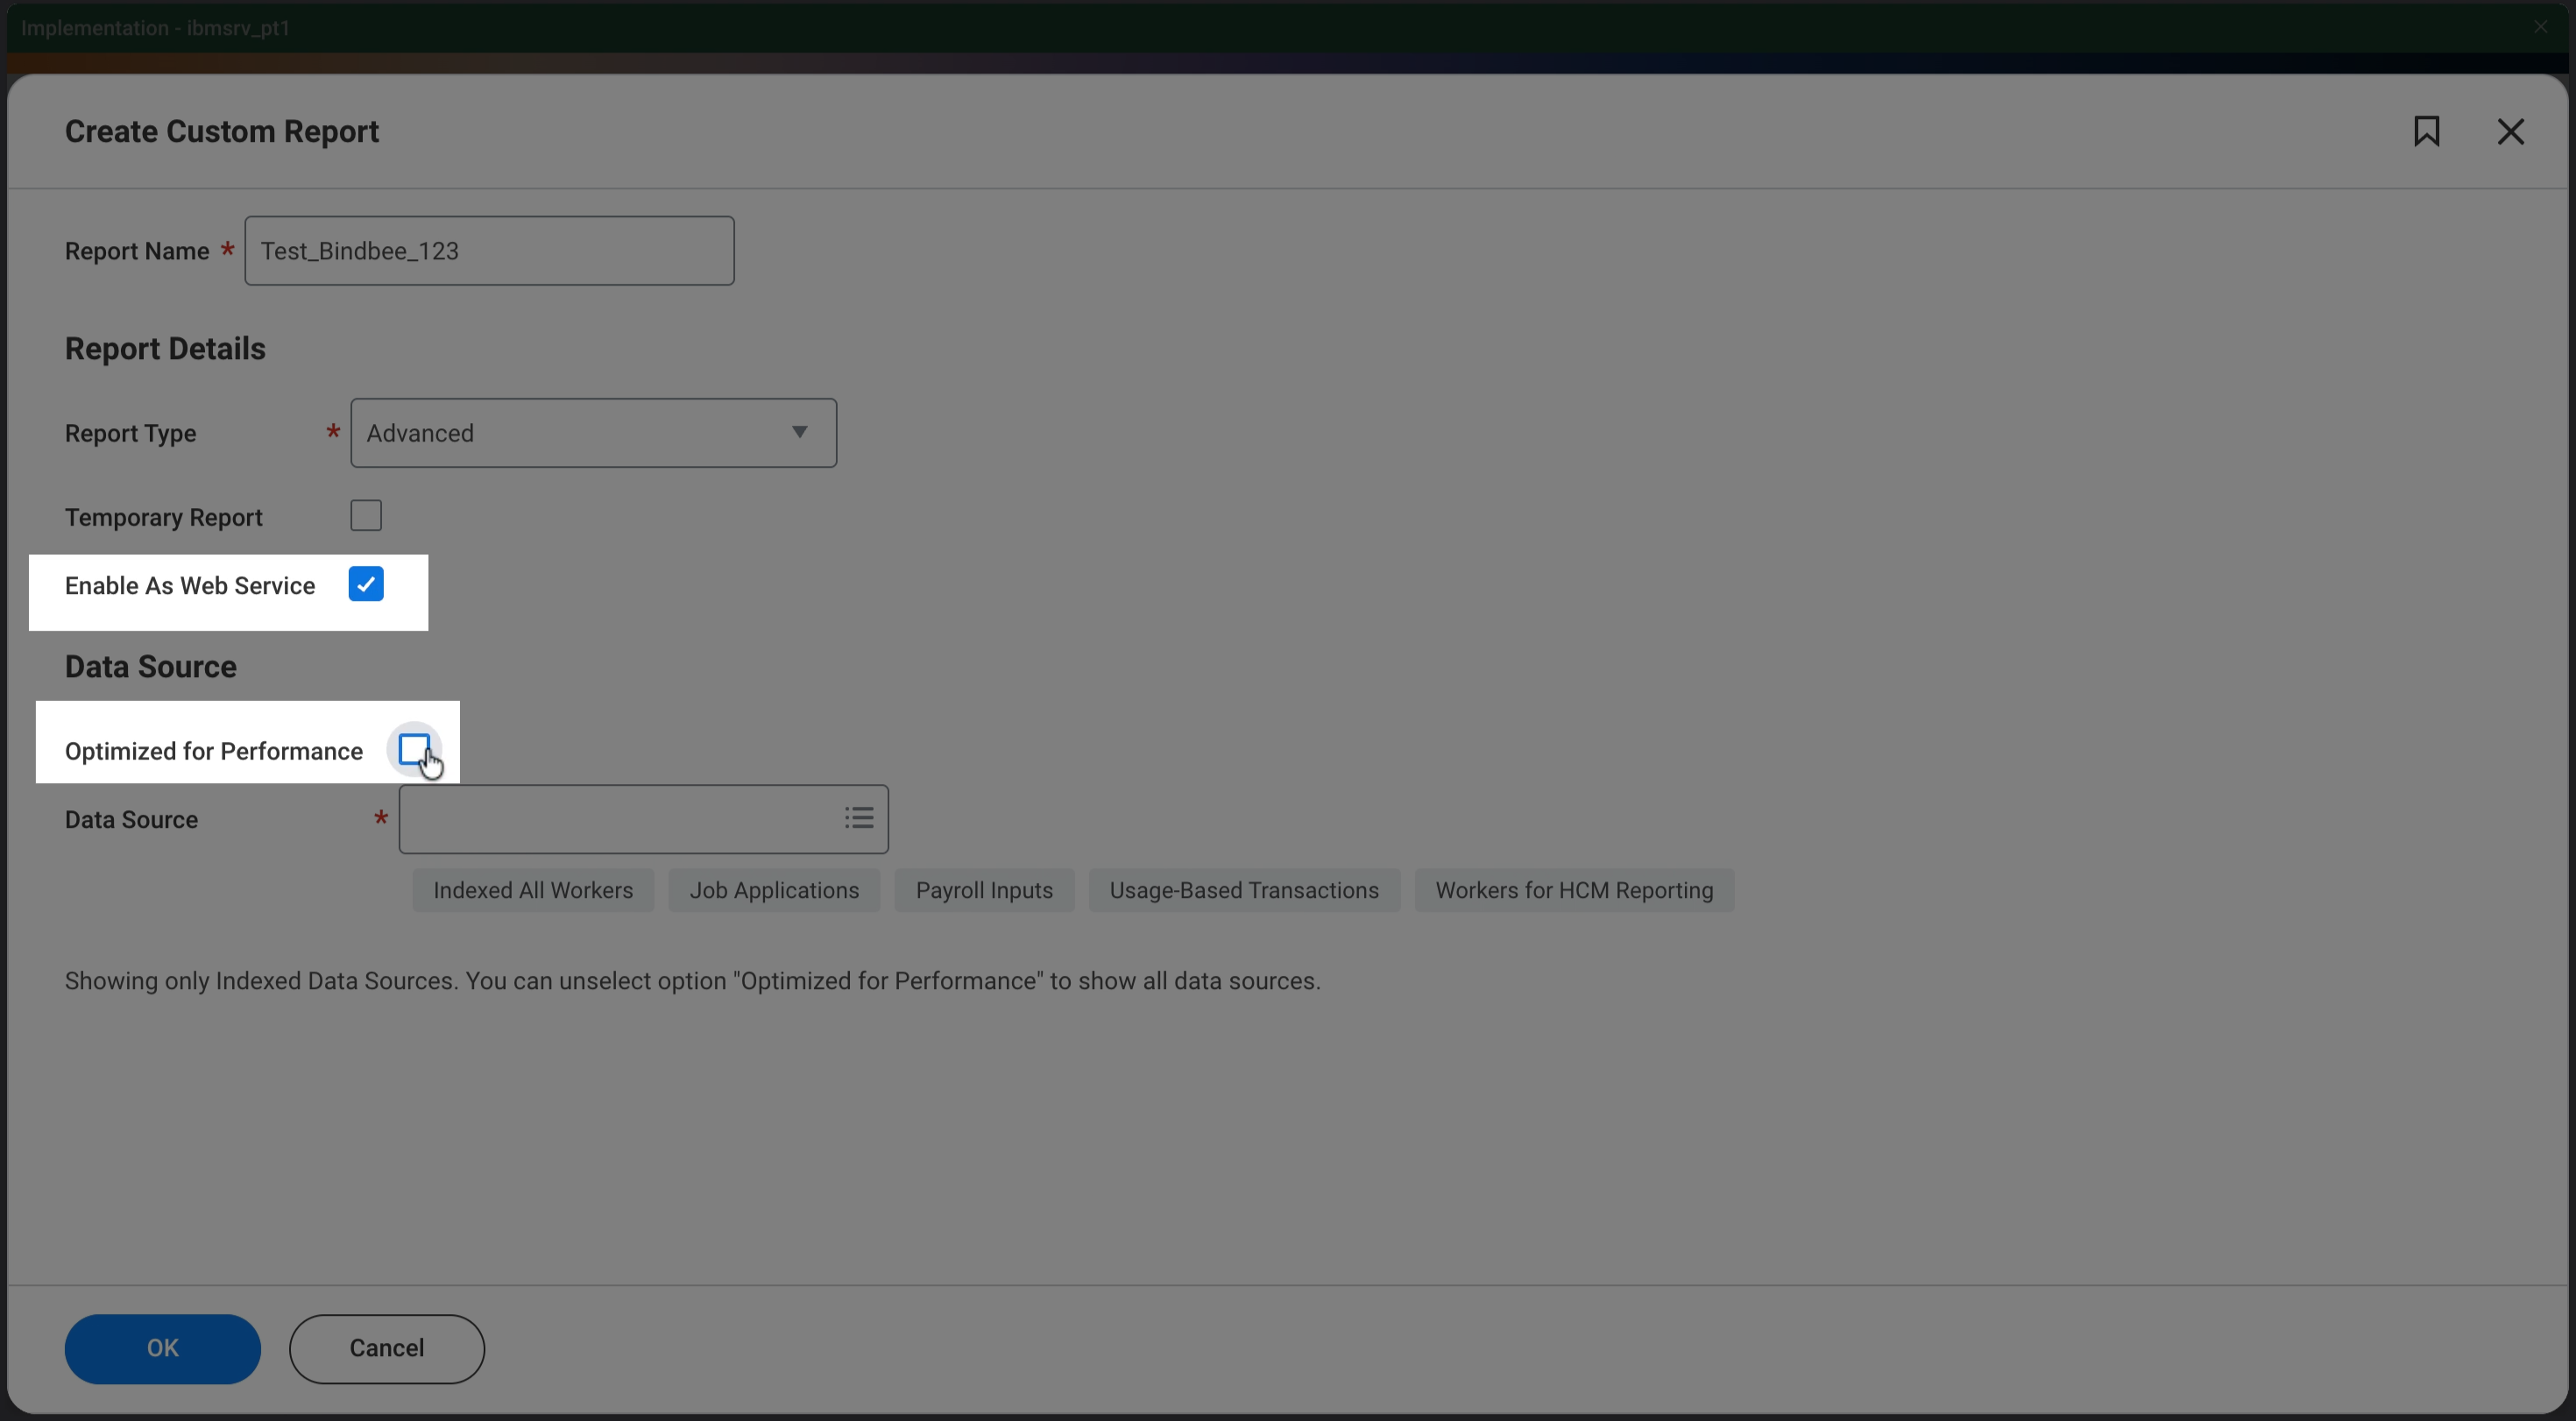
From your Workday dashboard, search for and open Create Custom Report.
Configure the Report Type
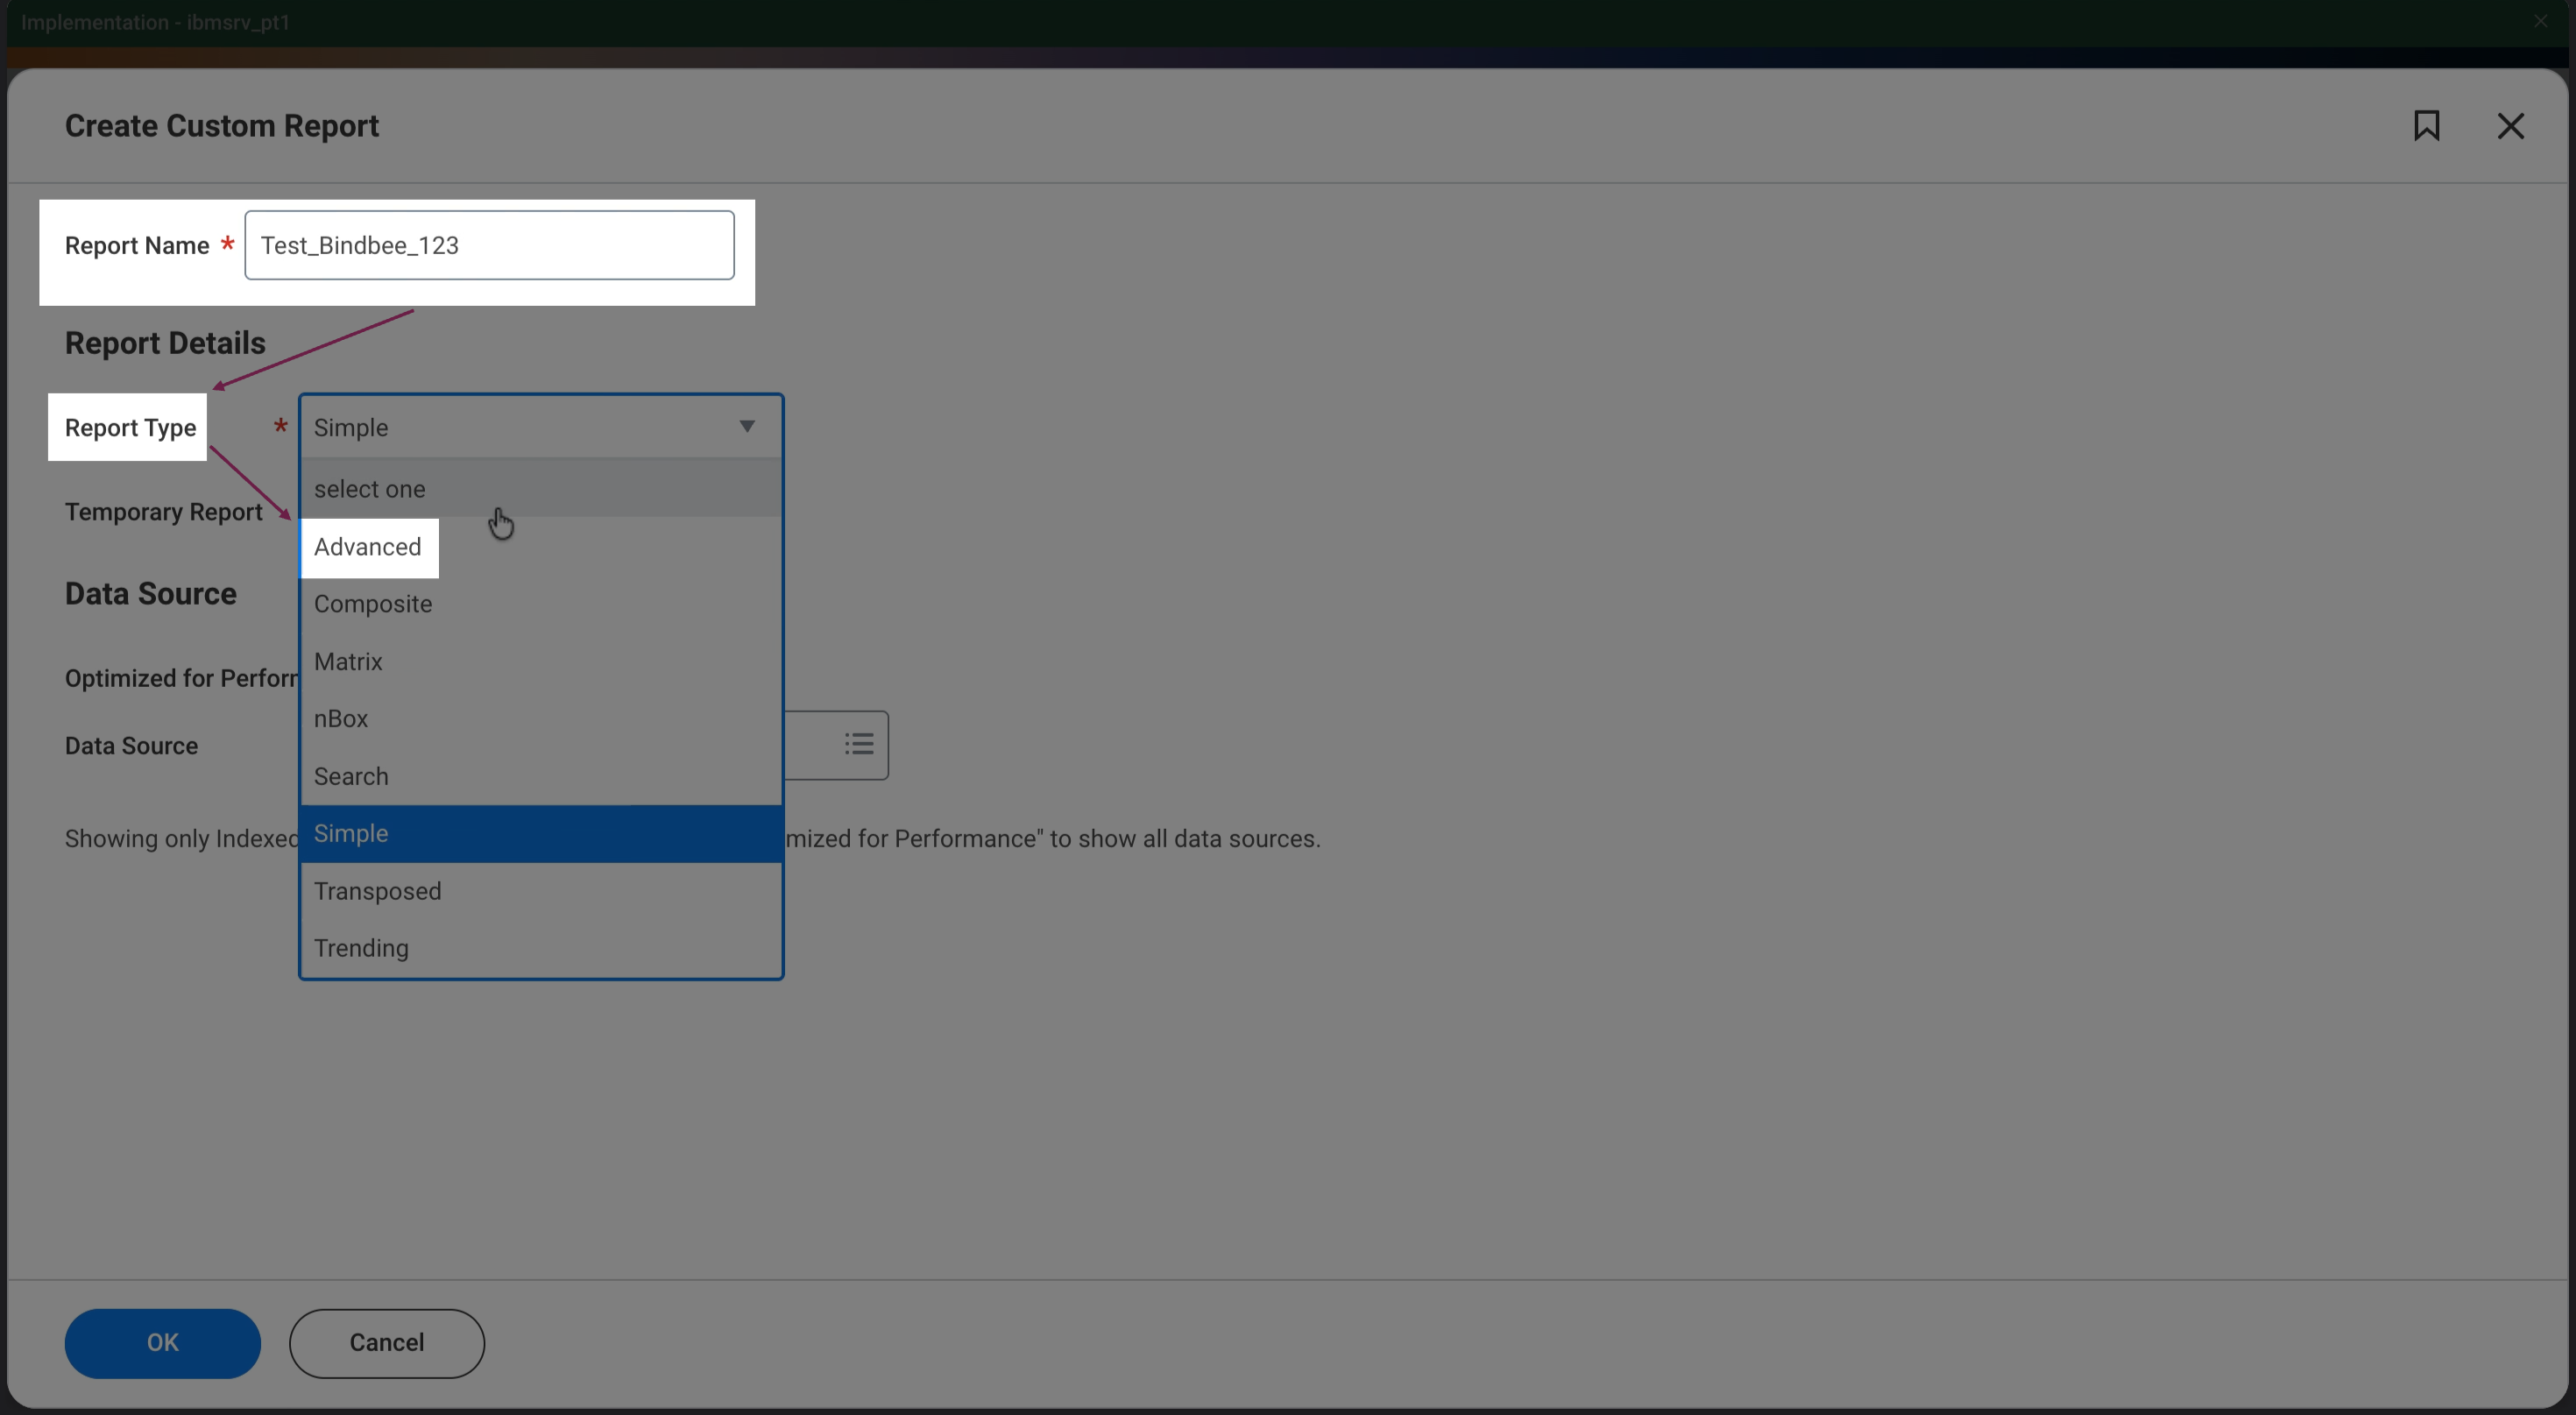
Enter a name for your custom report and set the Report Type to Advanced.
Enable the Report as a Web Service
Select Enable as Web Service.
Make sure Optimized for Performance is not selected.
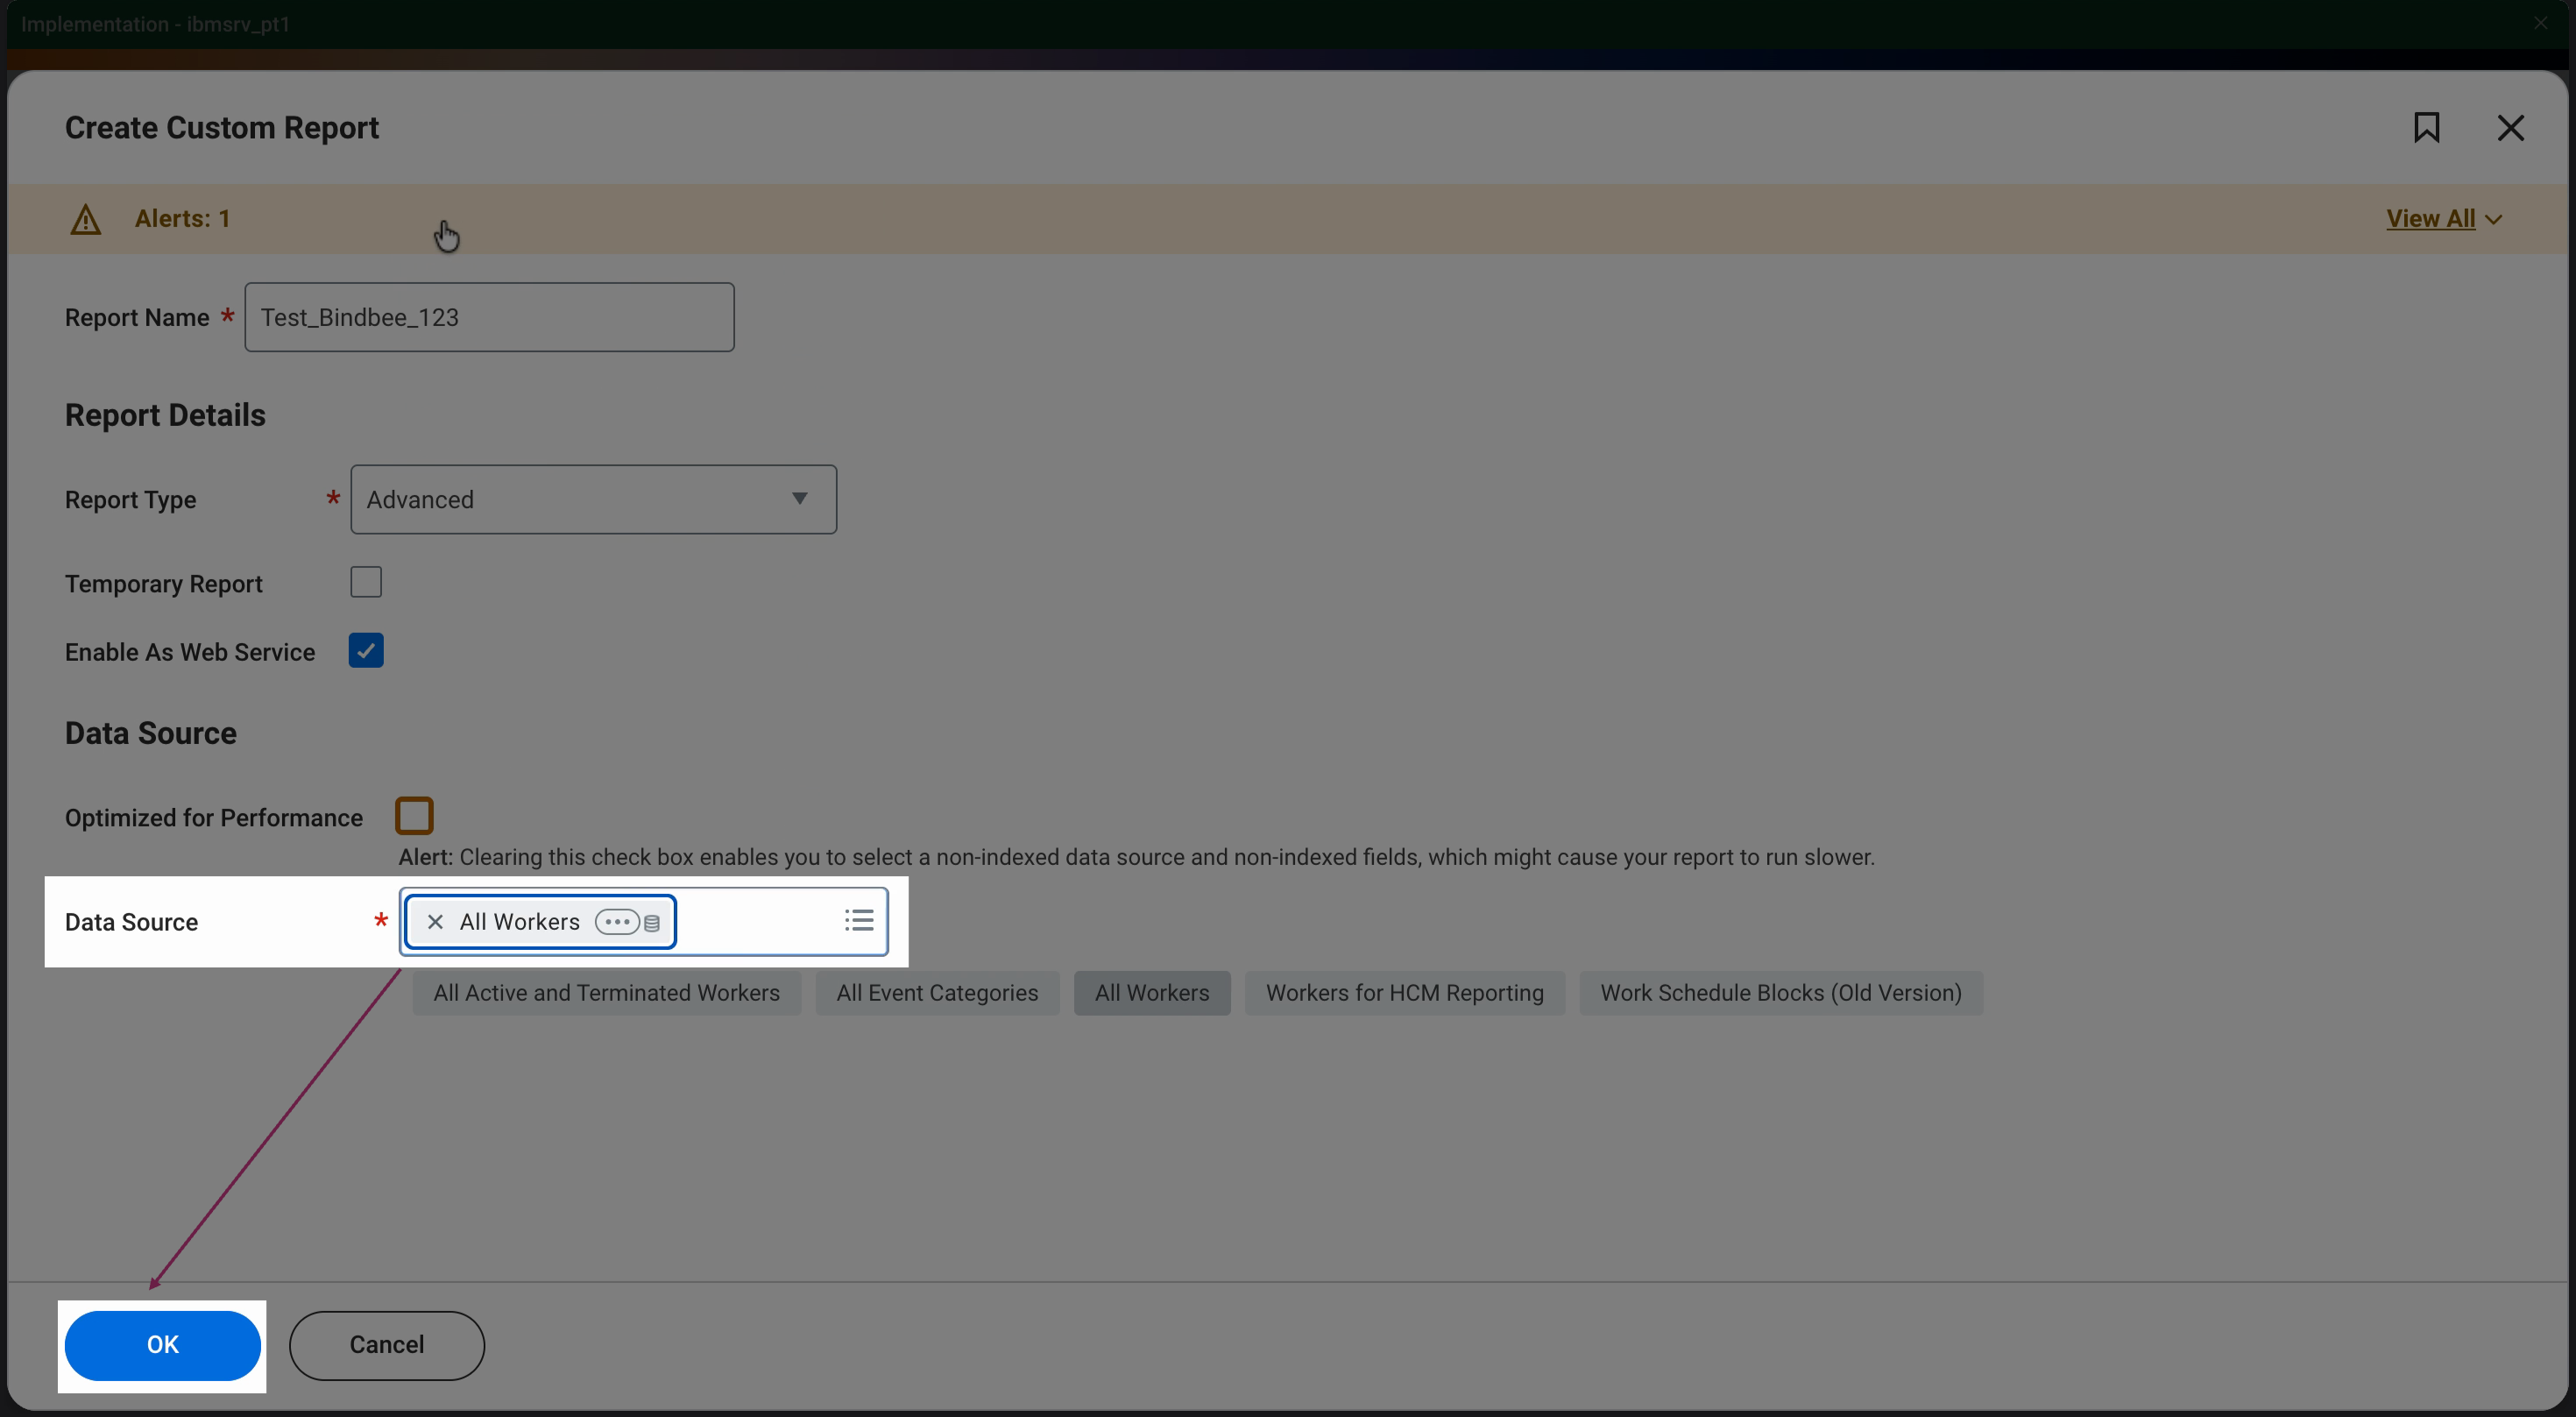
Select the Data Source
Select the Data Source containing the Workday object you want to retrieve.
For example, for a worker report, you can use All Workers as the data source.
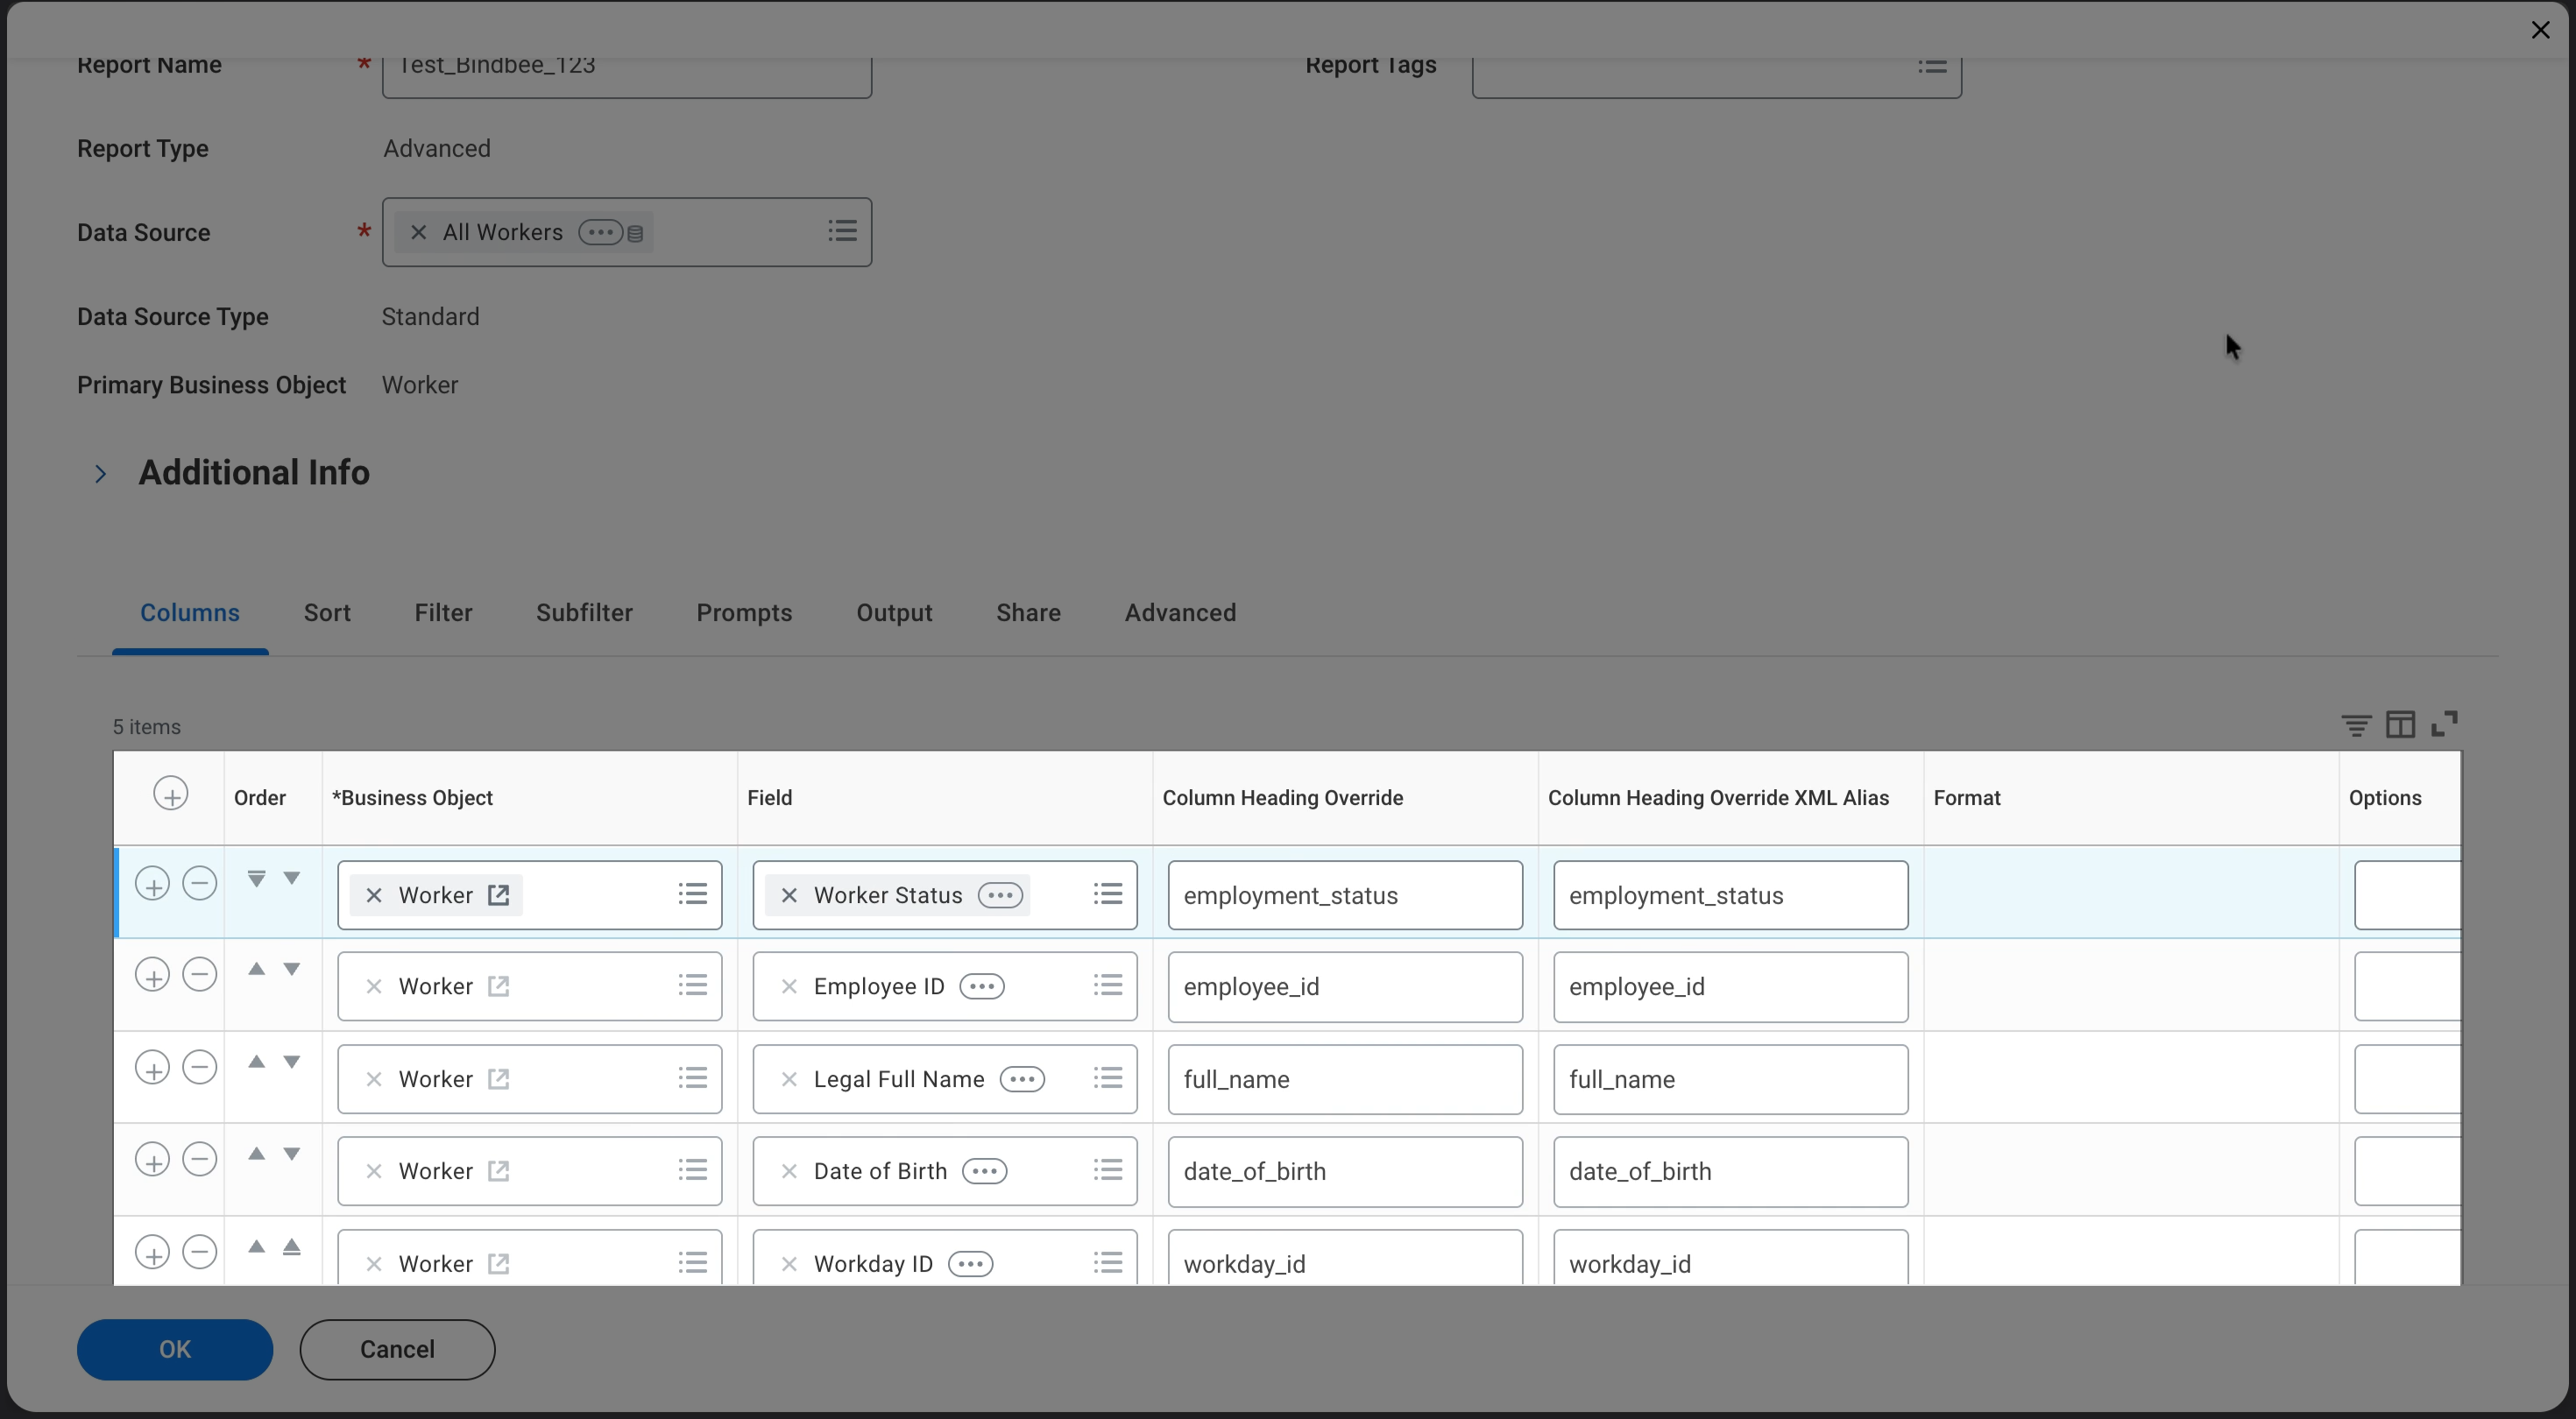
Add the Required Report Fields
Add the columns that you want Bindbee to retrieve from the report.
Start from the standard Bindbee RaaS report template, and use the exact field names it provides. You can ignore any fields that are not relevant to your use case.
If you need to include additional fields that are not listed in the template, add them to the report. Bindbee will sync these fields as well.
The Workday account used by the integration must have access to the custom report.
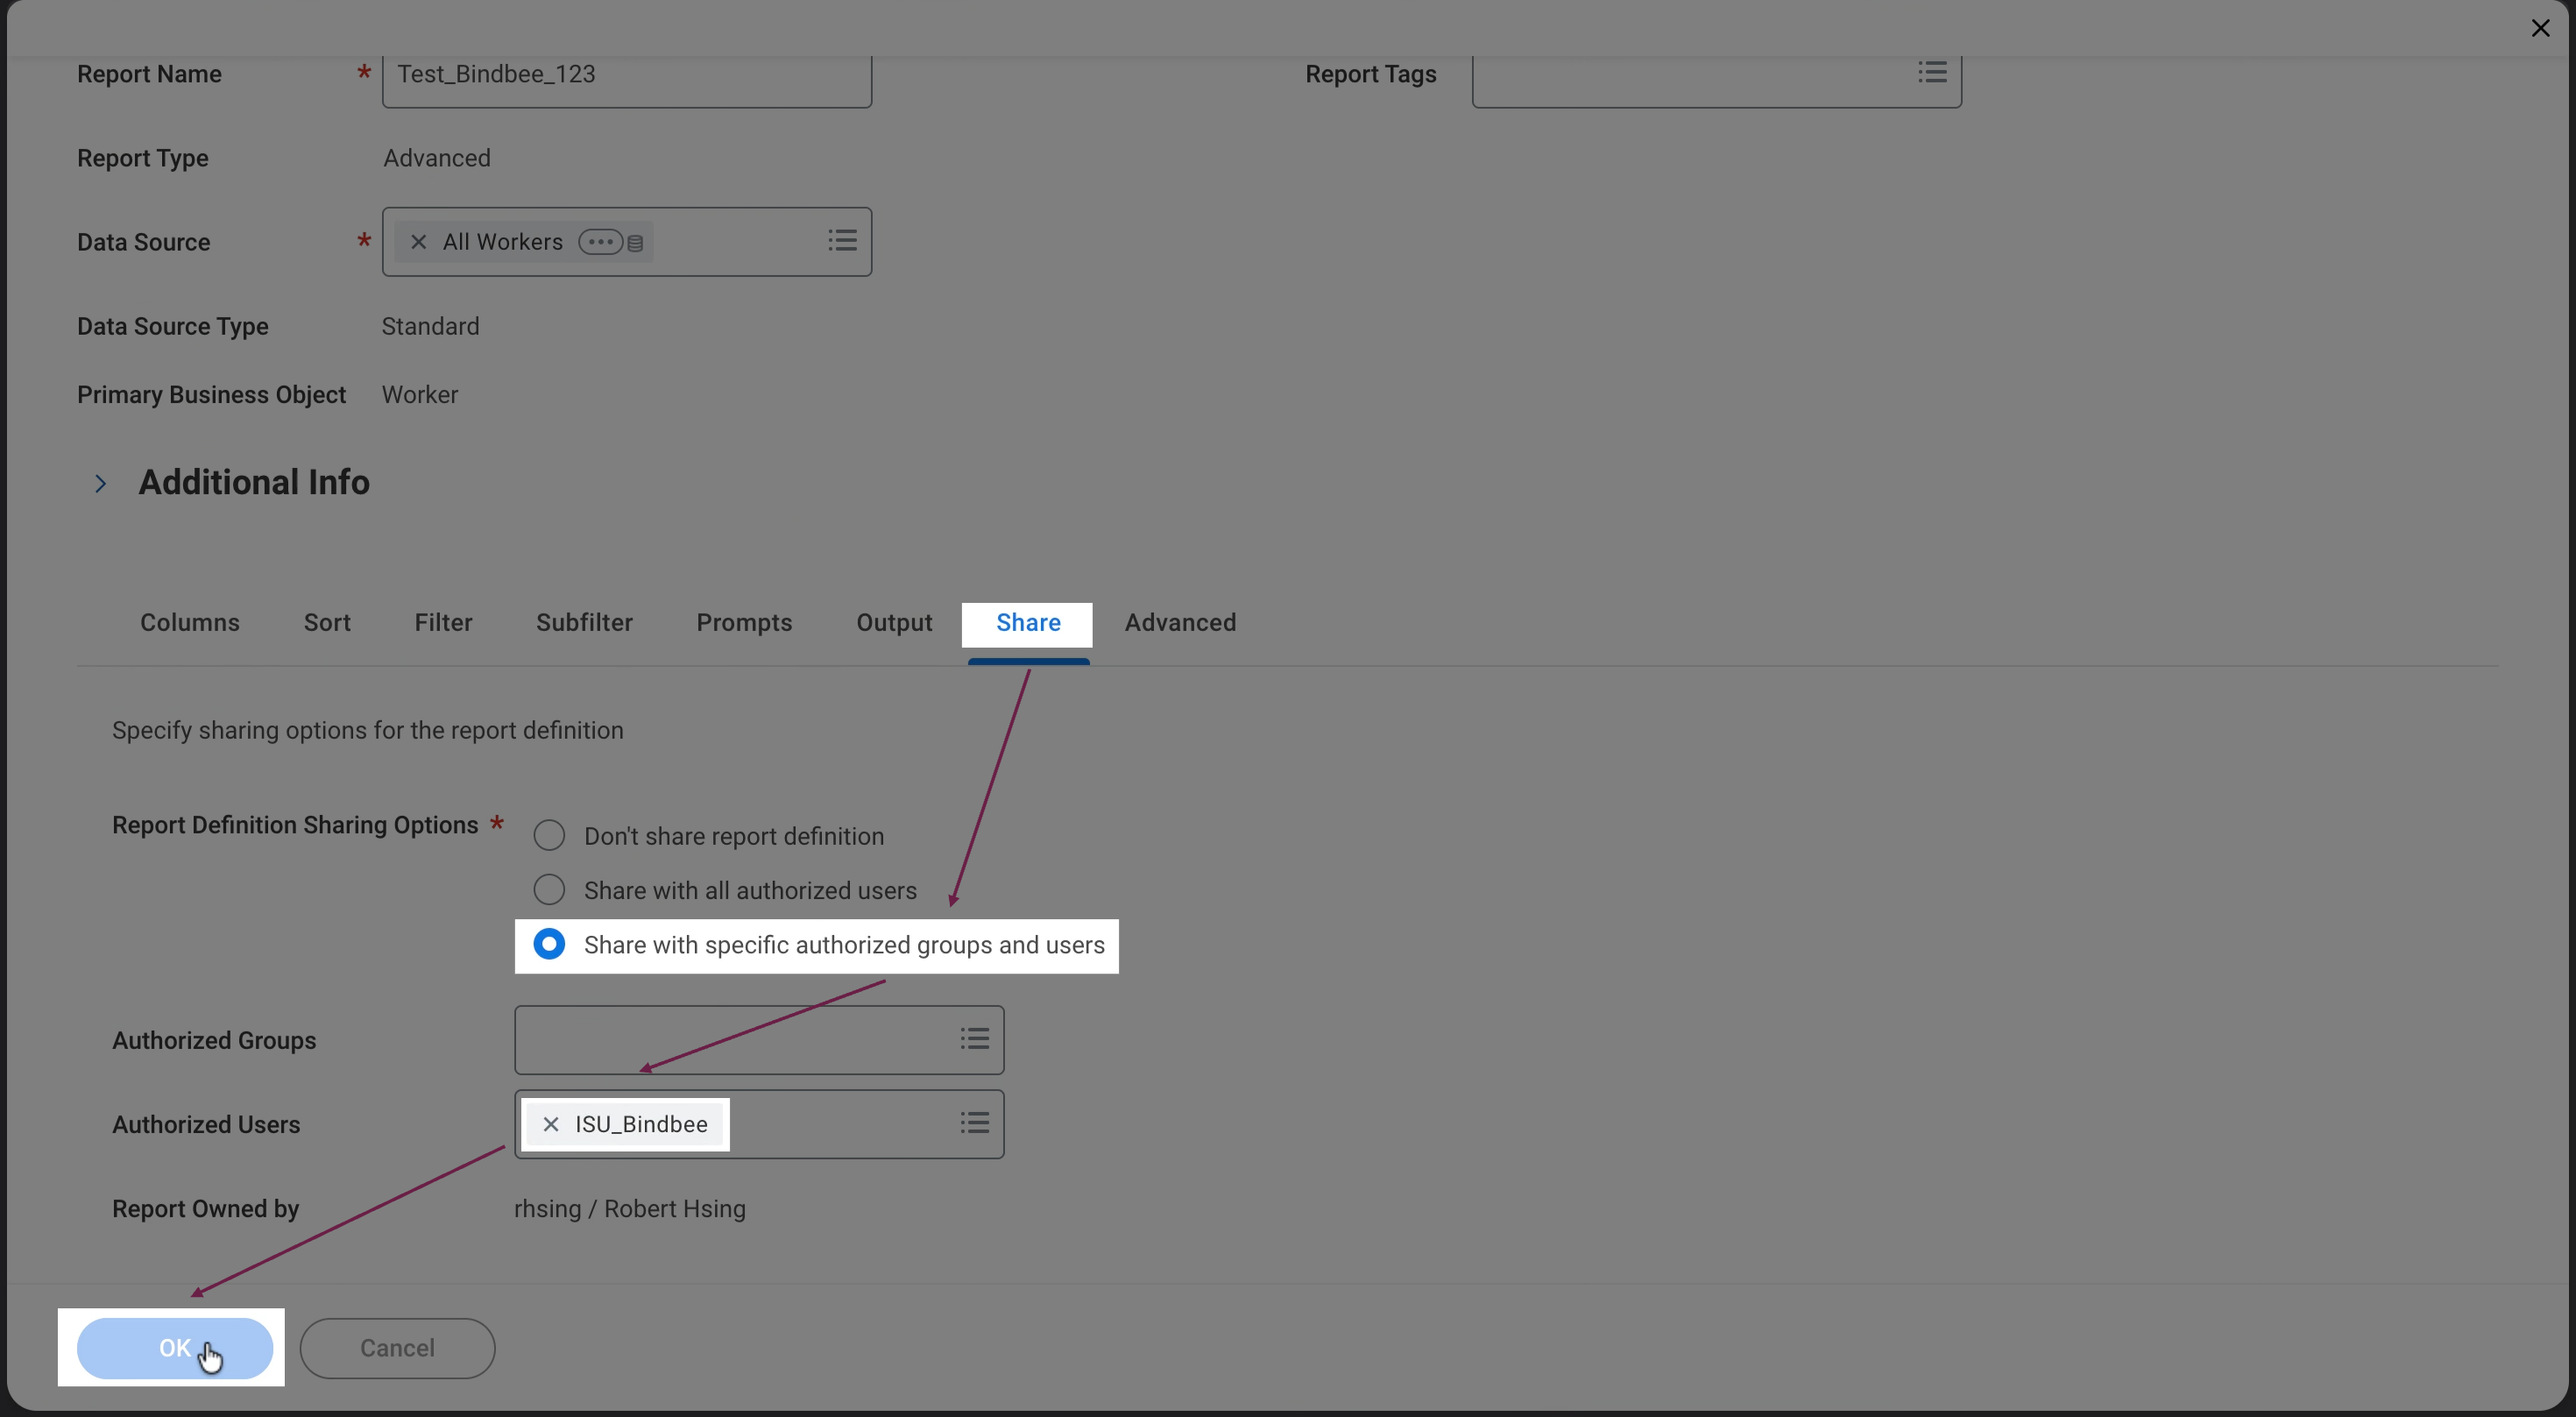
Open the Share Tab
Open the Share tab of the custom report.
Restrict the Report to Authorized Users
Enable Share with Specific Authorized Groups and Users.
Add the Authorized Workday User
In Authorized Users, add the Integration System User that will be used to access the report.
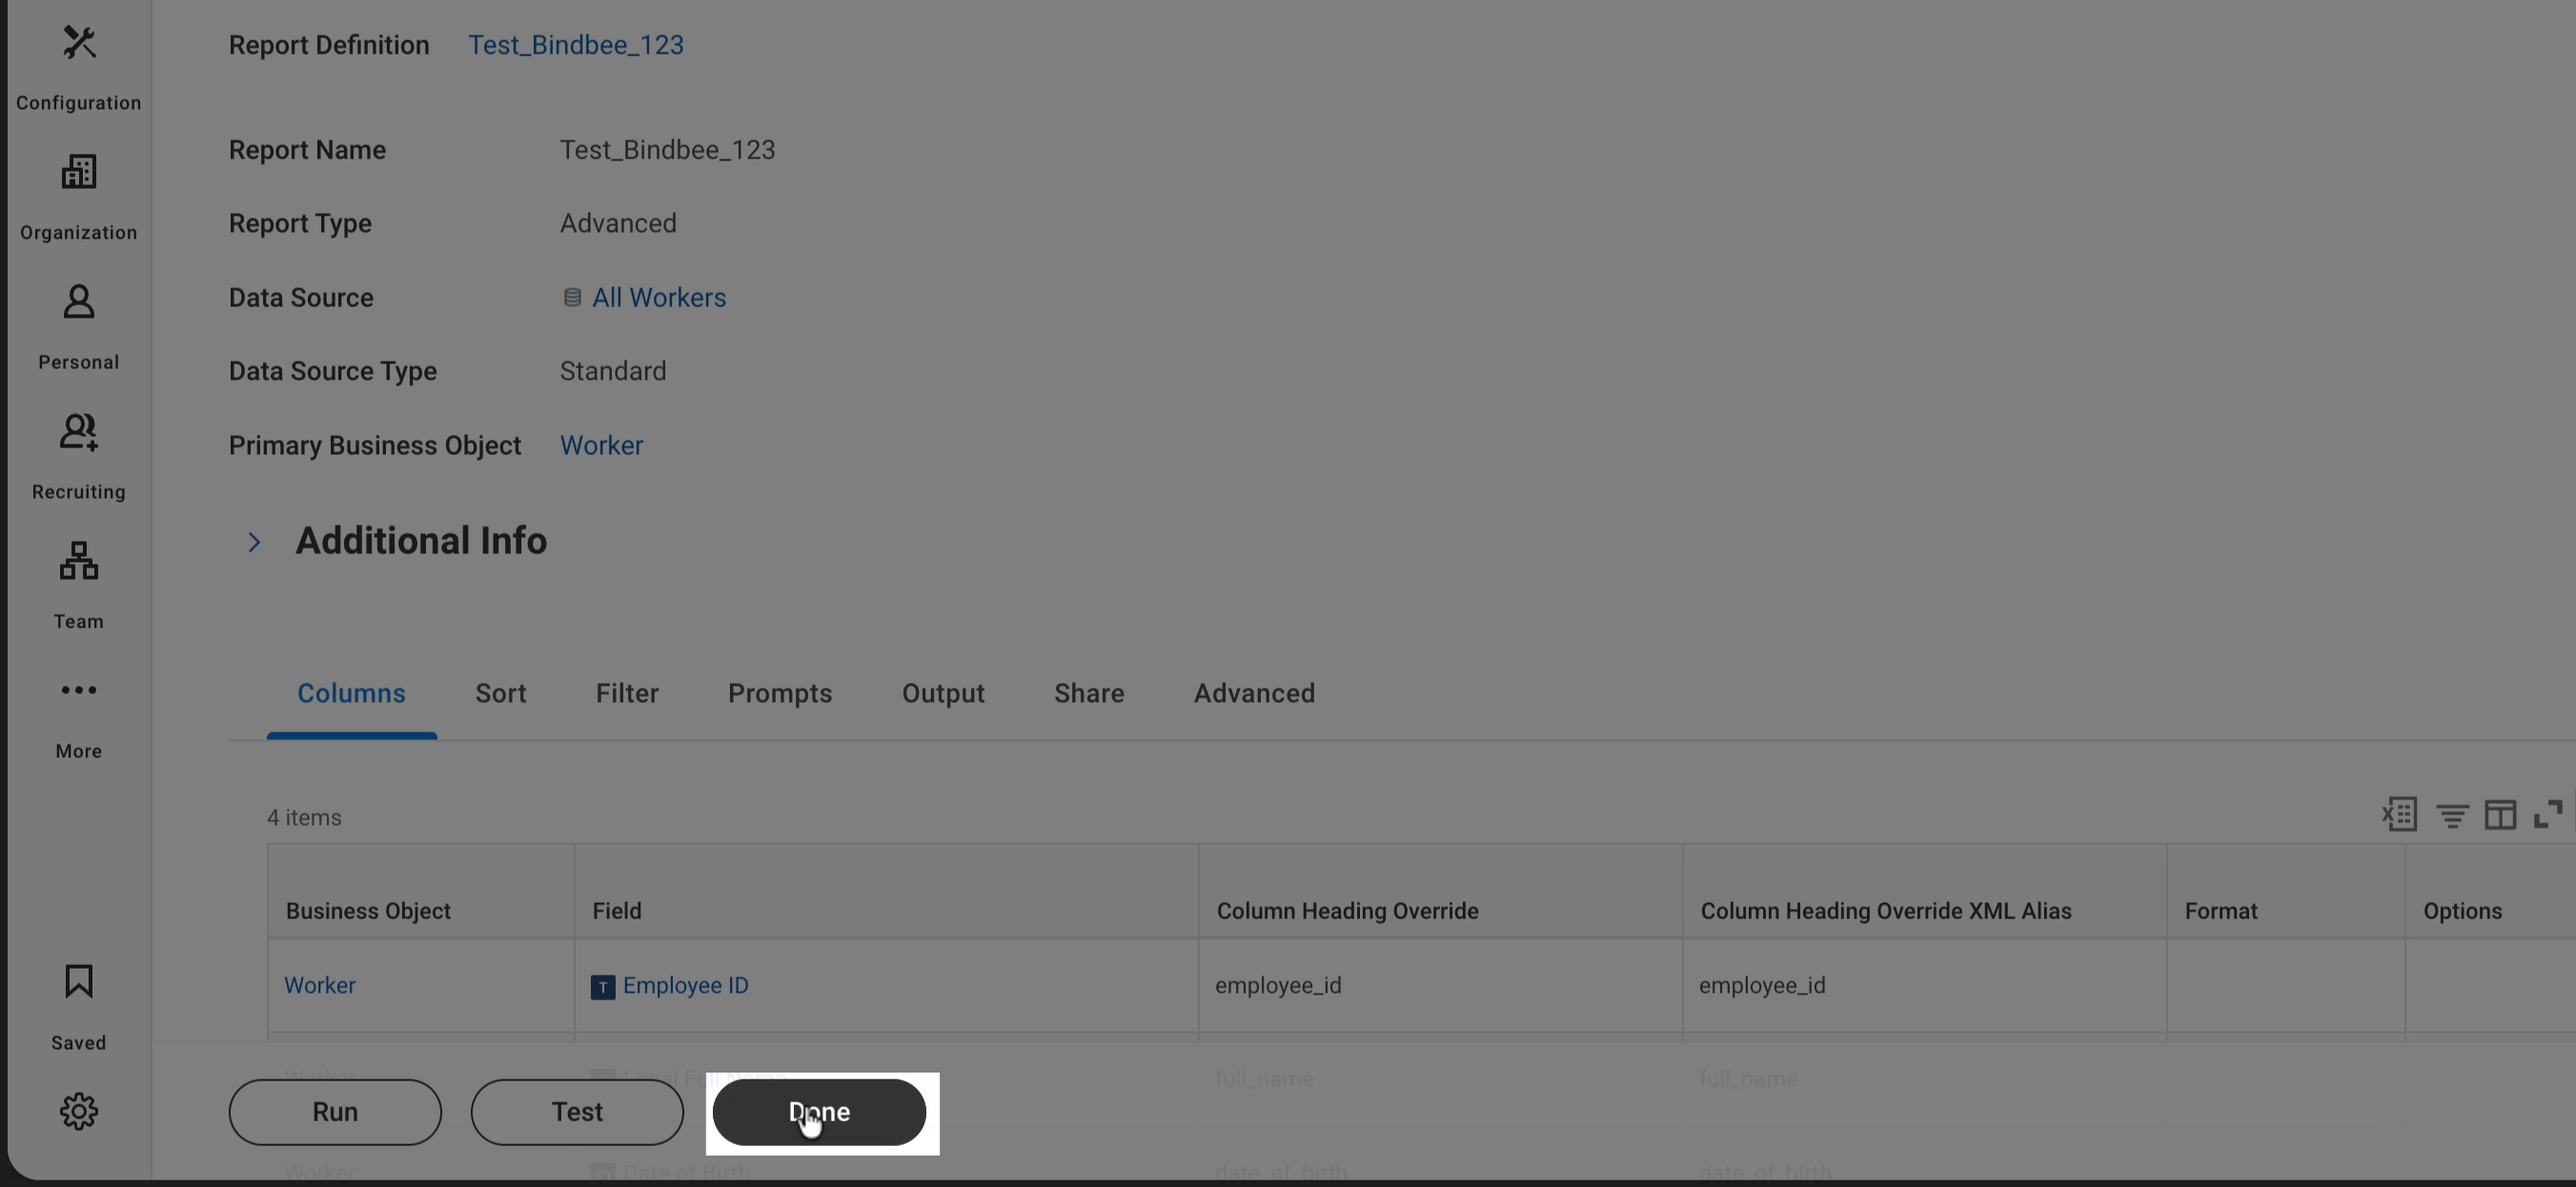
Click OK, then Done.
If you still need to create an Integration System User, see 4.1 Create a Workday Integration System User above.
The user must also have access to the Workday domains required by the data included in the report. See 4.5 Grant Permissions to the Security Group above for the relevant permissions.
5.3 Get the Workday RaaS Report URL
Once the custom report has been created and enabled as a web service, retrieve its RaaS URL.
Open the Custom Report
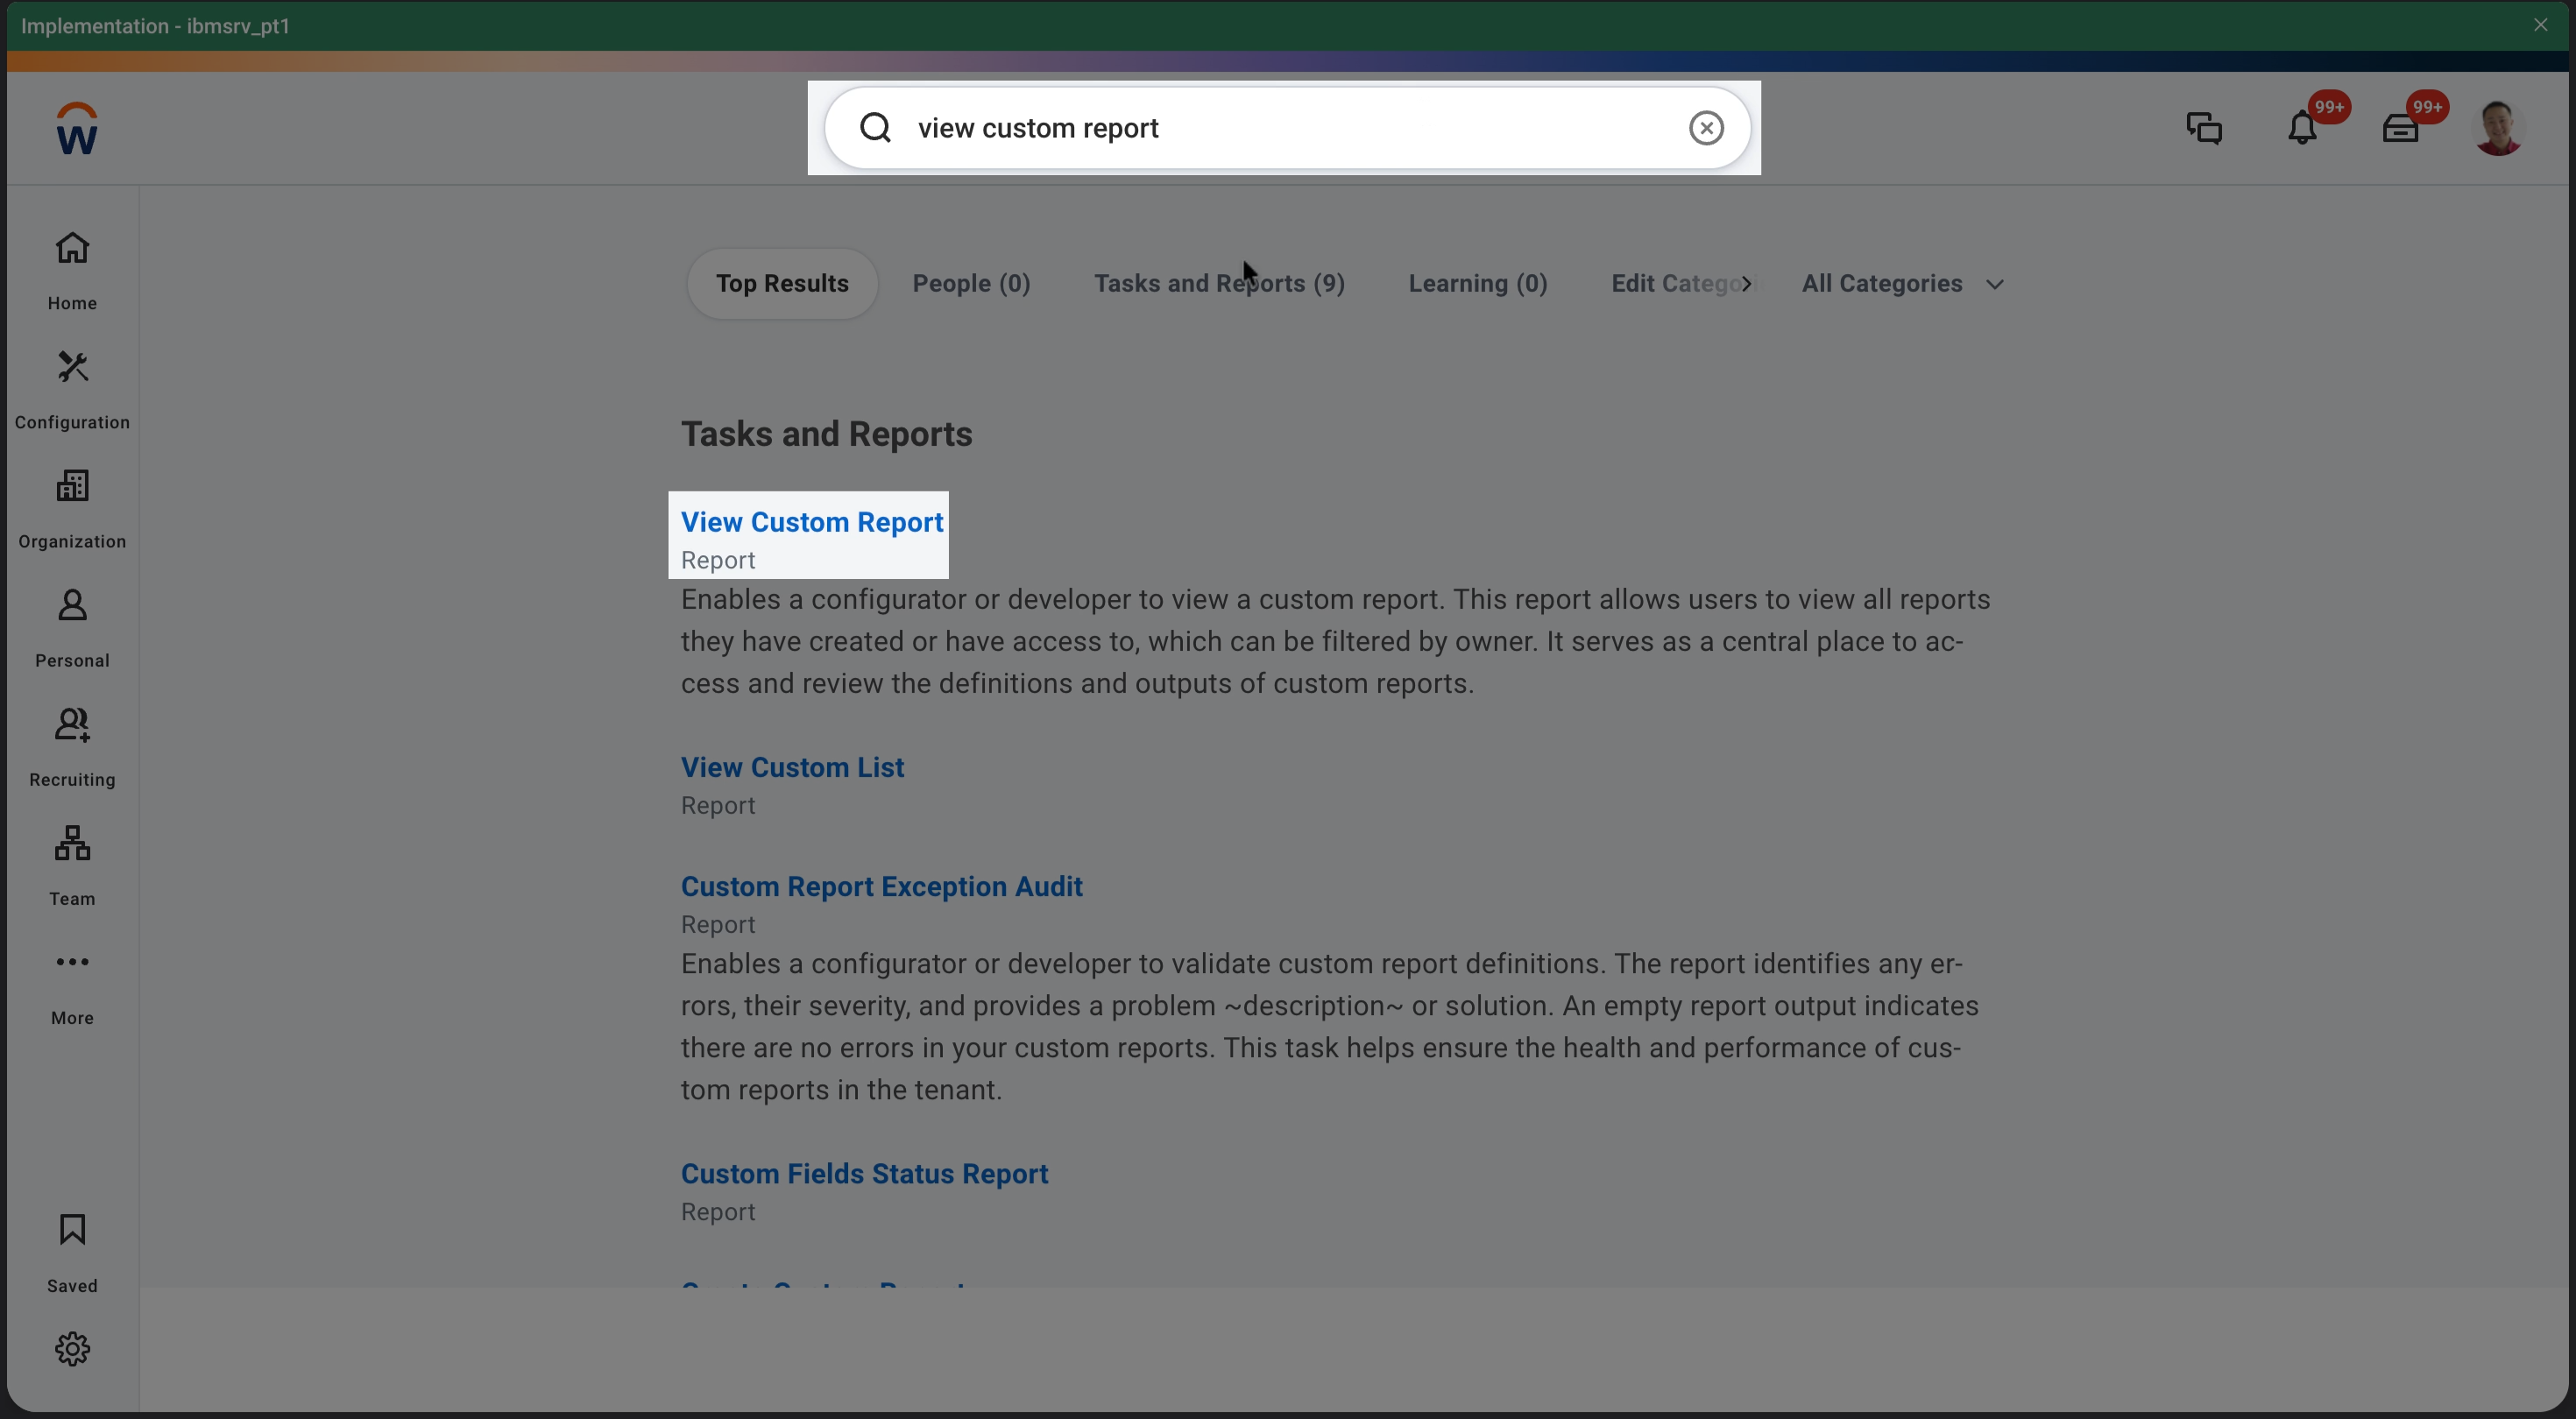
Search for and open View Custom Report.
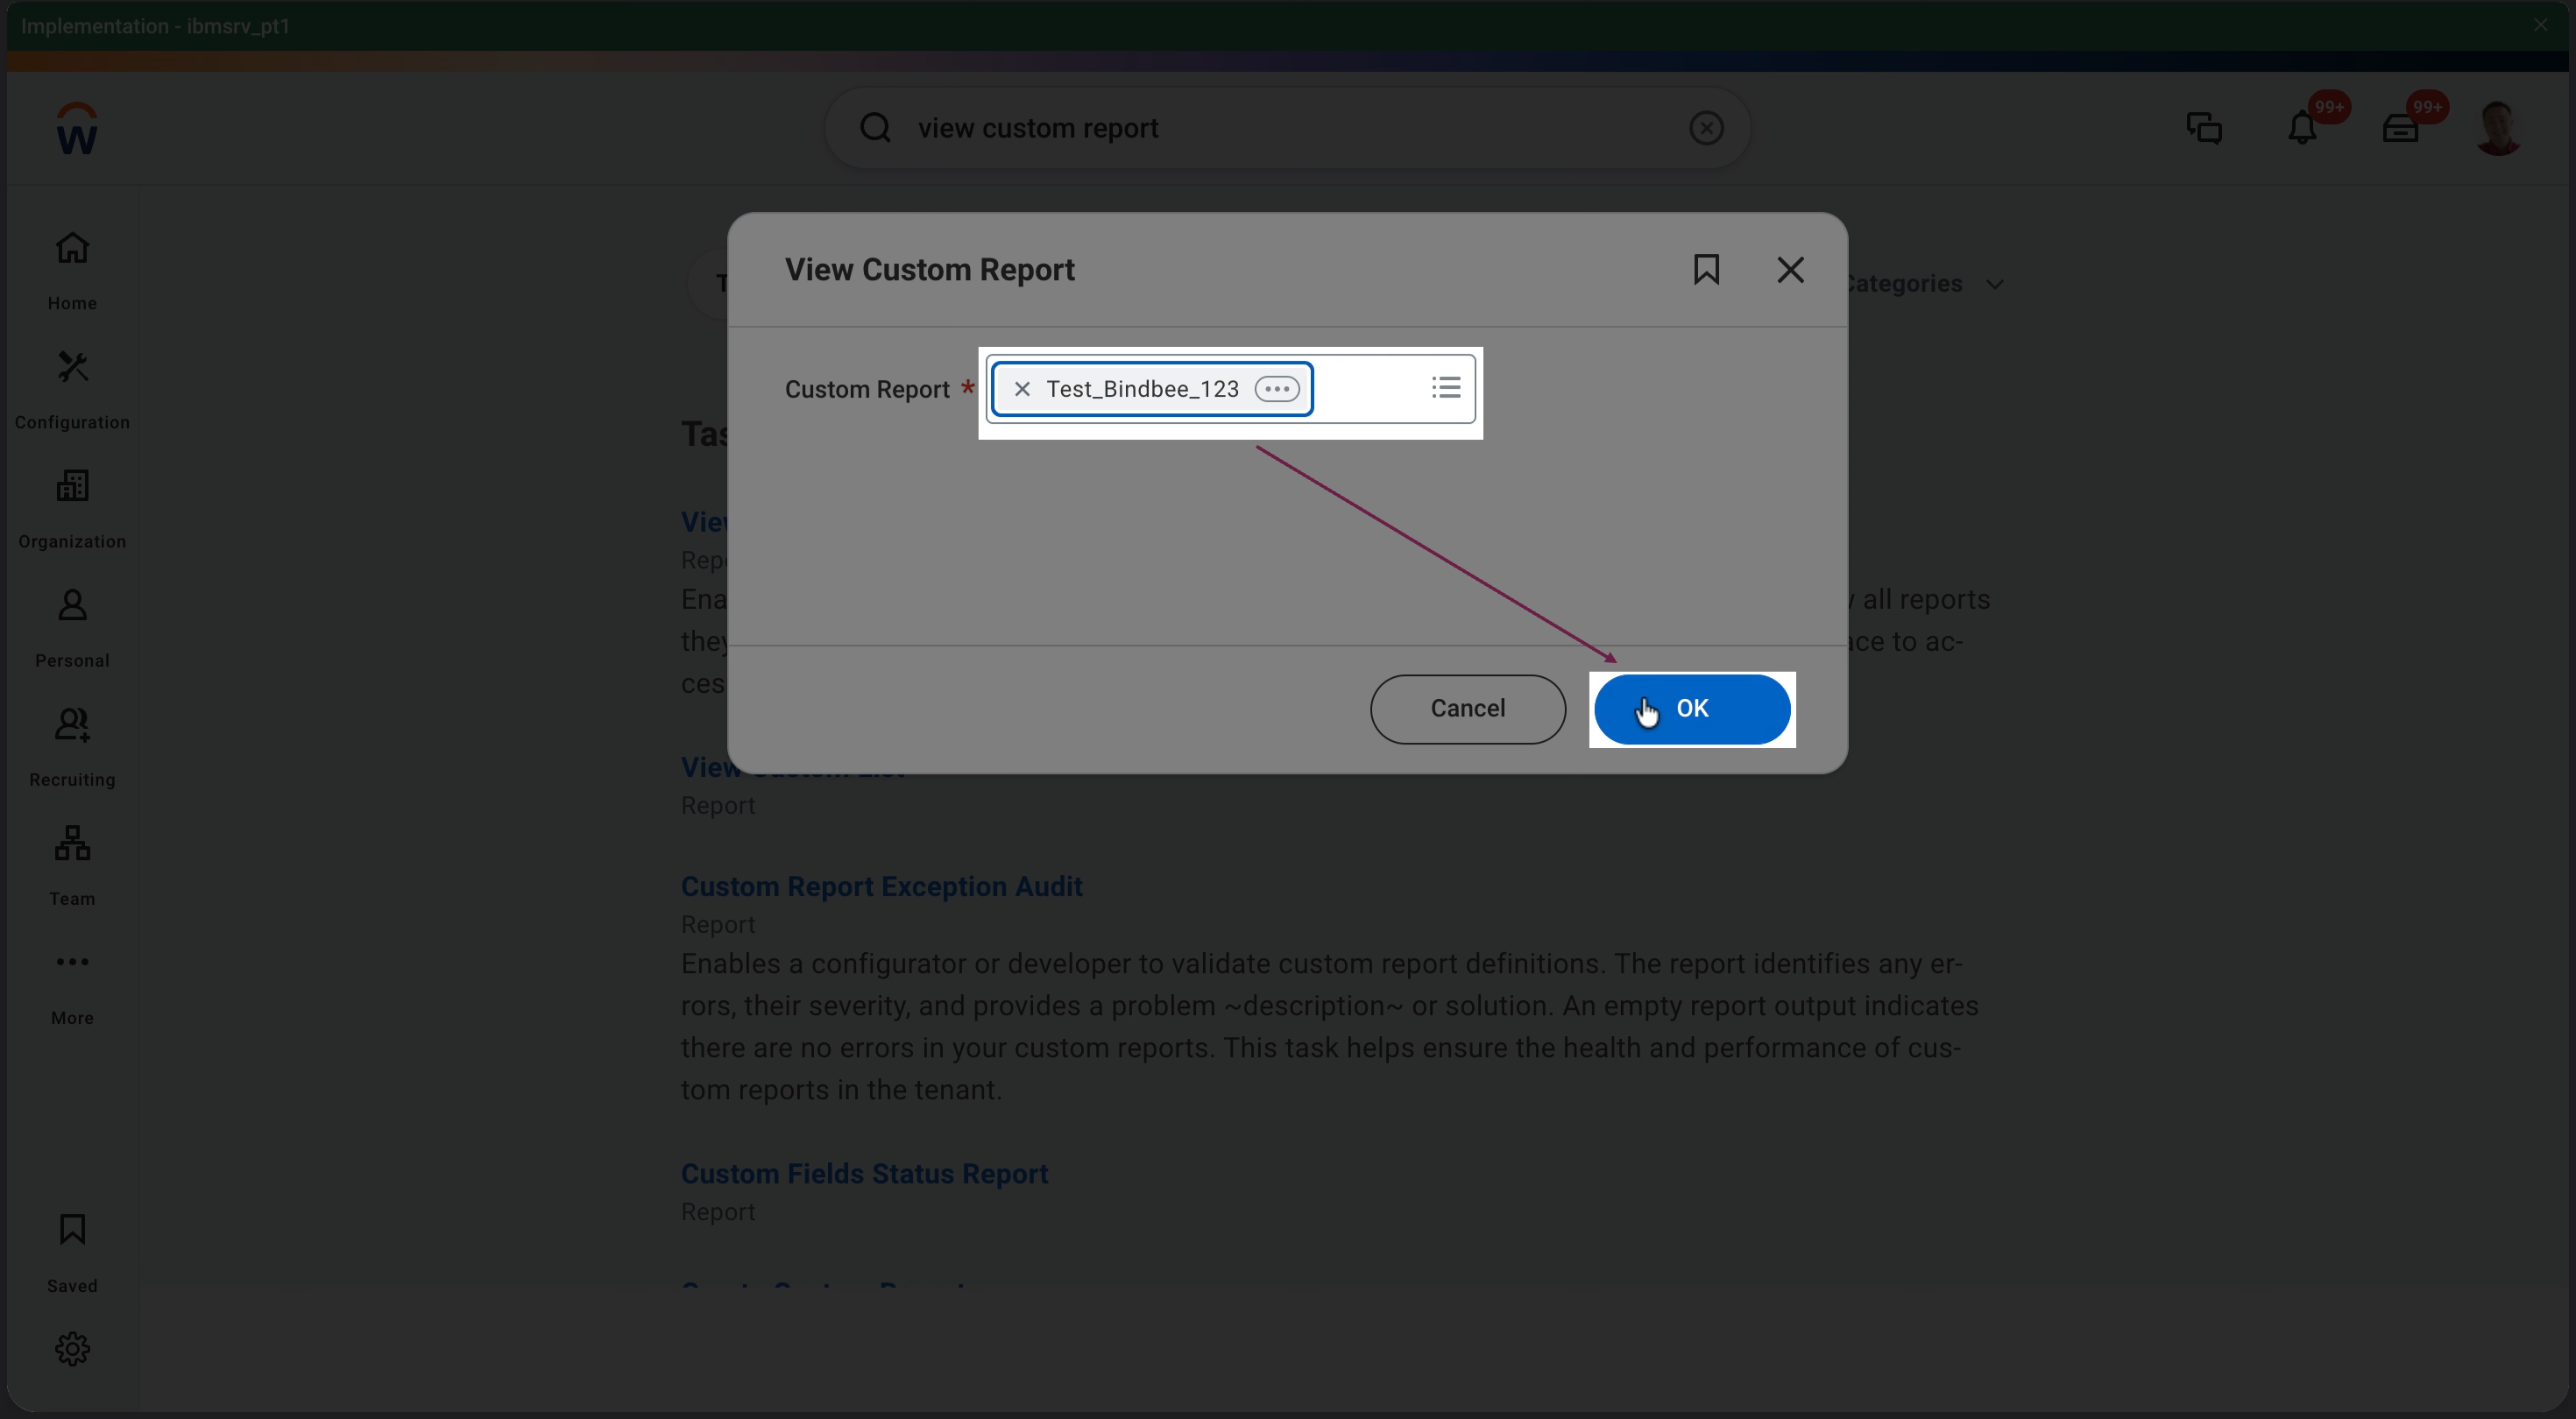
Select Your Report
Enter the name of the custom report and click OK.
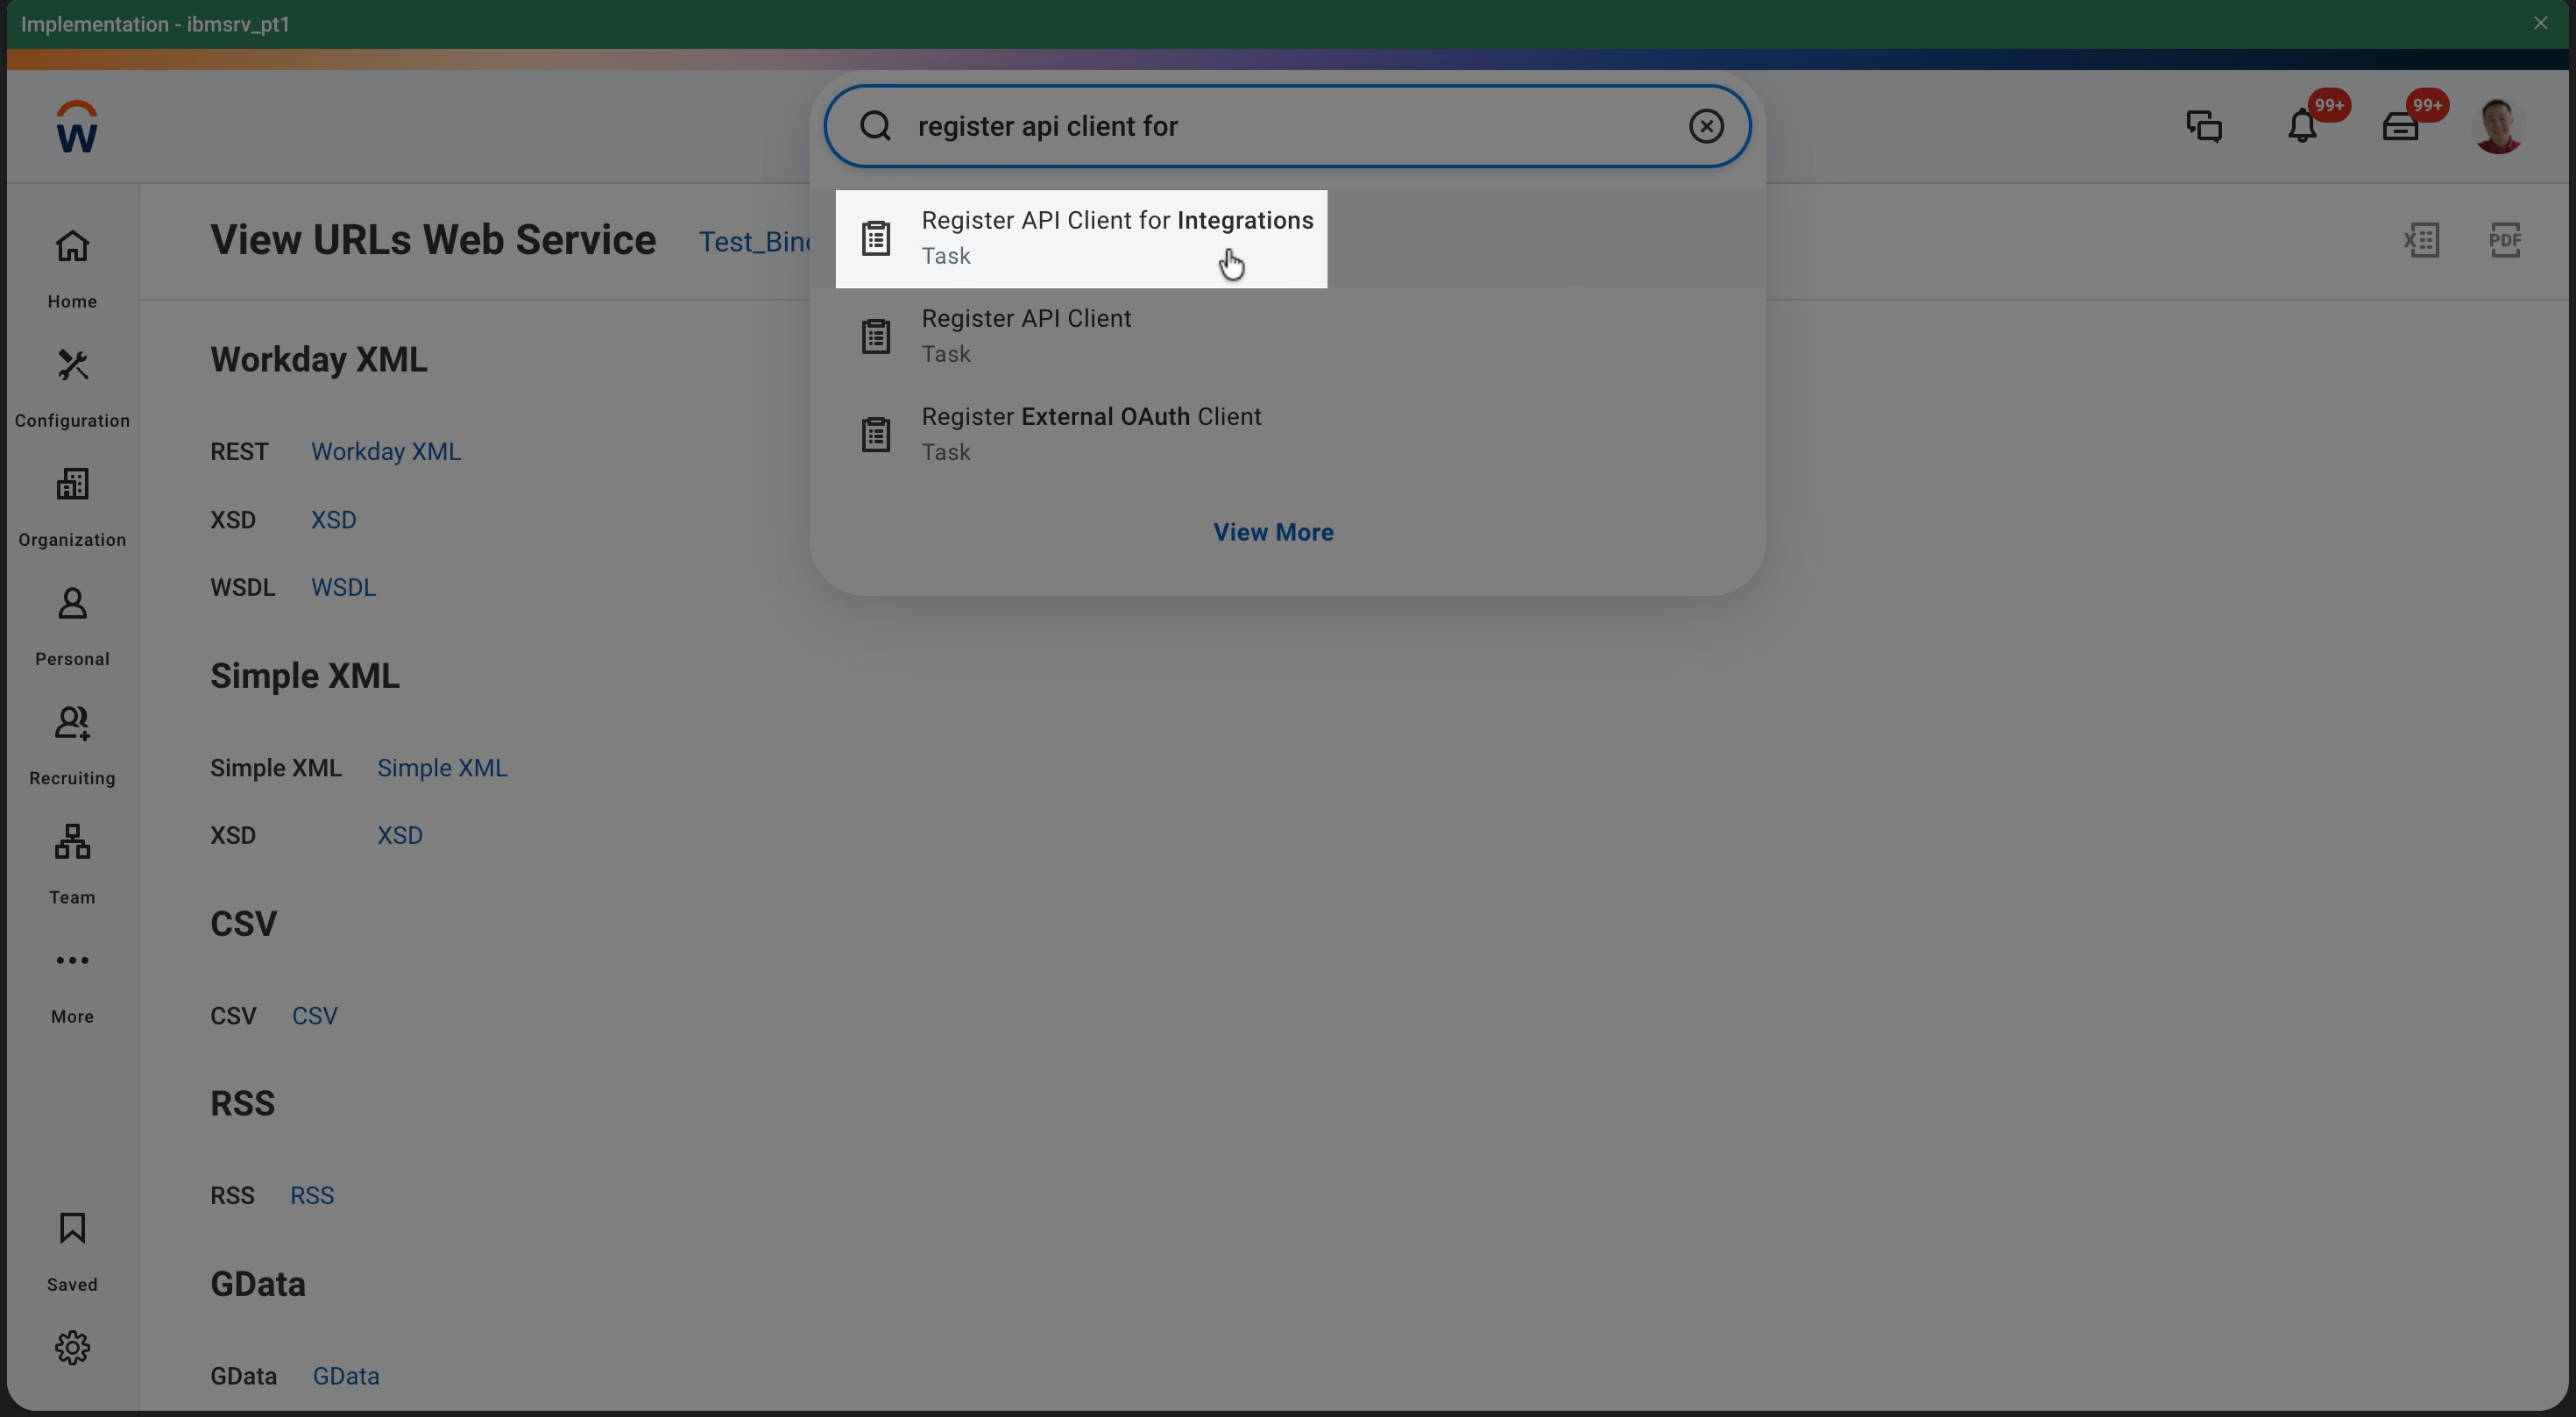
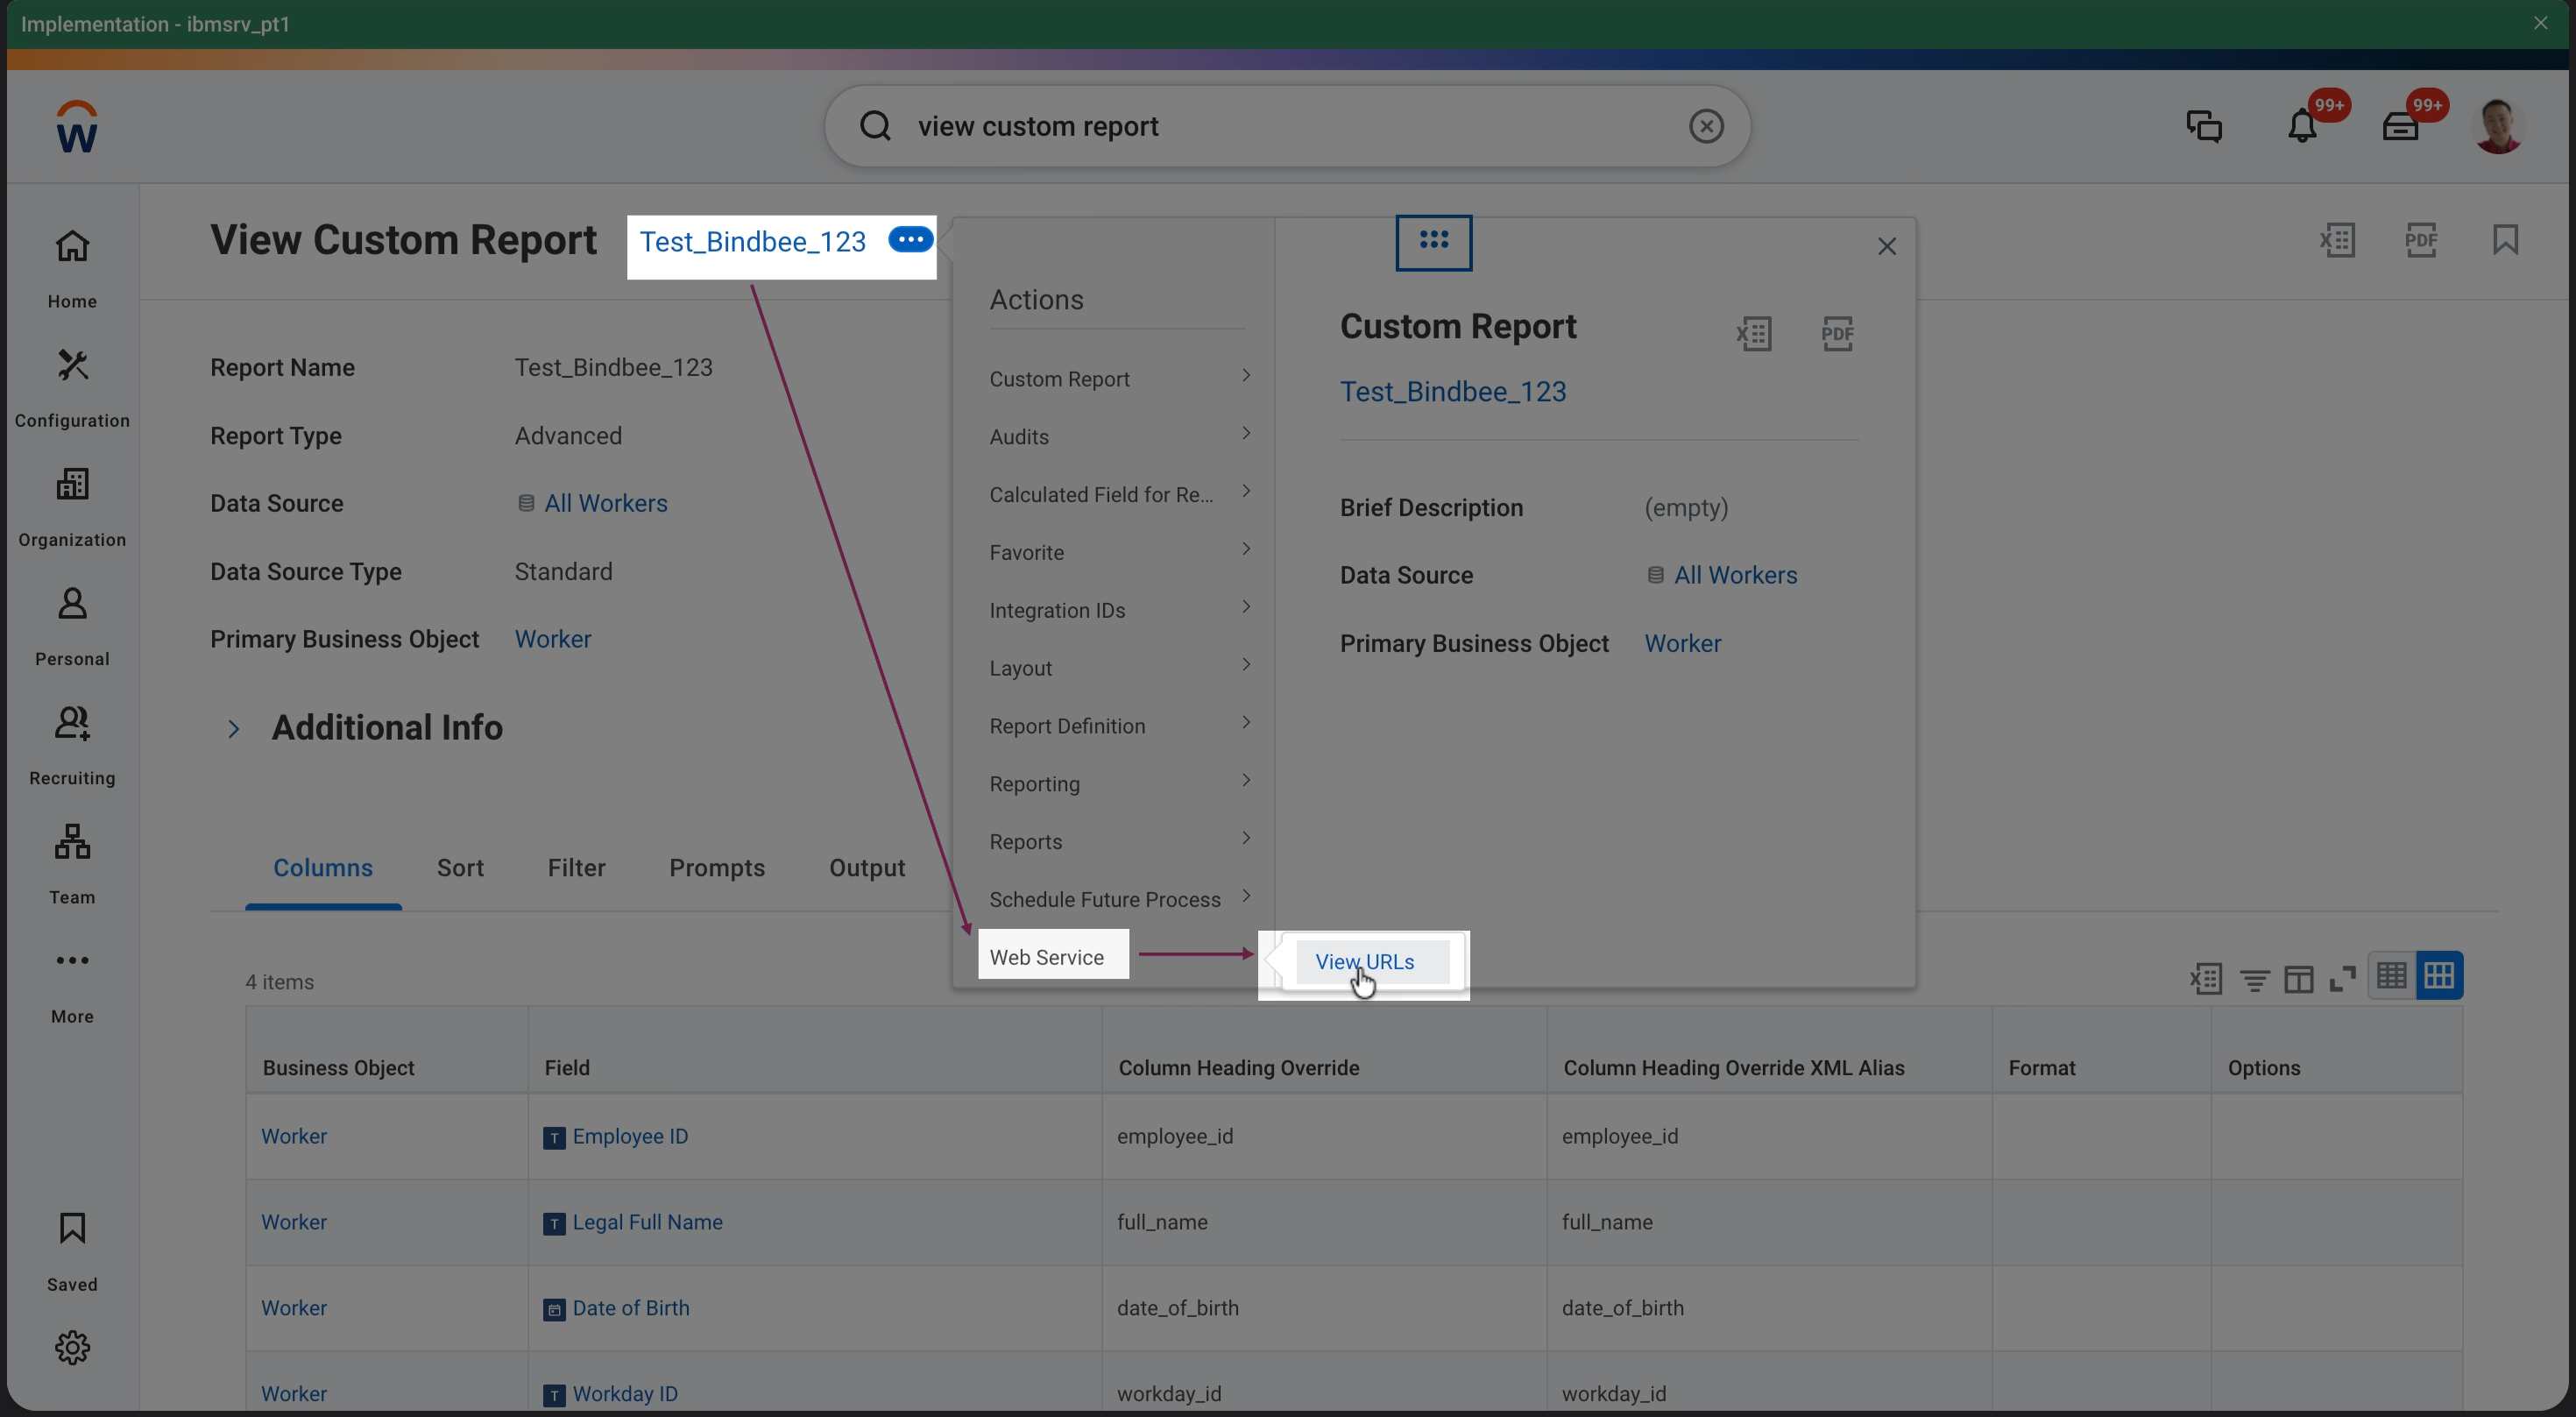
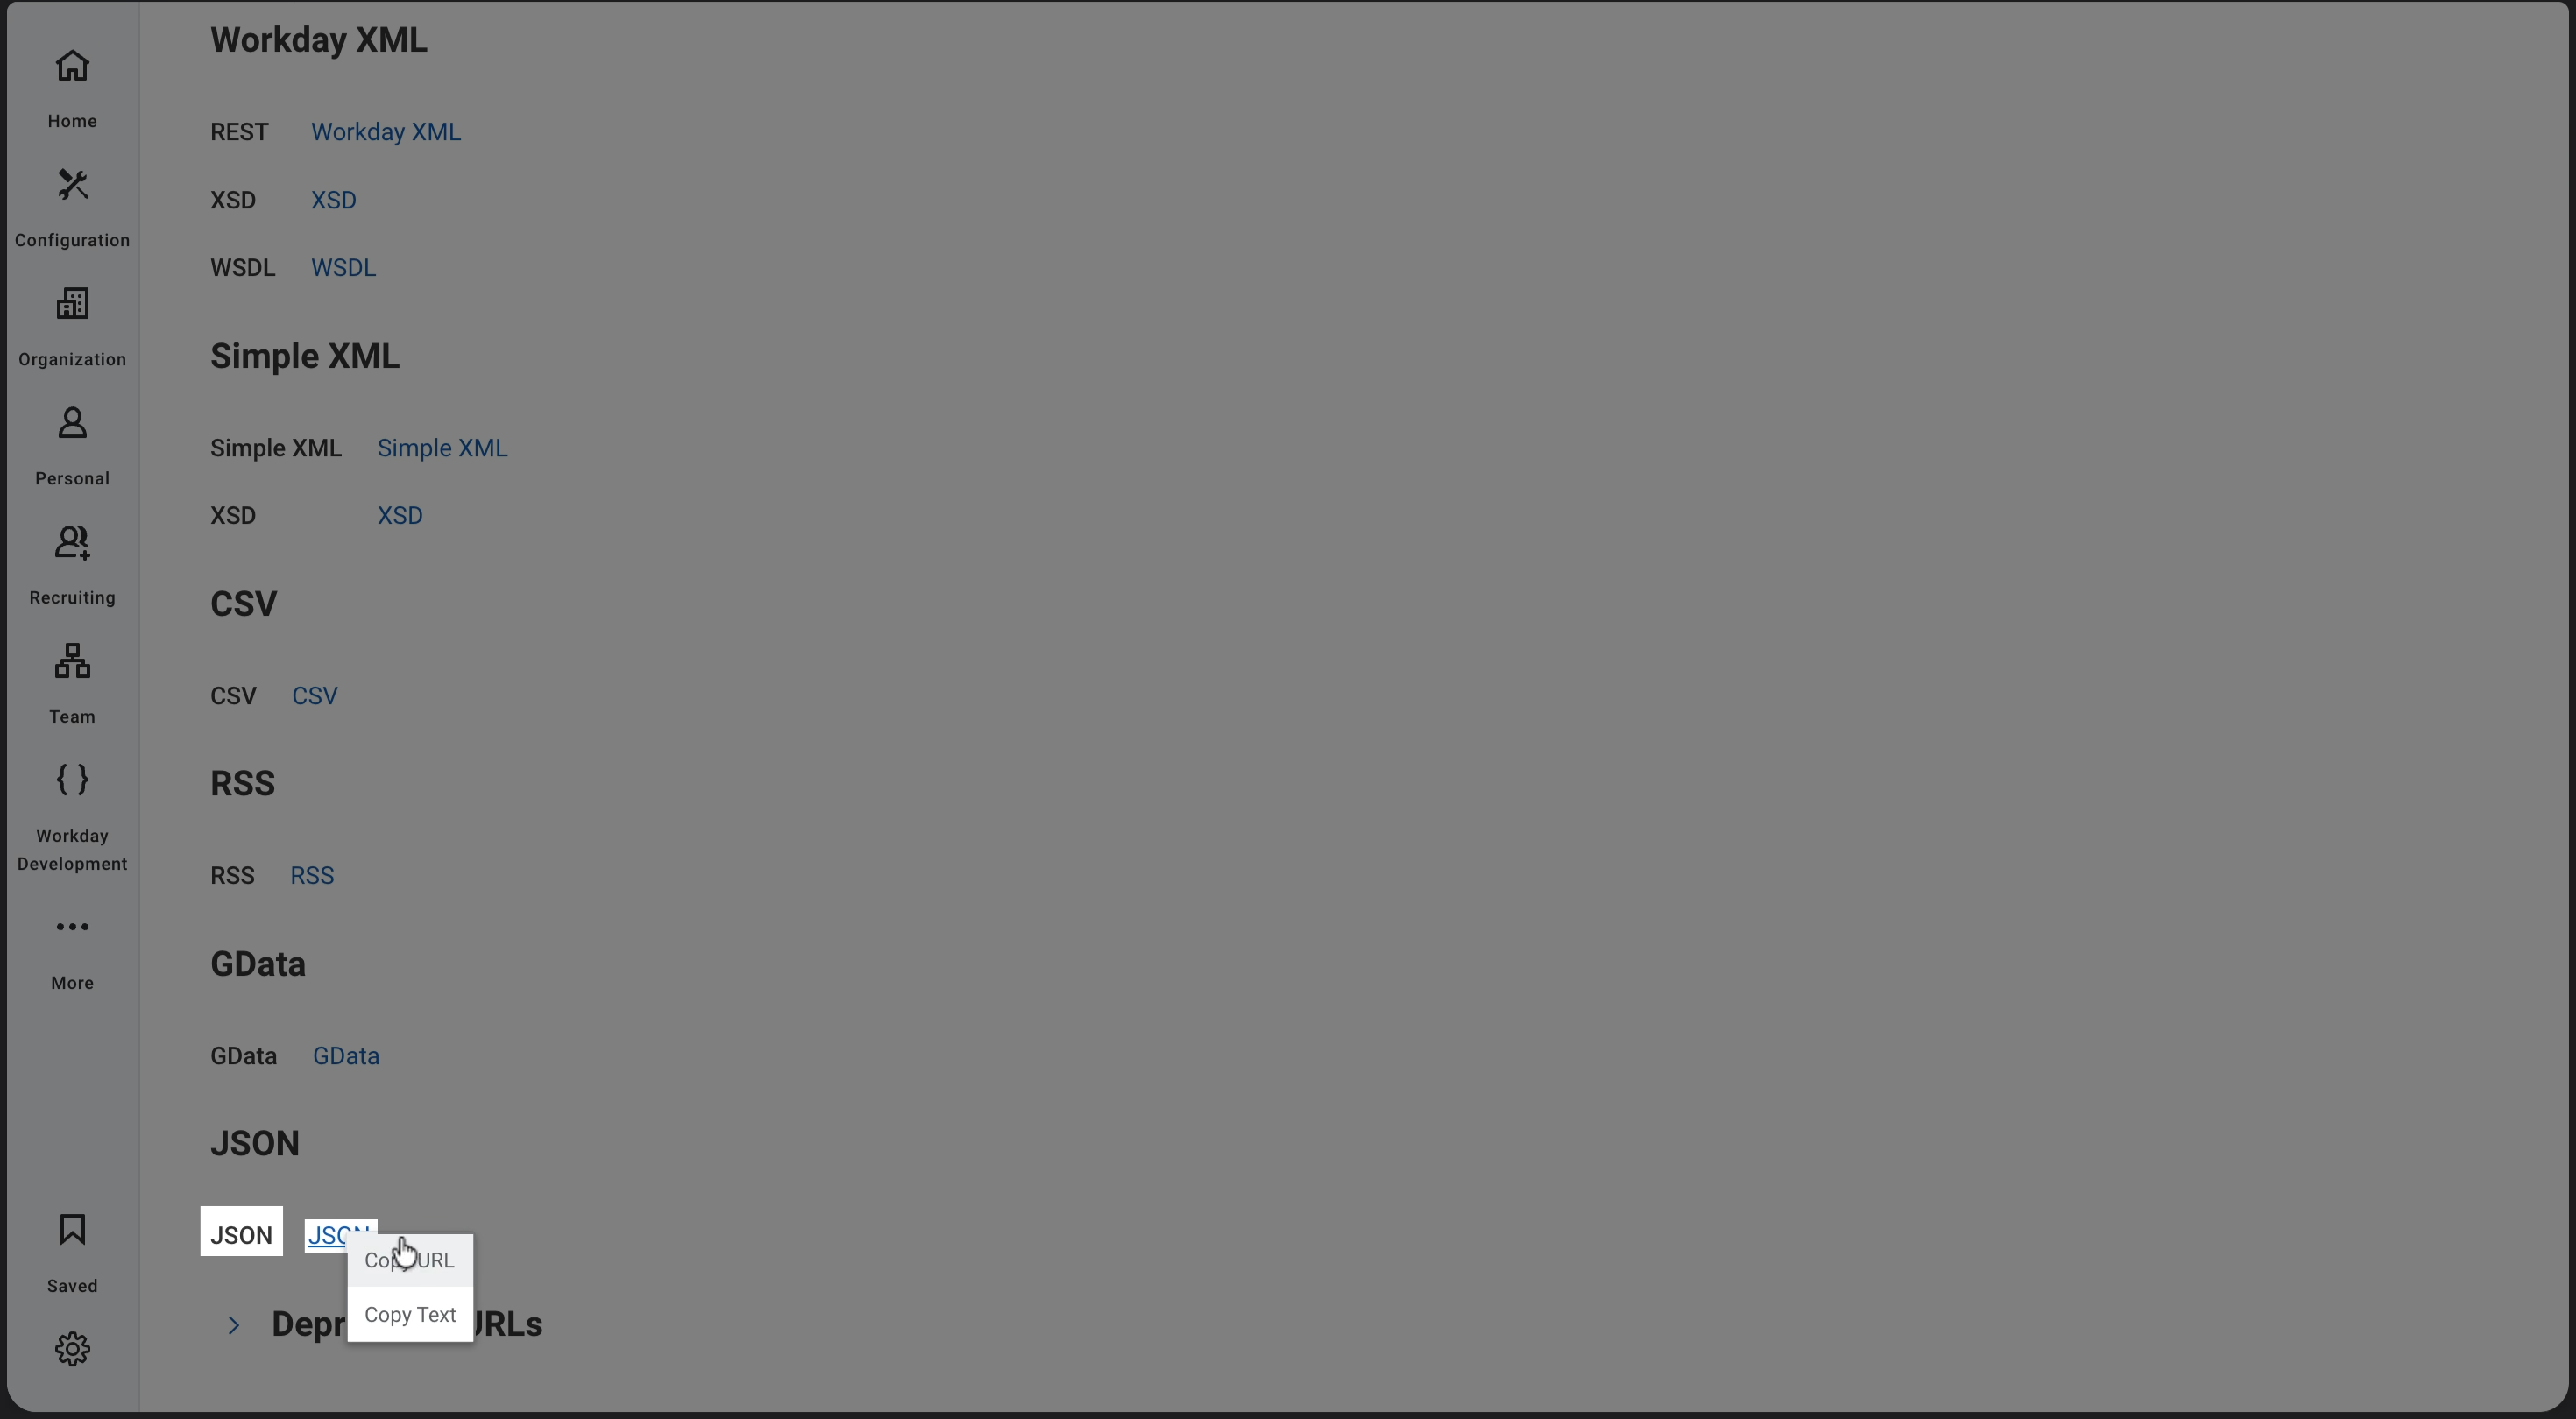
Open the Web Service URLs
Click the ellipsis (...) next to the report, then select Web Service → View URLs.
Copy the JSON Report URL
Scroll to the JSON option.
Right-click the JSON link and select Copy URL.
Save this URL. You will enter it in the Workday Report URL field in the next step.
5.4 Enter the Report URL in Bindbee
Back in the magic link, paste the JSON RaaS URL you copied in 5.3 into the Workday Report URL field and click Connect.
Once the credentials and report configuration are verified, Bindbee can begin retrieving data from the Workday RaaS report.
Troubleshooting
Why can't Bindbee access my Workday RaaS report?
Verify that the custom report has Enable as Web Service selected.
Without this setting, Workday will not expose the report through a RaaS web service URL.
Why does the report work in Workday but not through the integration?
Confirm that the report is shared with the Workday account associated with the integration.
Open the custom report's Share settings and verify that the correct user appears under Authorized Users.
Why does my OAuth connection work but the RaaS report returns no data?
Verify that the Workday account associated with the Refresh Token is the same account authorized to access the custom report. The account must also have access to the underlying Workday domains used by the report.
Why am I getting a permission error when accessing the report?
The Workday account may not have access to one or more domains used by the report.
Review 4.5 Grant Permissions to the Security Group and verify that the required Domain Security Policies have been granted.
After changing Workday security permissions, make sure you run Activate Pending Security Policy Changes before testing again.
Why does the API Client authenticate successfully but fail to run the report?
Verify that the API Client includes the functional area associated with the Report Execution domain.
Search for View Domain, look up Report Execution, and compare its Functional Area with the functional areas configured on your API Client.
If the functional area is missing, add it using Edit API Client for Integrations.
Why are some fields missing from my Workday RaaS report?
First, verify that the fields are included as columns in the custom report.
If the columns are present but their values are unavailable, verify that the authorized Workday account has access to the underlying Workday domains for those fields.
See 4.5 Grant Permissions to the Security Group for the relevant domain permissions.