
Workday – How do I connect with a RaaS report?
Updated 2 weeks ago
This guide walks you through the process of setting up a Workday RaaS connection.
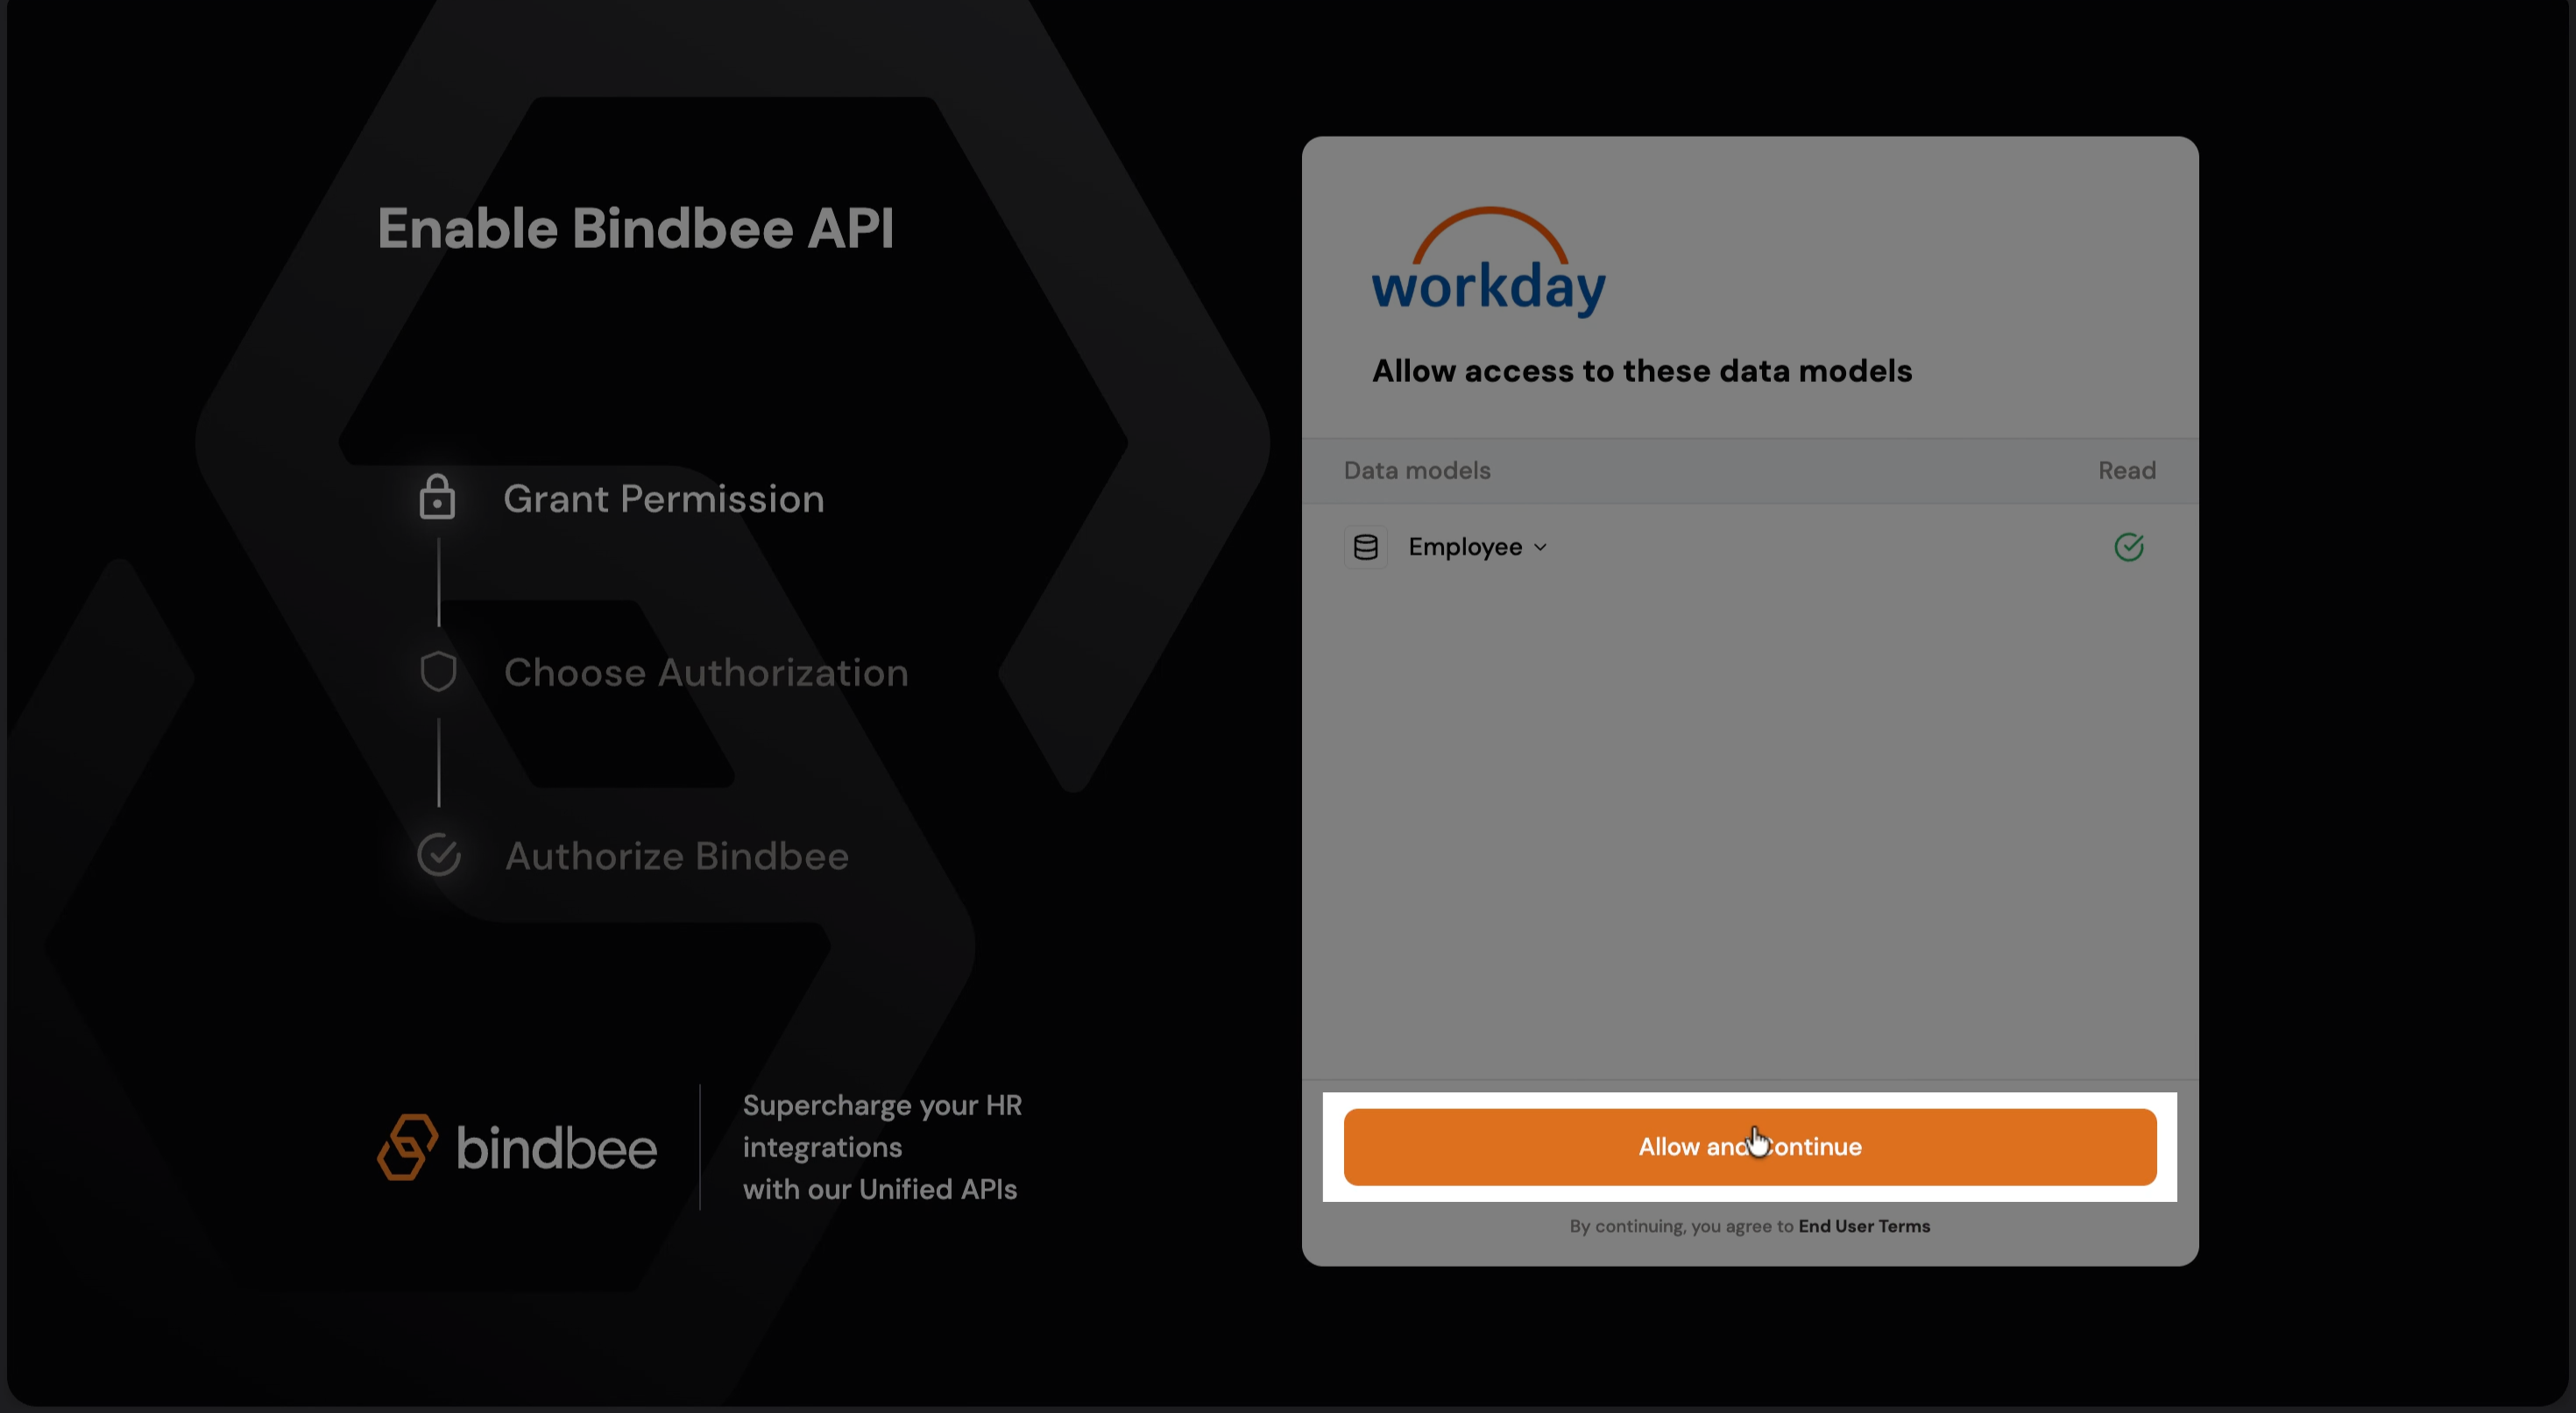
Step 1: Go to your magic link to start the setup process, and click "Allow and Continue".
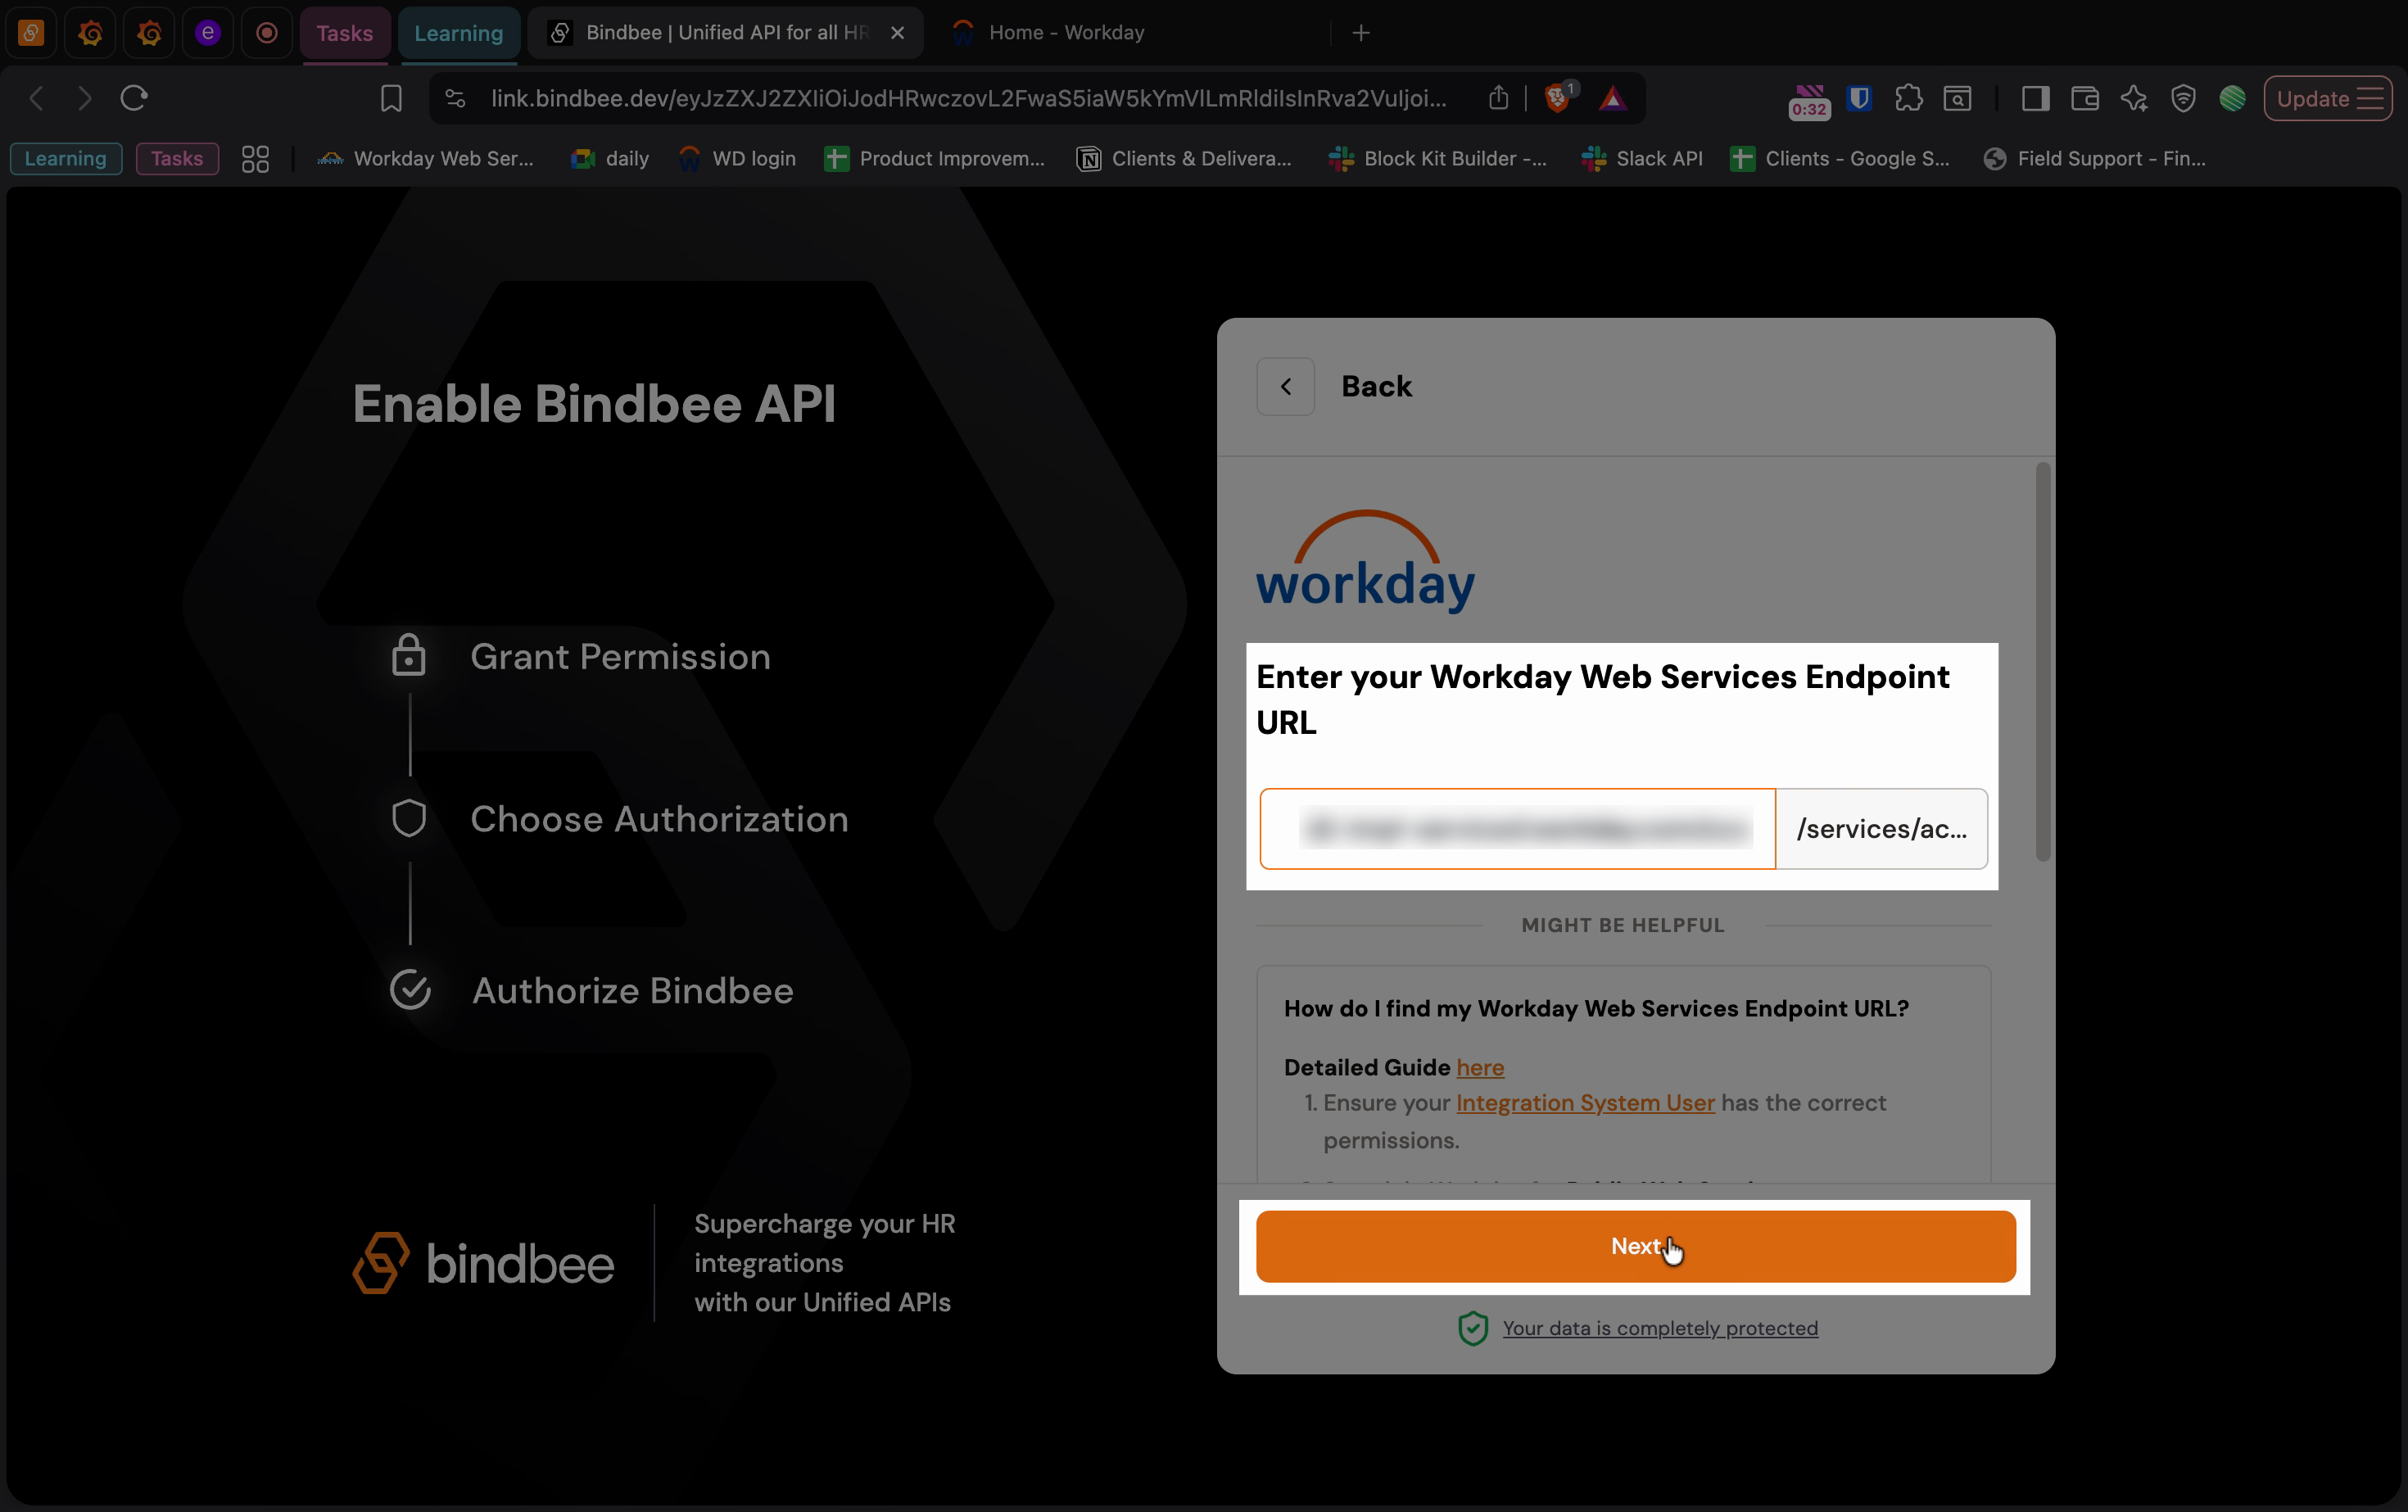
Step 2: Enter your Workday Web Services Endpoint URL. Click Next to proceed.
Step 3: Type your Workday Tenant Name. Click Next.
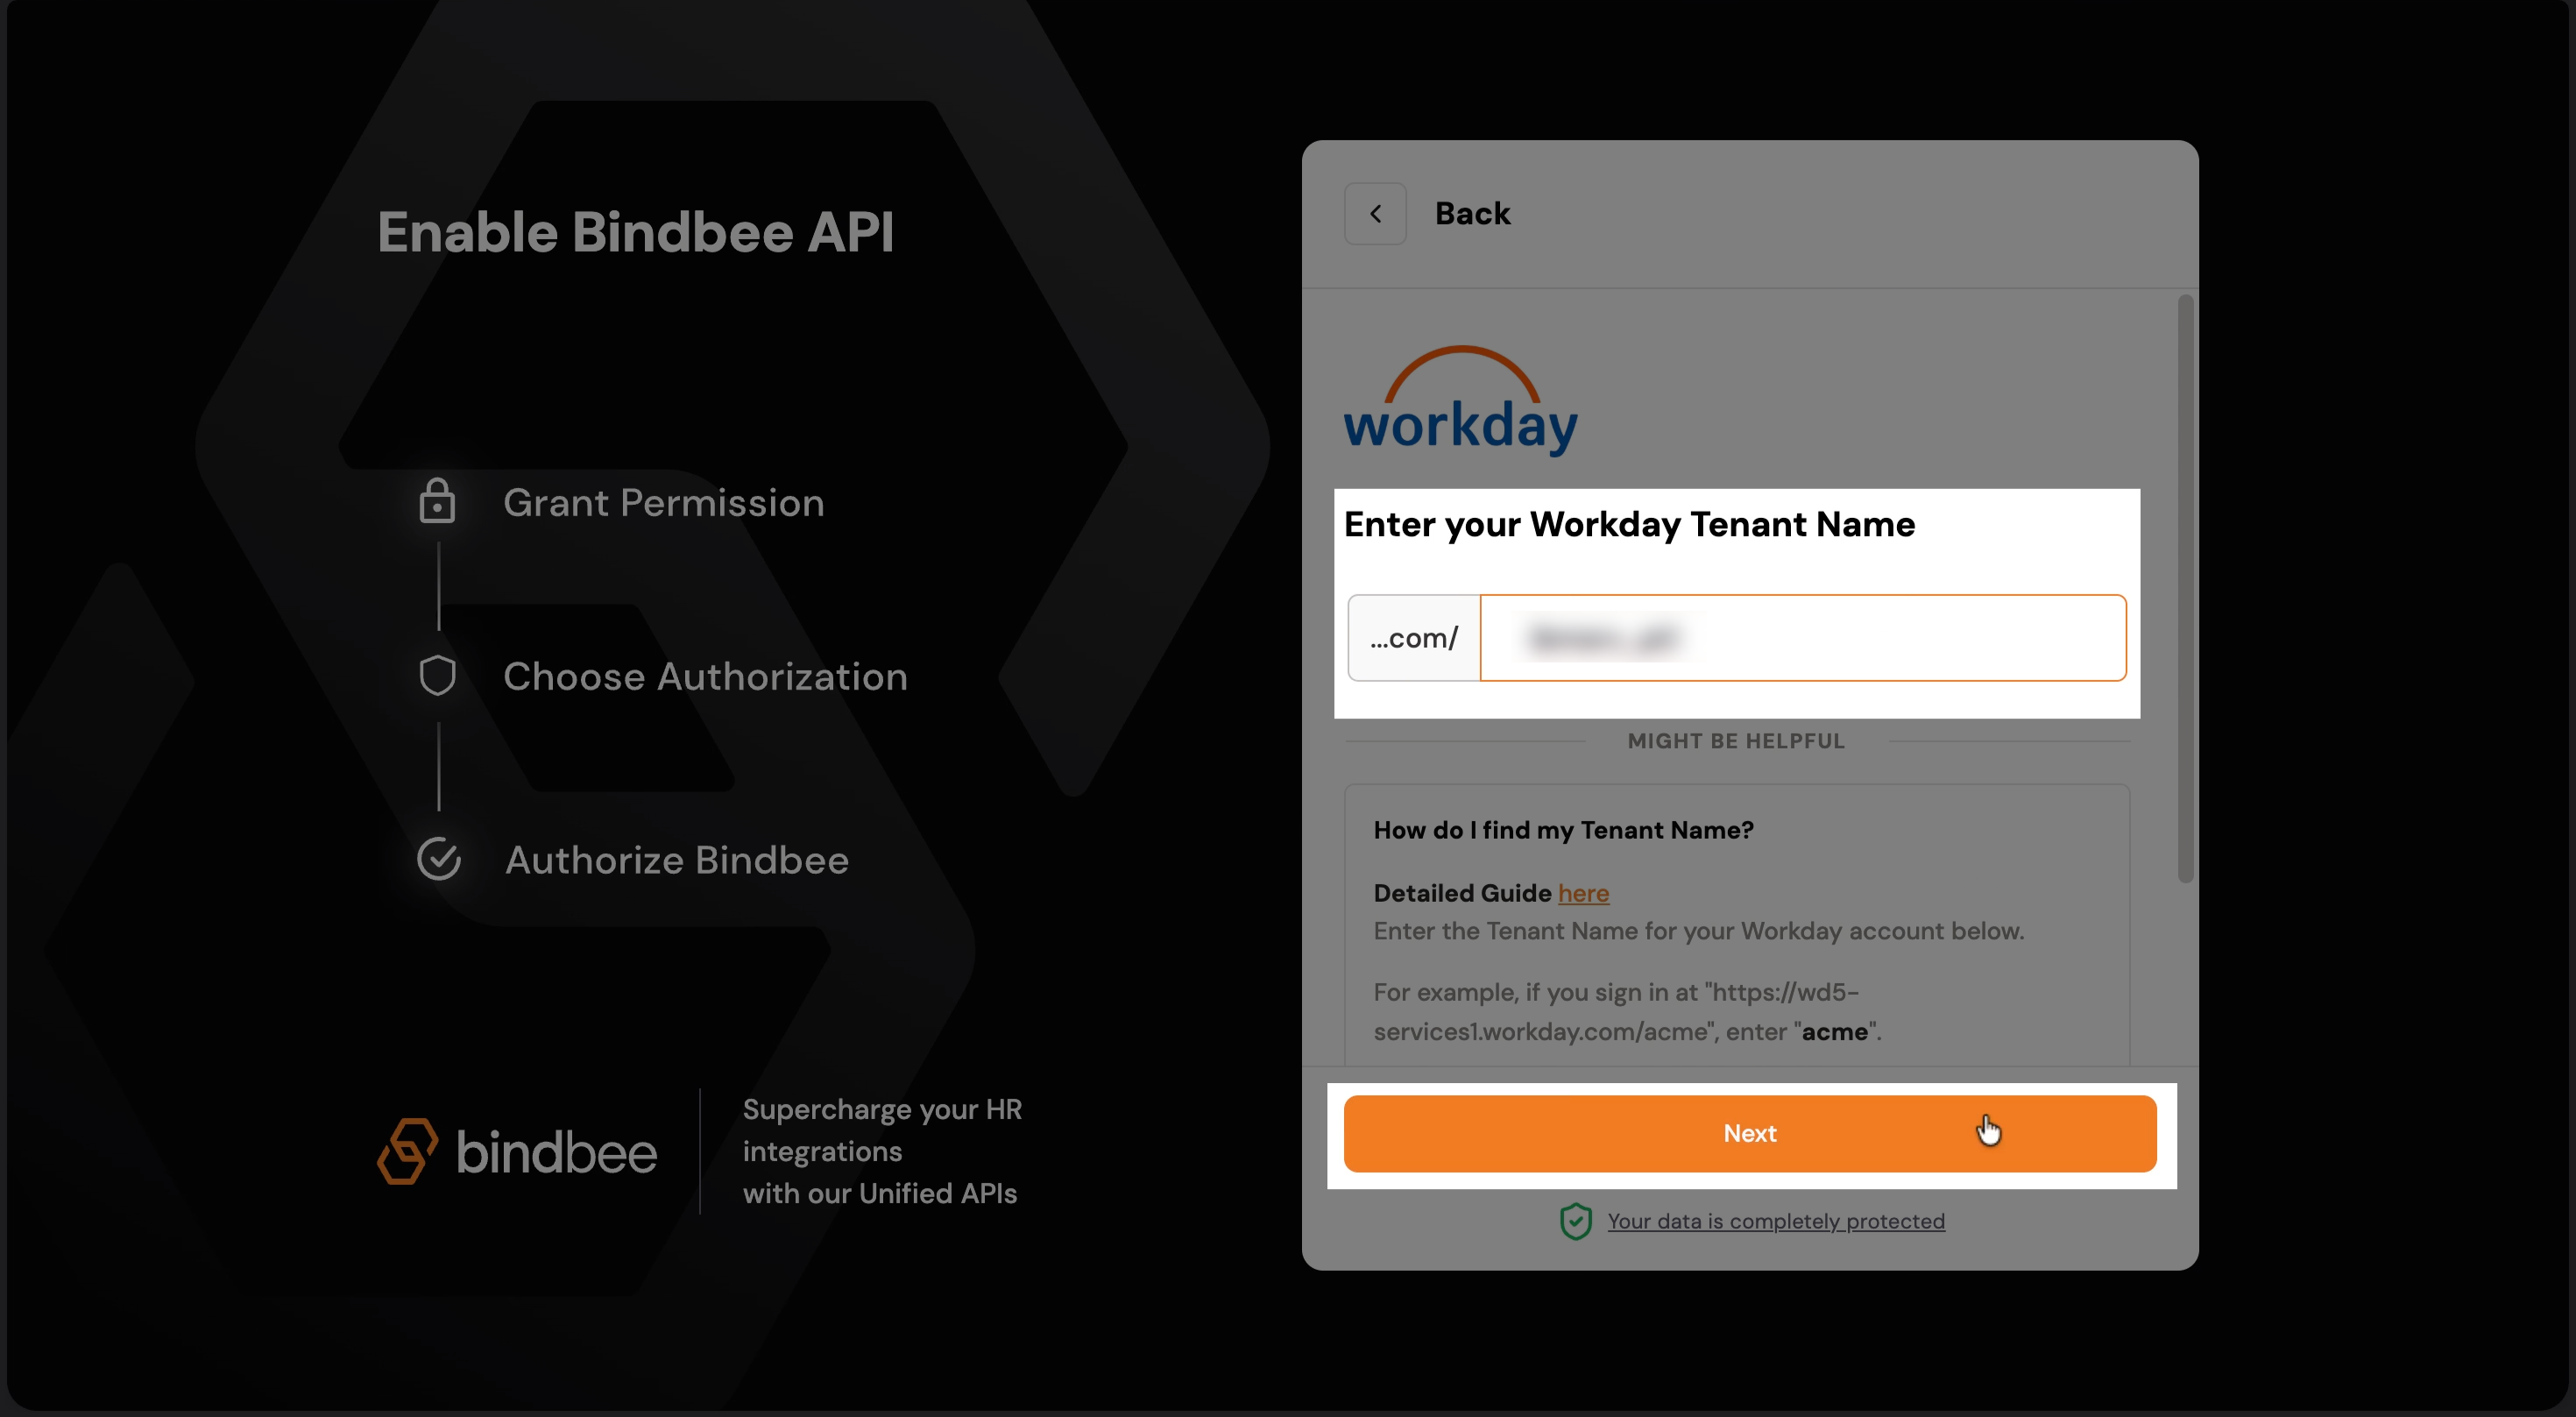
Note: For instructions on how to obtain these credentials from your Workday dashboard, refer to the Workday: How To Authenticate documentation.
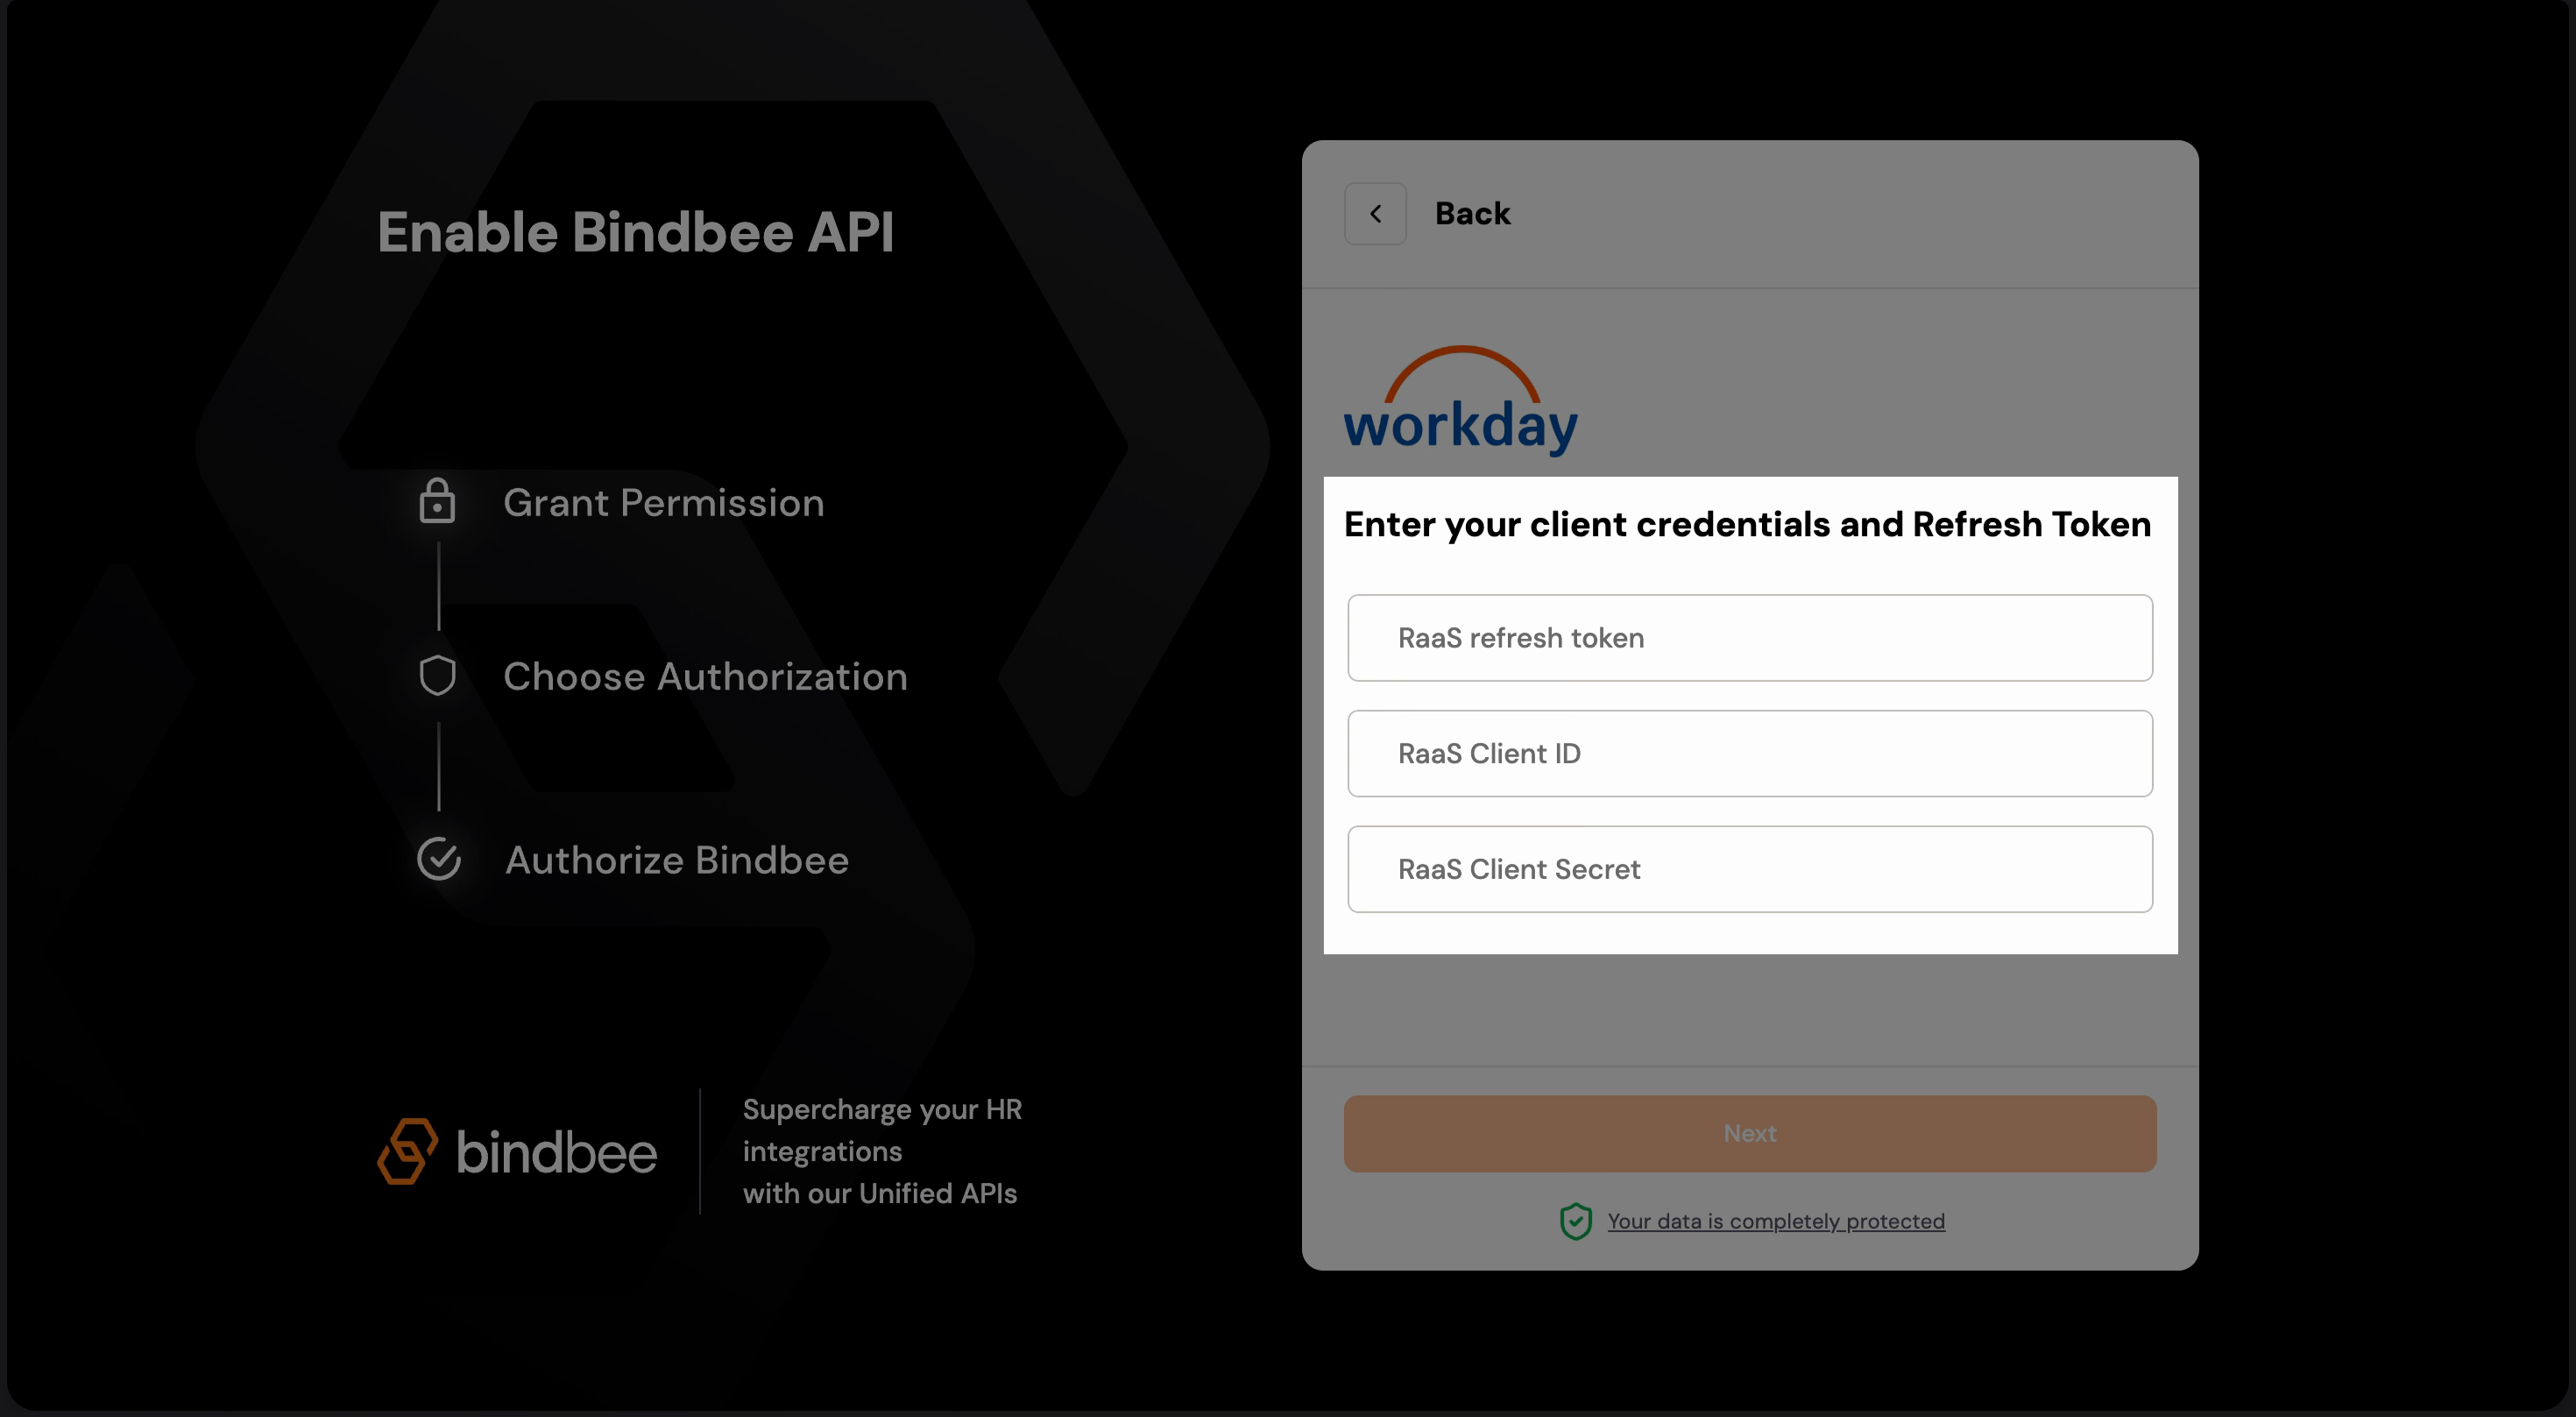
Step 4: Now you need to enter your Refresh Token and API Client Credentials. For this, head over to your Workday dashboard.
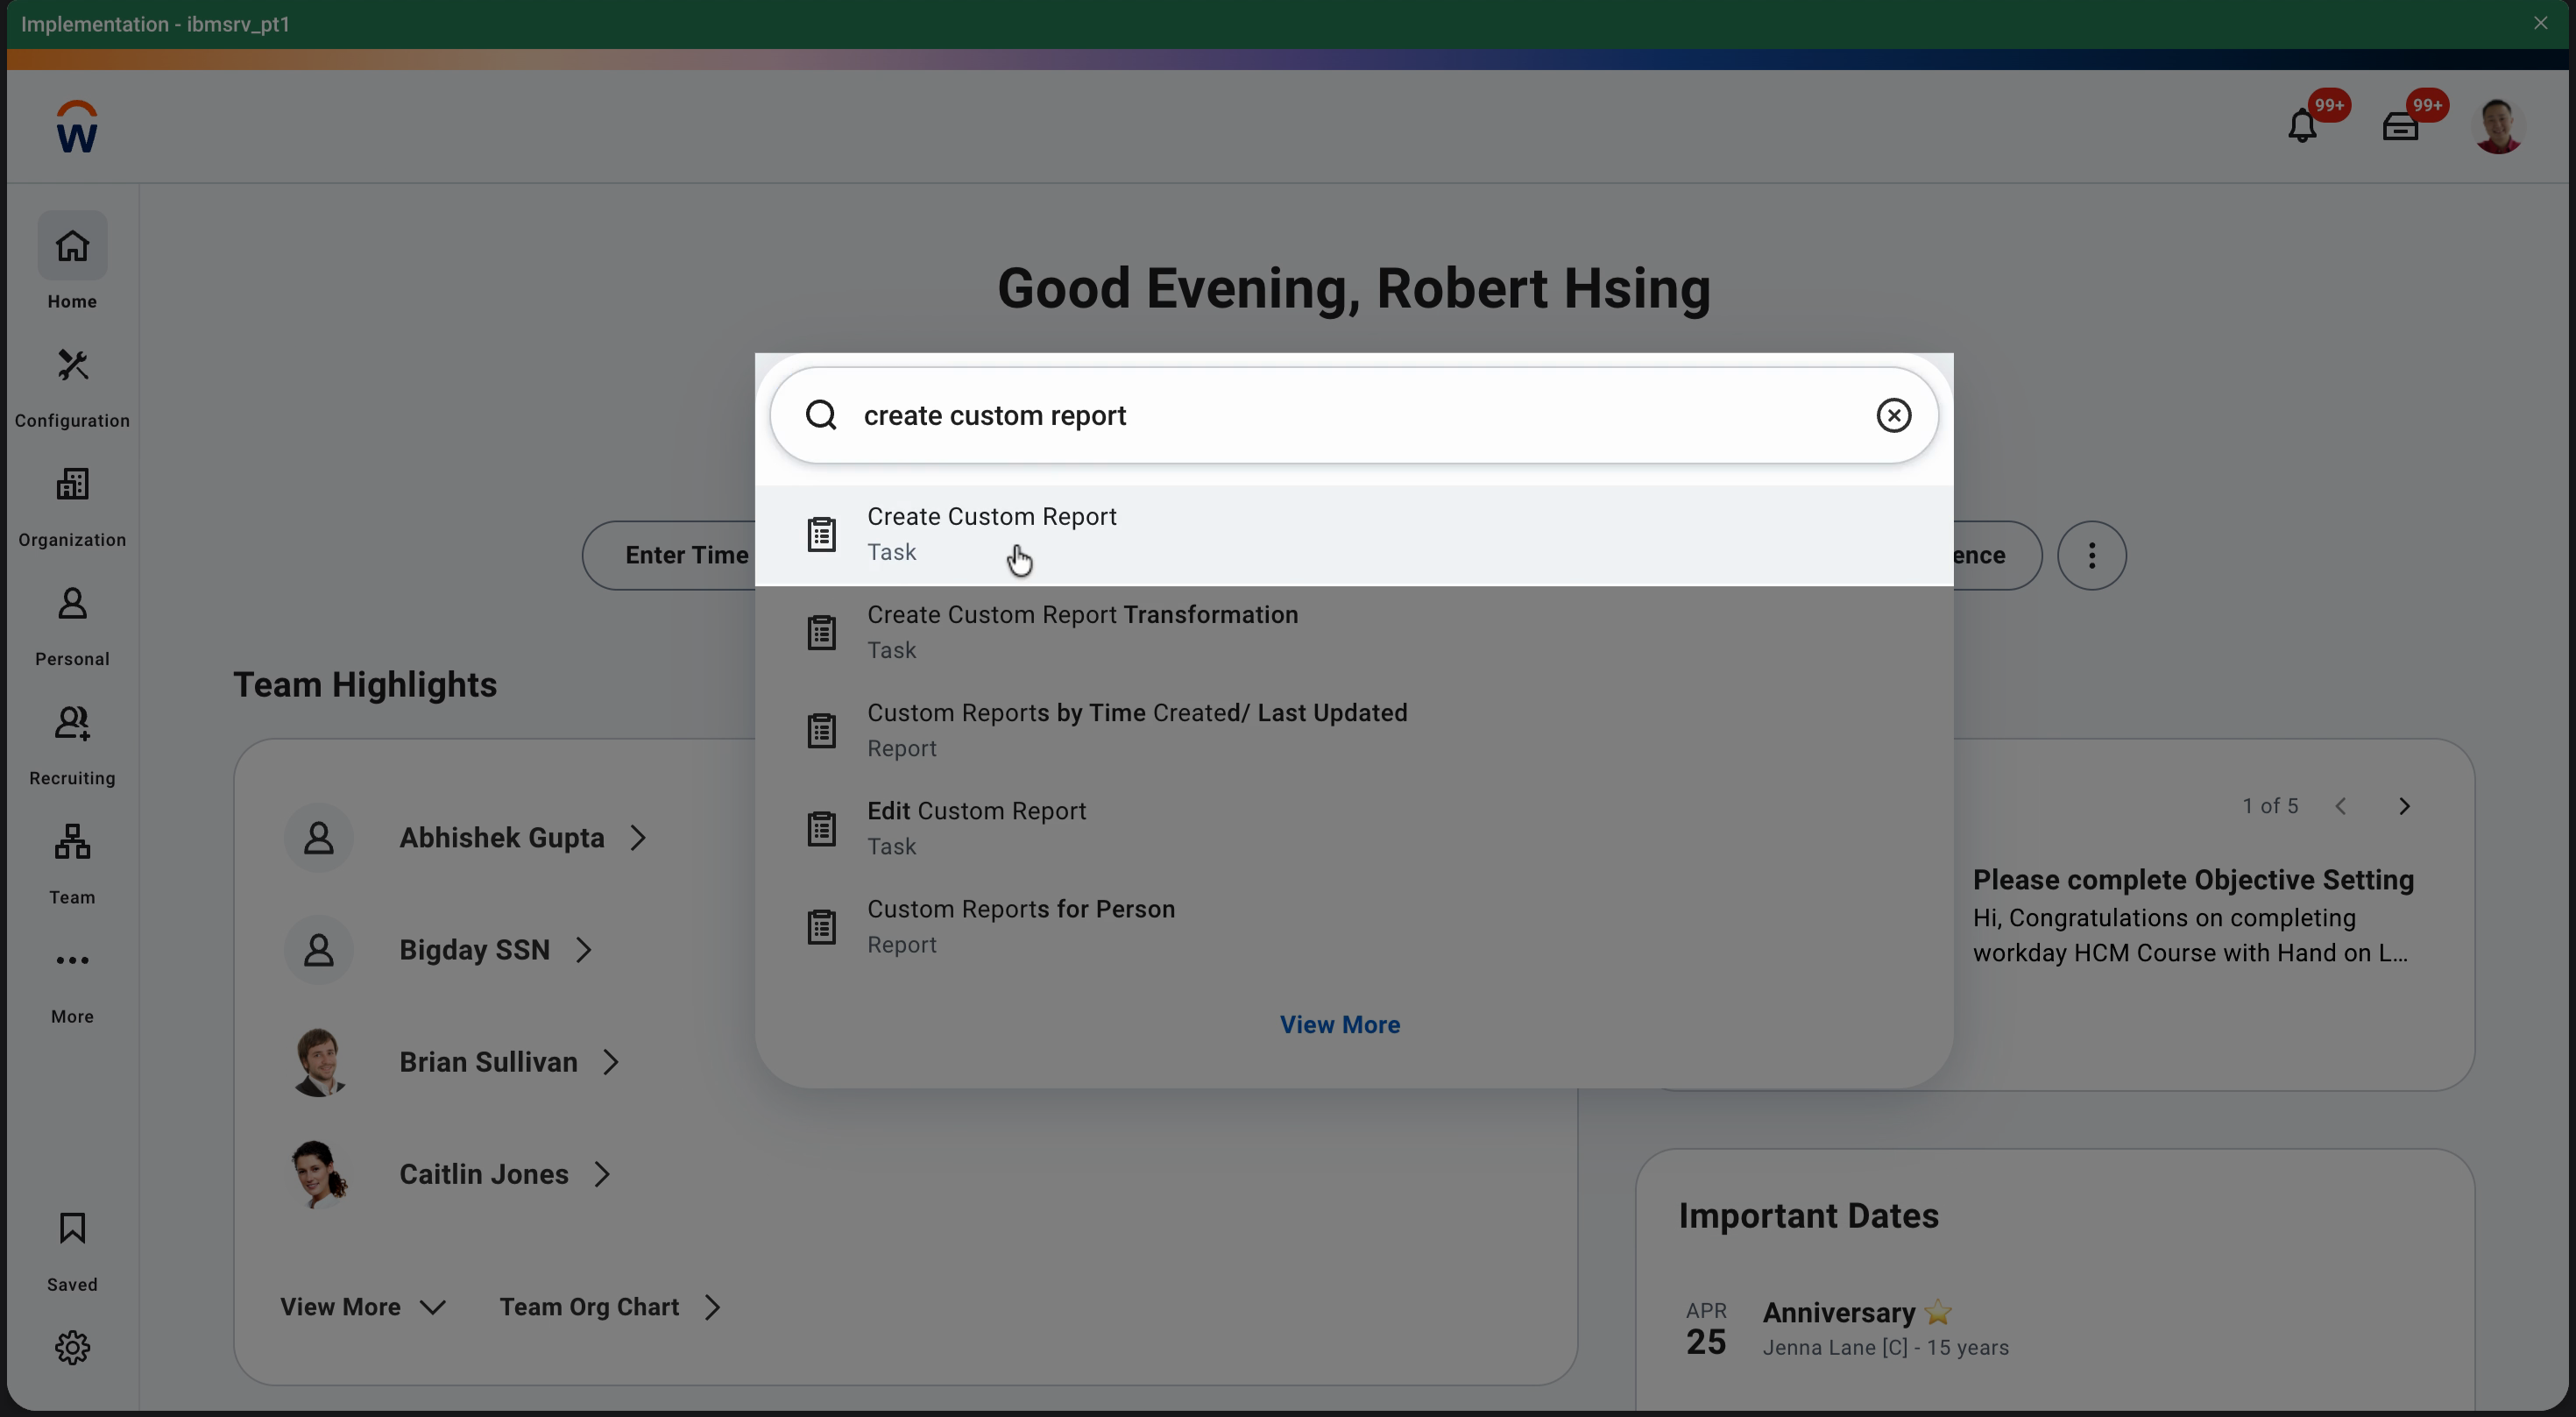
Create a Custom Report
Step 1: Search for and select Create Custom Report.
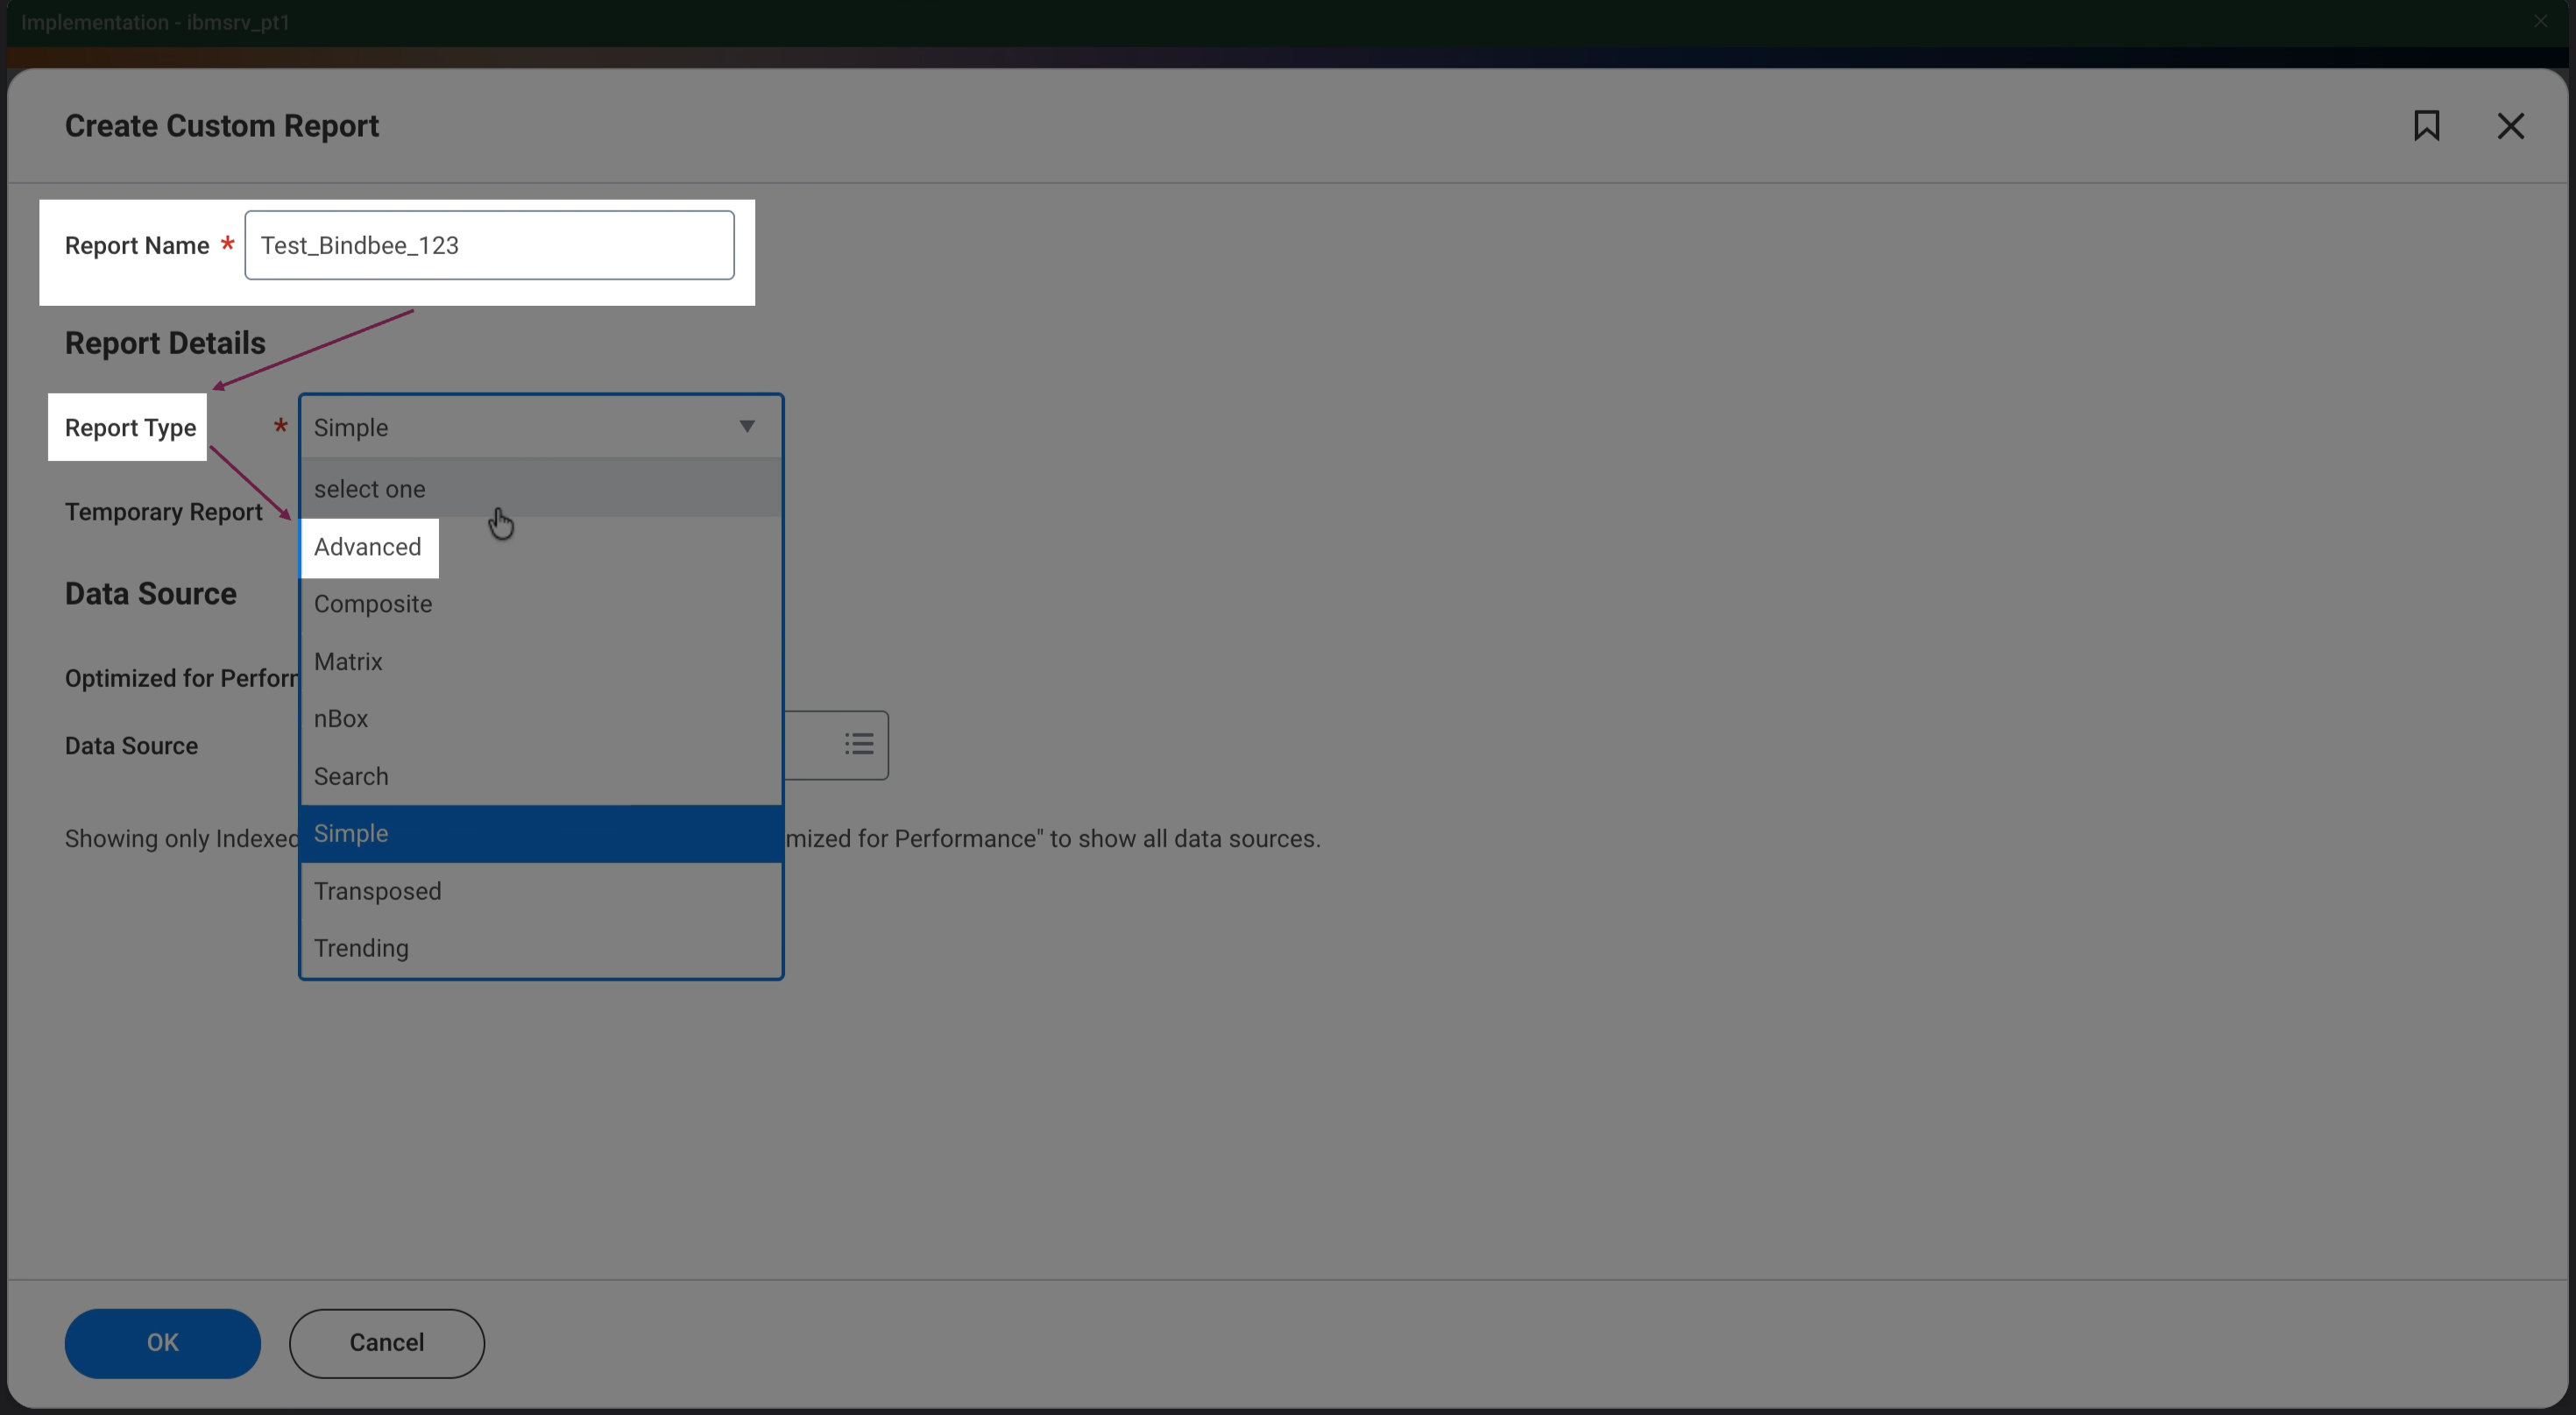
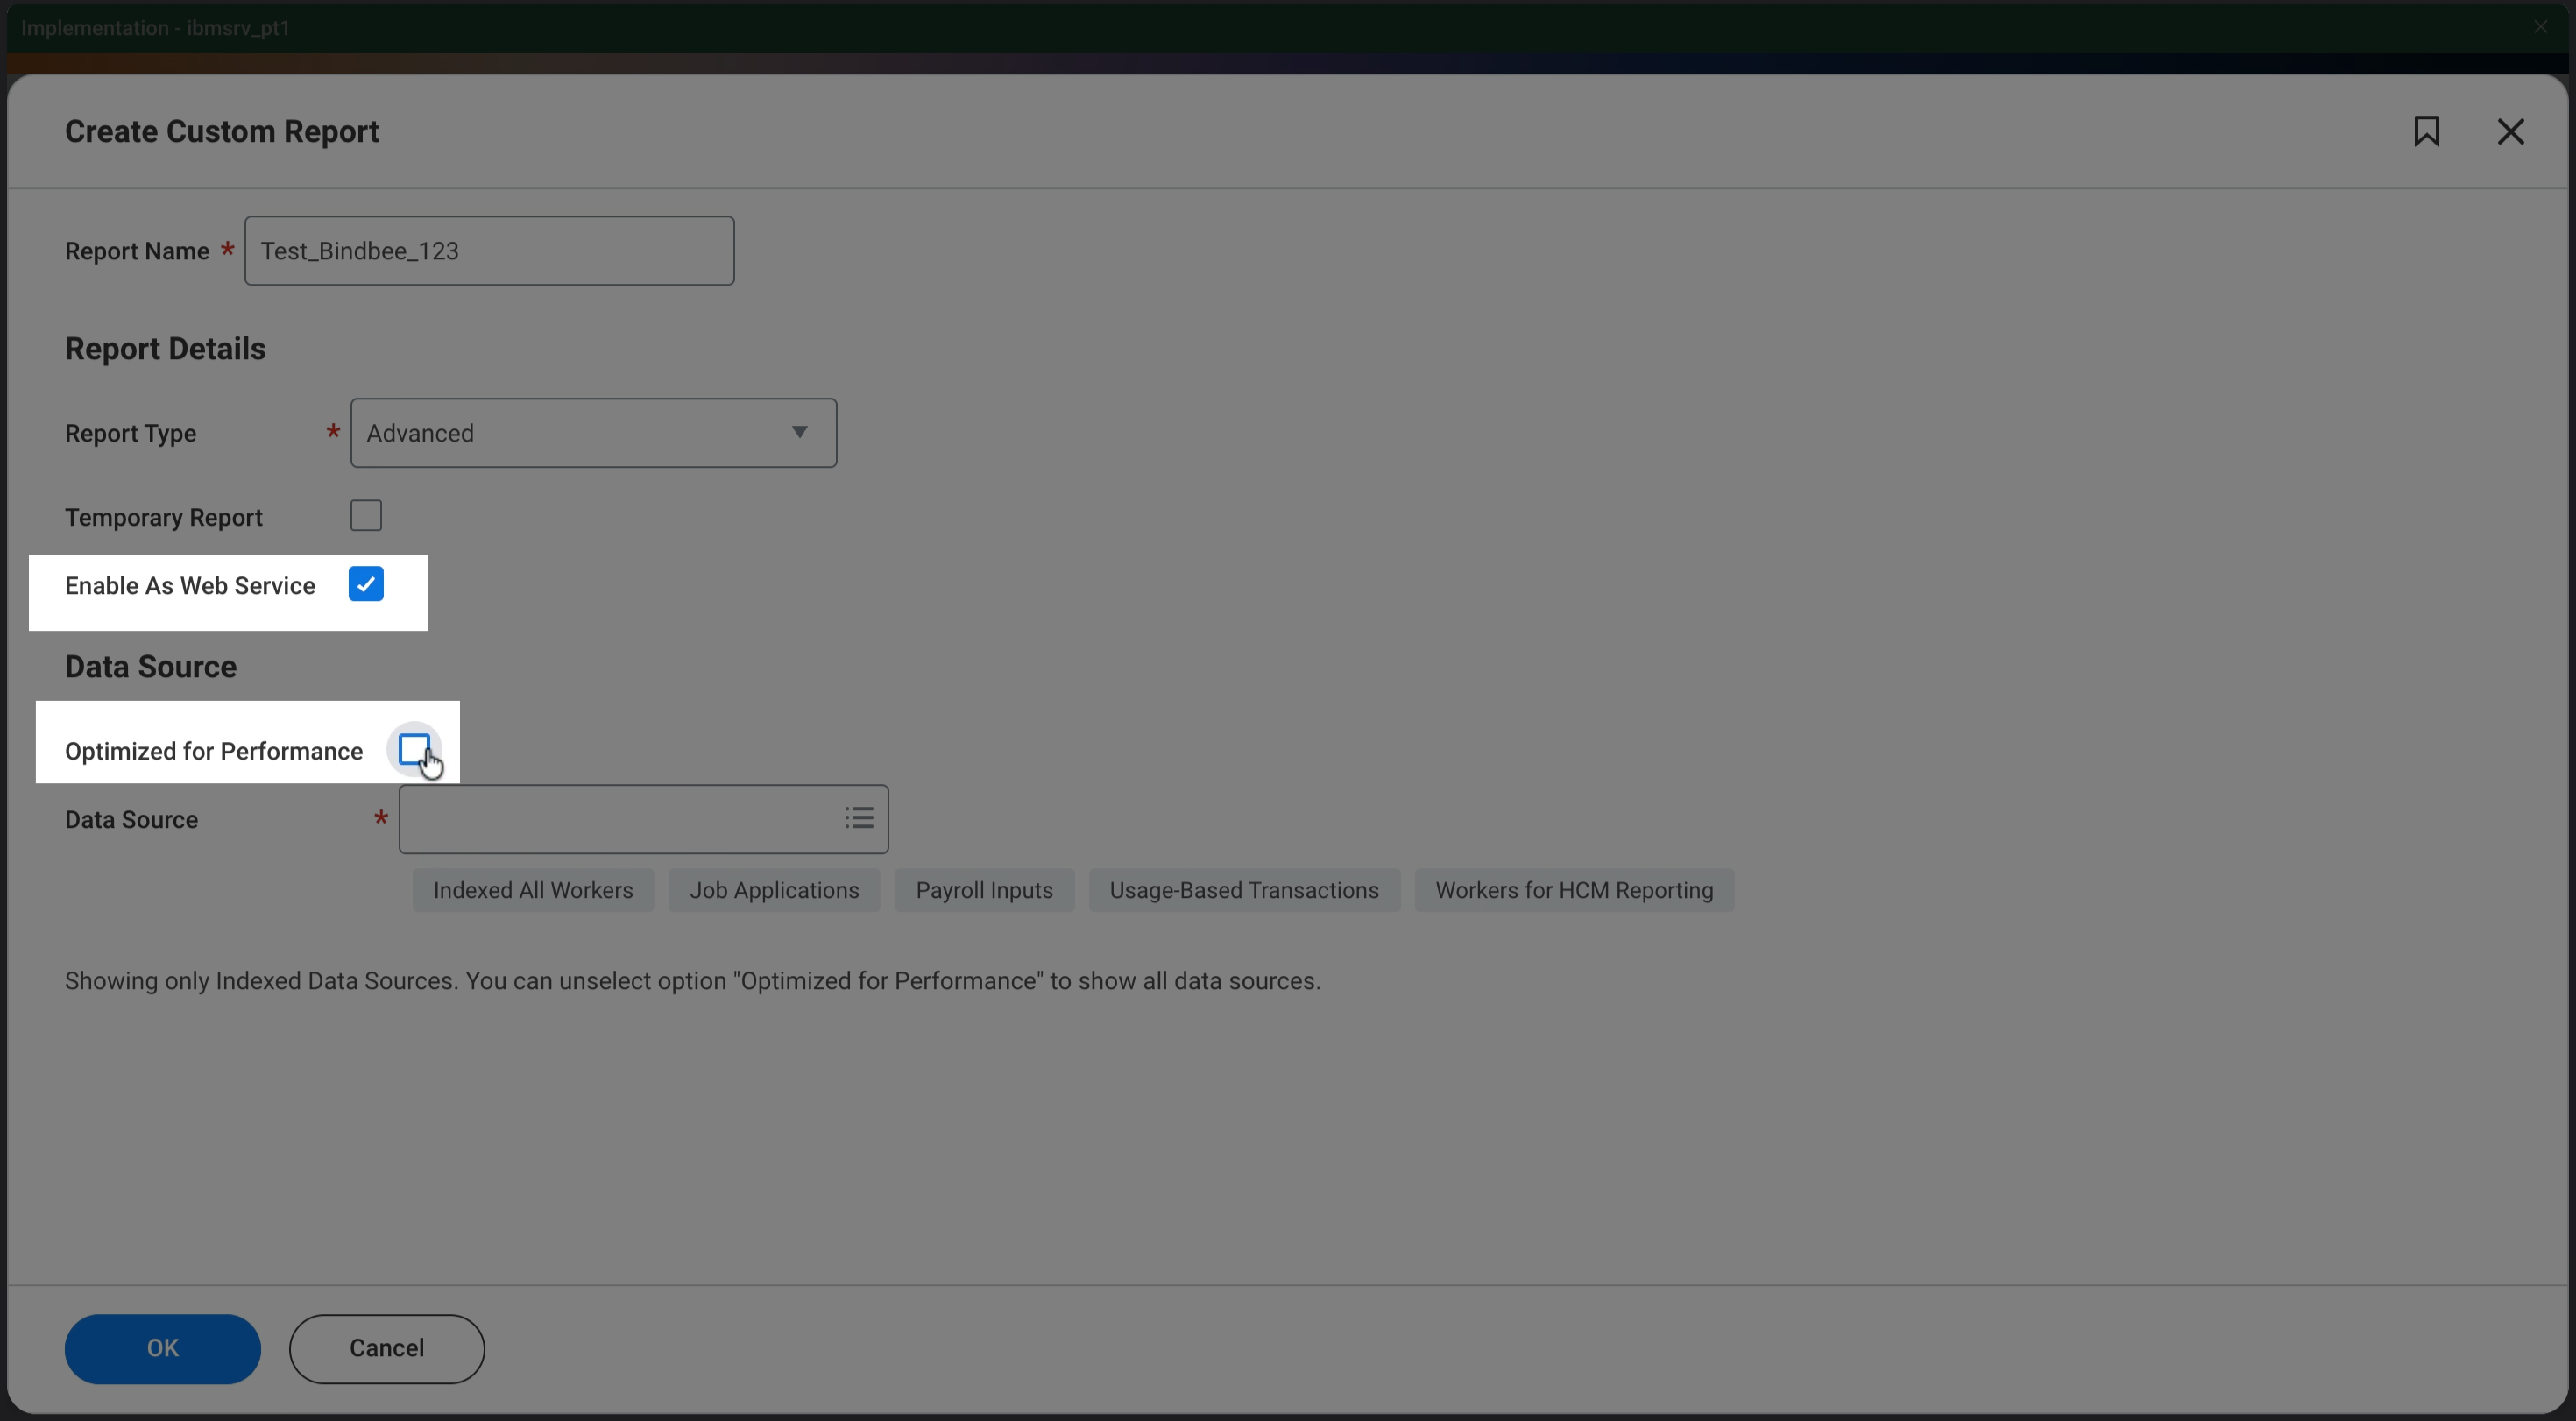
Step 2: Name your custom report and set report type to Advanced.
Step 3: Check Enable as a Web Service and uncheck Optimized for Performance for the report.
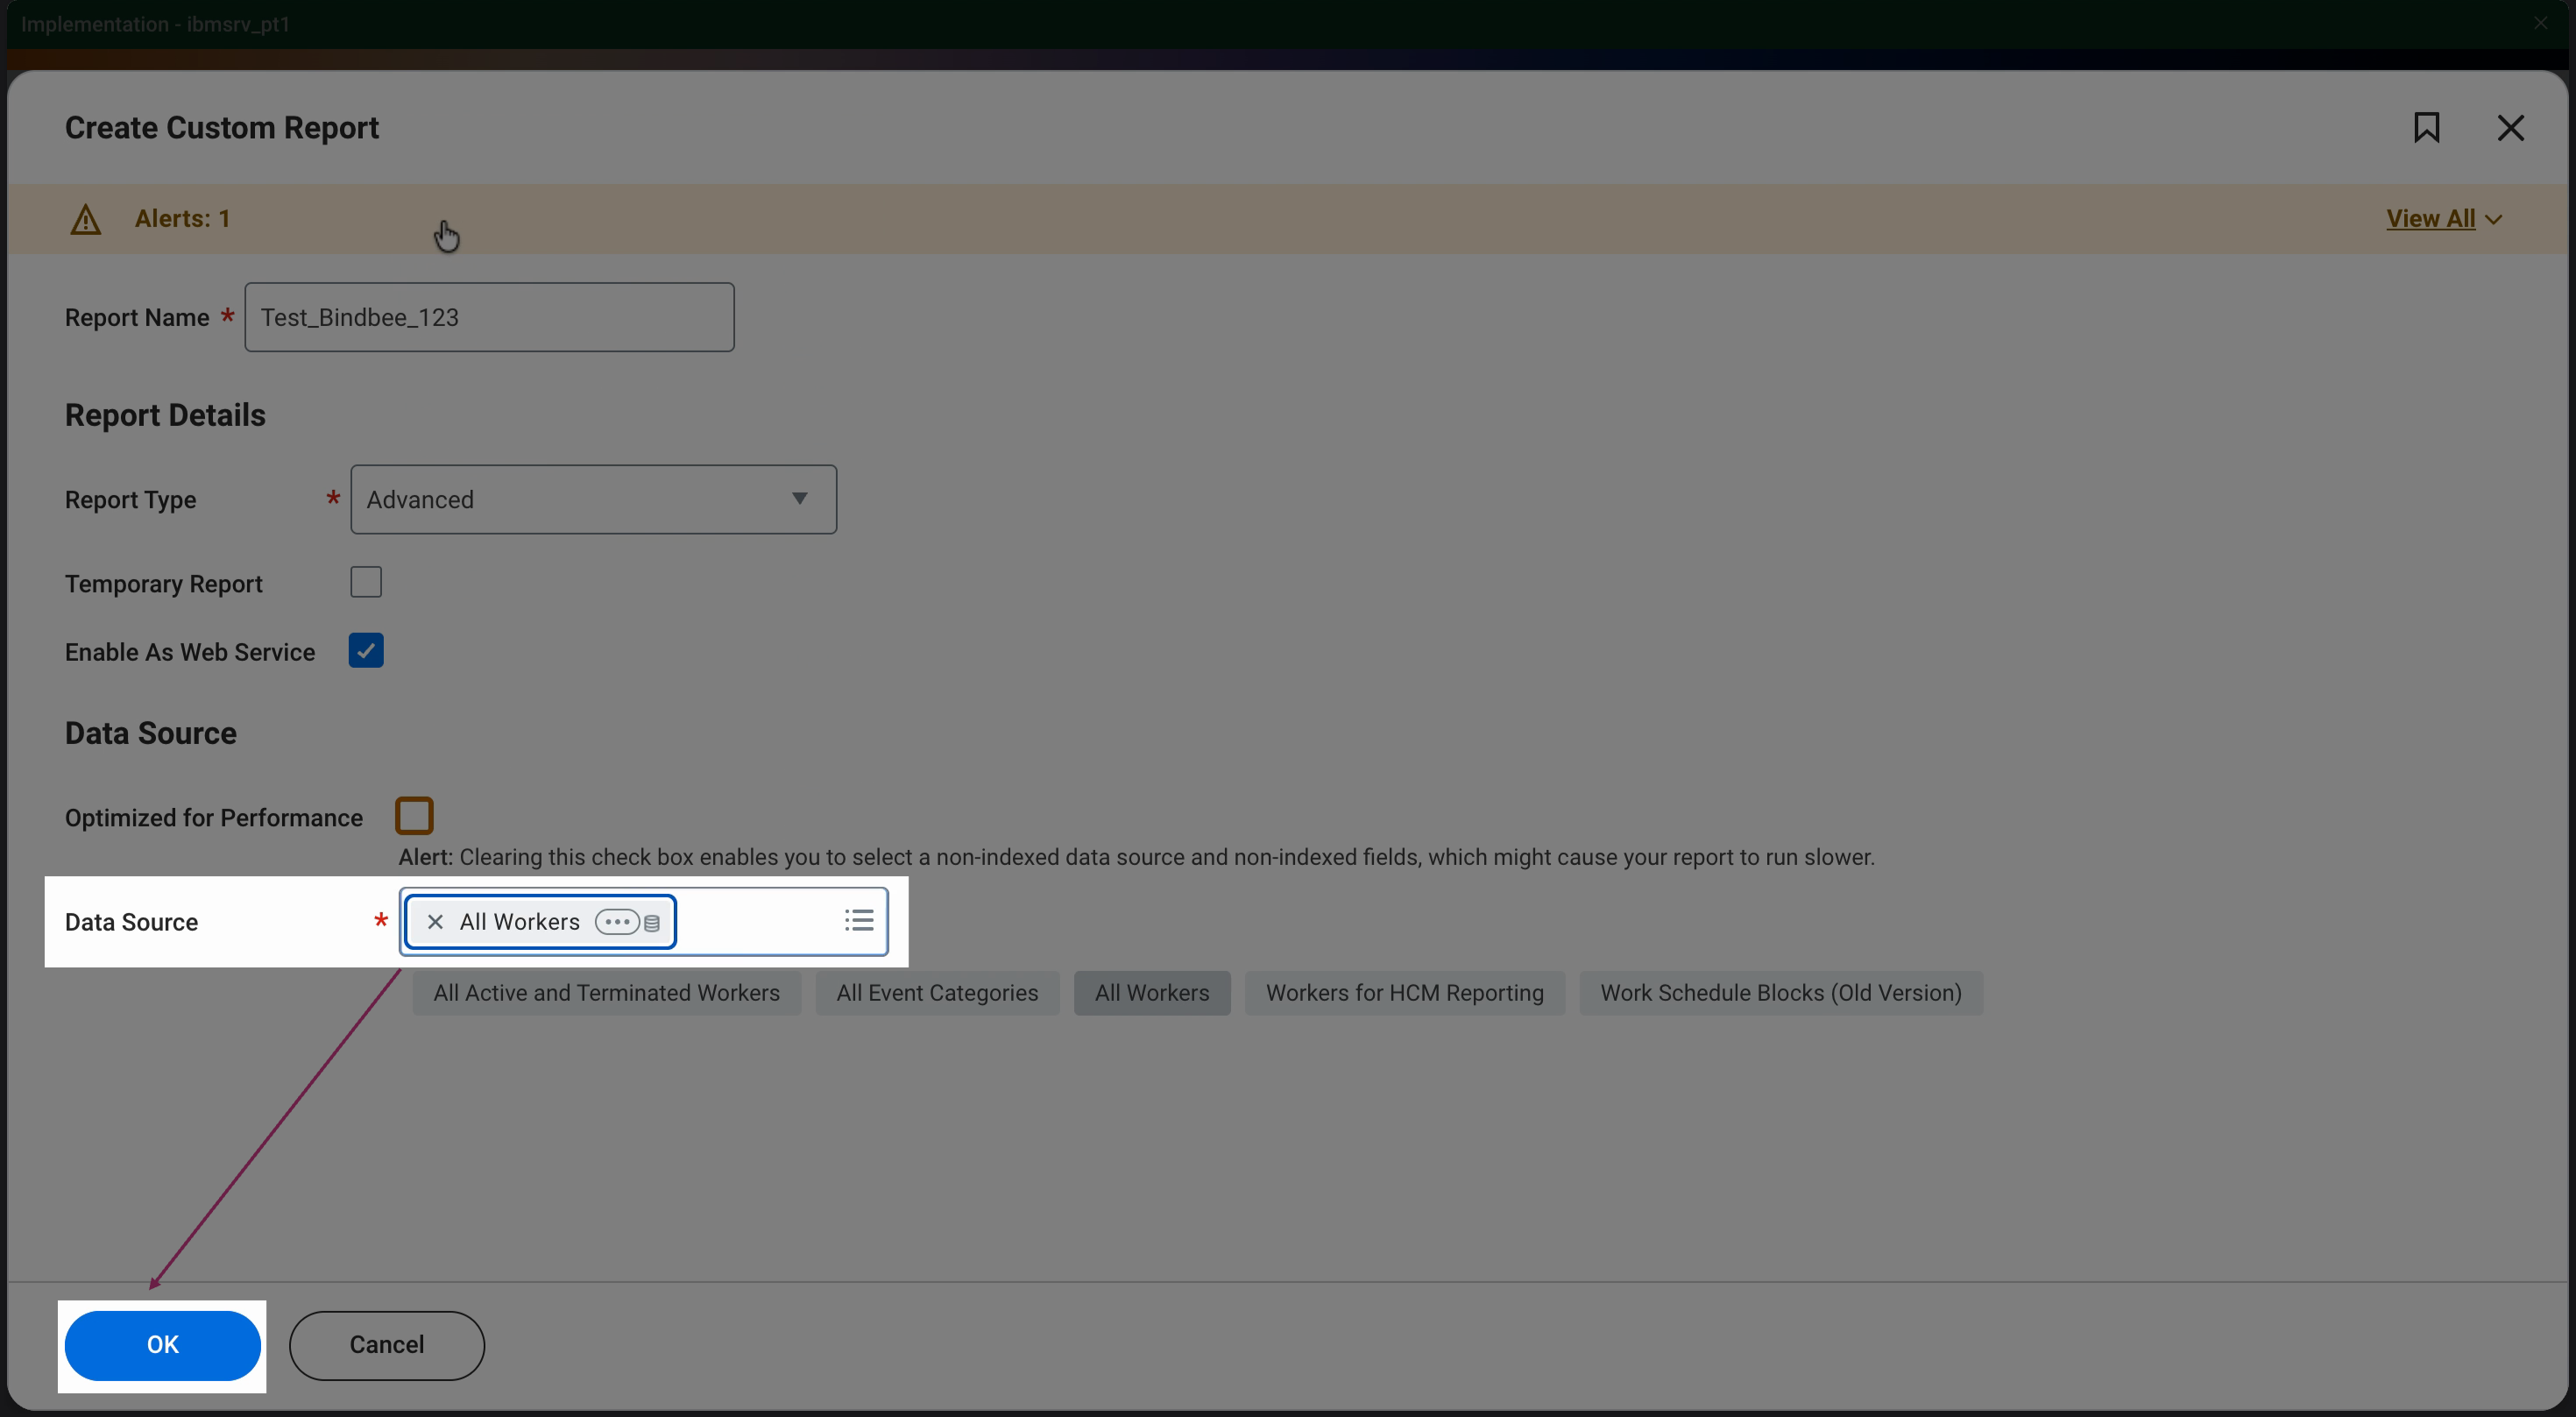
Step 4: Add your Data Source that contains the object whose data you want in the report (in this case, All Workers).
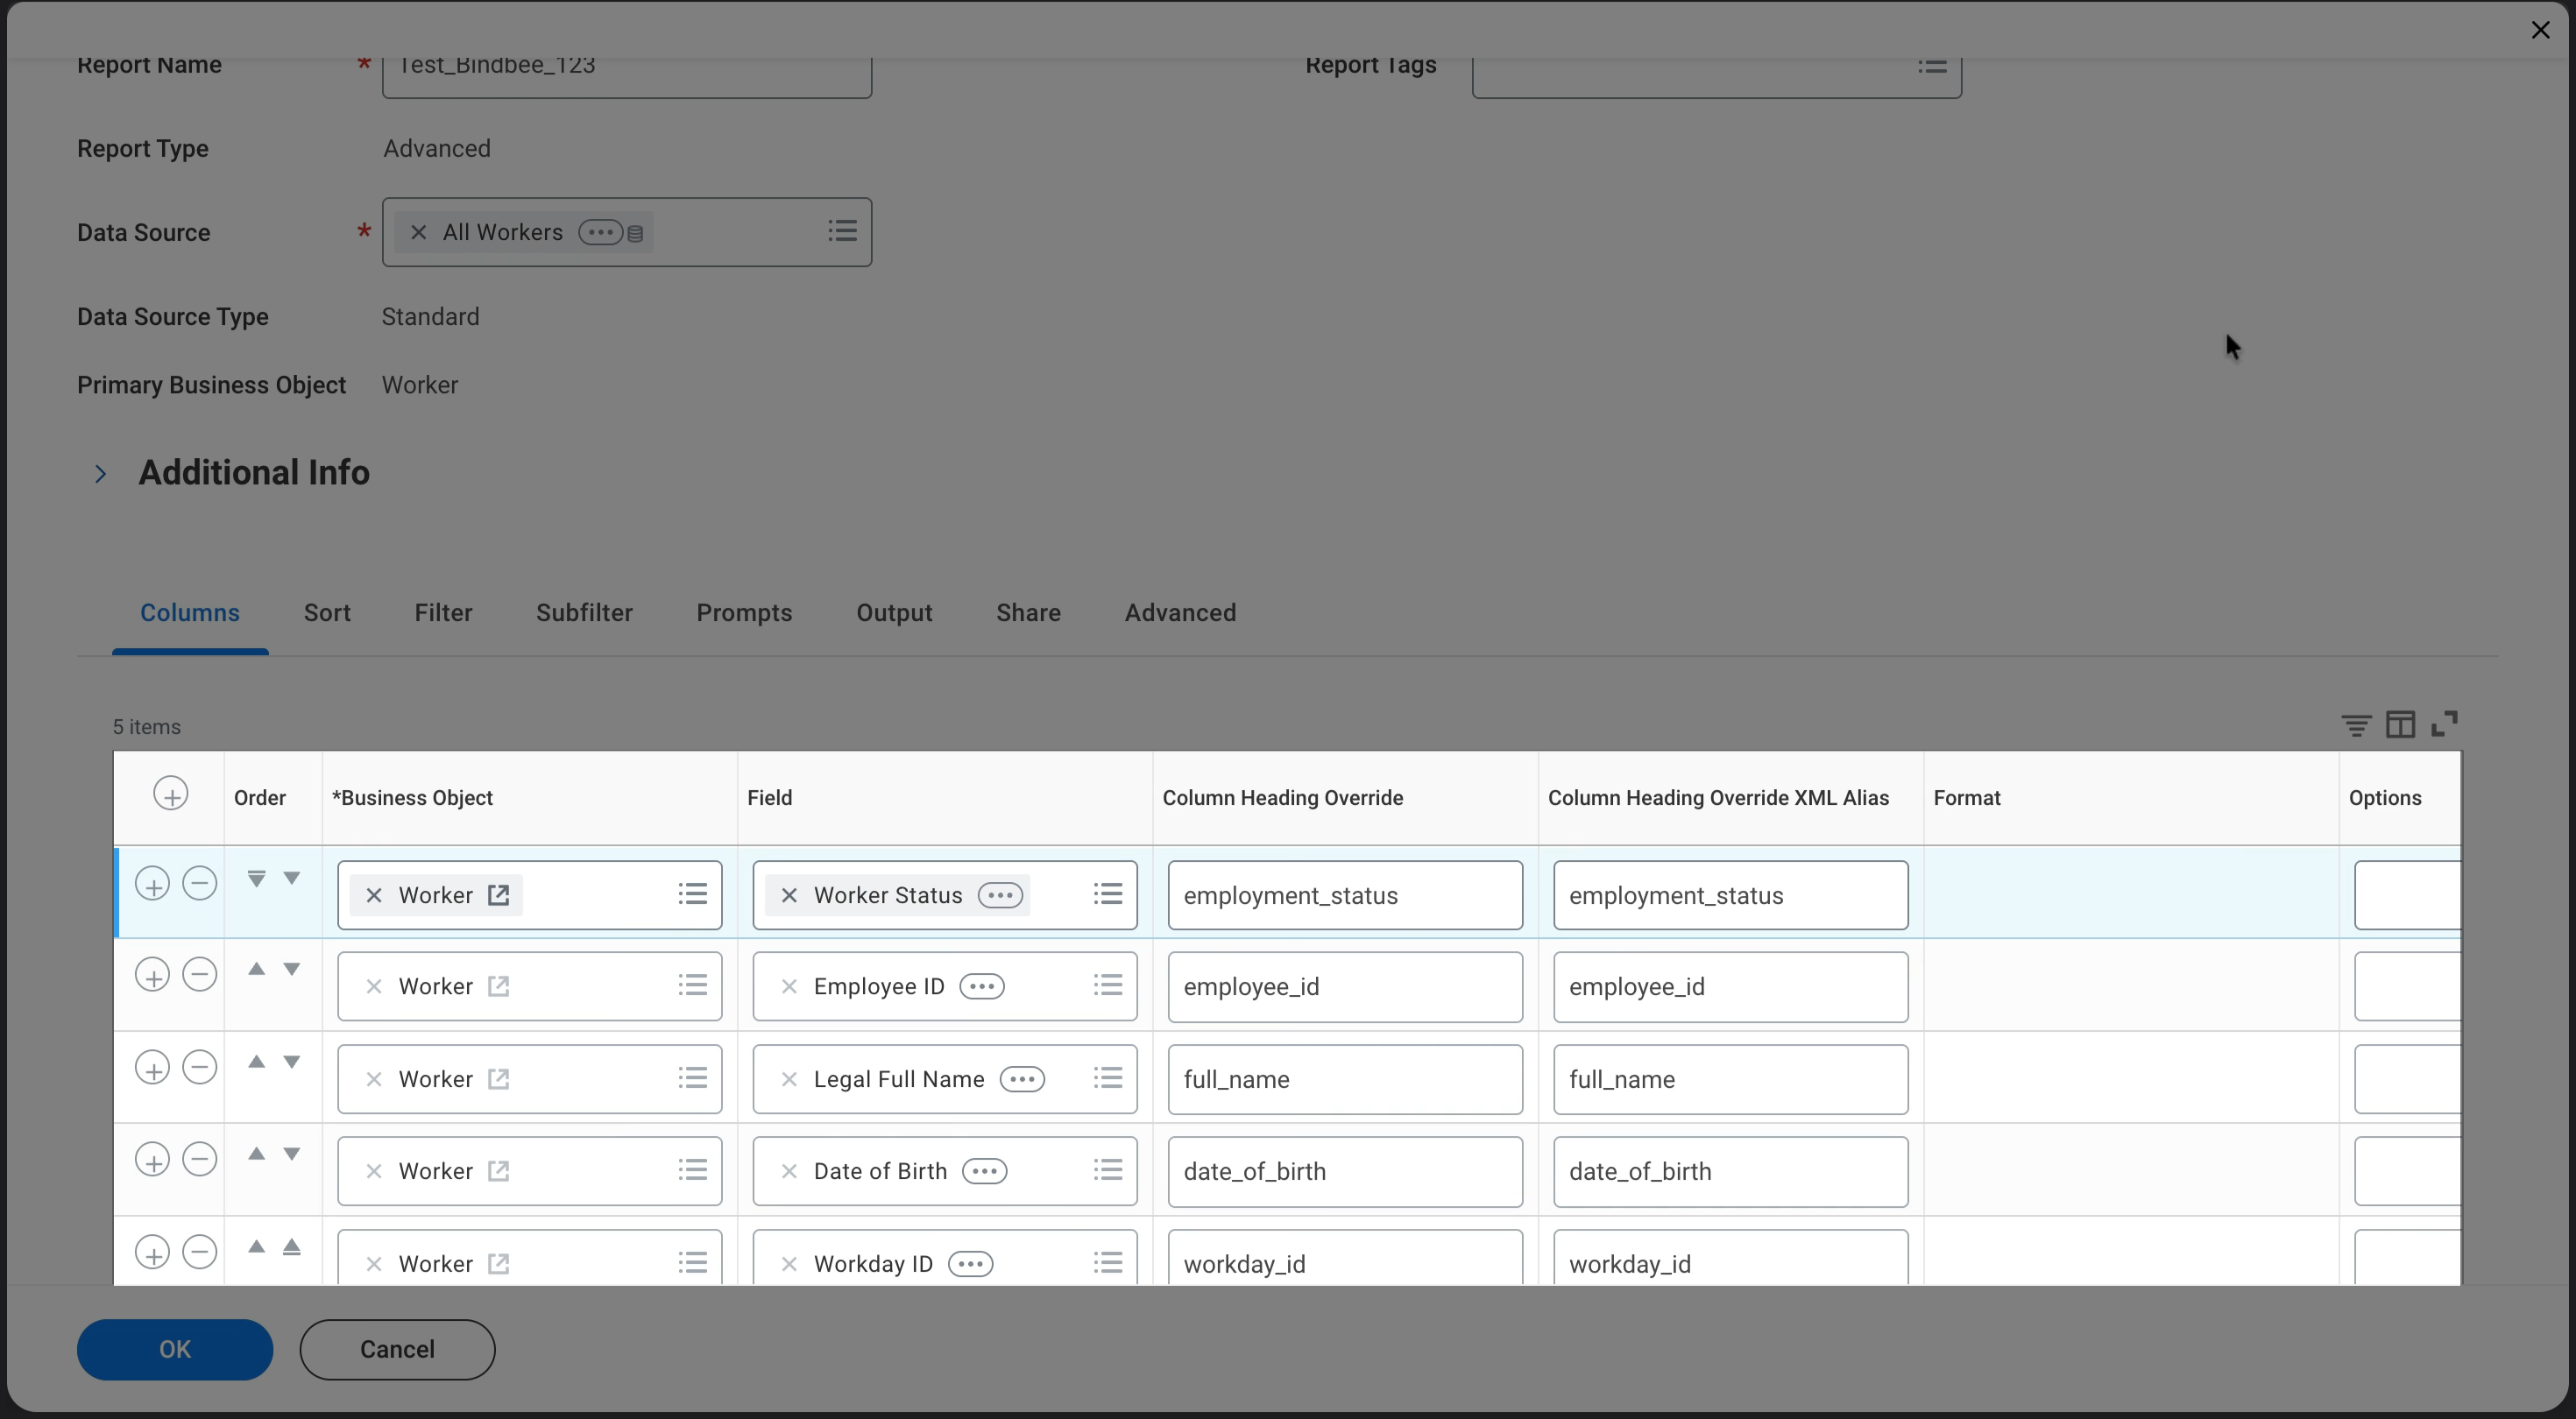
Step 5: Include the columns intended for the data sync.
We’ve created a standard template, which you can find here: template.
Please use the exact field names provided in the template. Include all fields that are required for your data sync and feel free to ignore the rest.
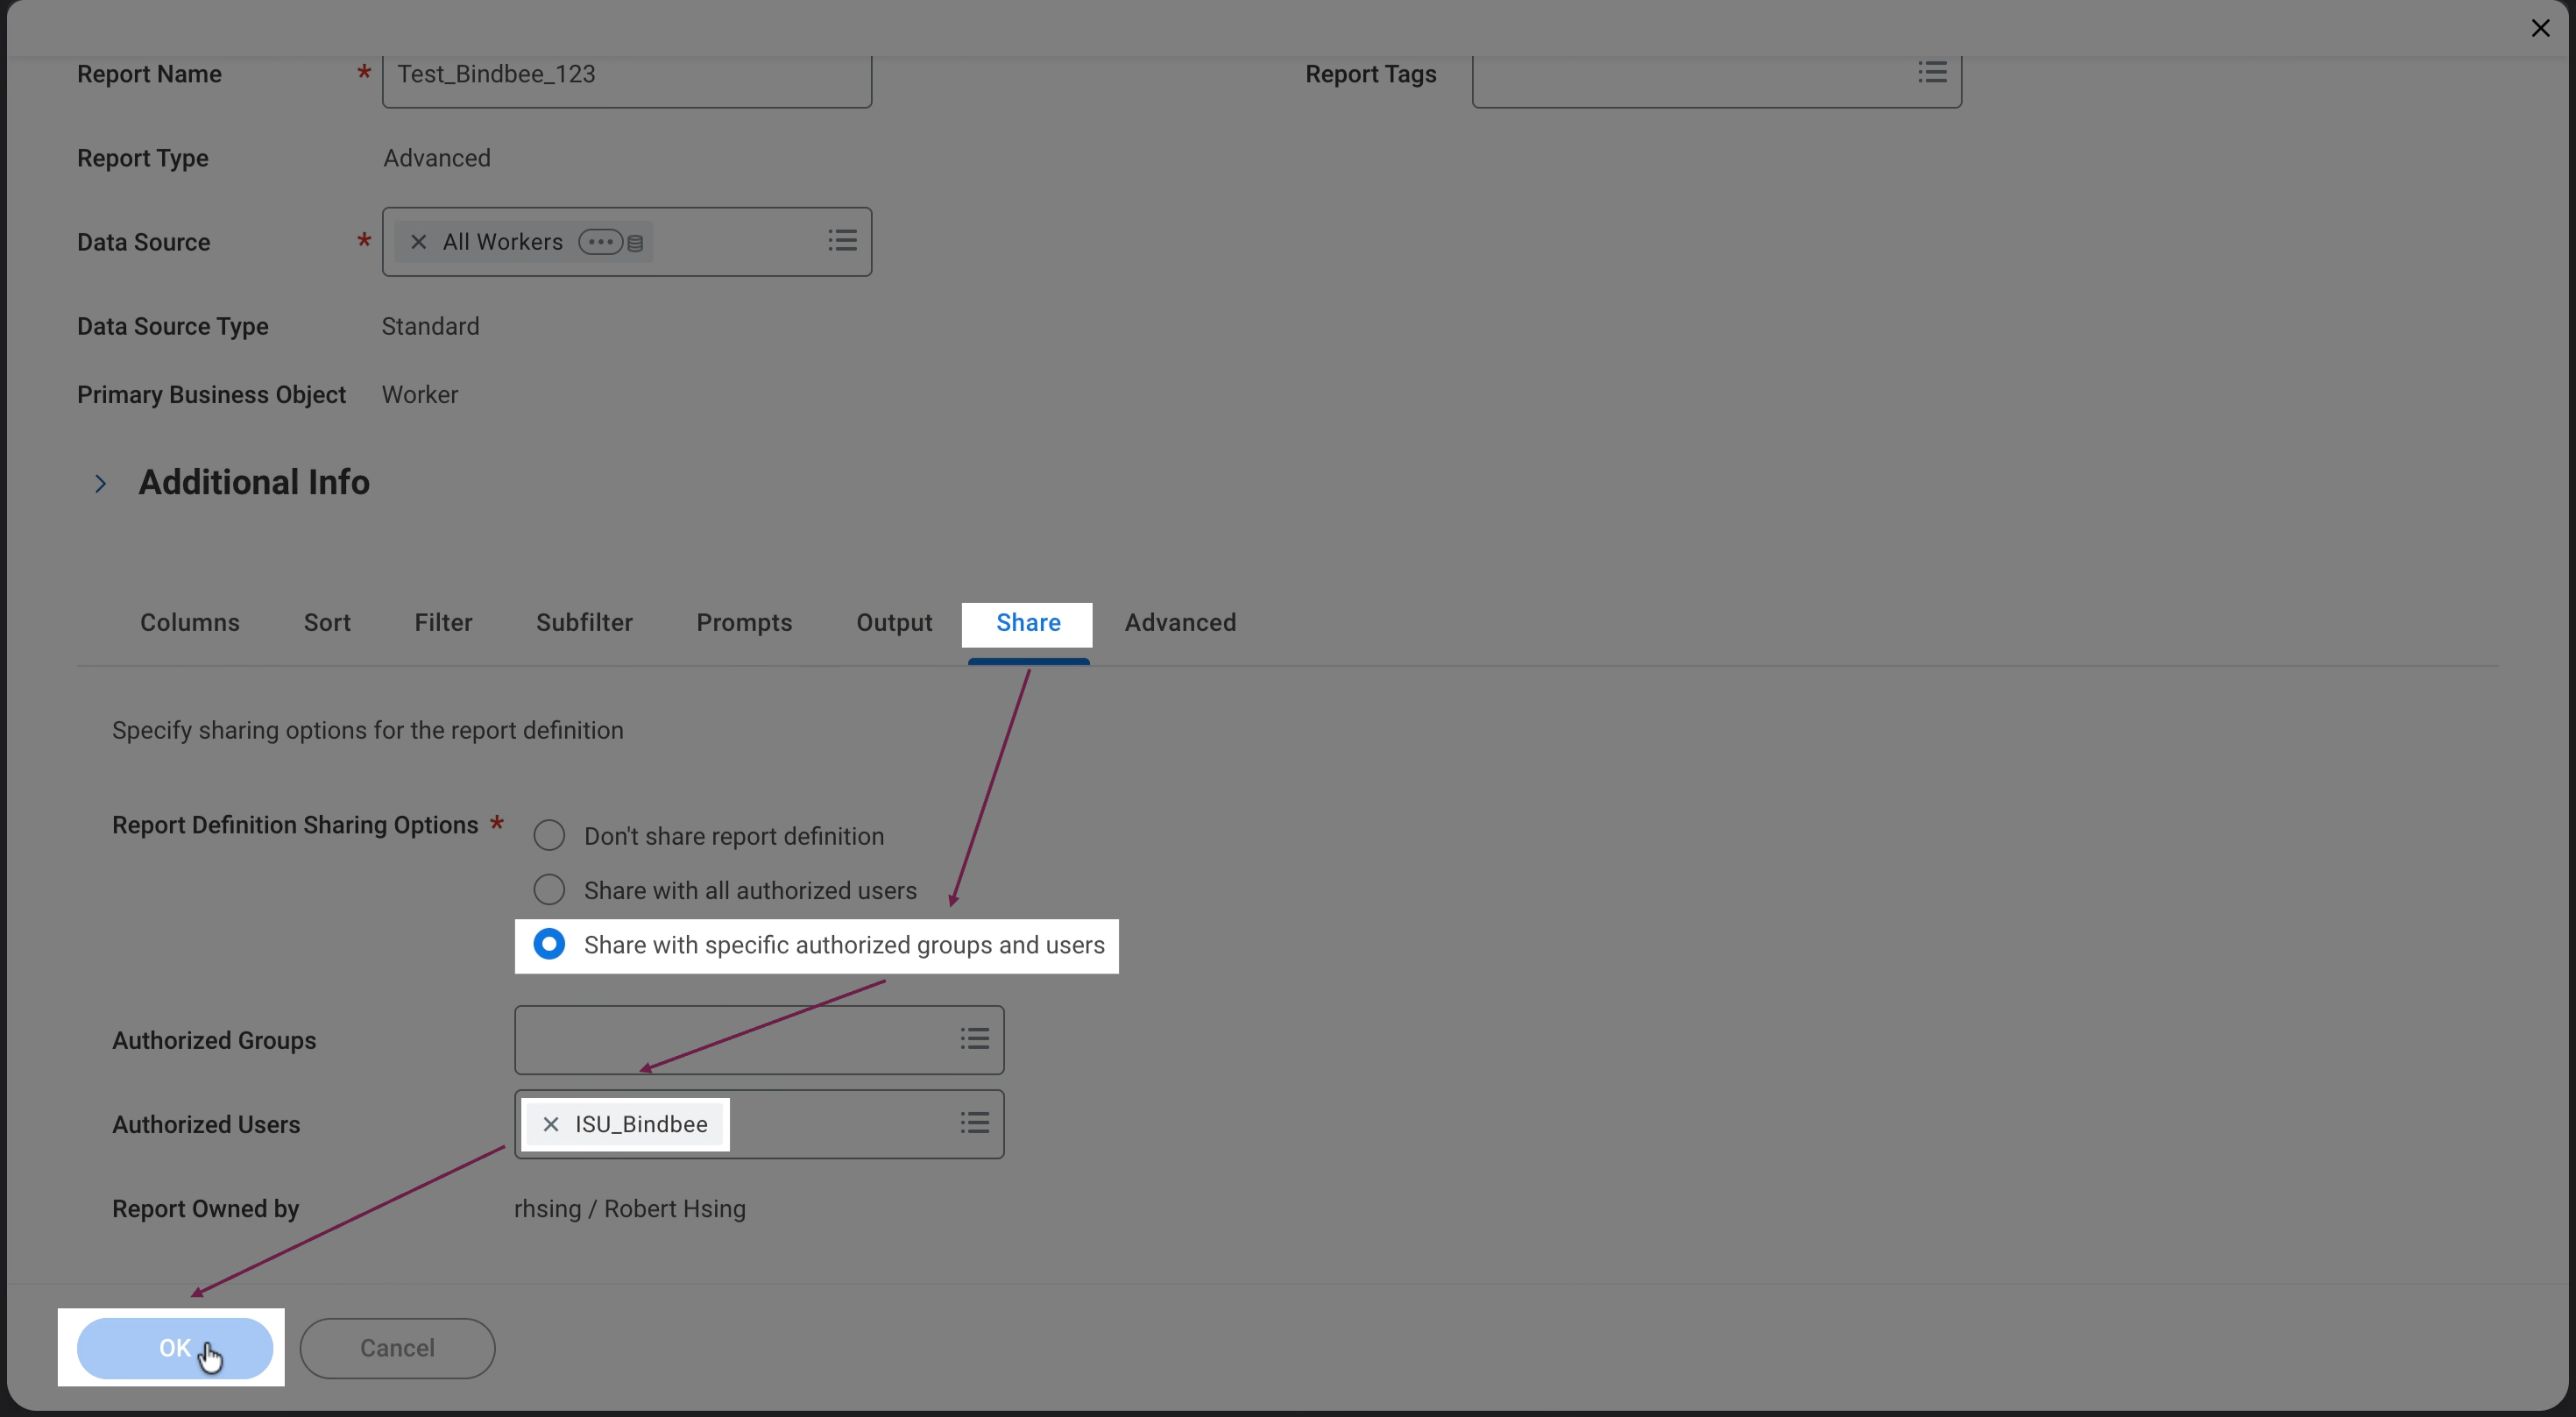
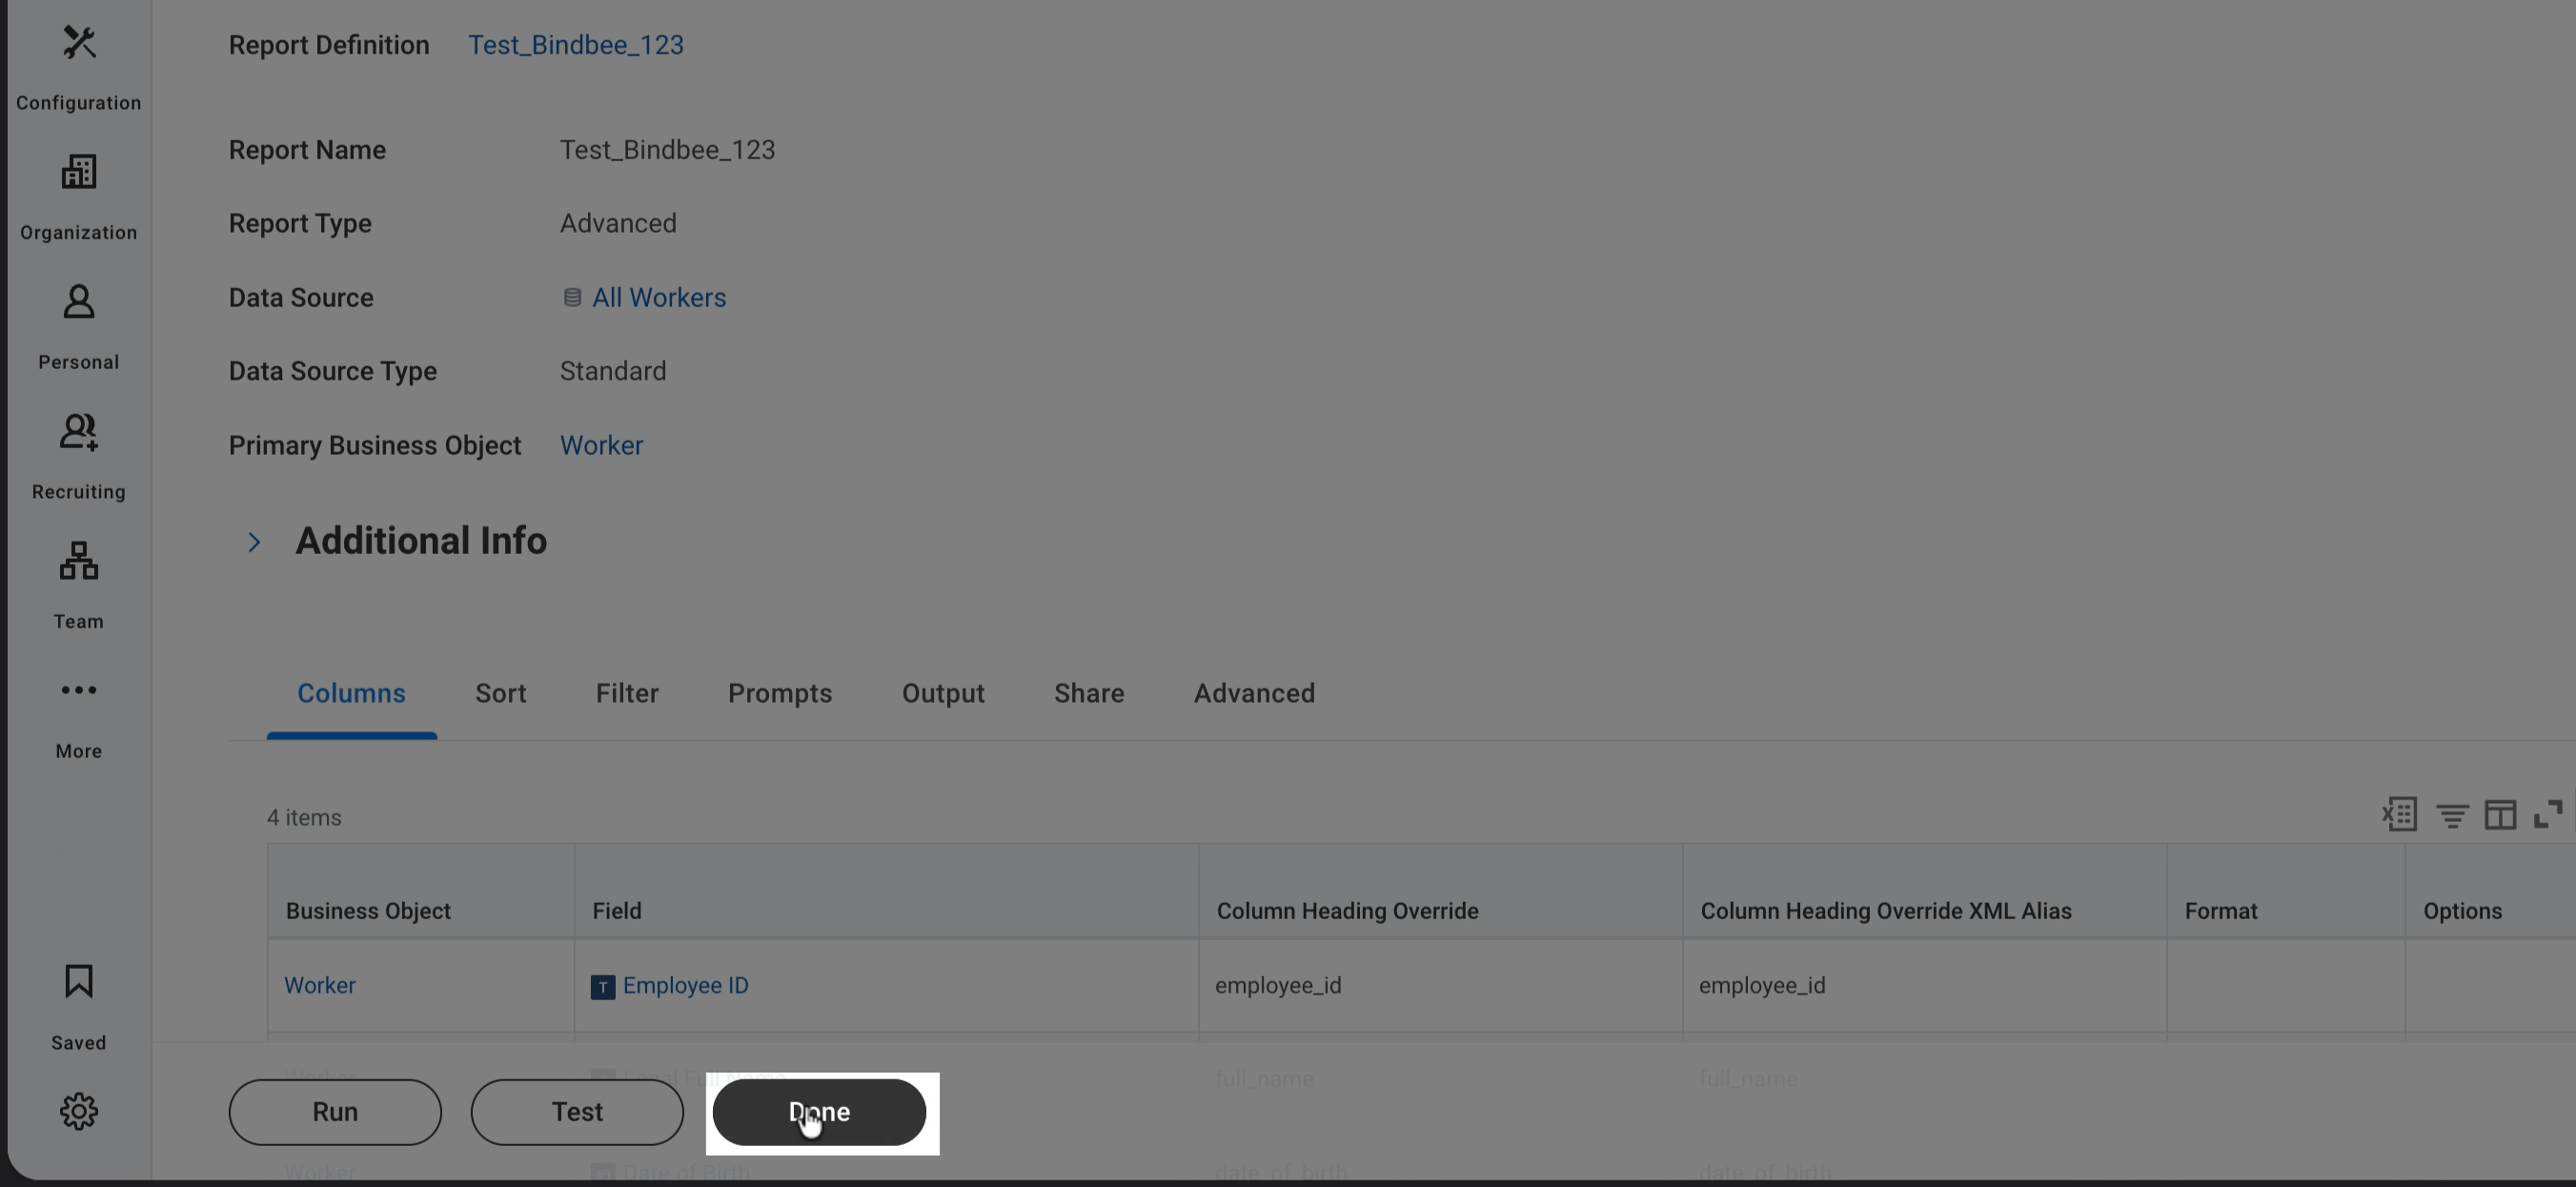
Step 6: Go to the Share tab and turn on Share with Specific Authorized Groups and Users.
Step 7: Then enter the authorized Integration System User in the Authorized Users field. Click 'OK' and then 'Done' once you're done.
Note: If you don't have an Integration System User set up, you can refer our Workday: How to Authenticate documentation and follow the steps all the way upto Activate All Changes.
You can refer our Permissions documentation to assign the relevant permissions to your Integration System User.
Get Custom Report URL
Step 1: Open View Custom Report.
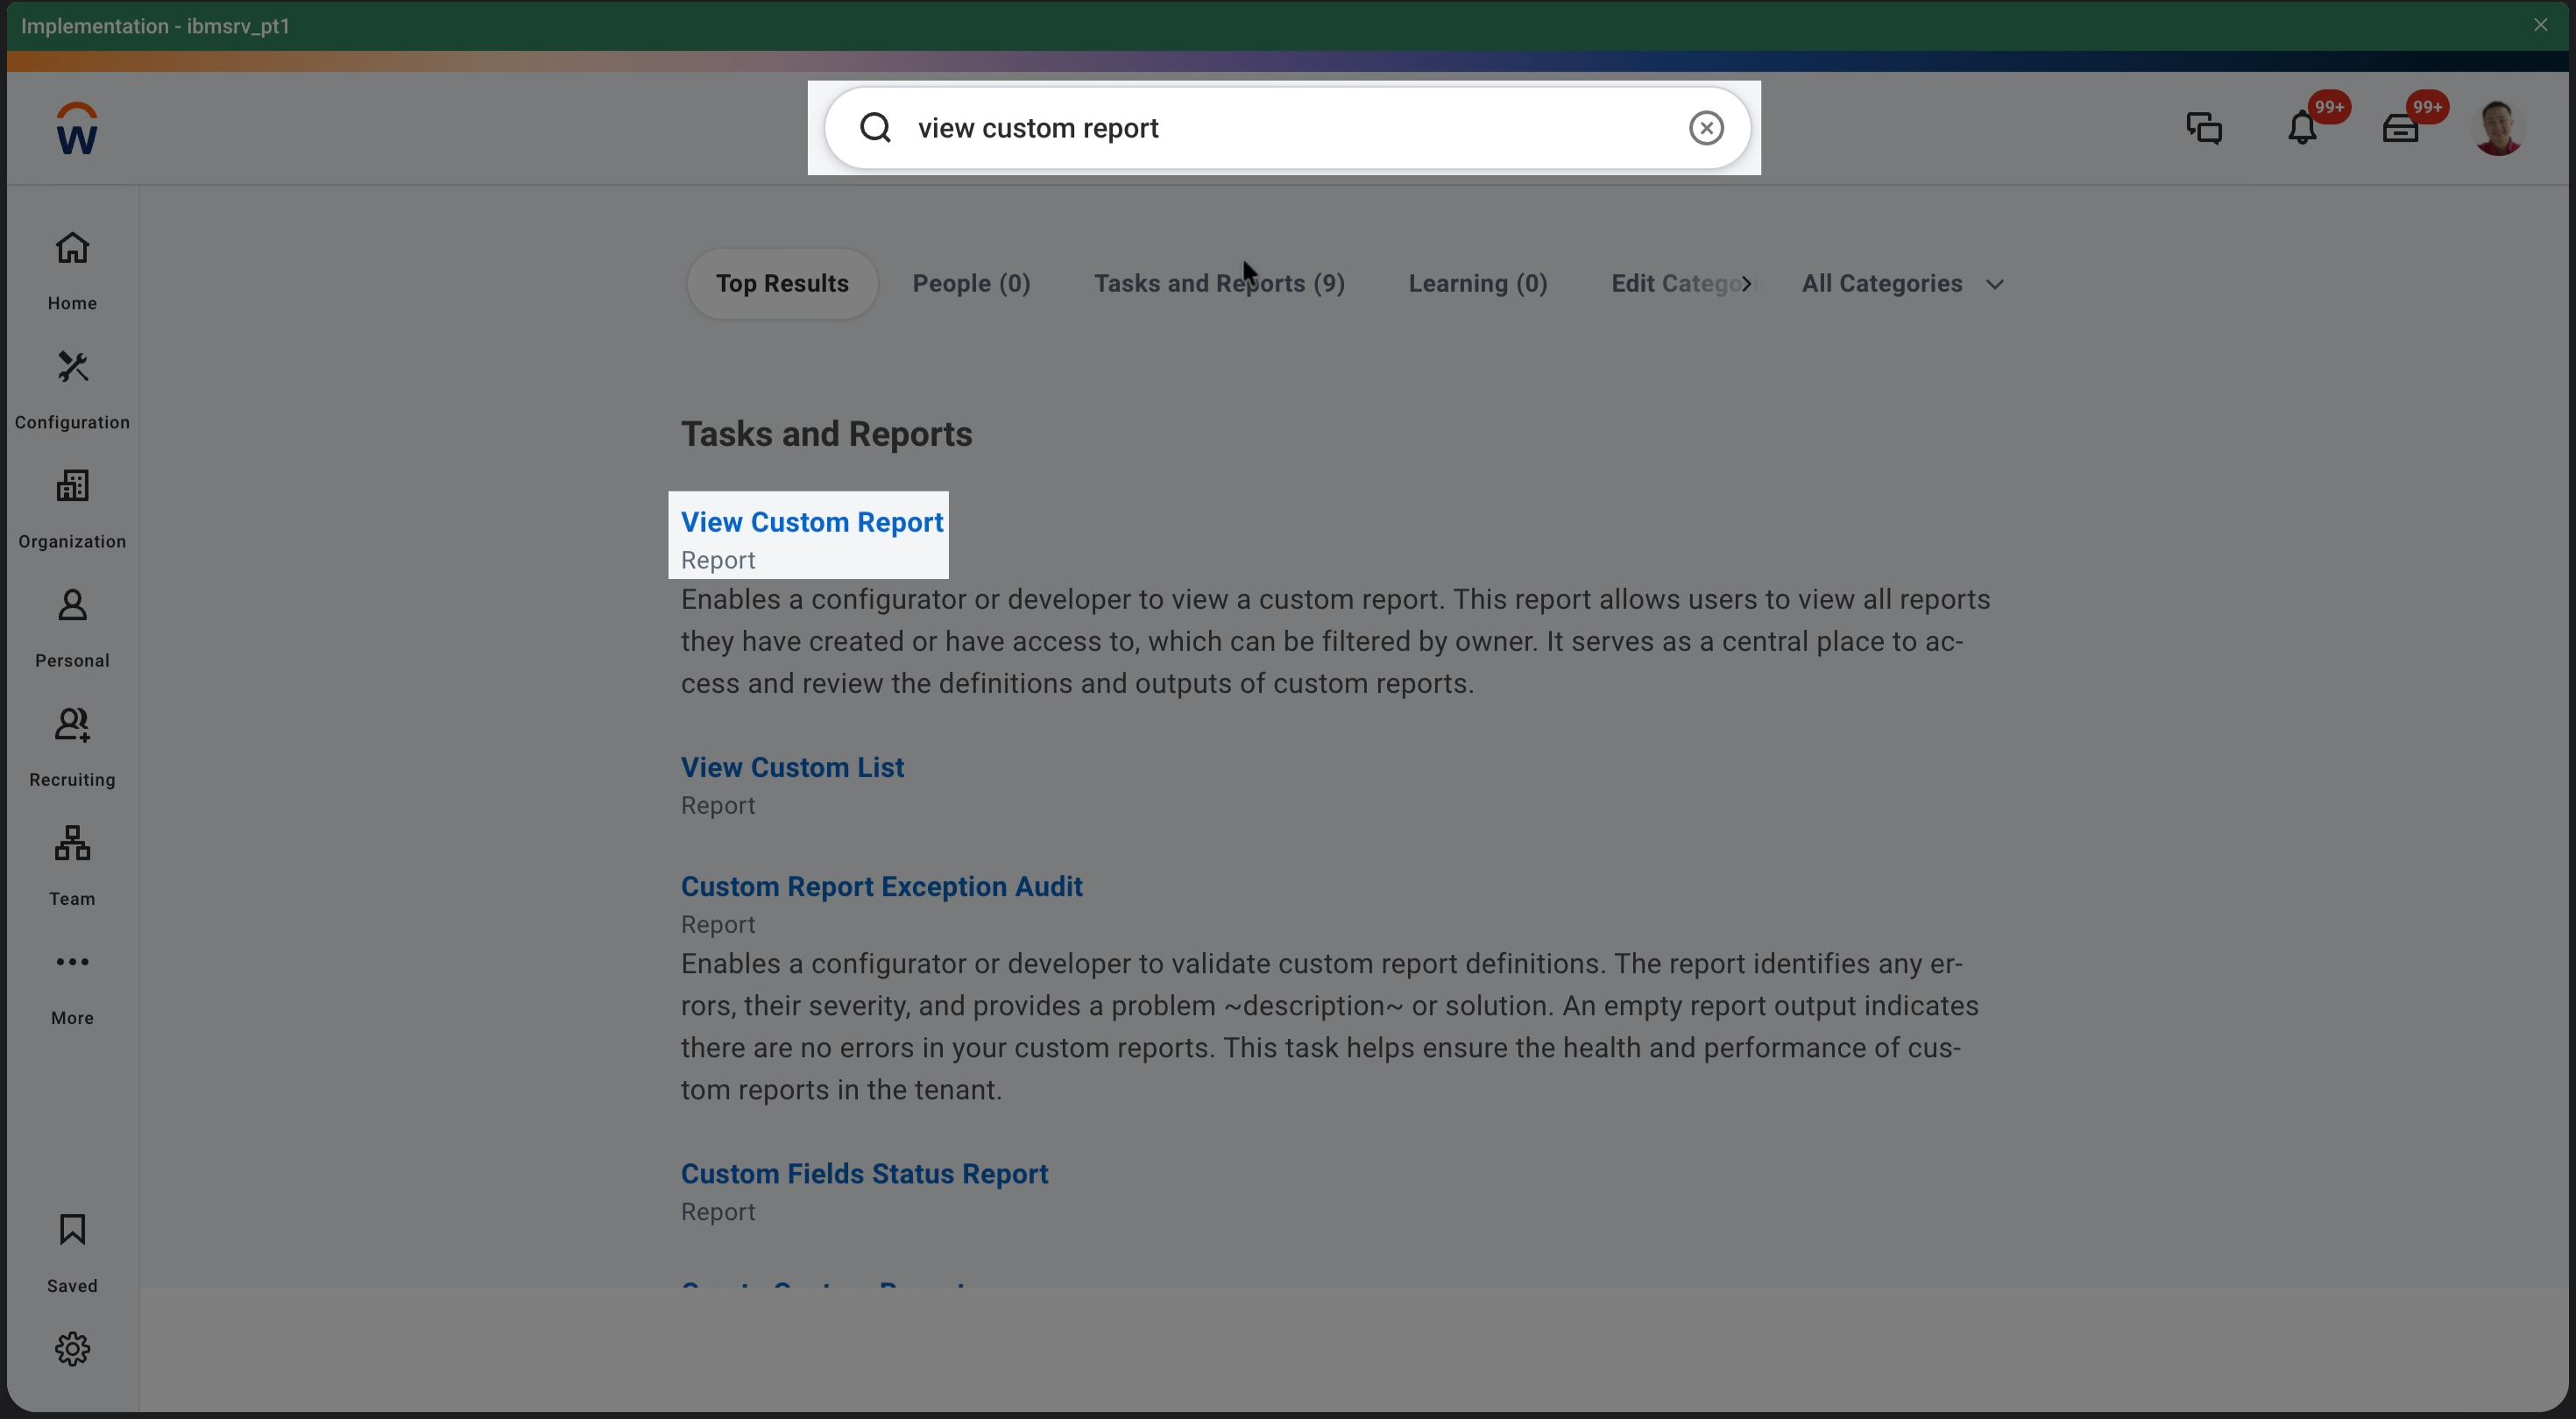
Step 2: Type your report name and click OK.
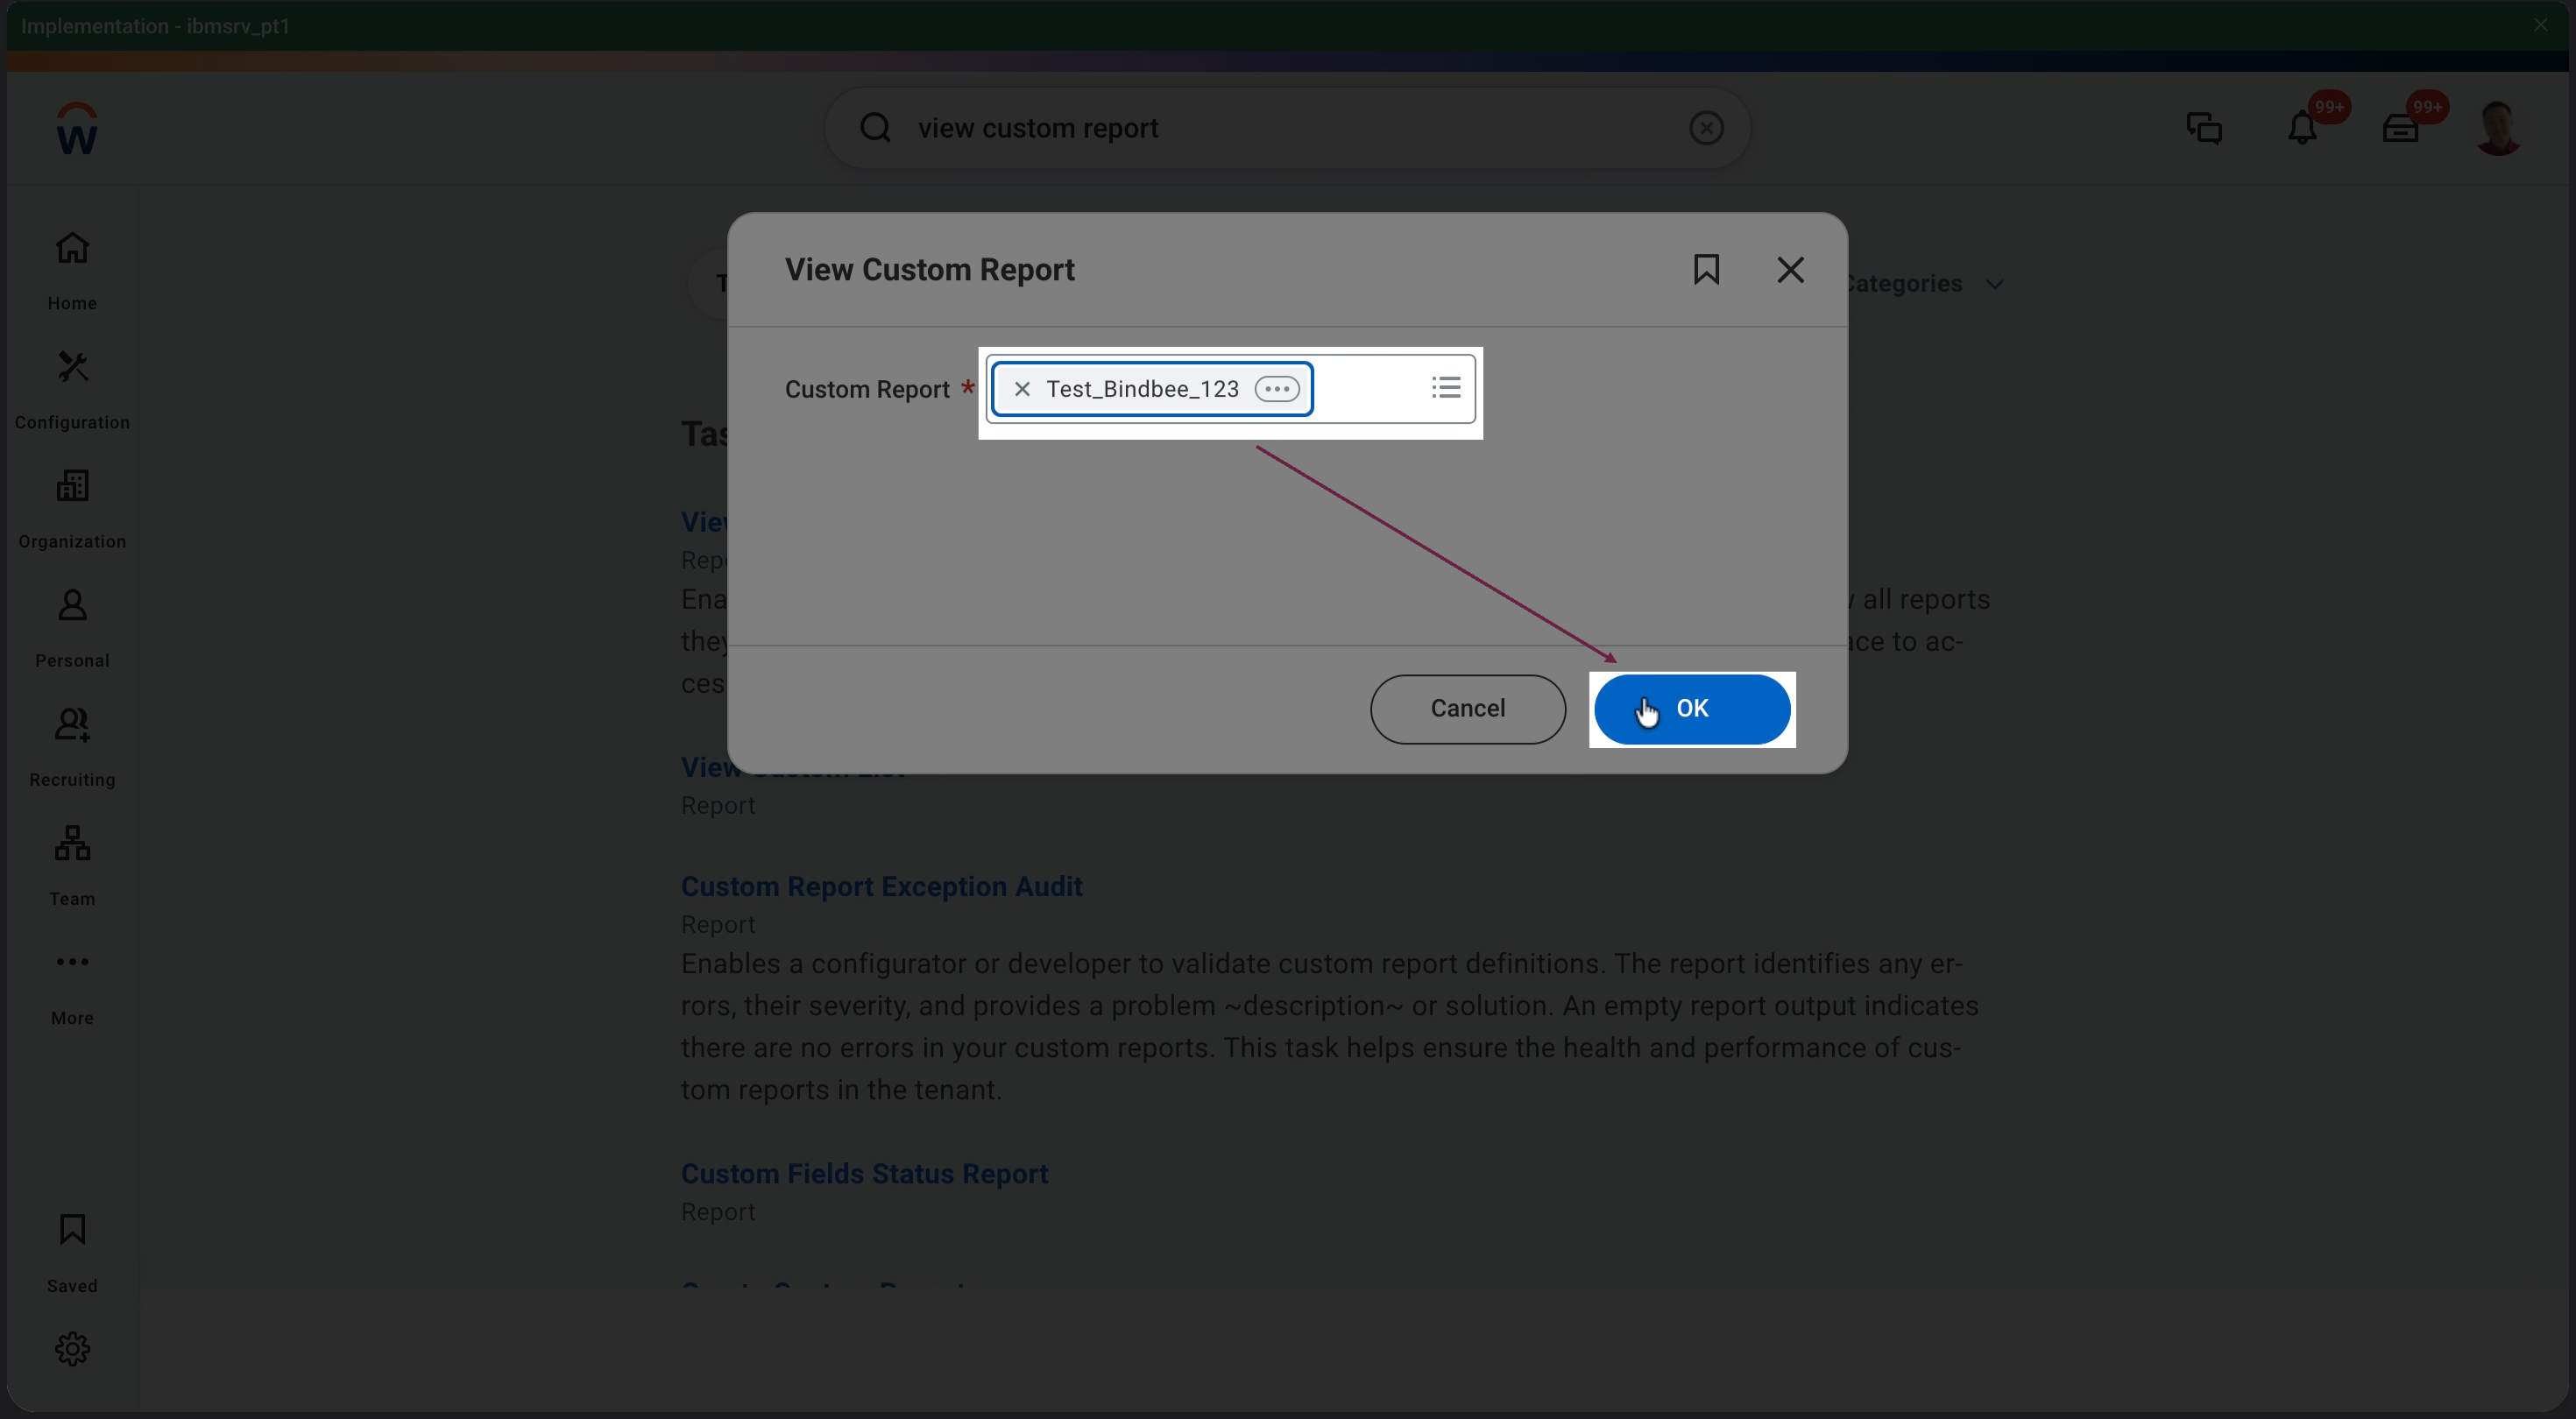
Step 3: Find the three dots next to your report → Web Service → View URLs.
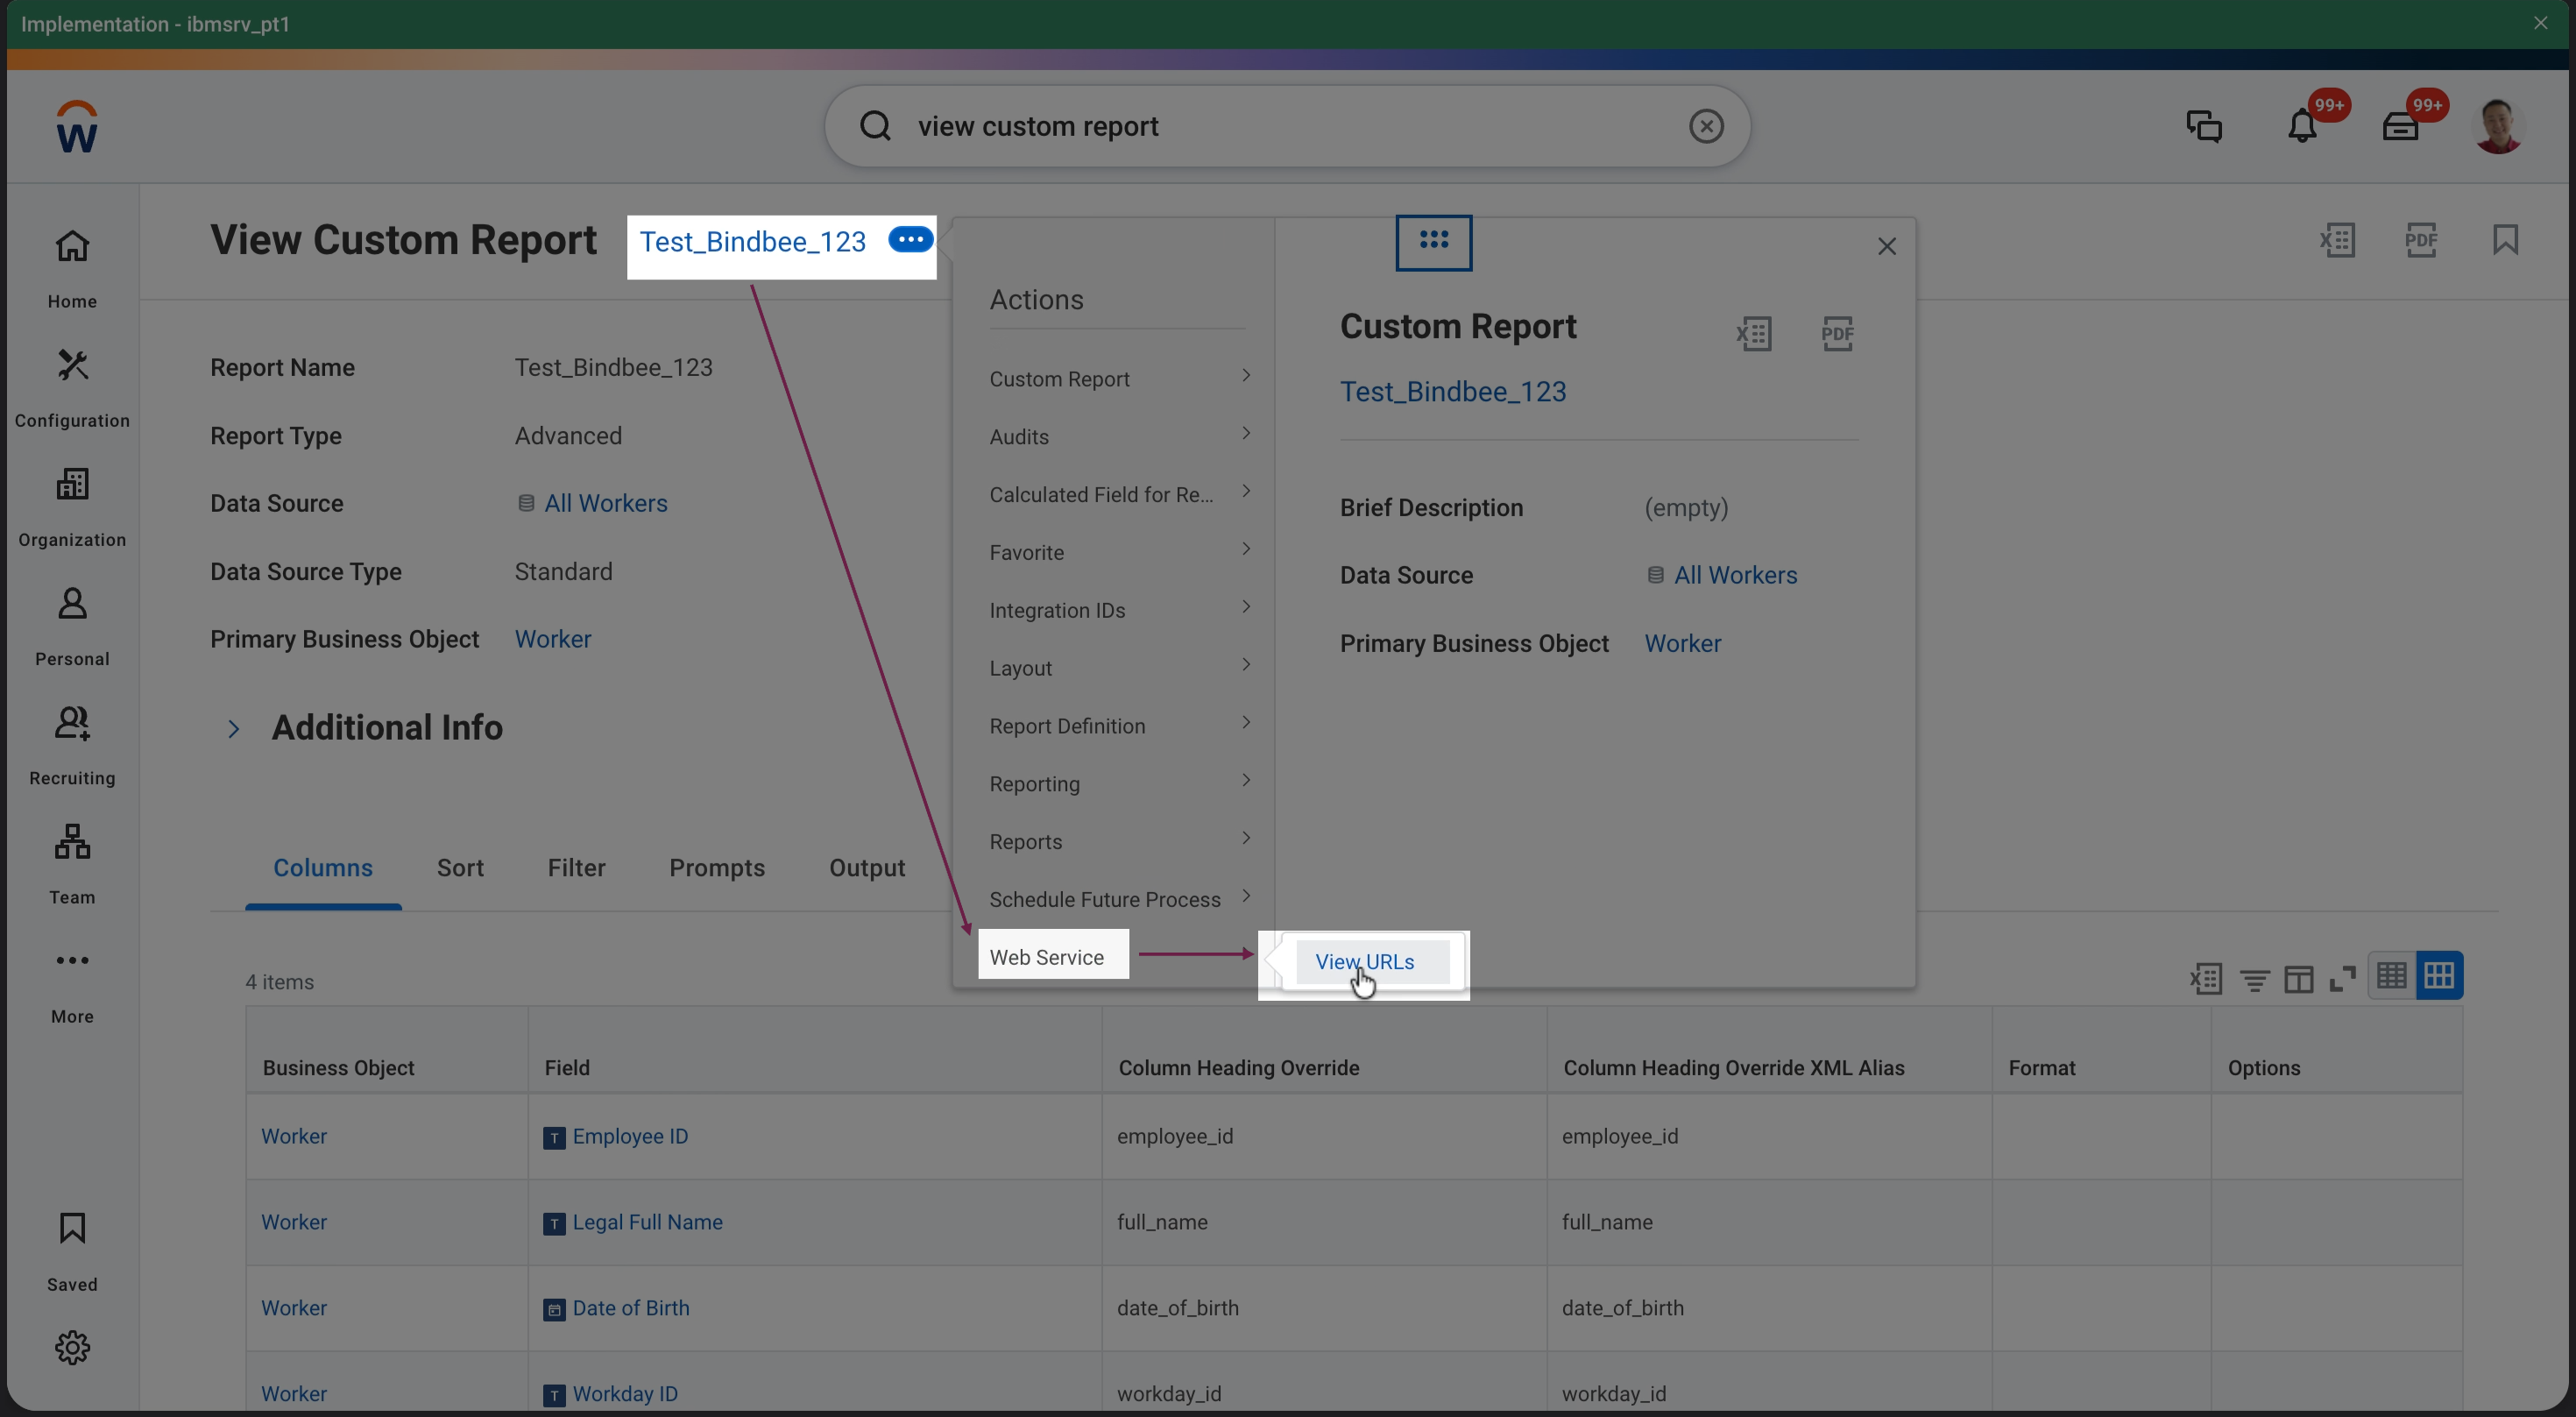
Step 4: Scroll to the JSON option, right-click it and select Copy URL.
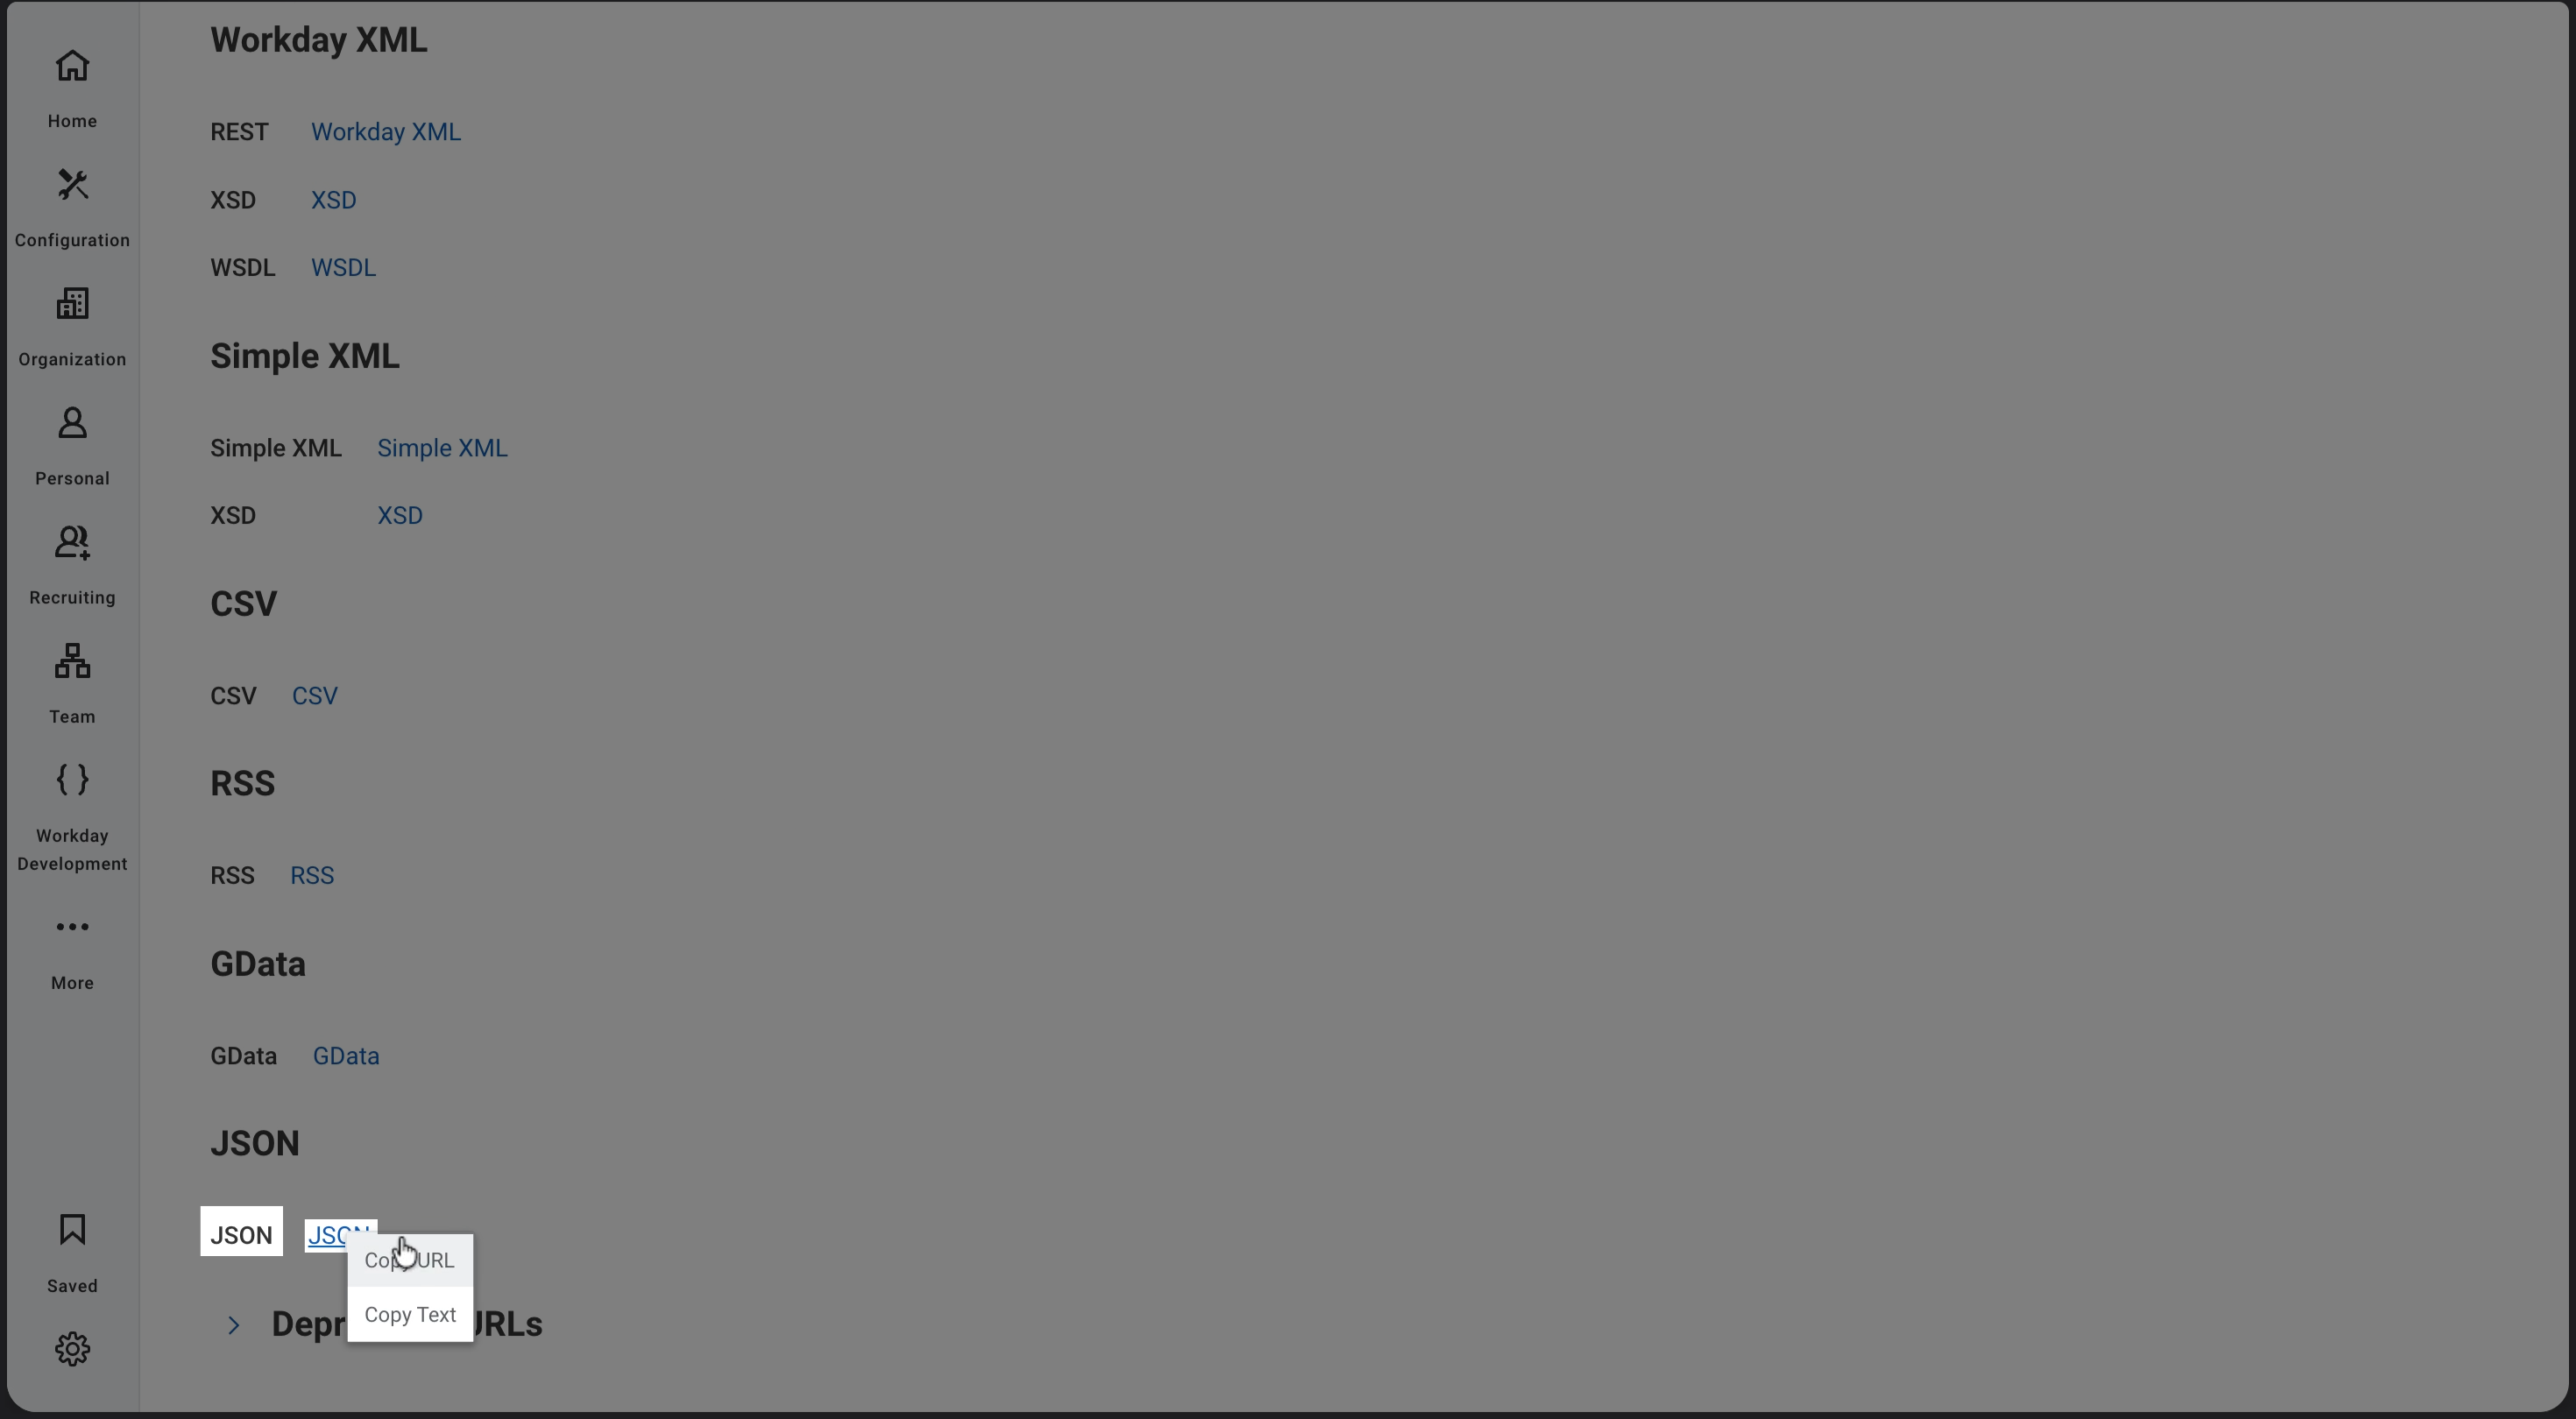
Store this URL safely for use in the magic link flow.
API Client Setup
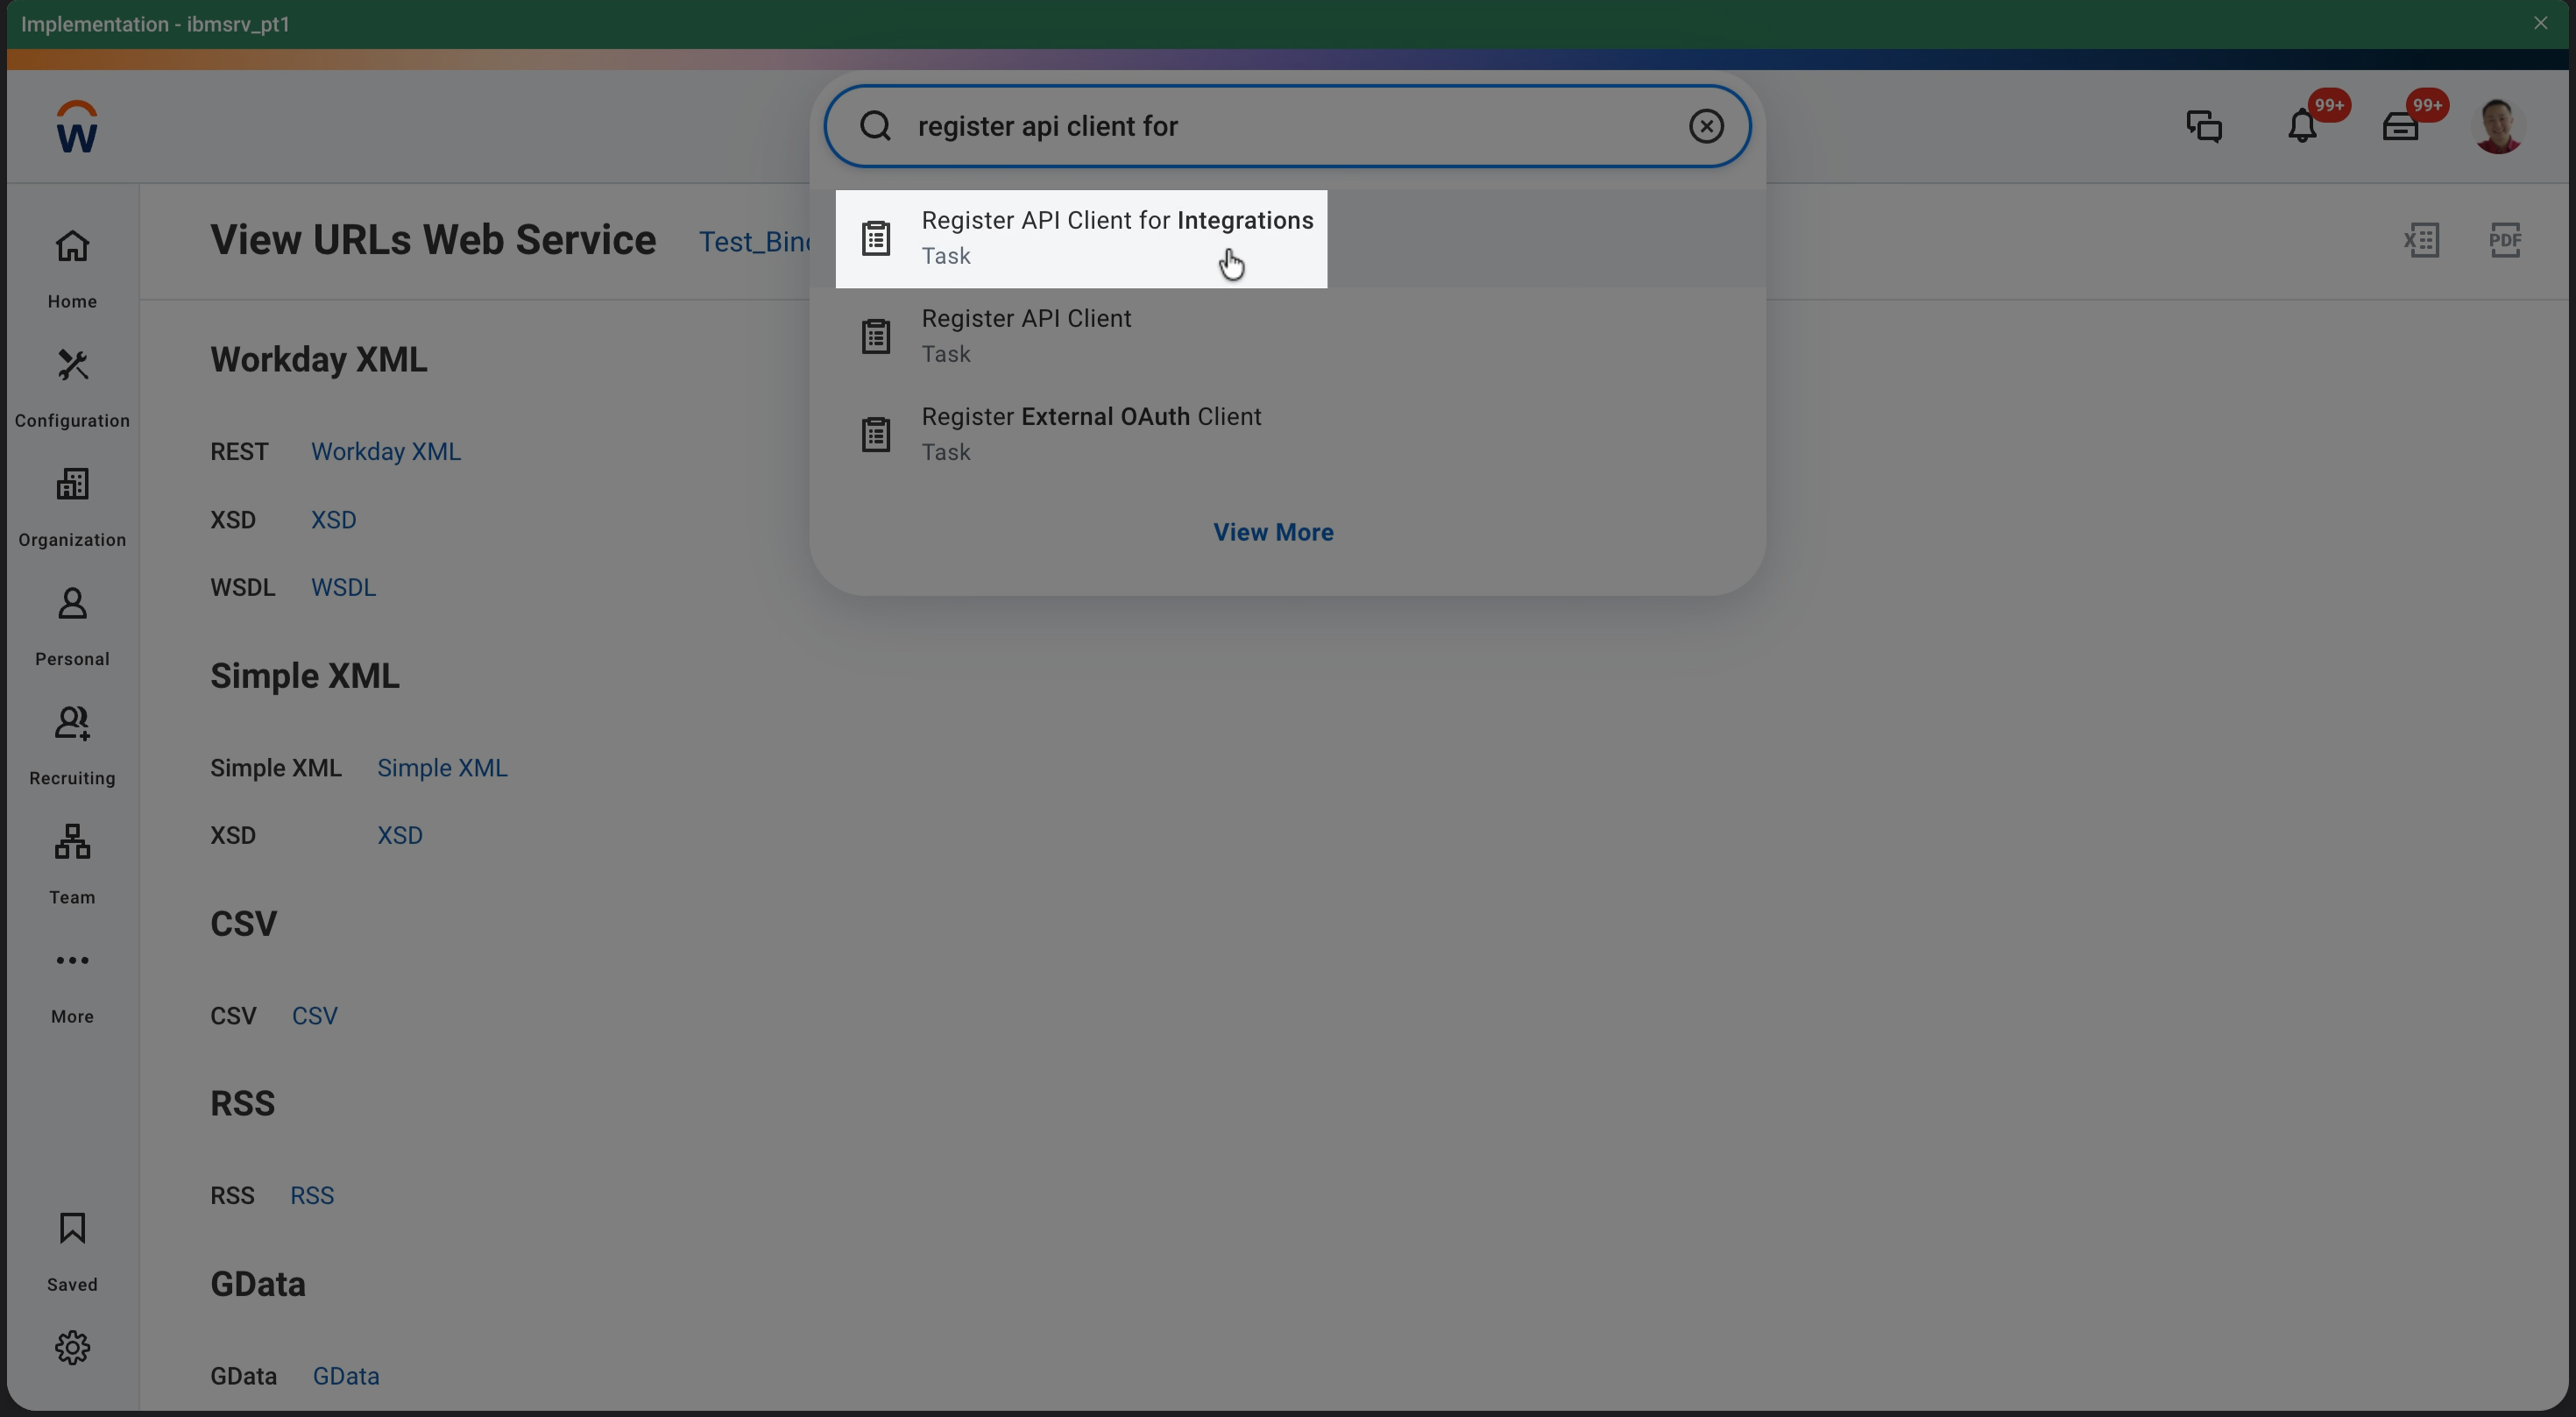
Step 1: If you don’t have an API client set up, register one under Register API Client for Integrations (If you already have one, you can skip this section and directly proceed to the next.)
Step 2: Enter a client name .
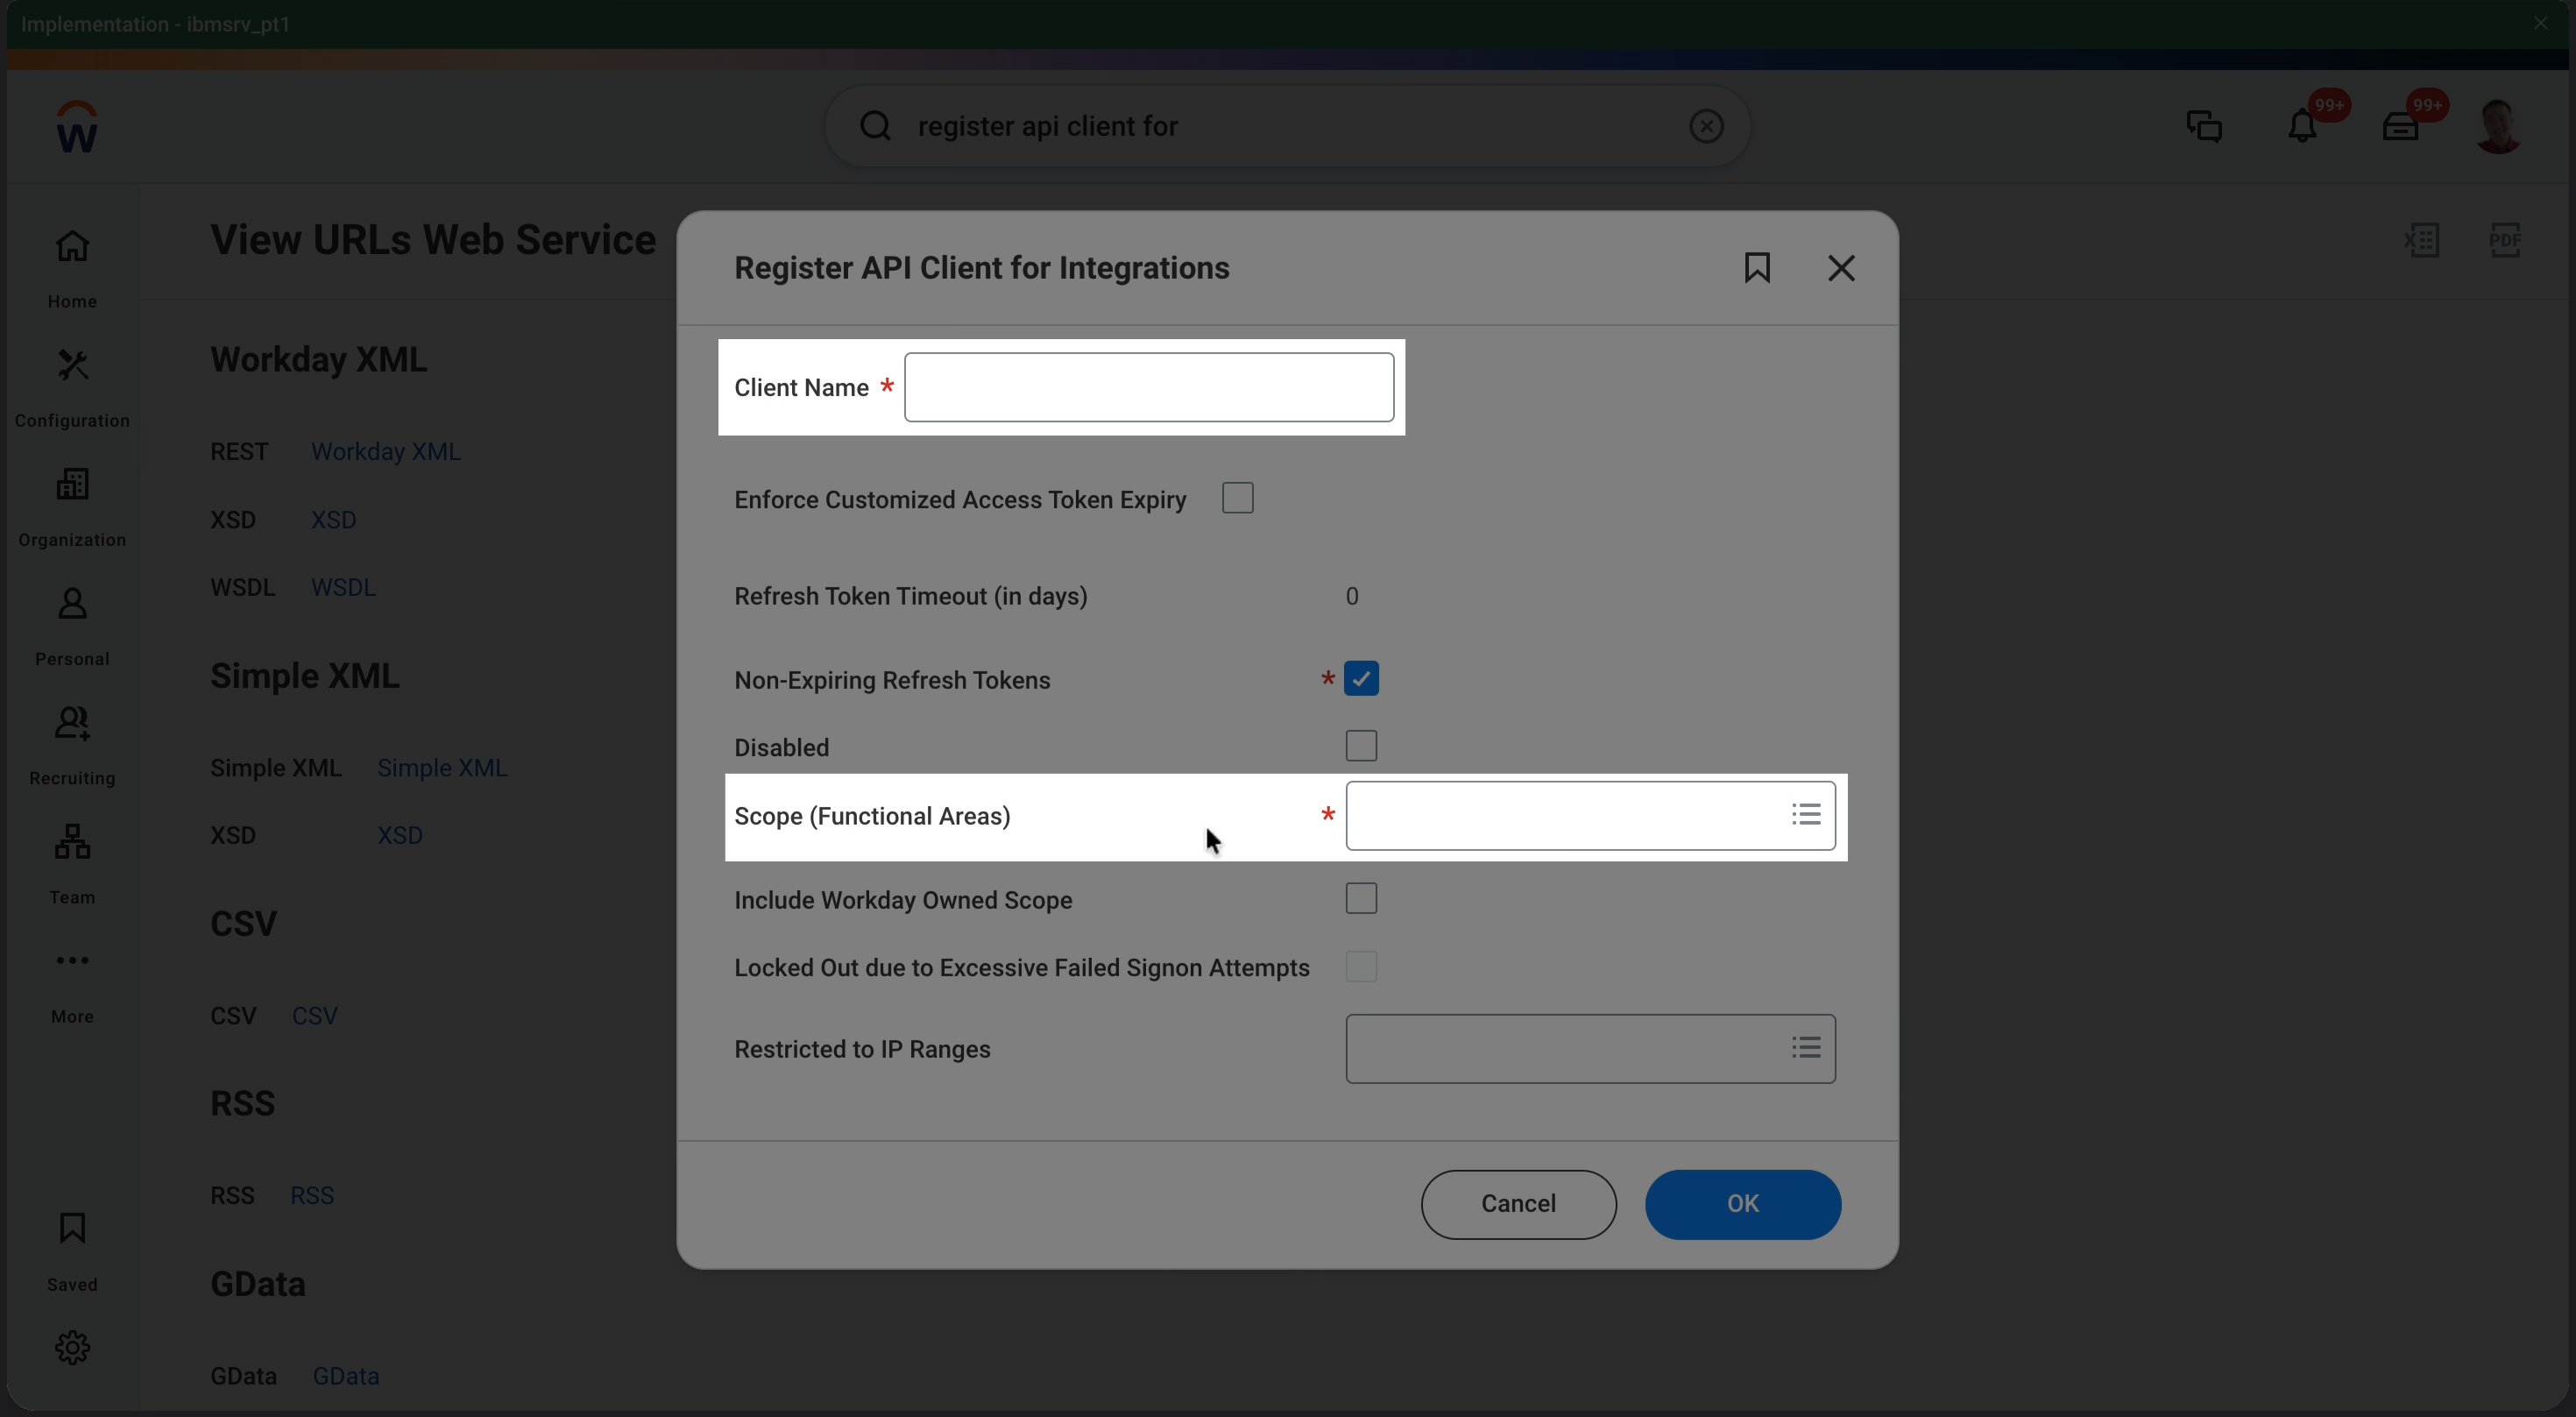
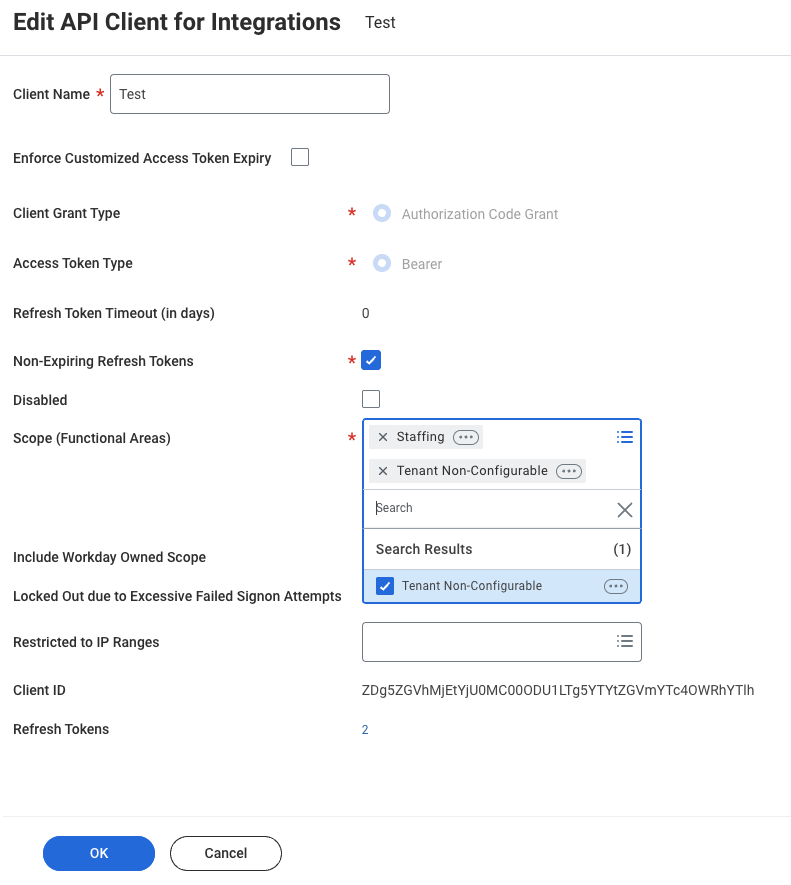
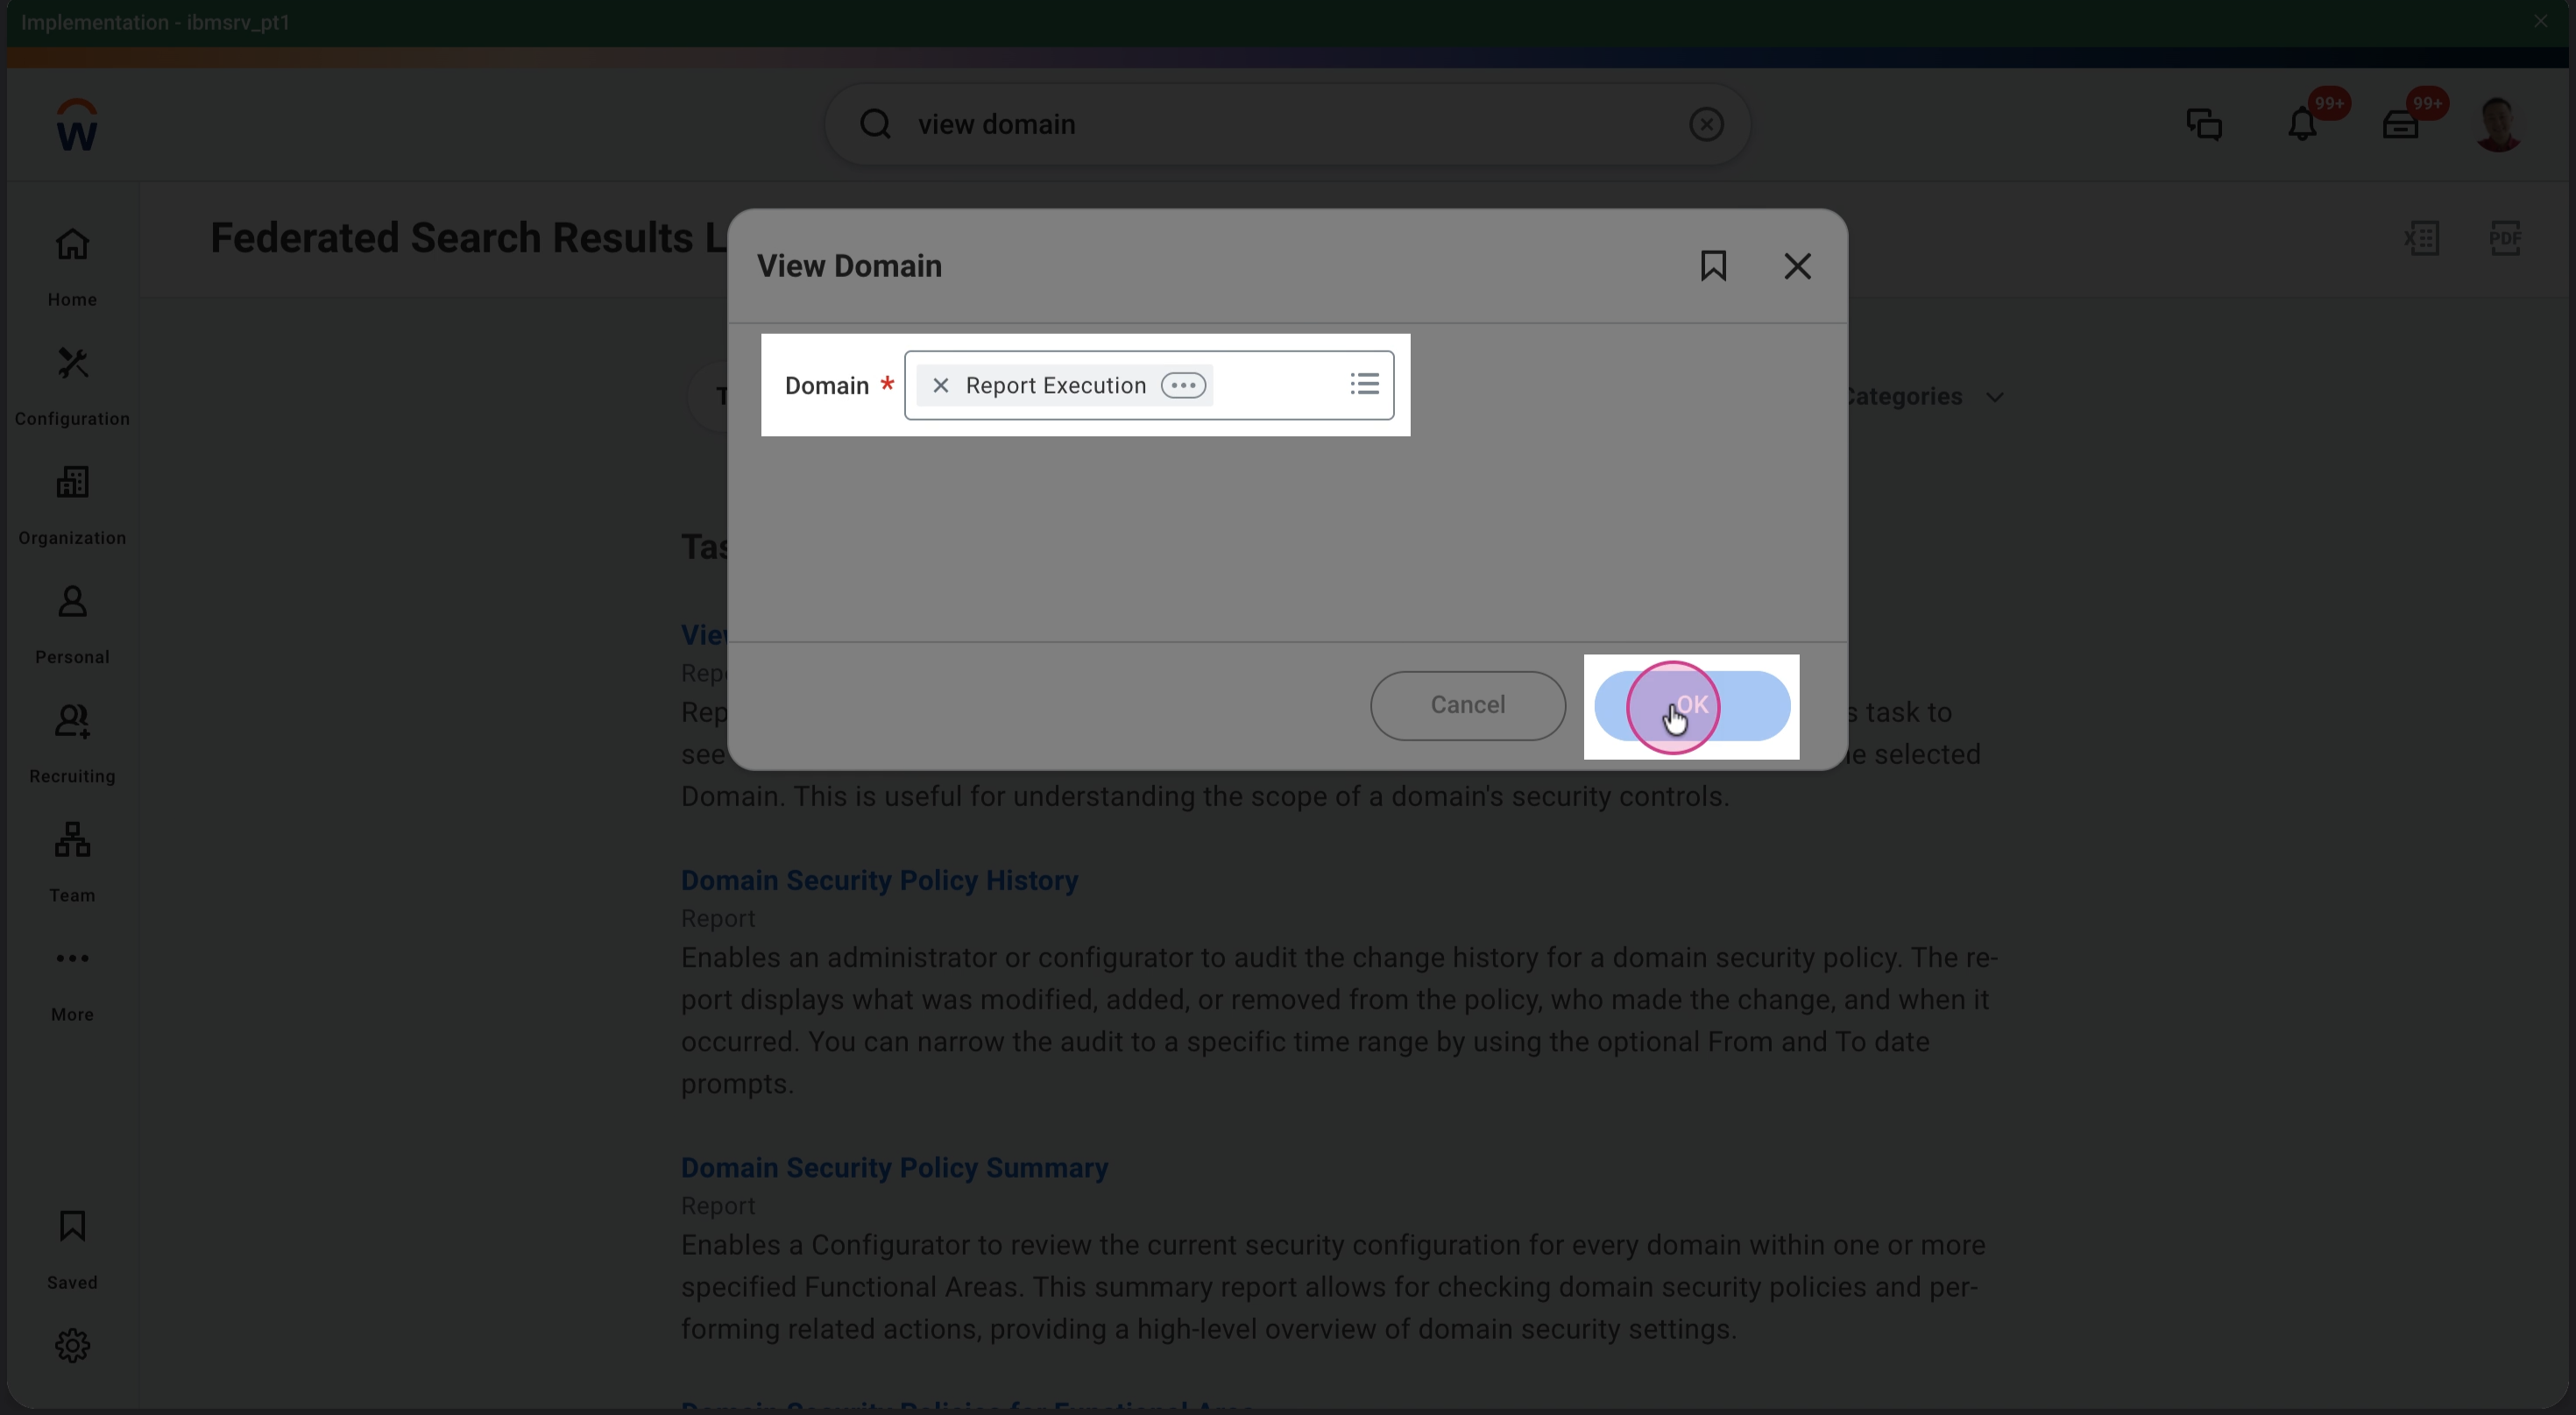
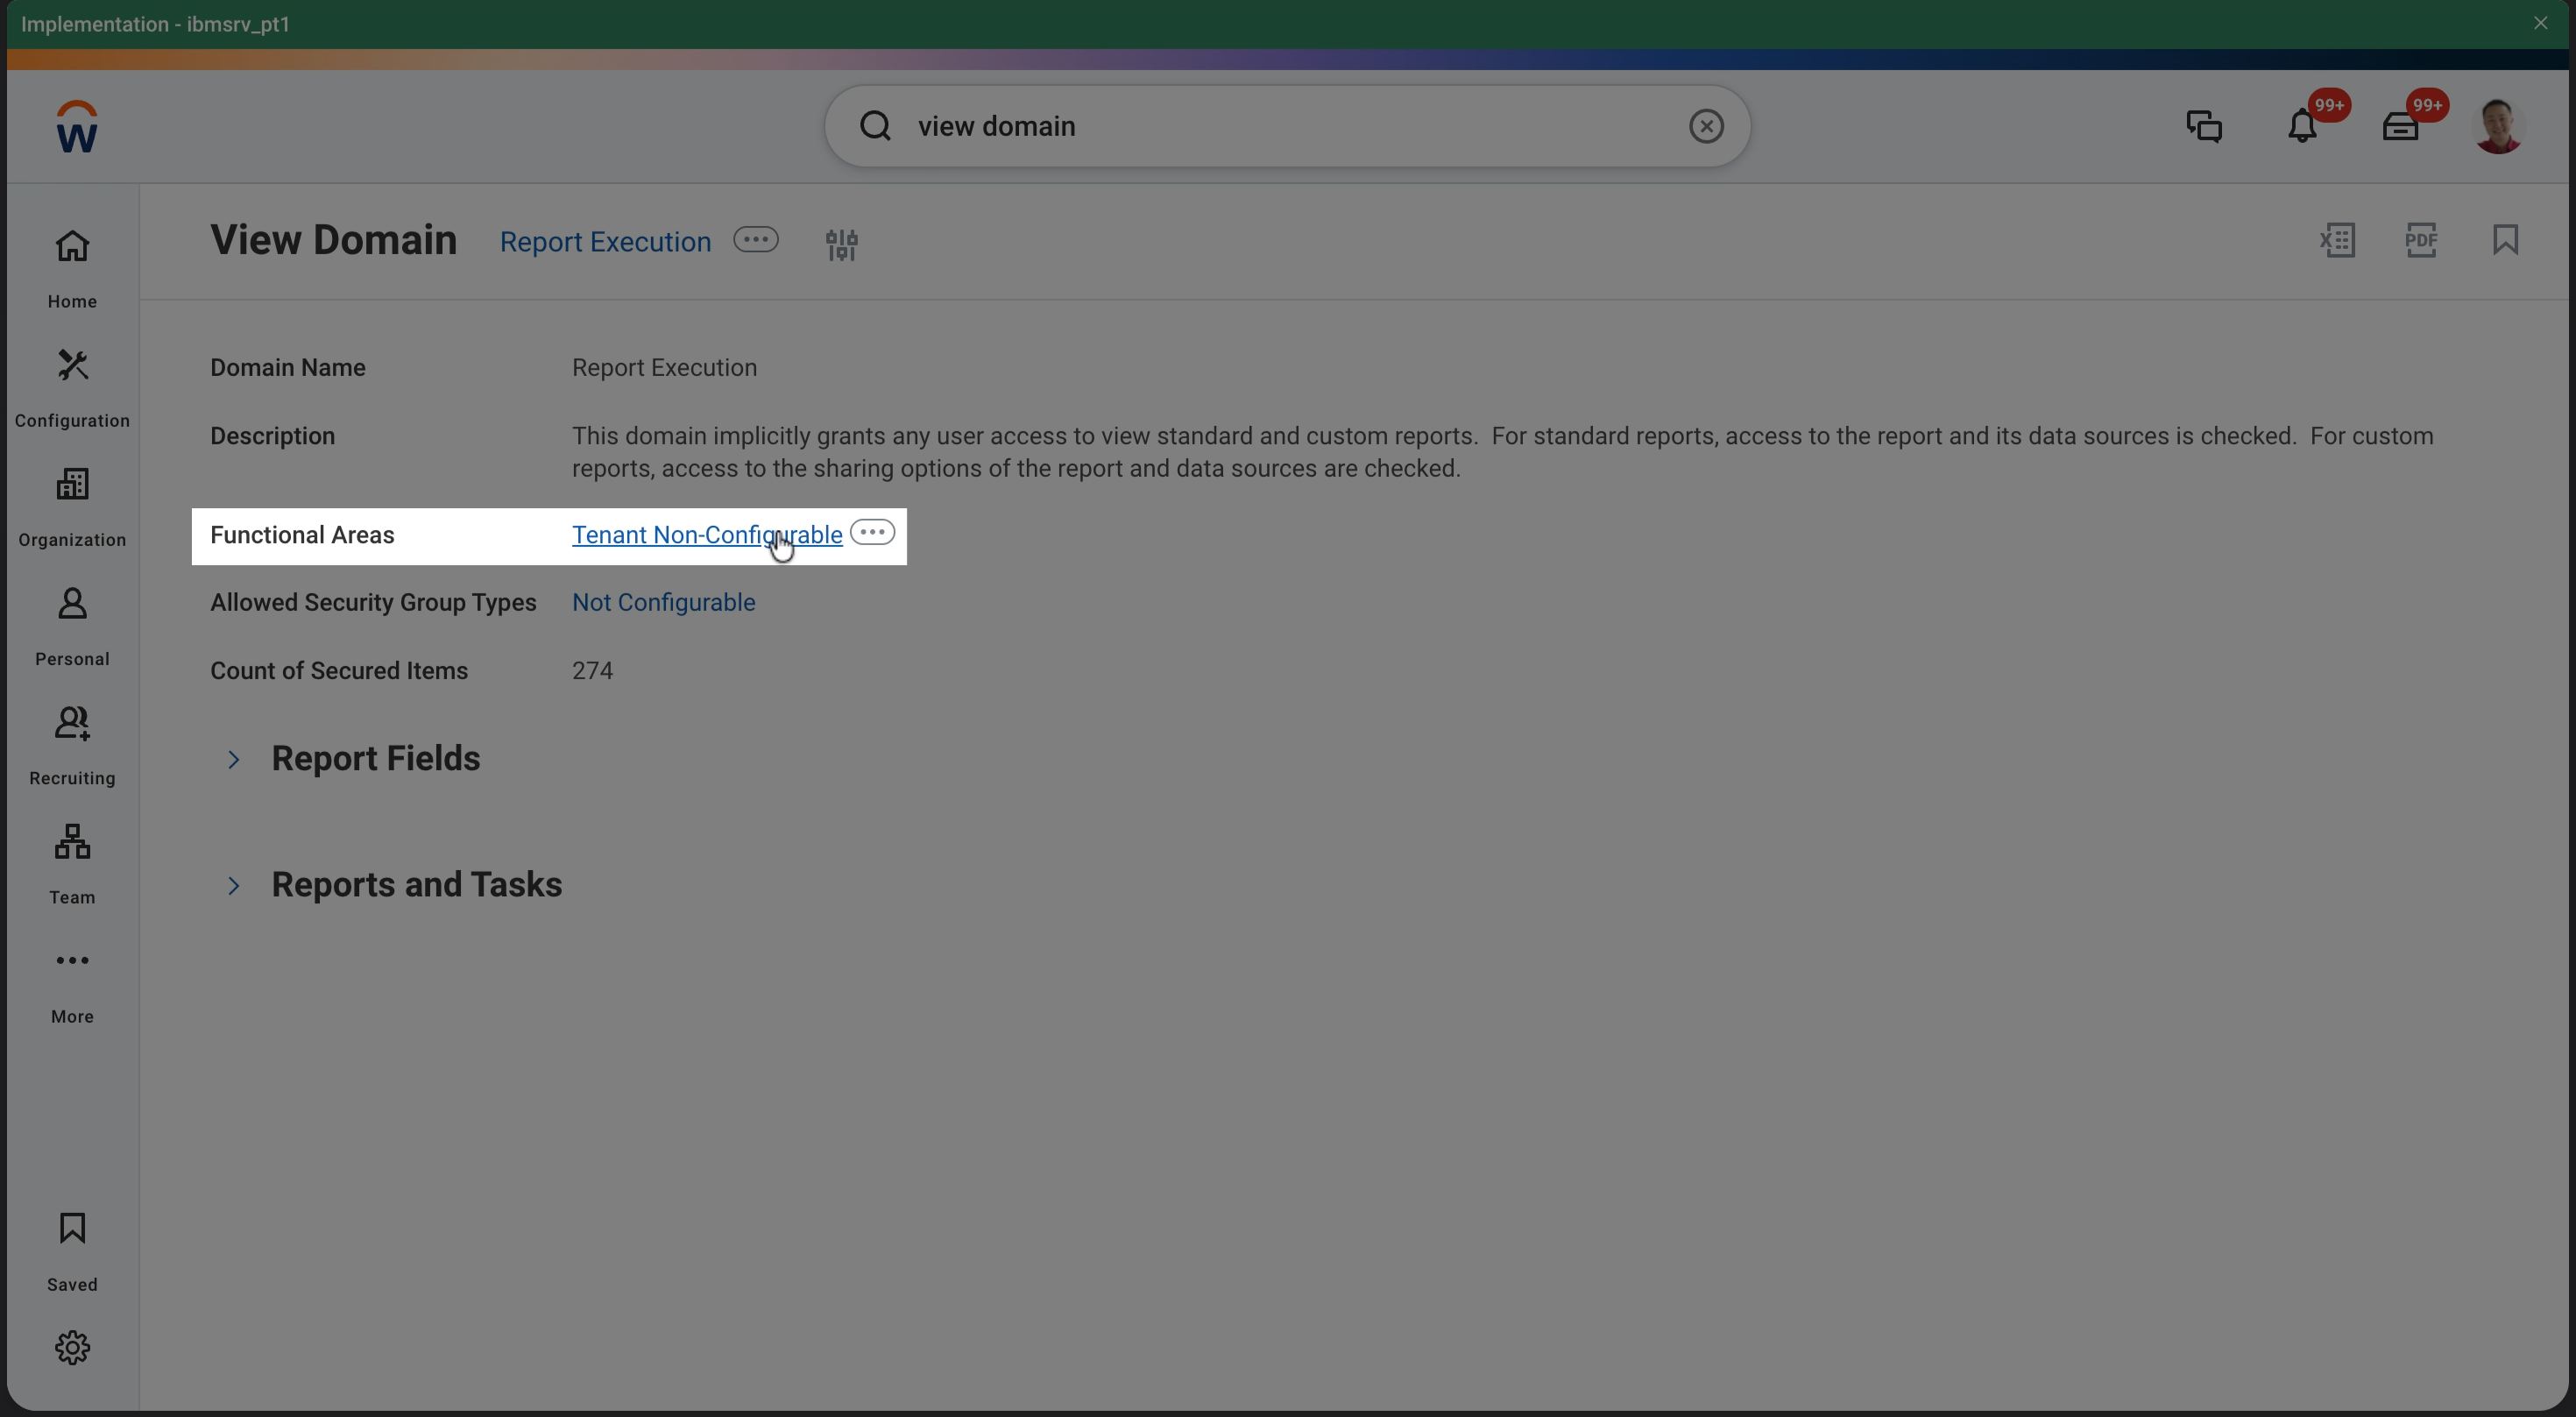
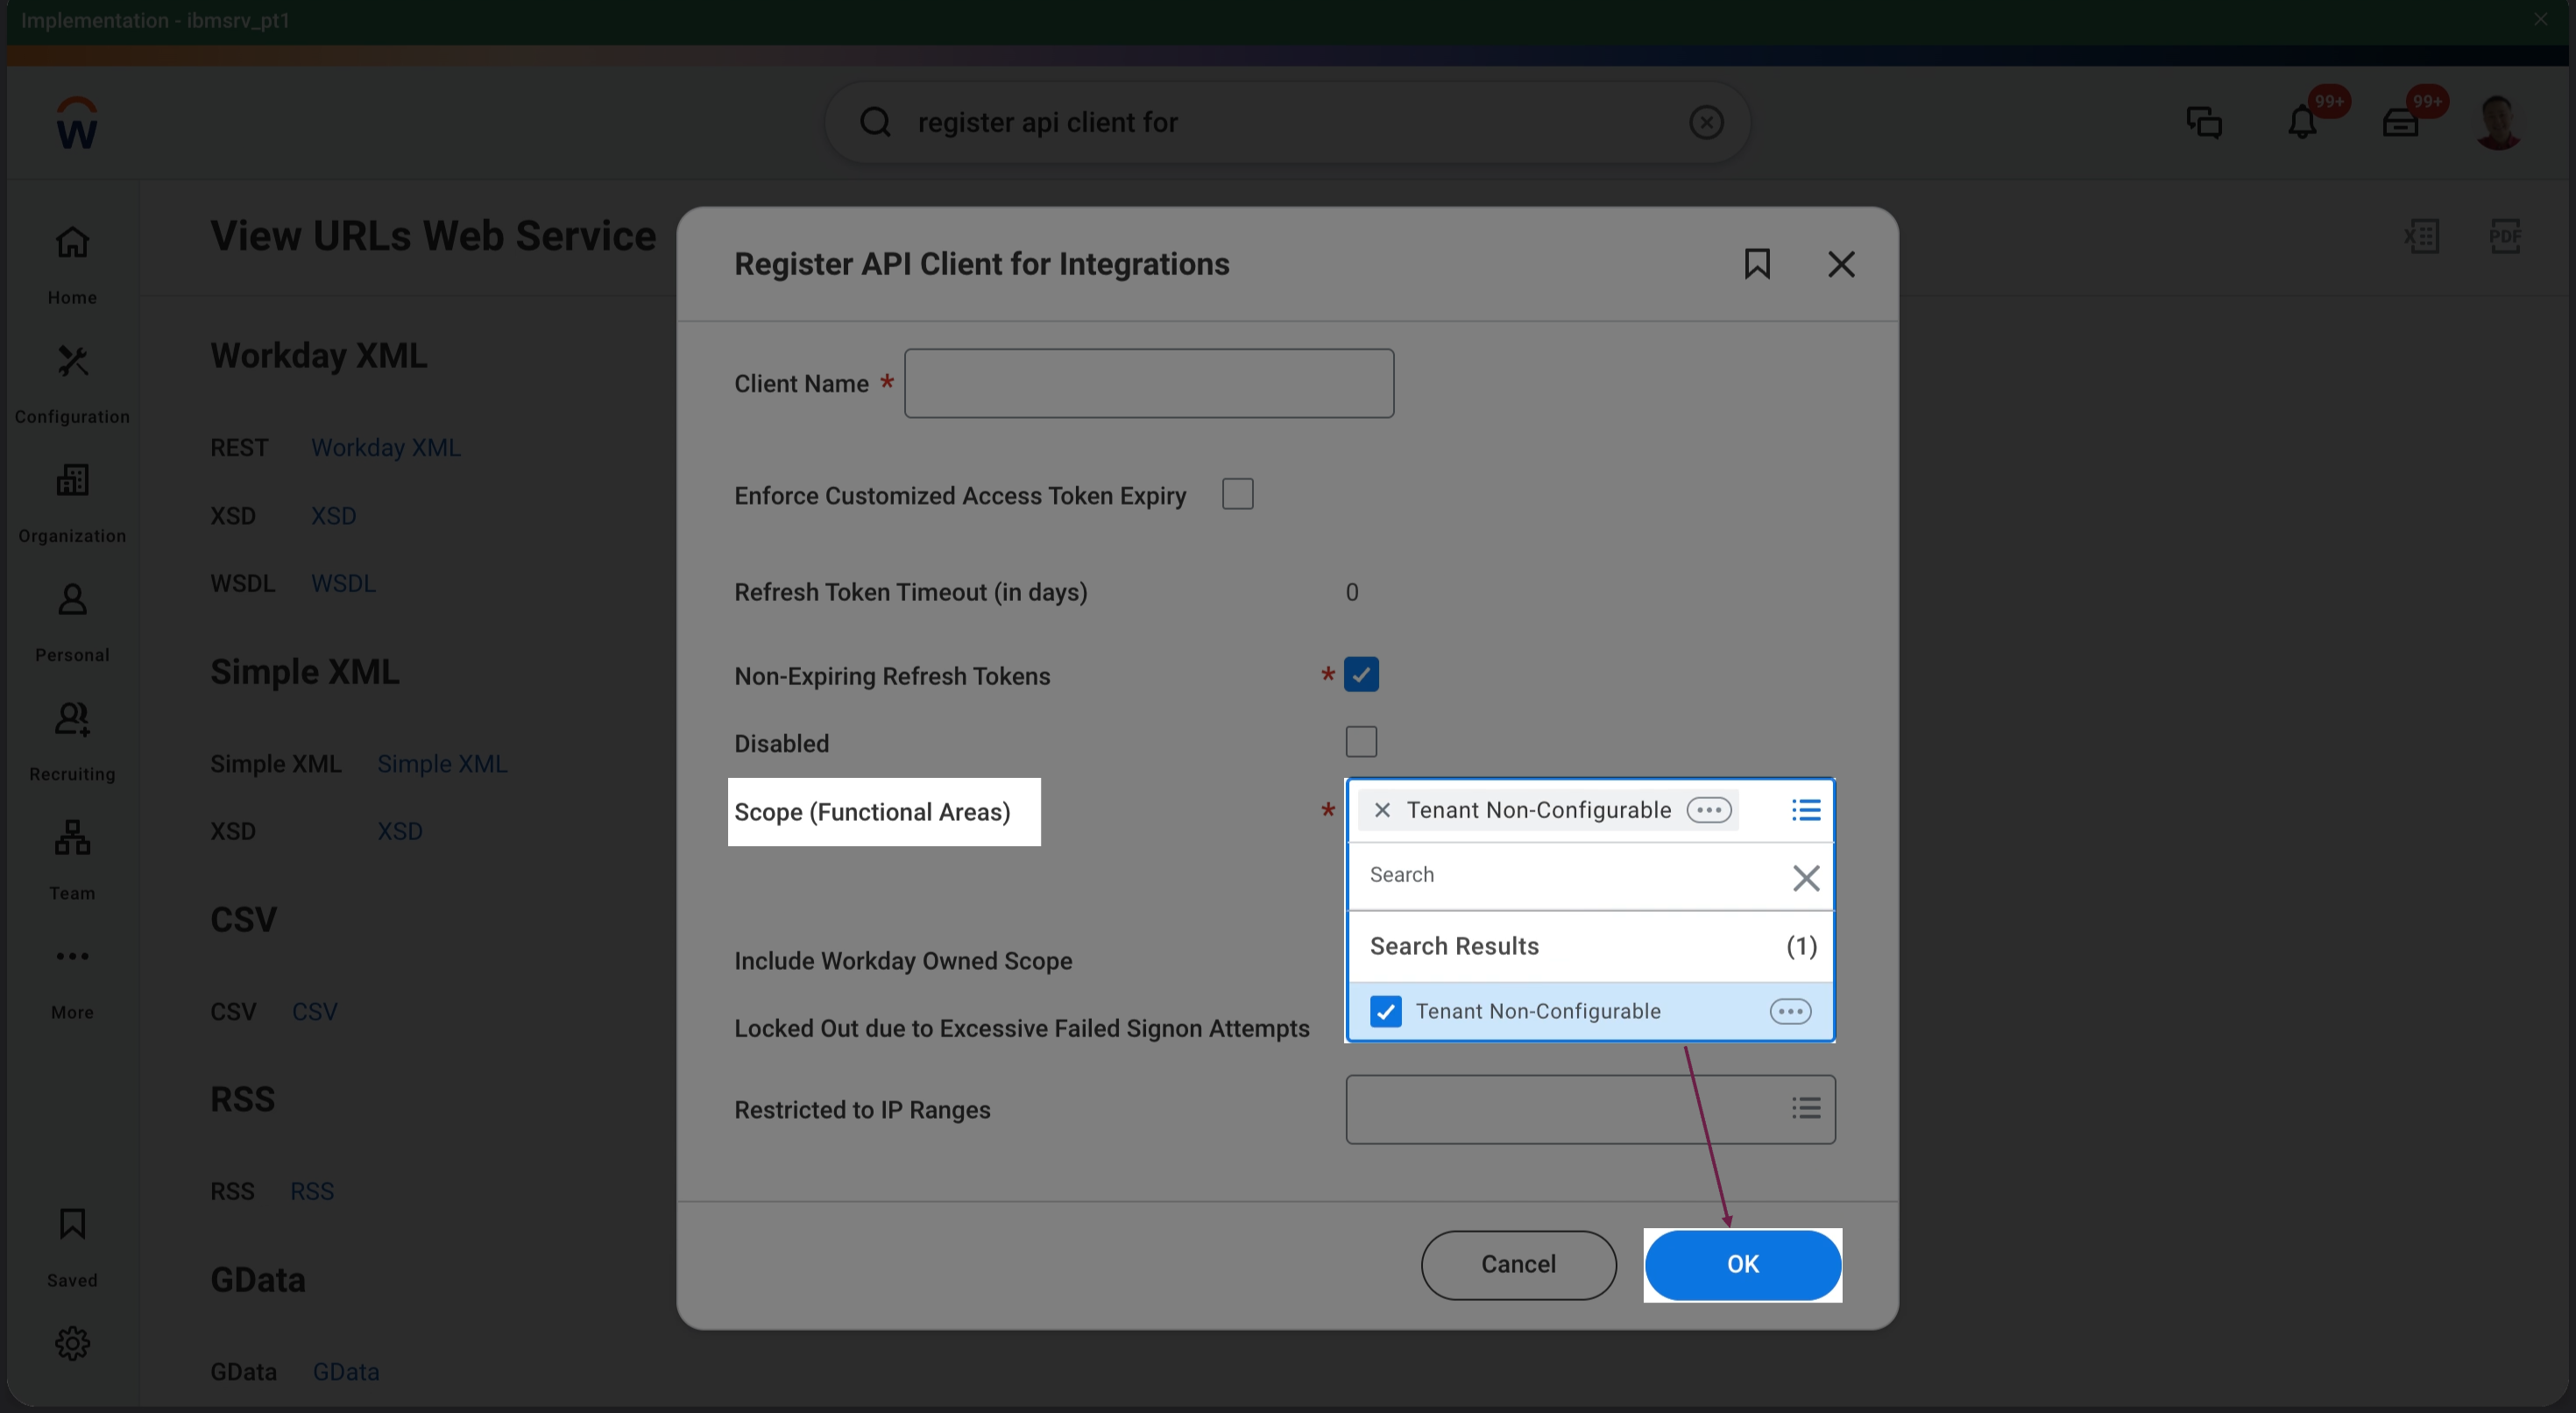
Step 3: Add the required scopes, including functional areas from the Report Execution domain. (As these may vary by tenant, follow the steps below to verify the required functional areas for your specific tenant configuration.)
Step 4: Upon creation of the API client, ensure that you securely copy and store the Client Secret, as the it will only be displayed at the time of creation and will not be accessible thereafter.
To Get the Refresh Token
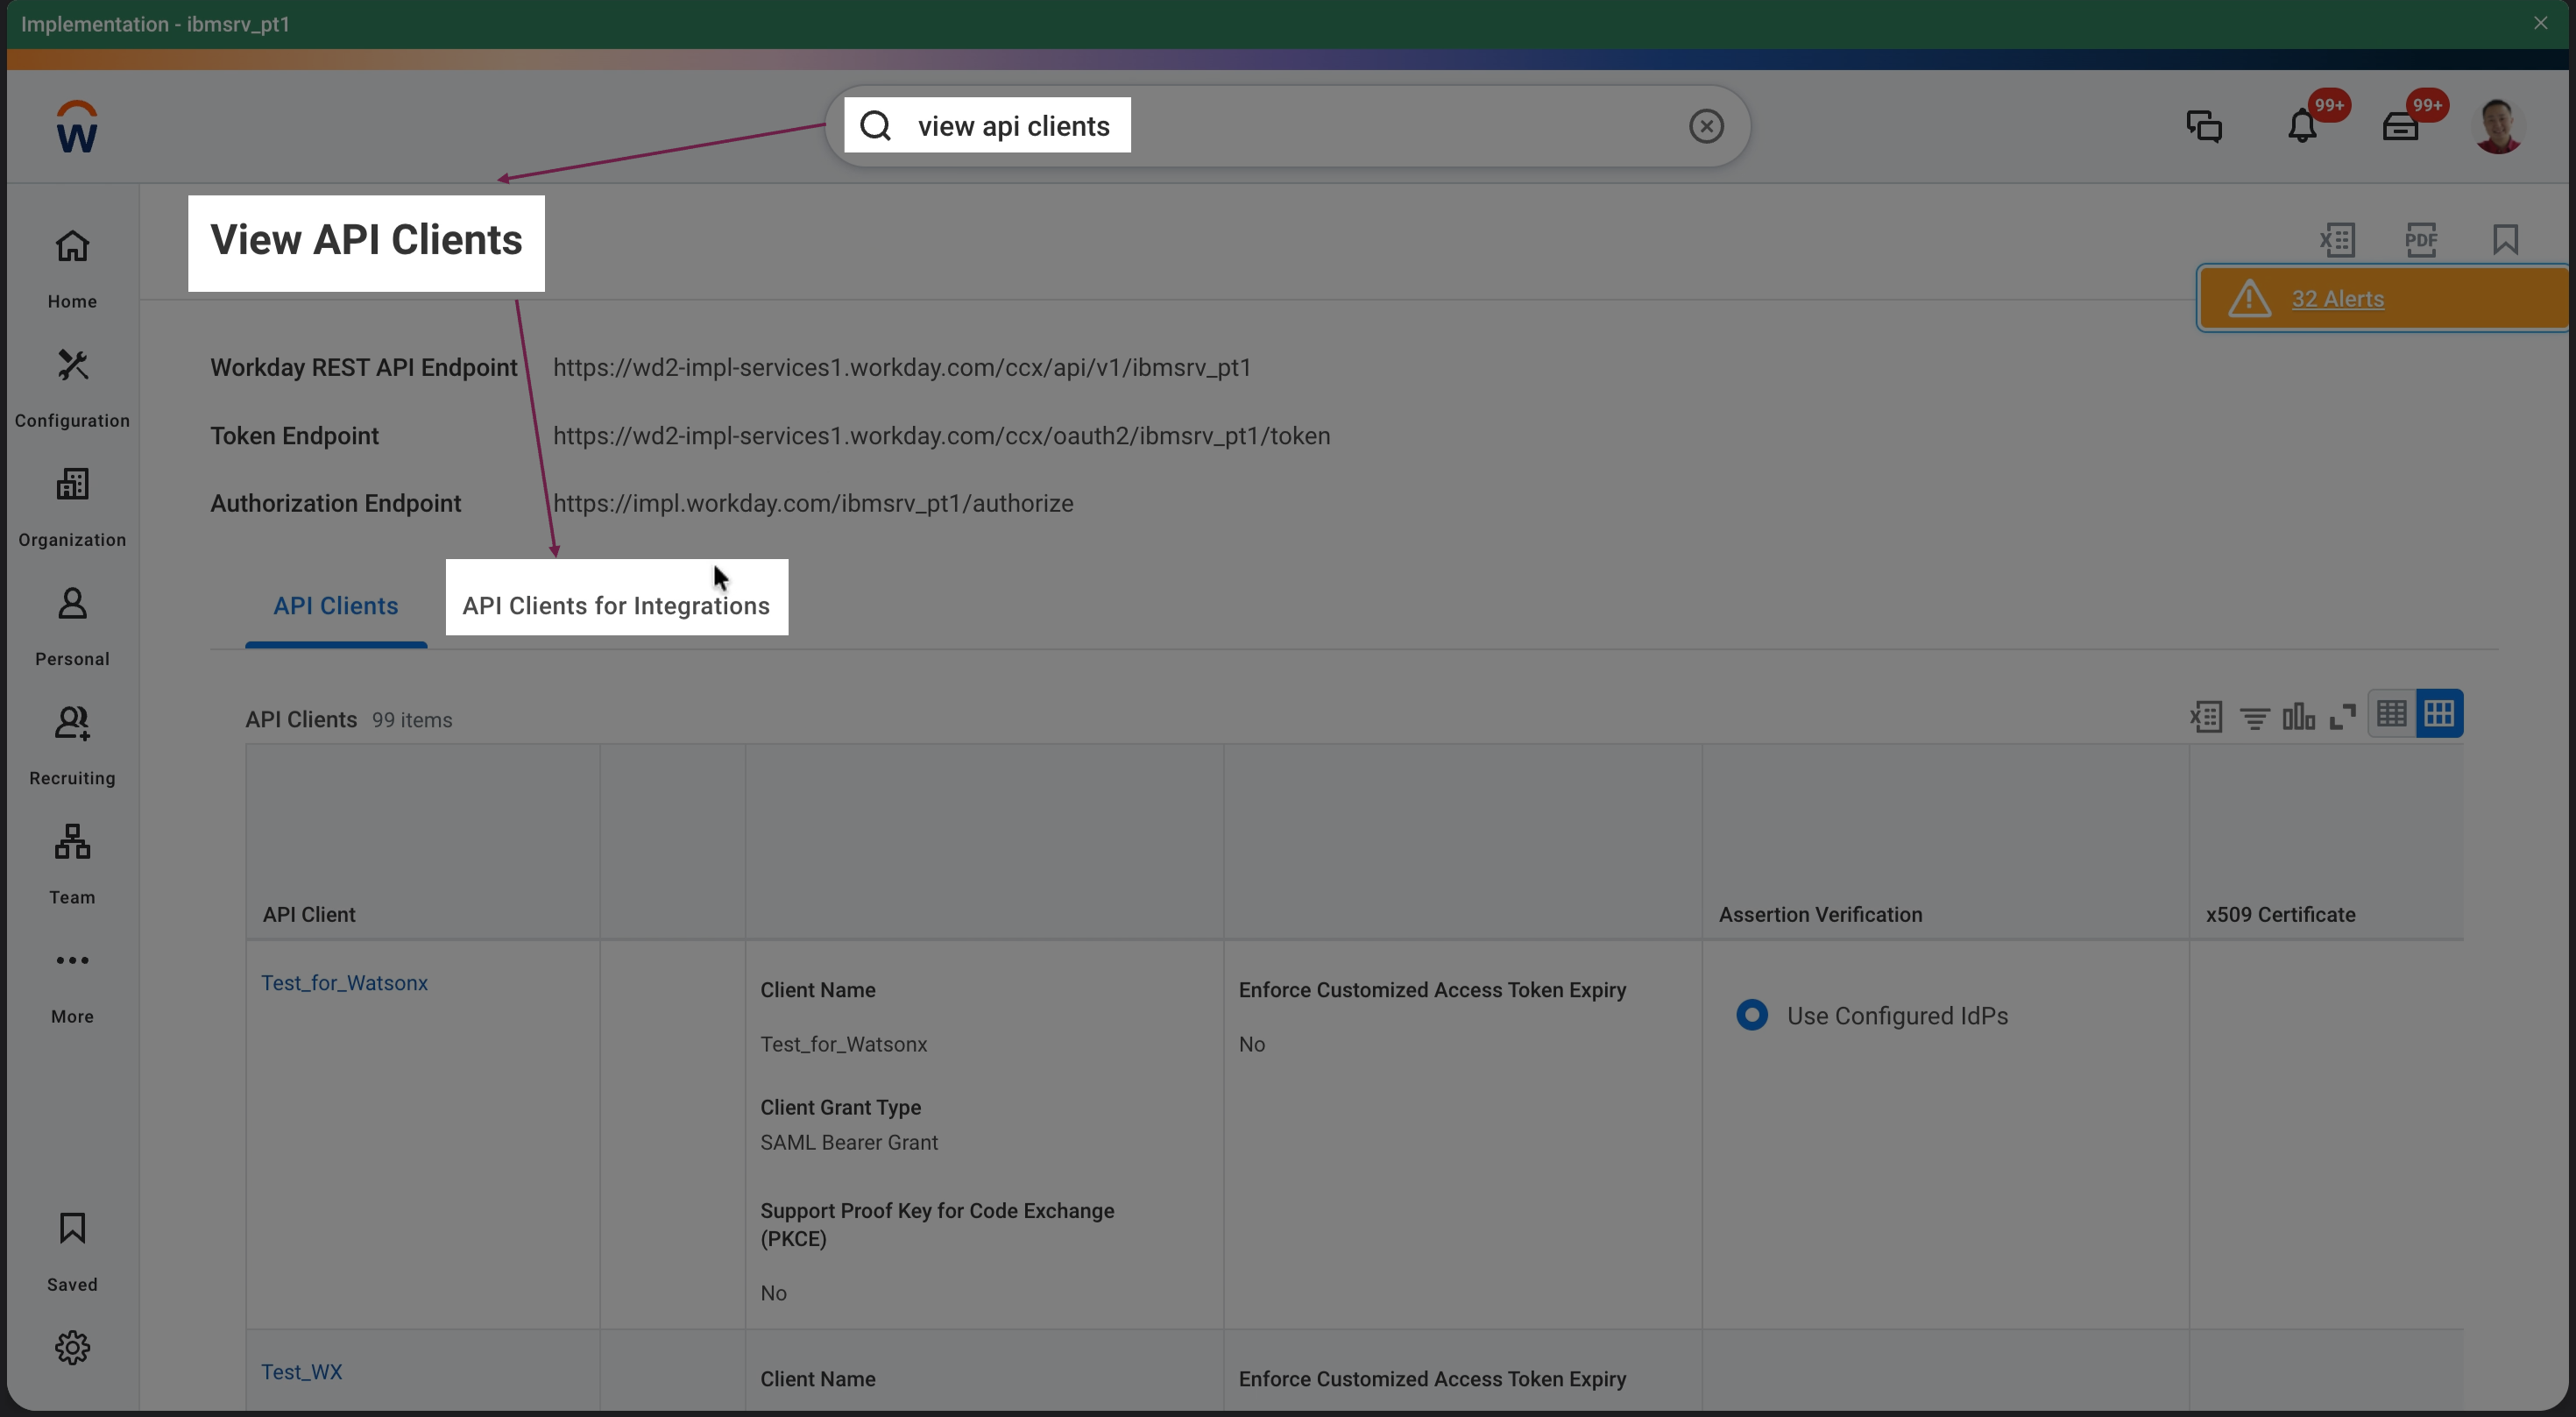
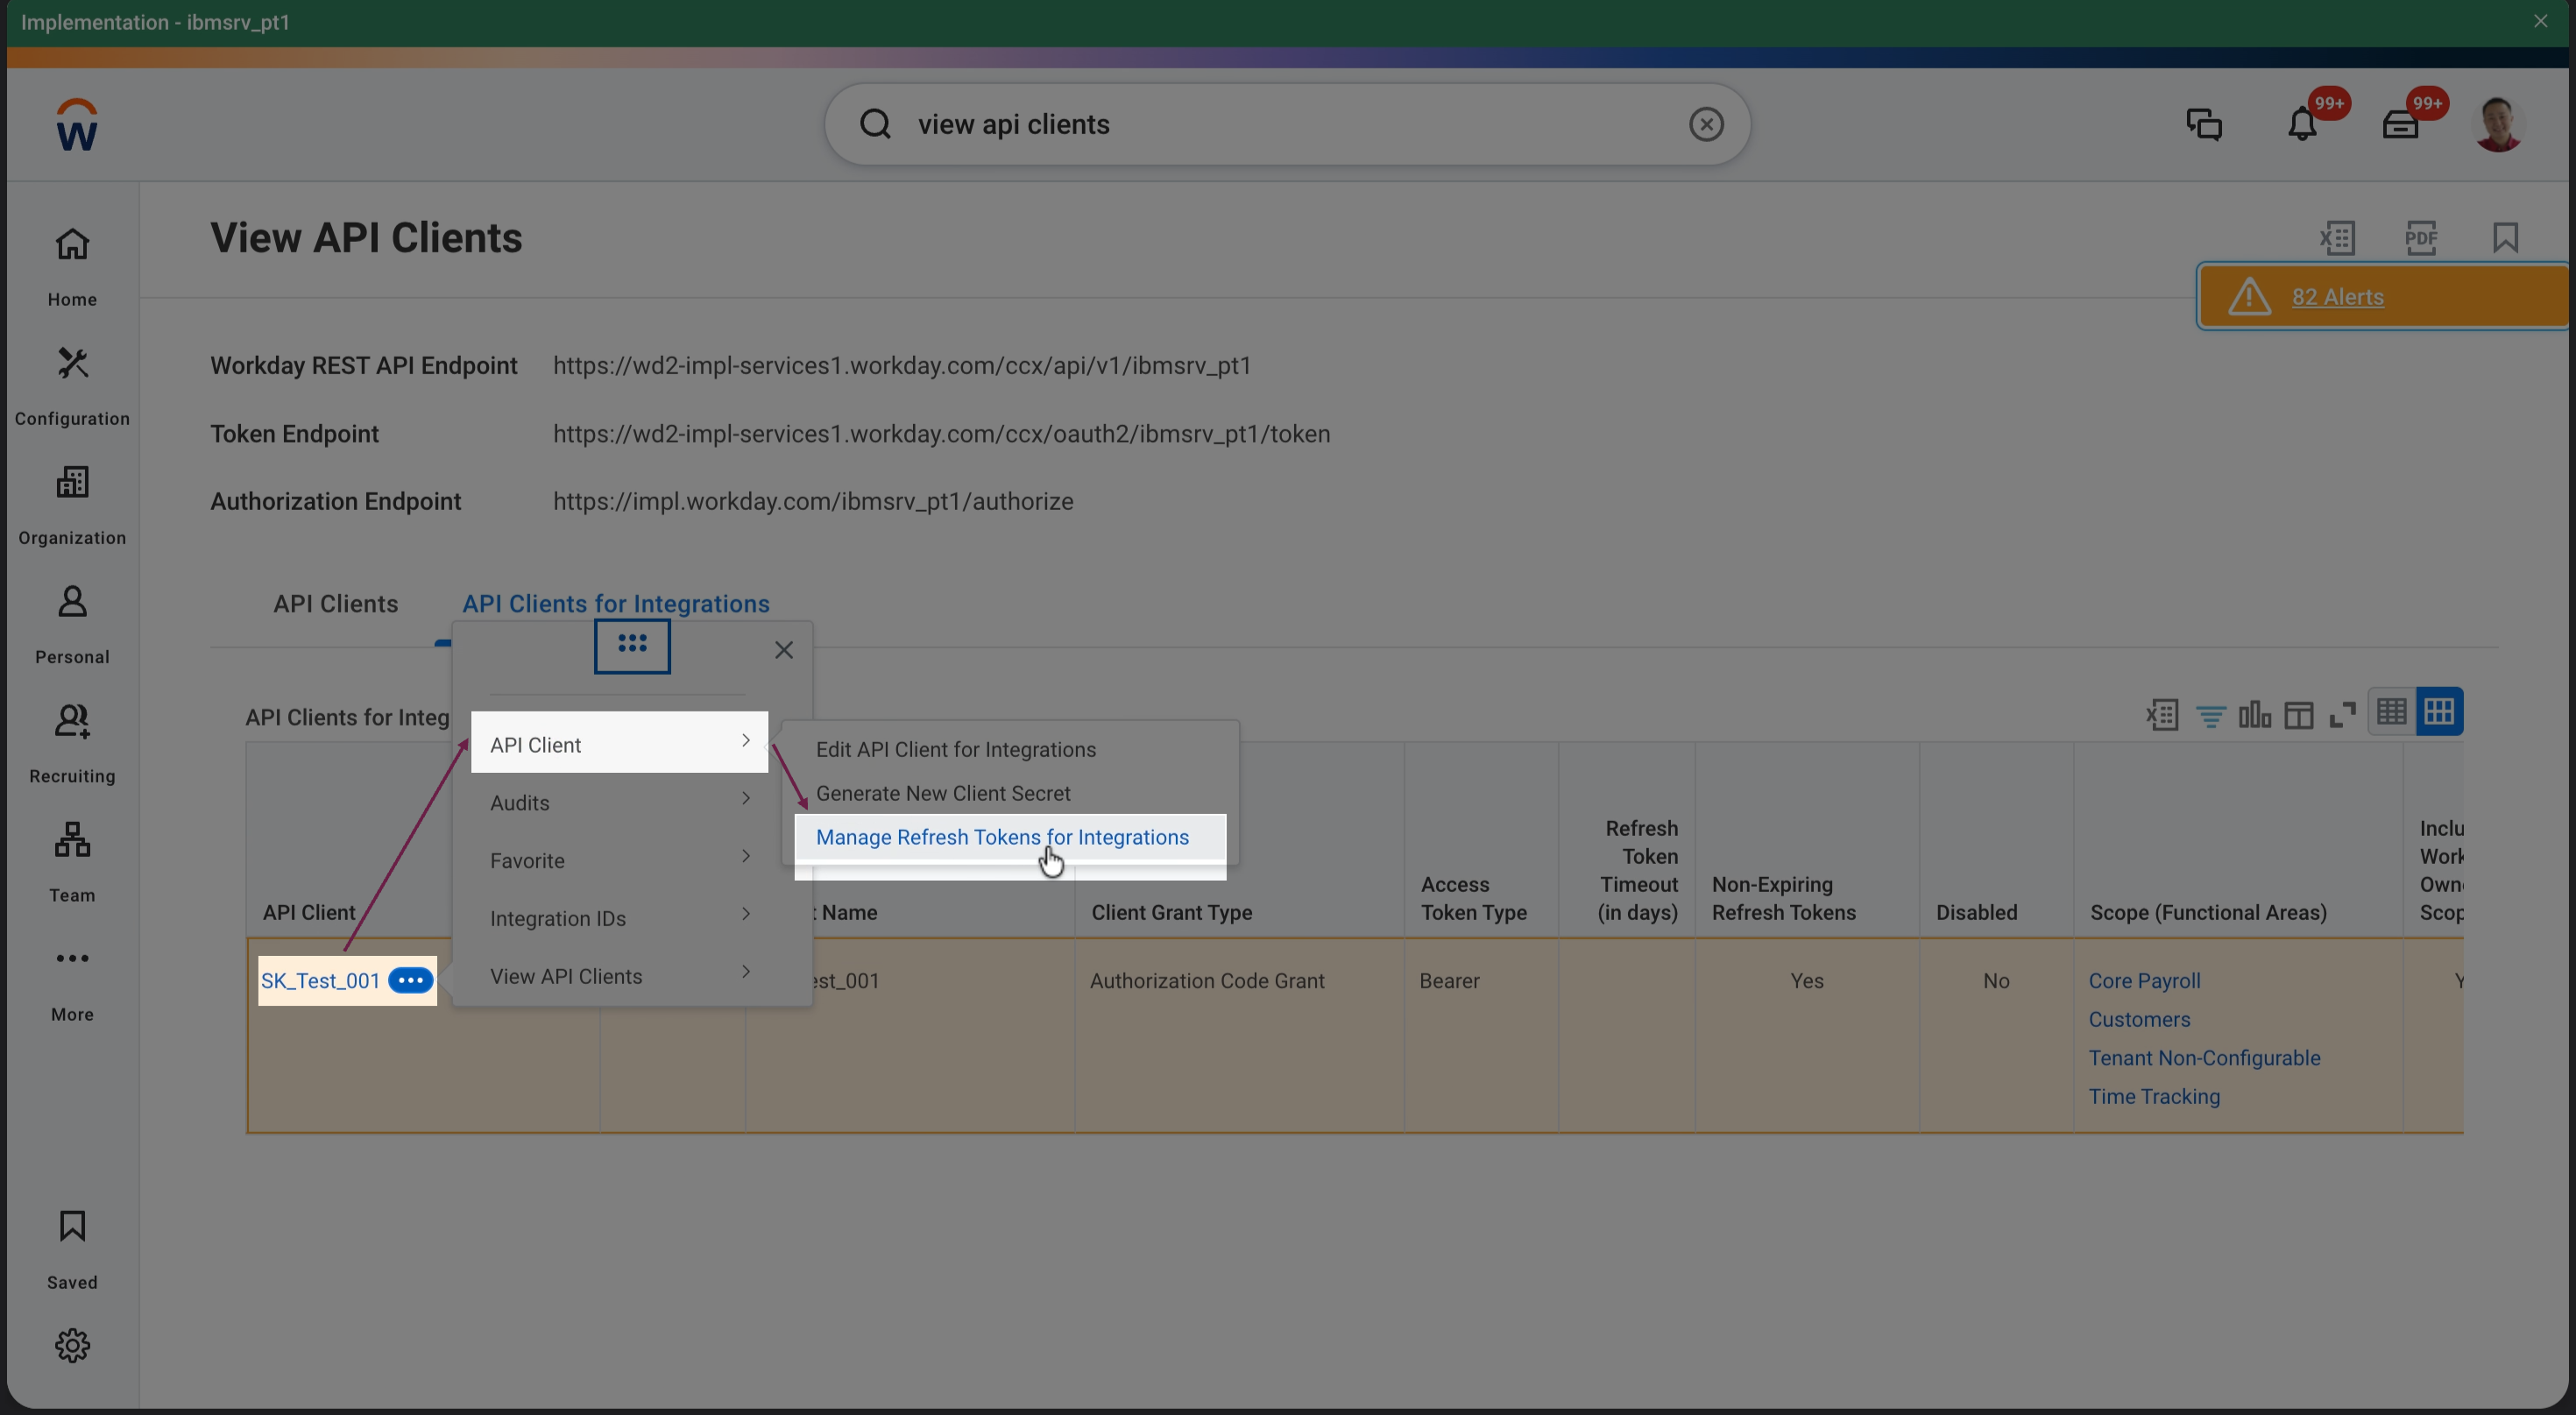
Step 1: After the API client is created (or if one already exists), go to View API Clients and then the API Clients for Integrations tab. Search your API client here.
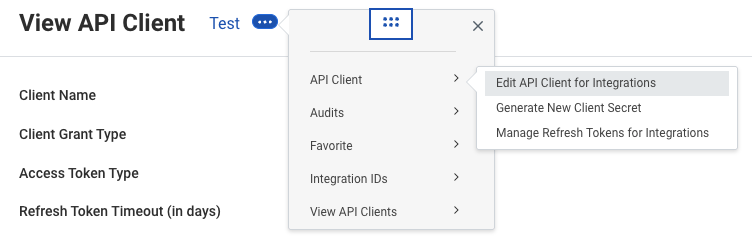
Step 2: Click the three dots next to the name of your API Client → API Client → Manage Refresh Tokens for Integrations.
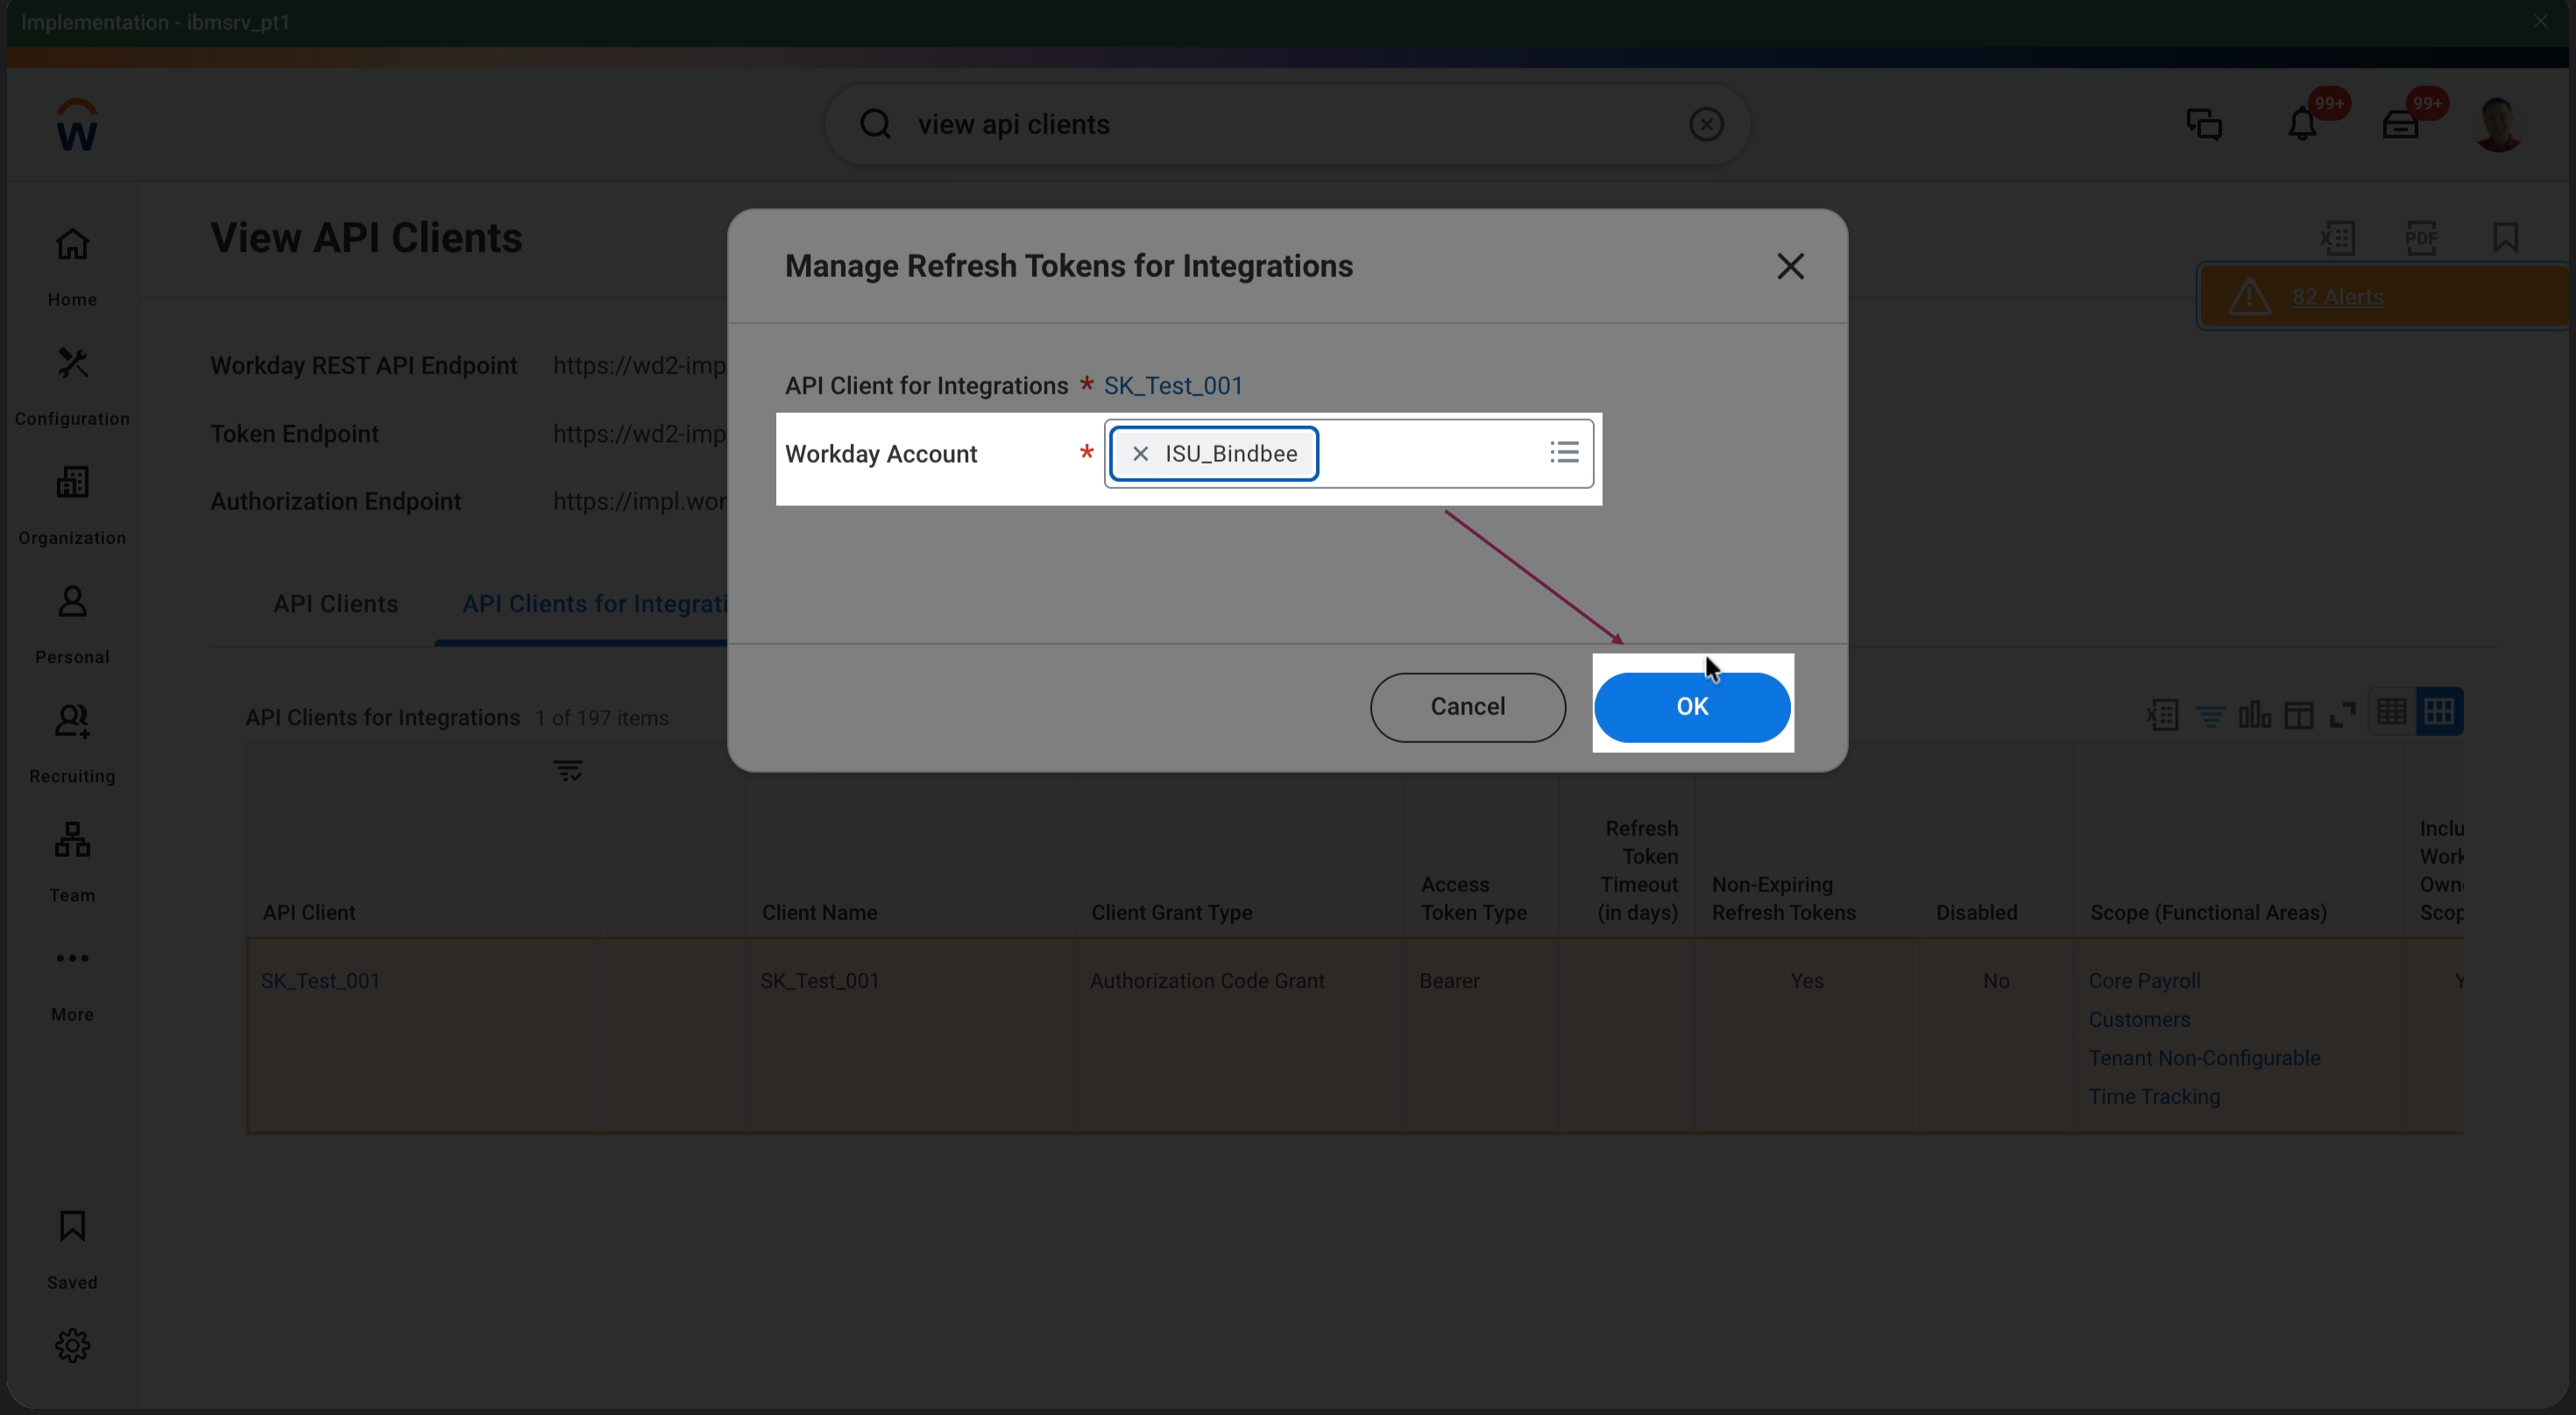
Step 3: In the Workday Account field, add the same authorized user that was added in the API Client and click OK.
Step 4: Reuse an existing refresh token (if you are already using this refresh token for other integrations)…
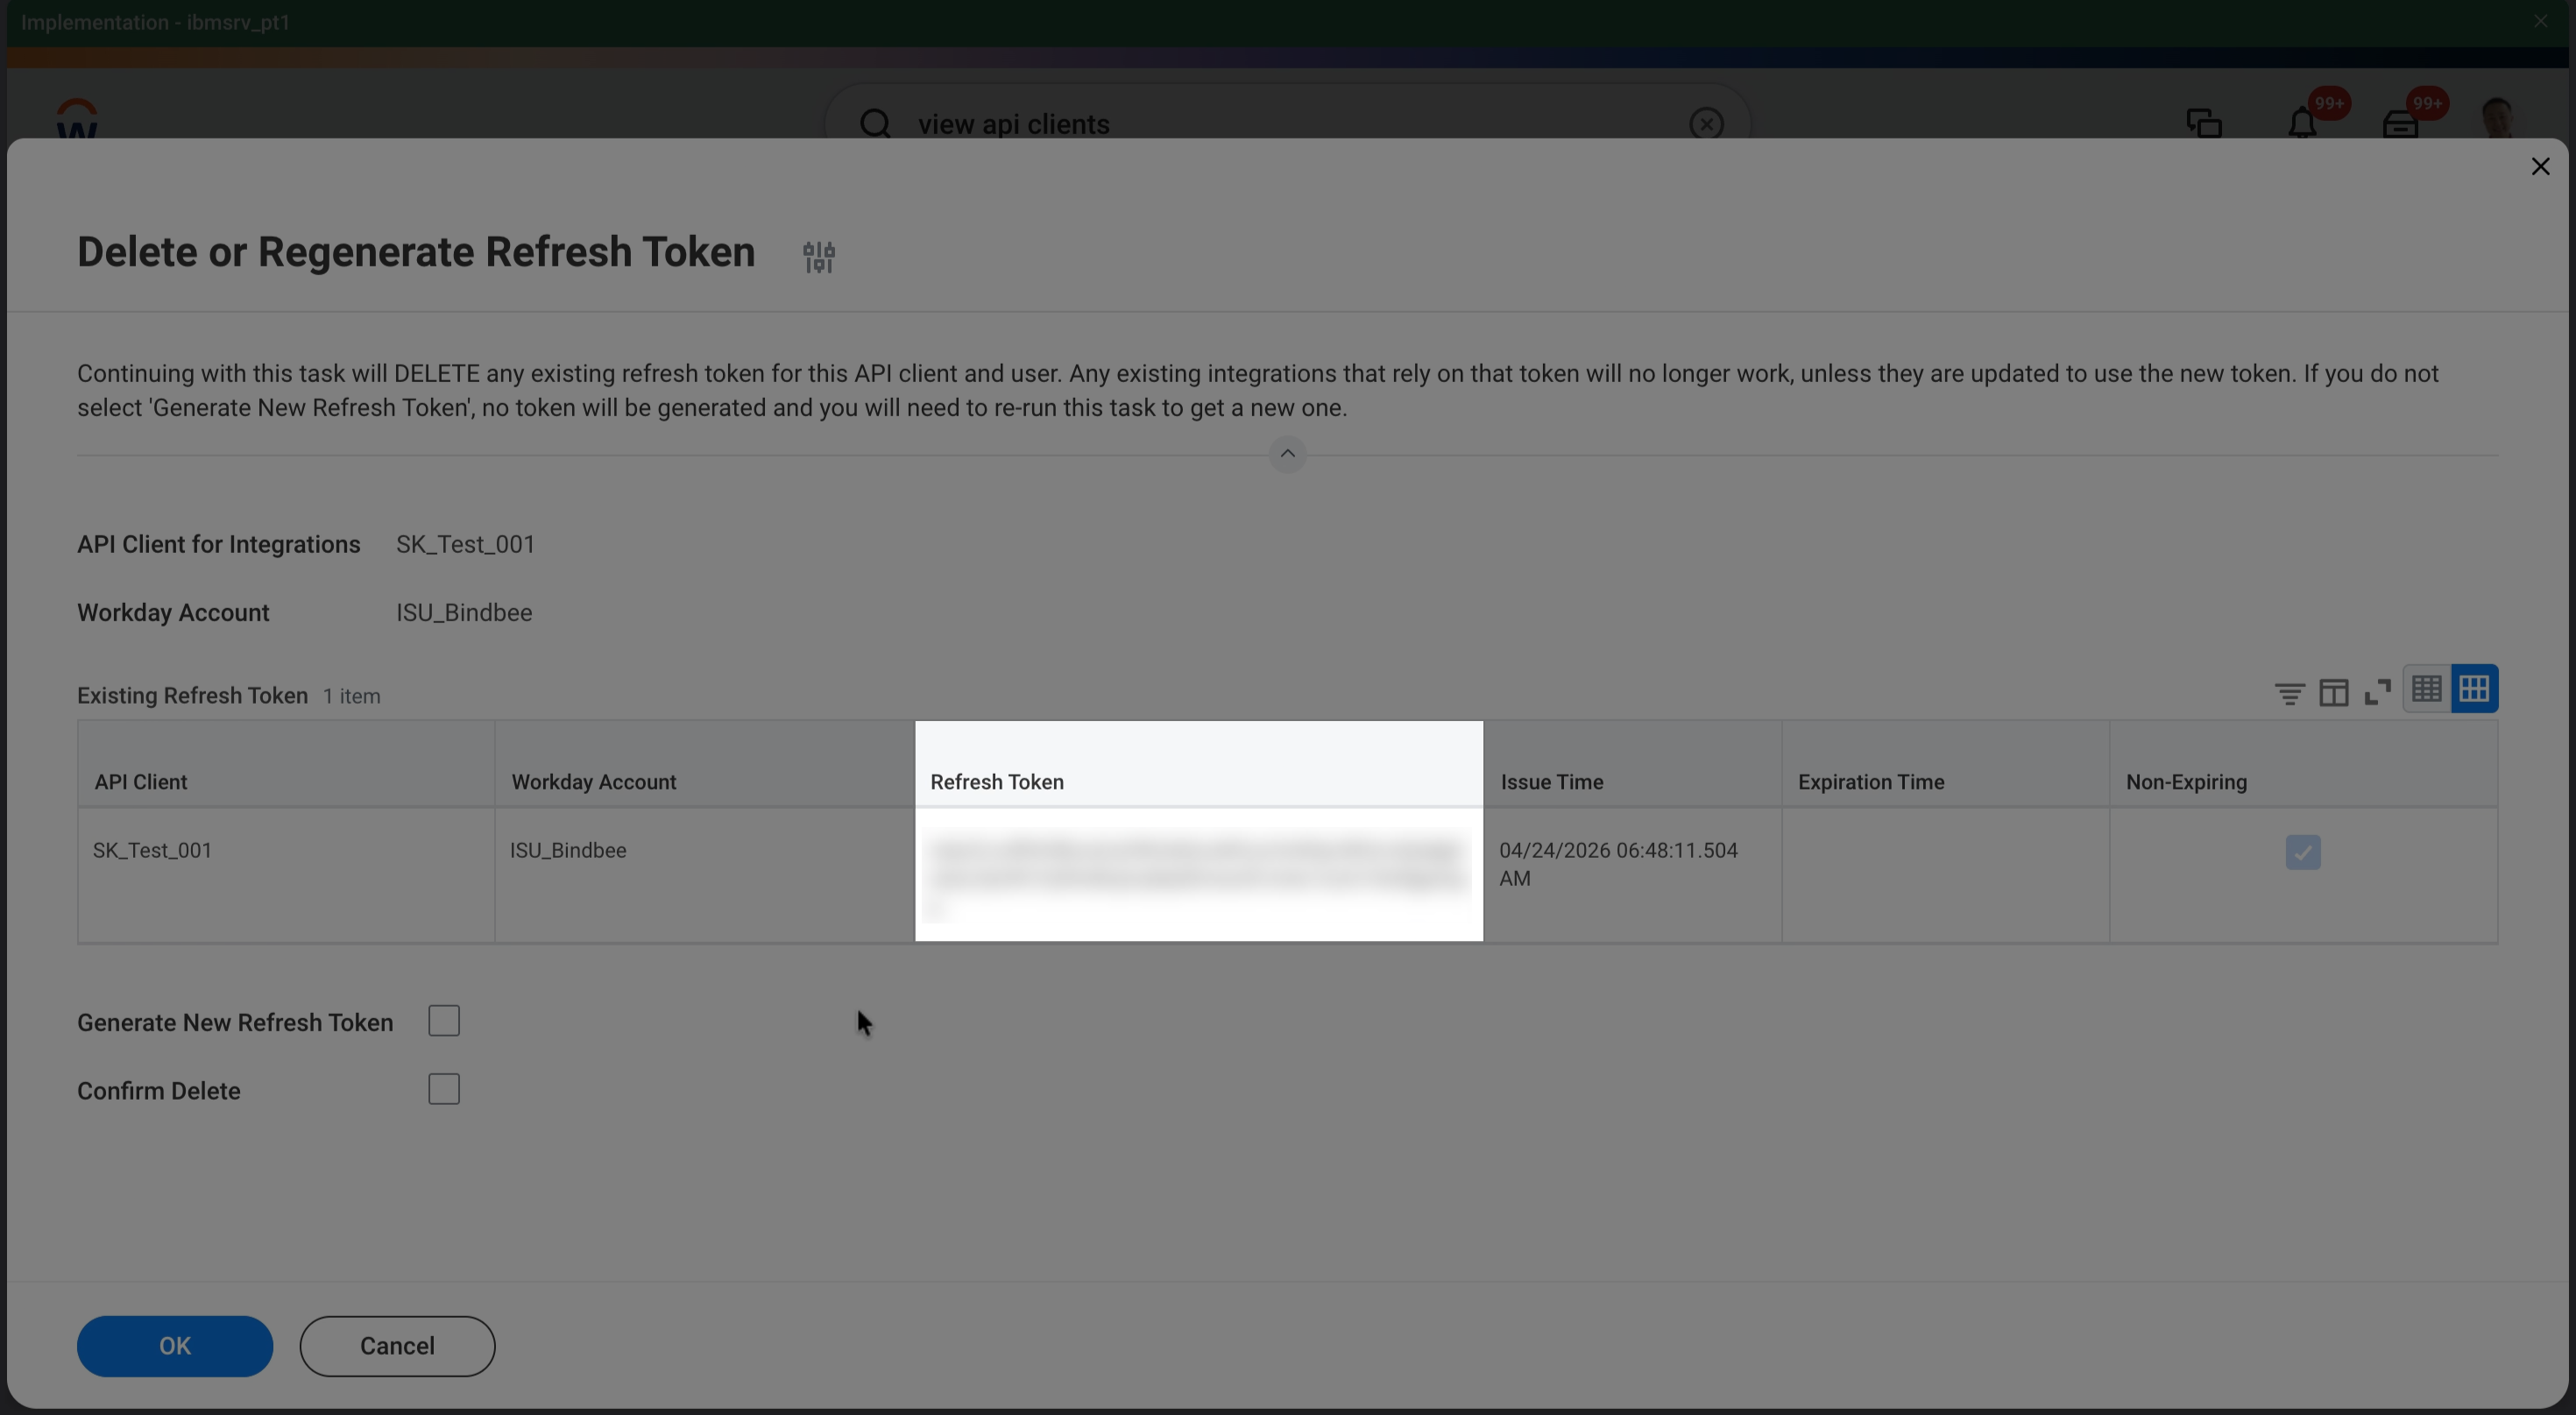
…or generate a new one (by checking both the boxes, and clicking 'OK').
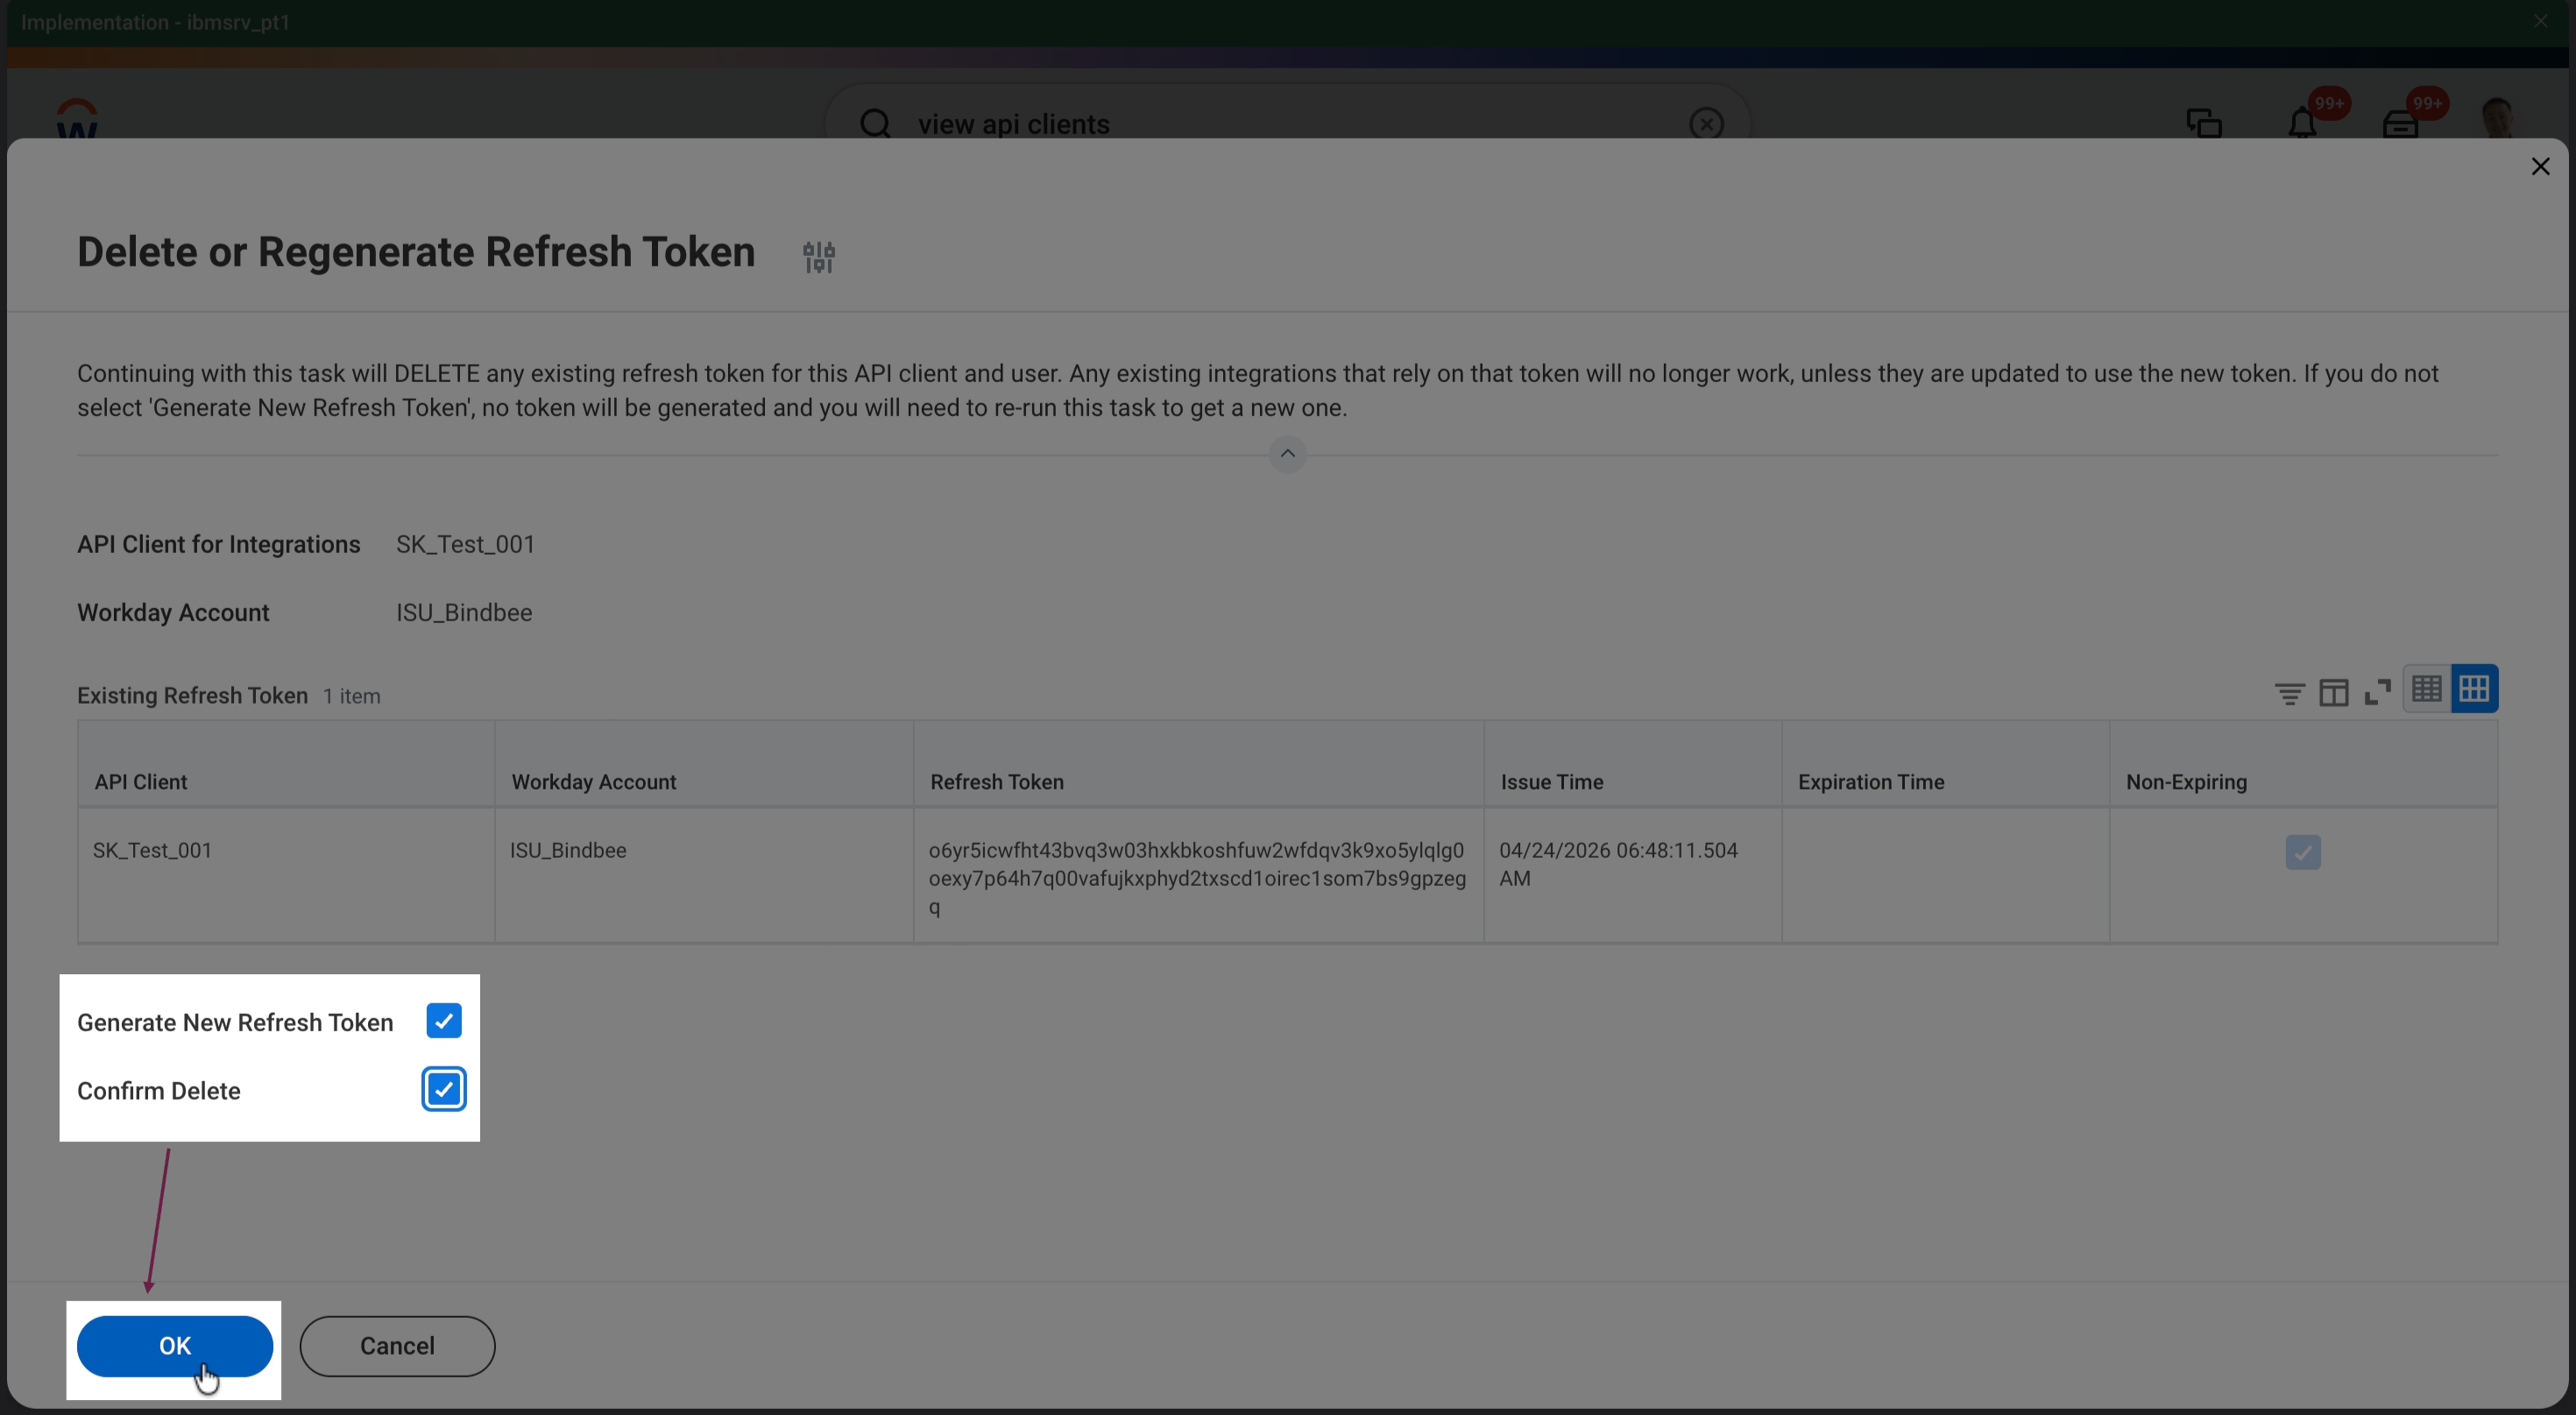
Step 5: Copy the refresh token and paste it in the magic link.
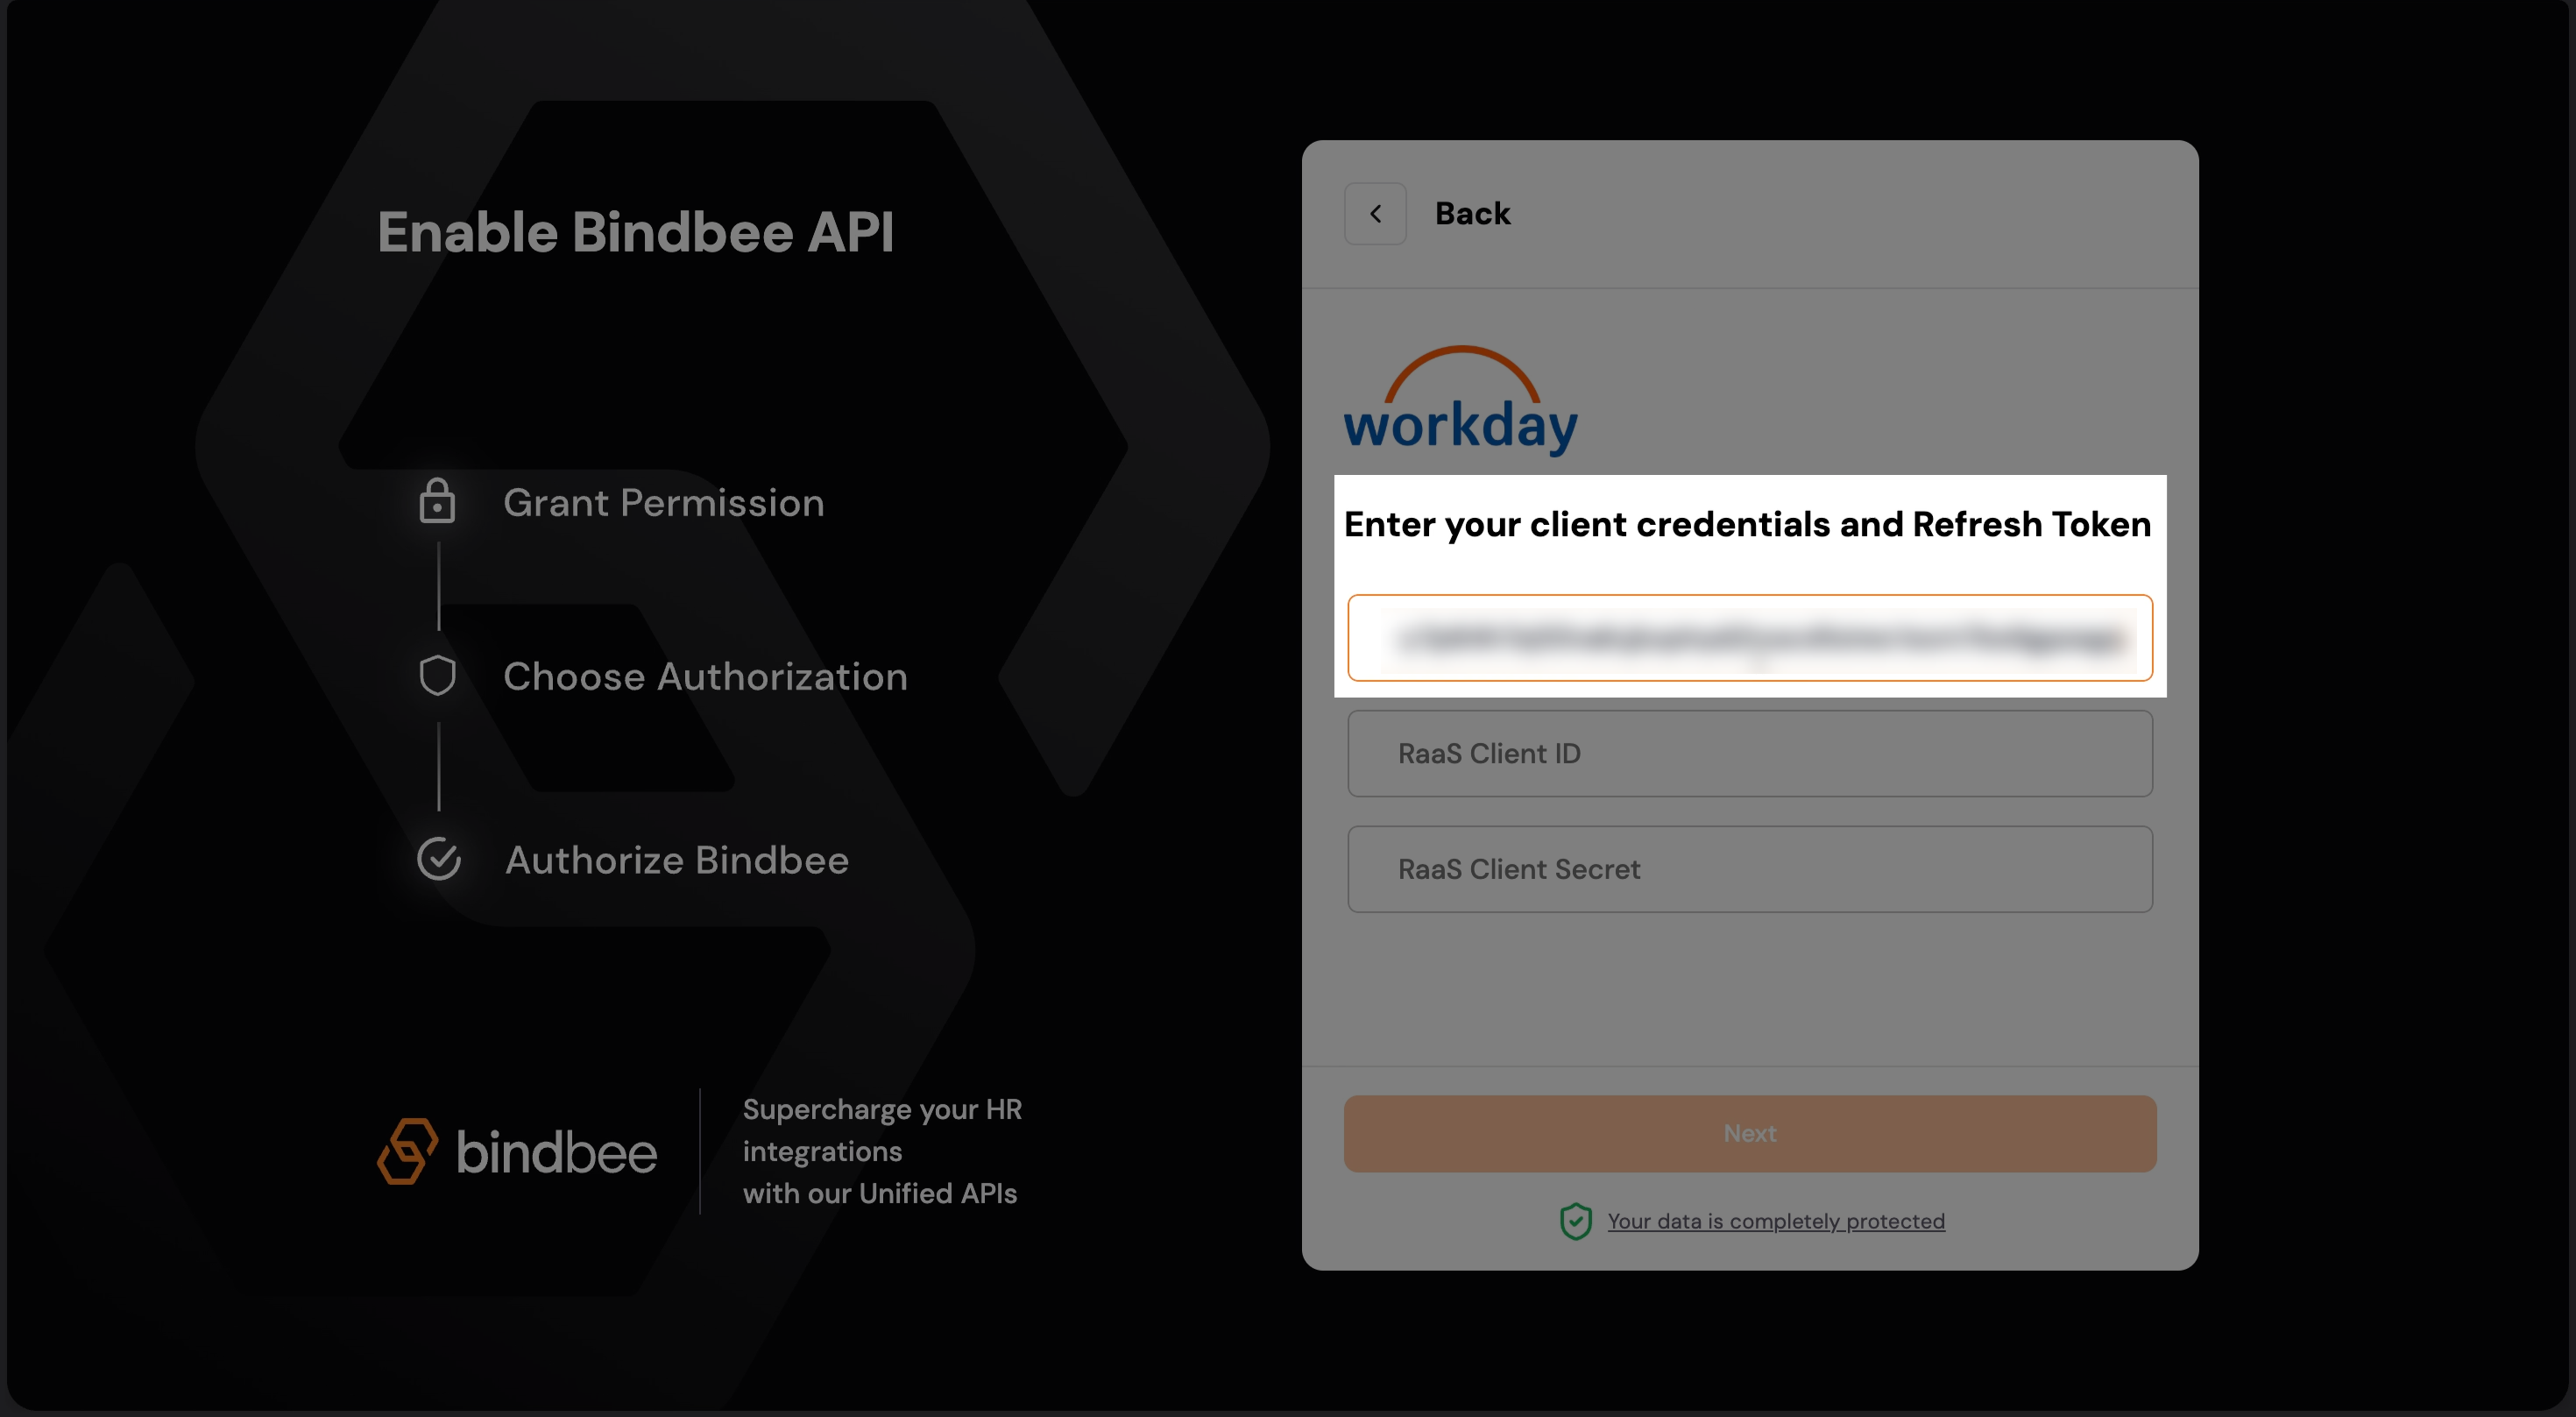
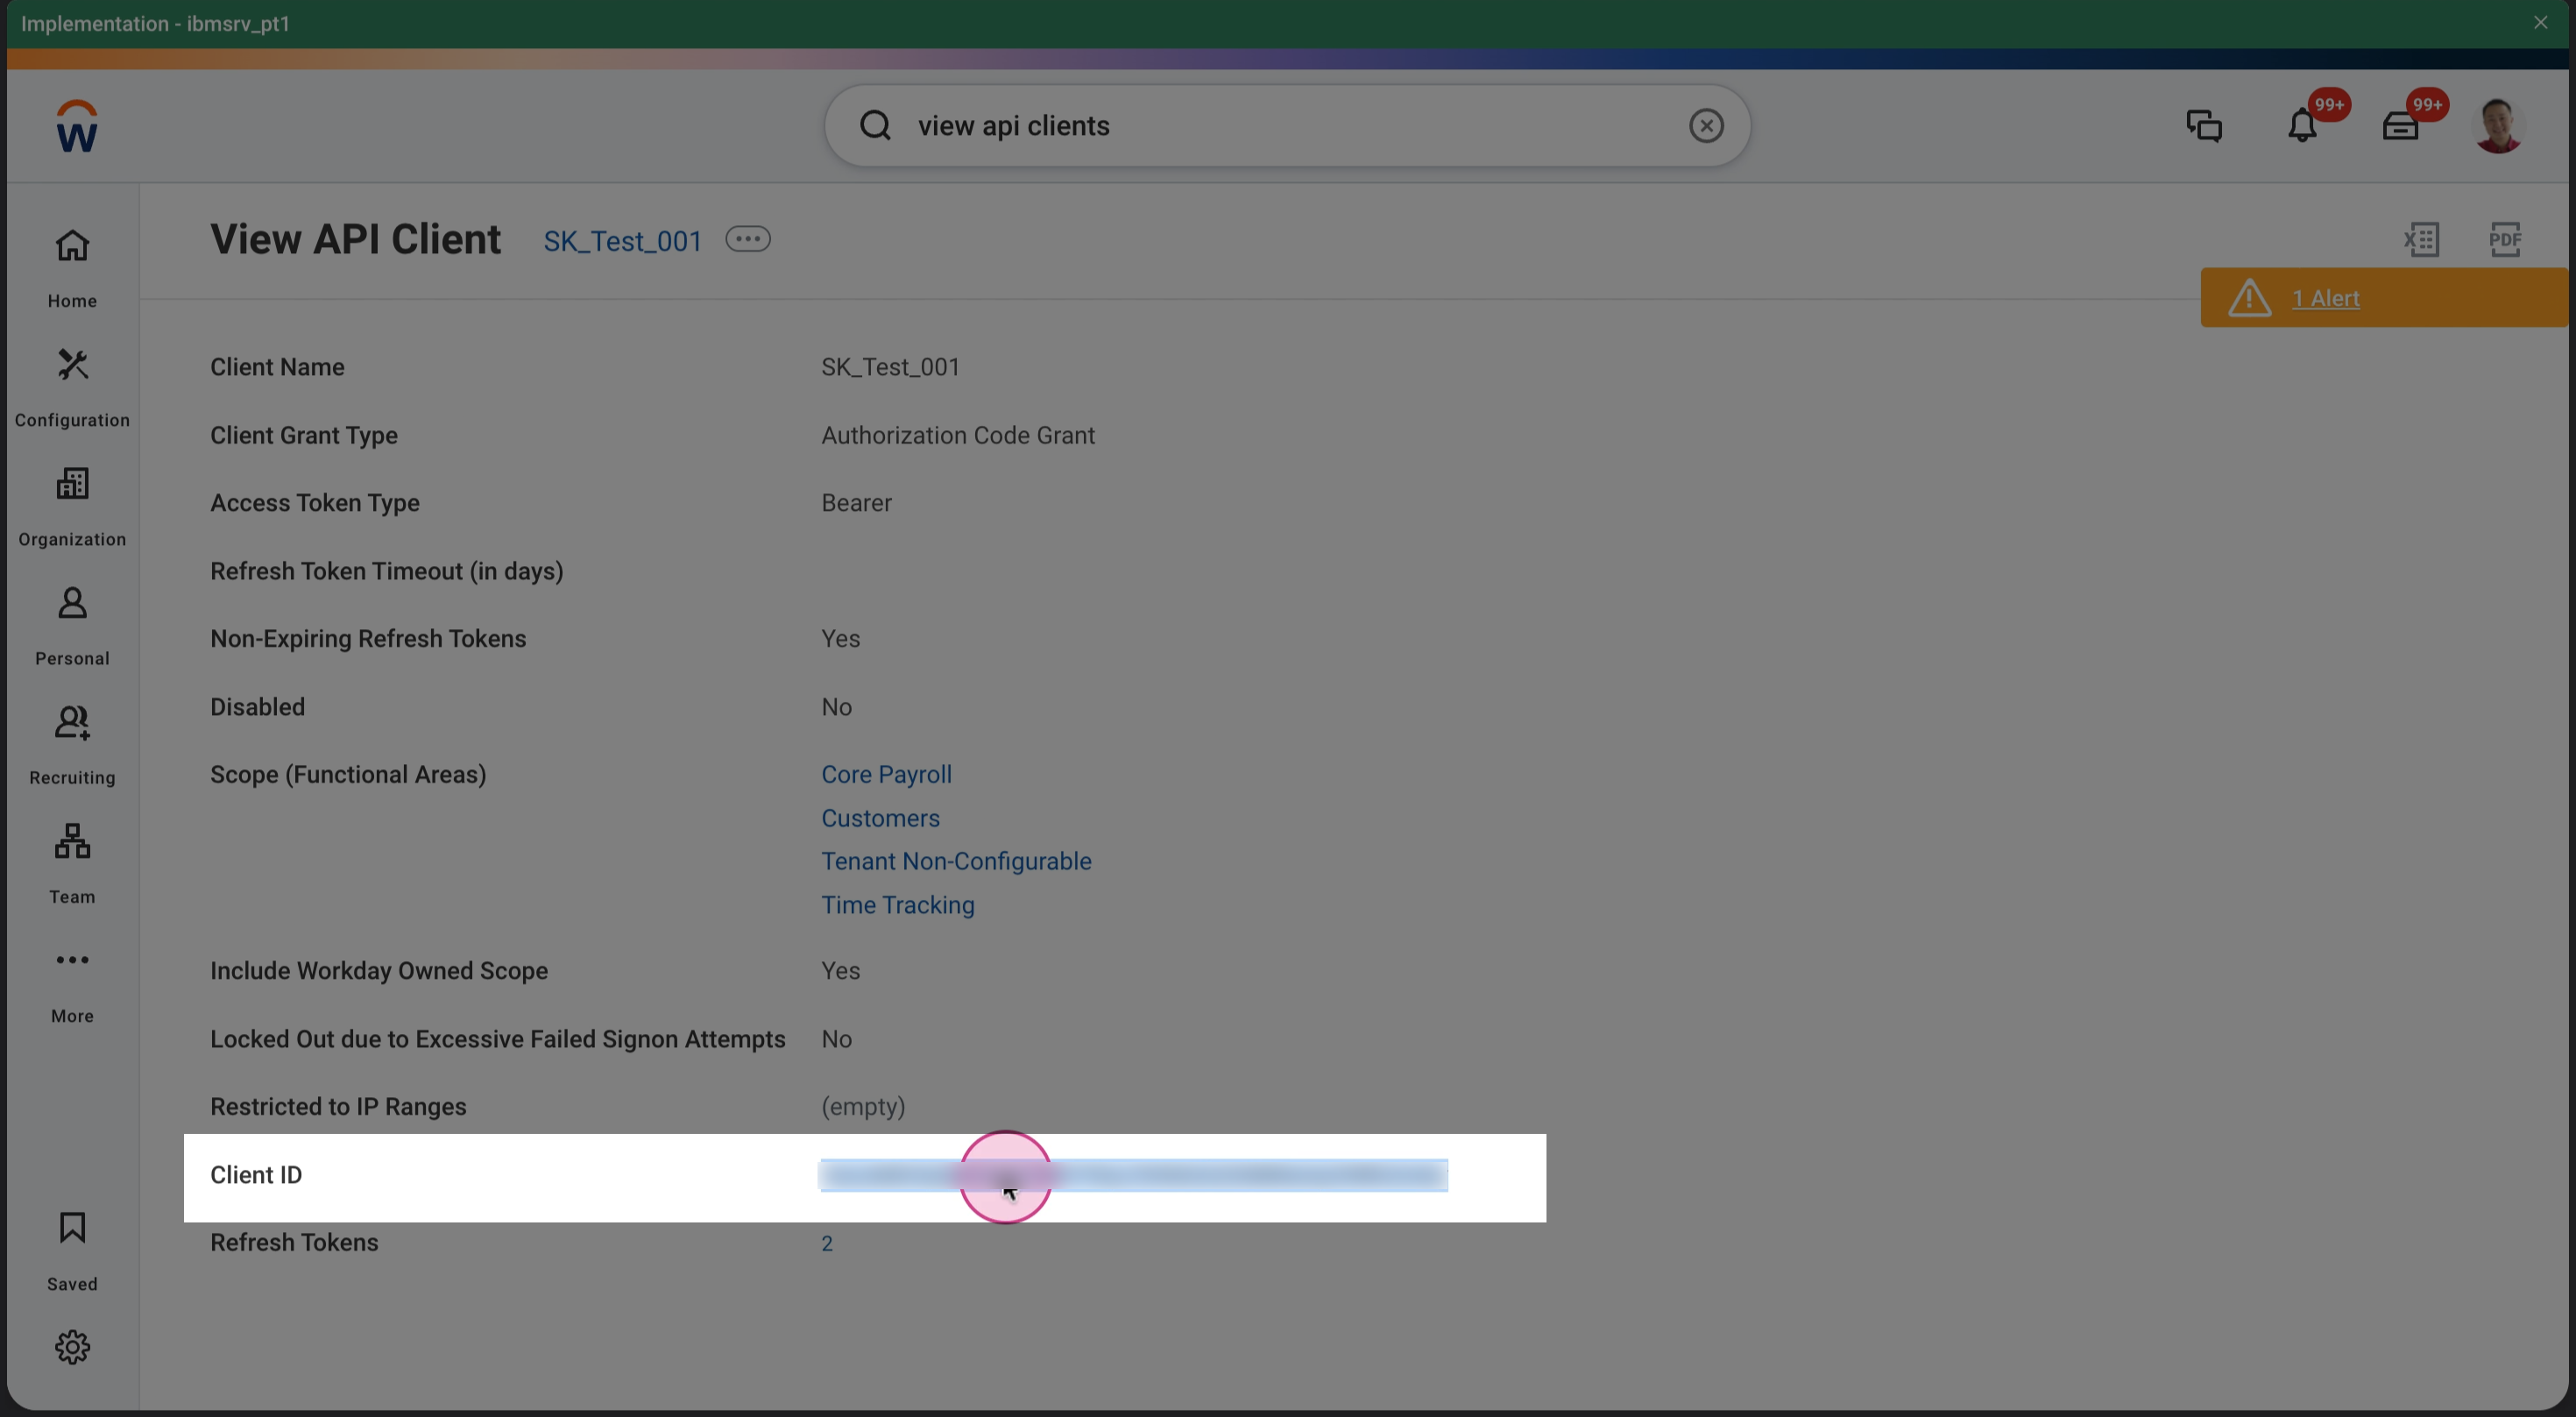
Step 6: To get your client ID, go to View API clients. Look for your API Client in the API Clients for Integrations tab.
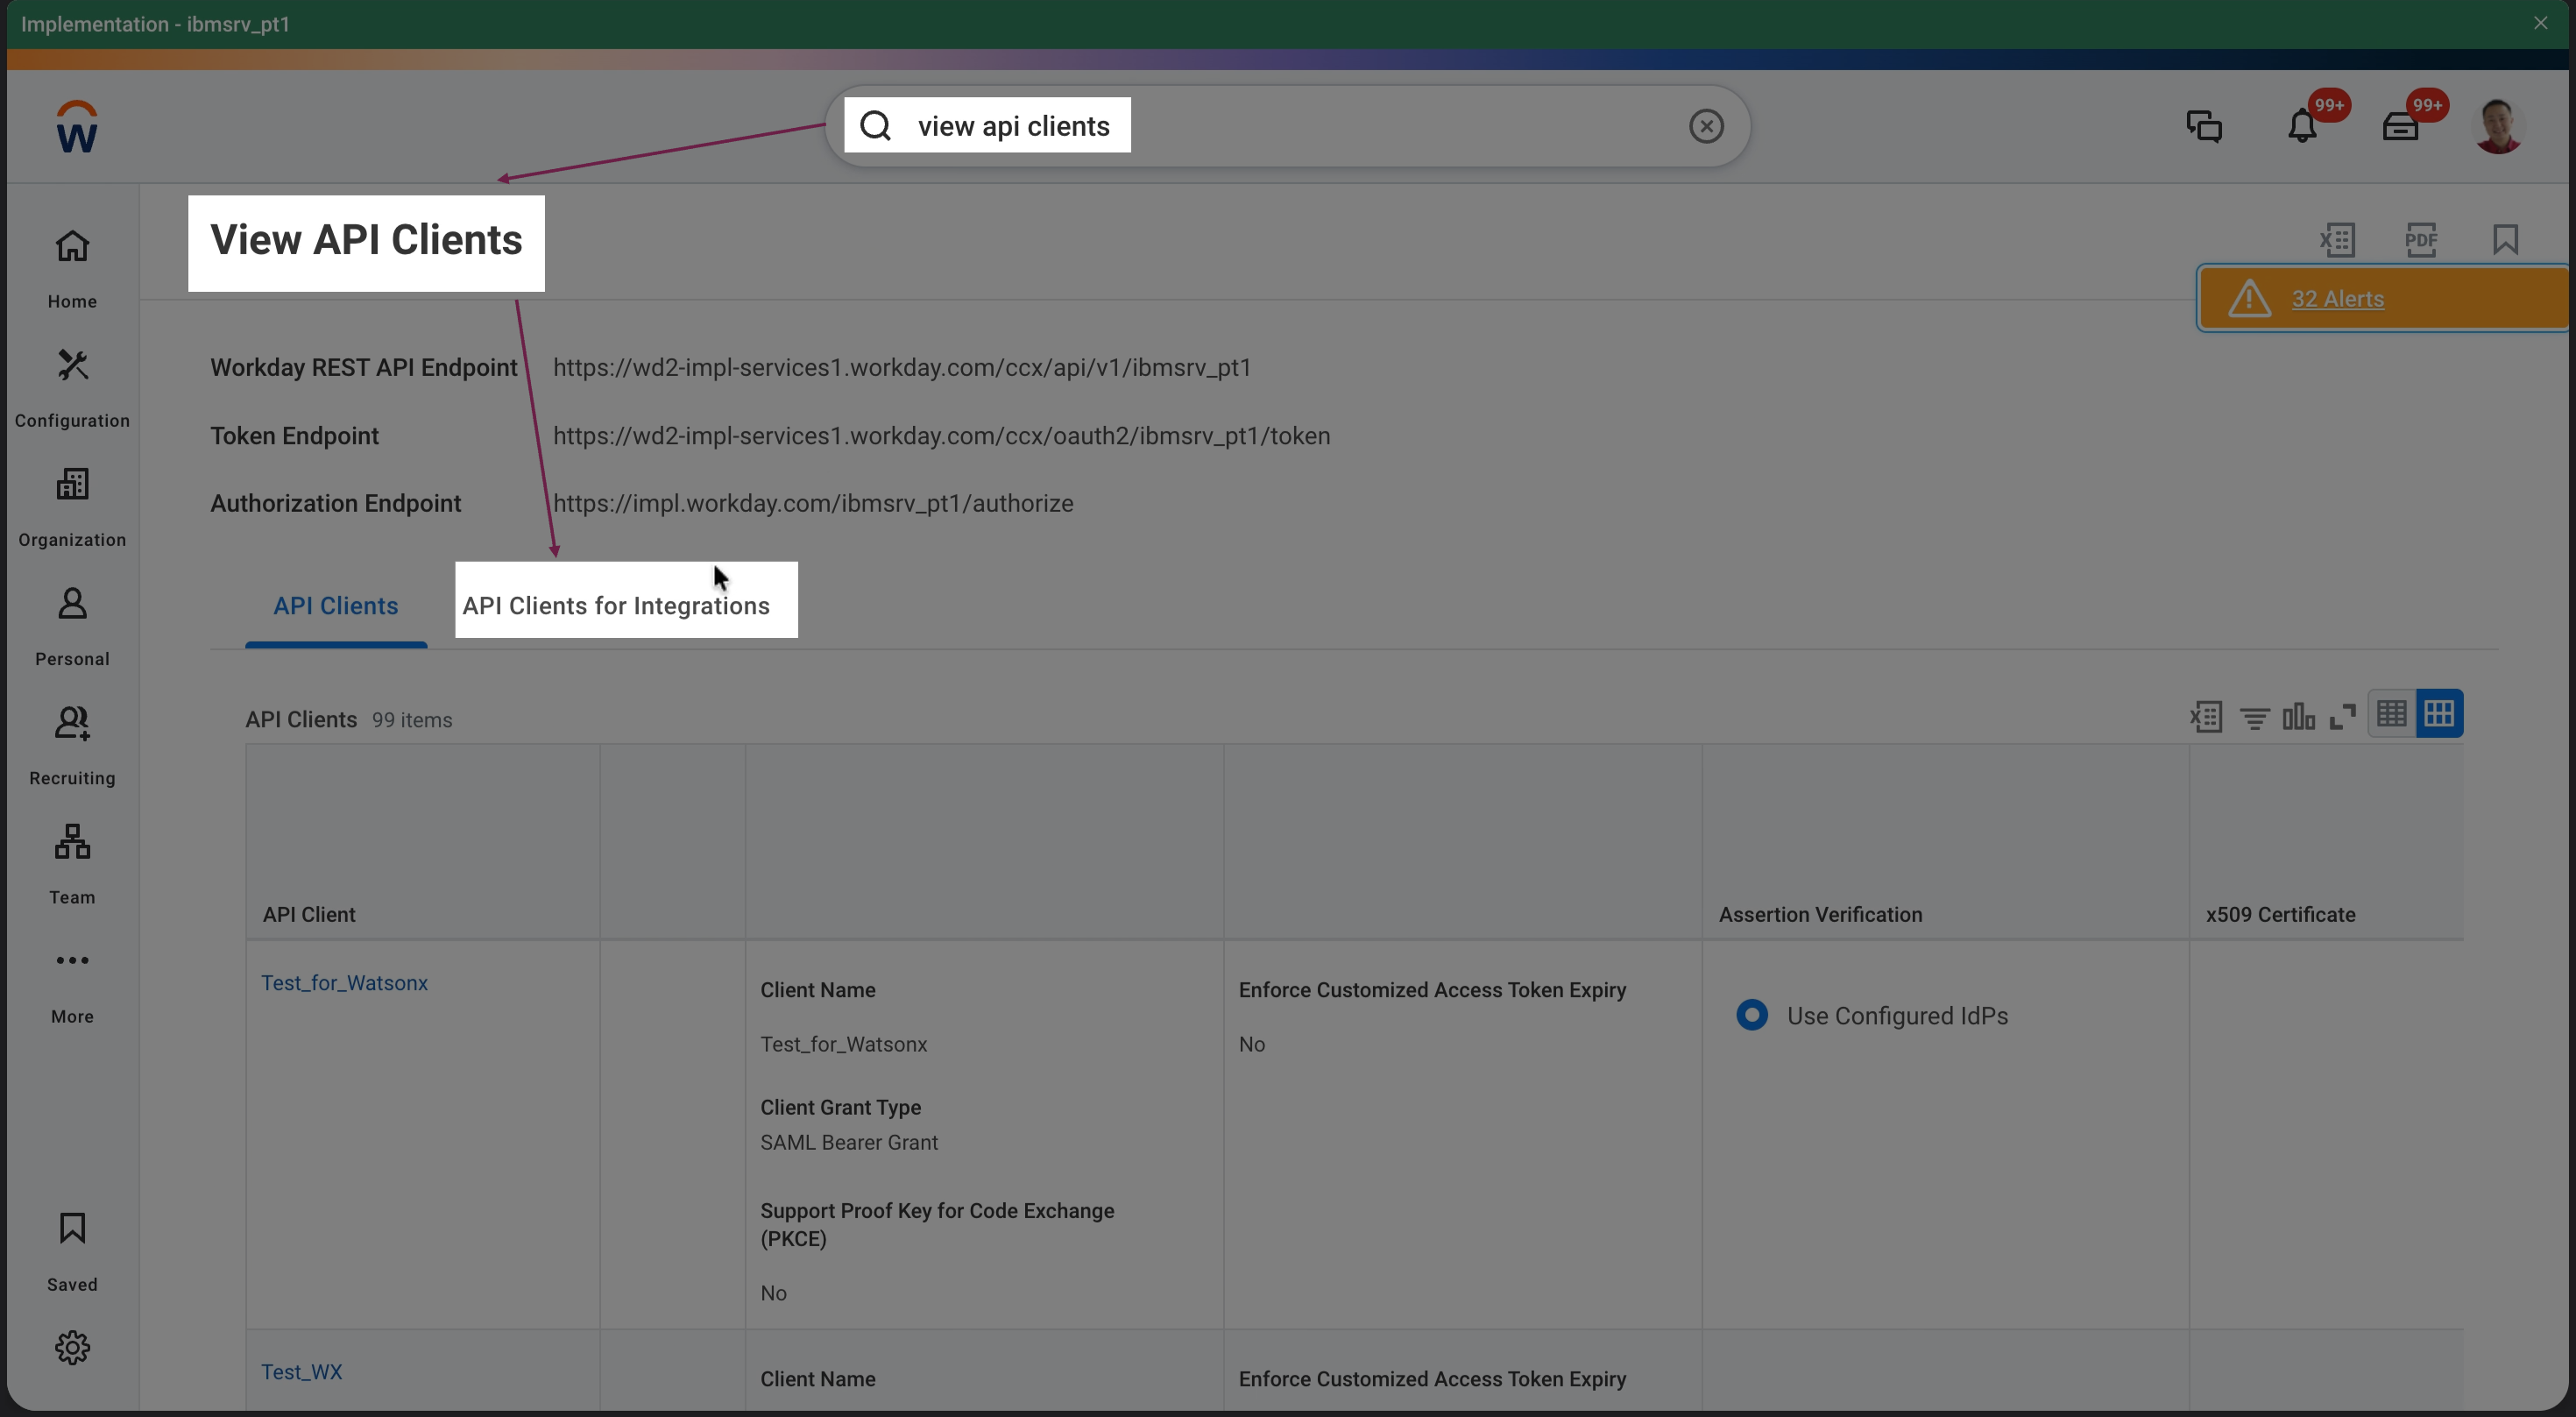
Step 7: If you have lost your Client Secret, generate a new one by going to Generate New Client Secret.
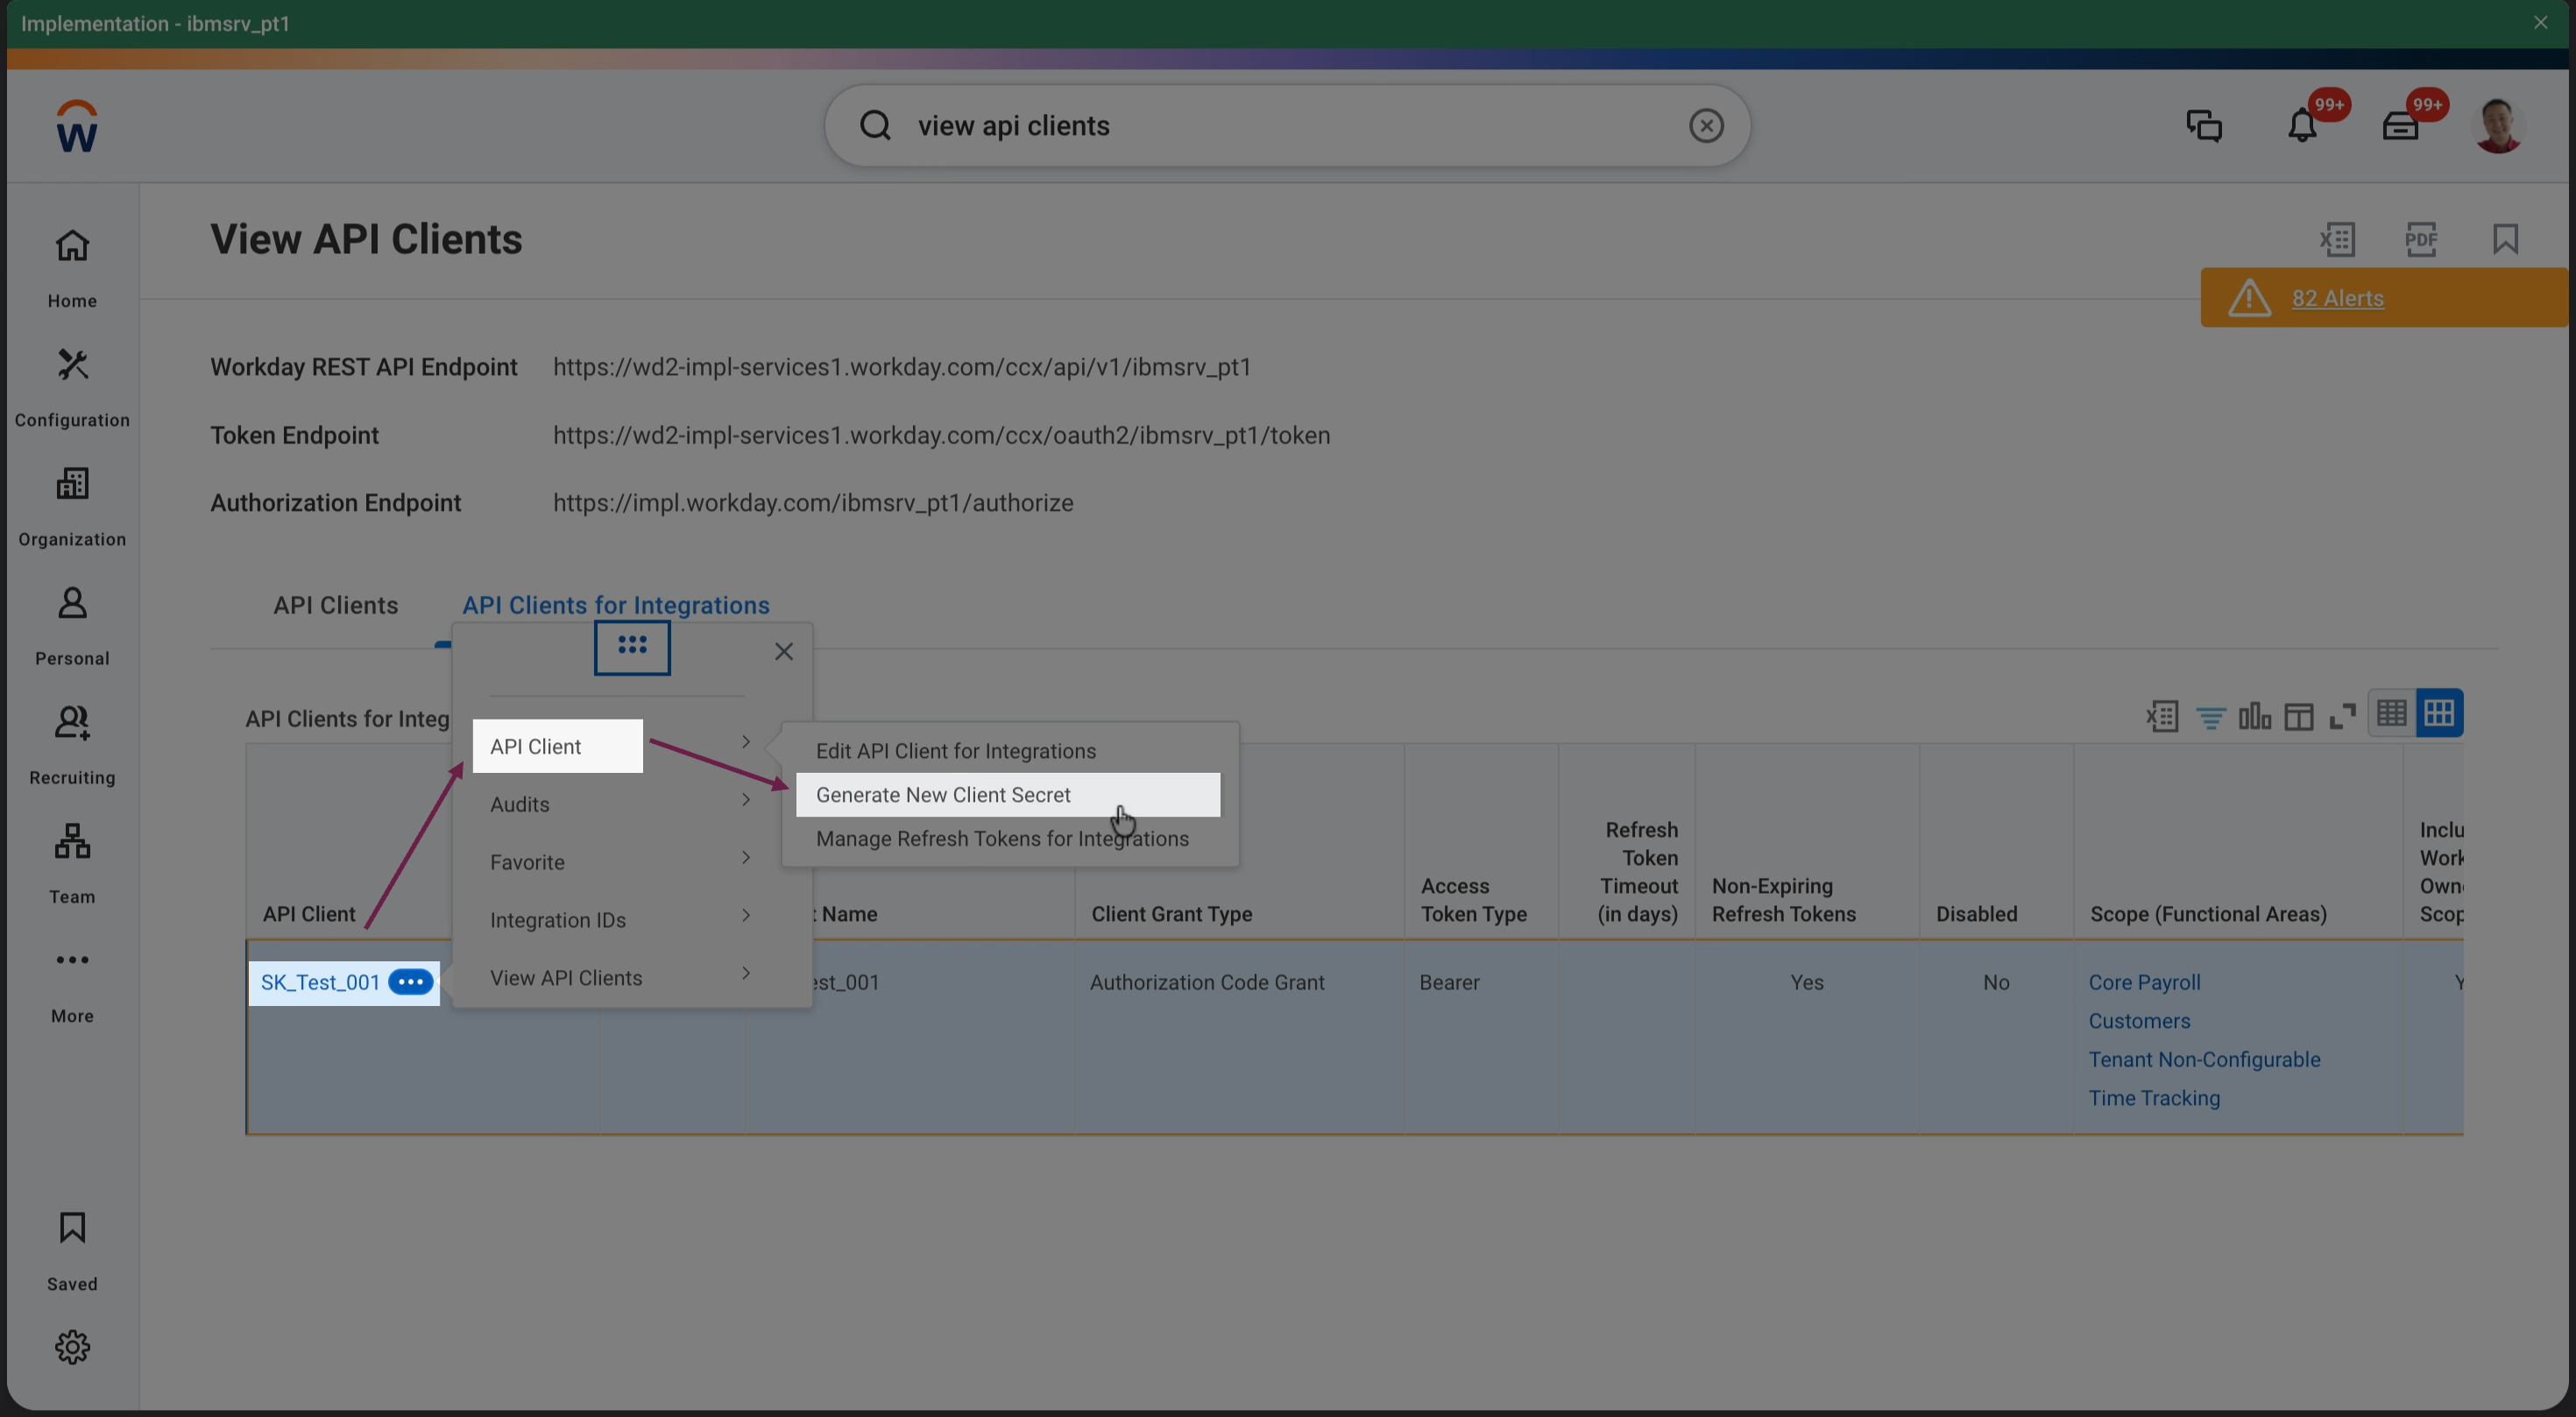
Step 8: To locate your Client ID, select your API client by clicking on its name. The Client ID will be displayed here.
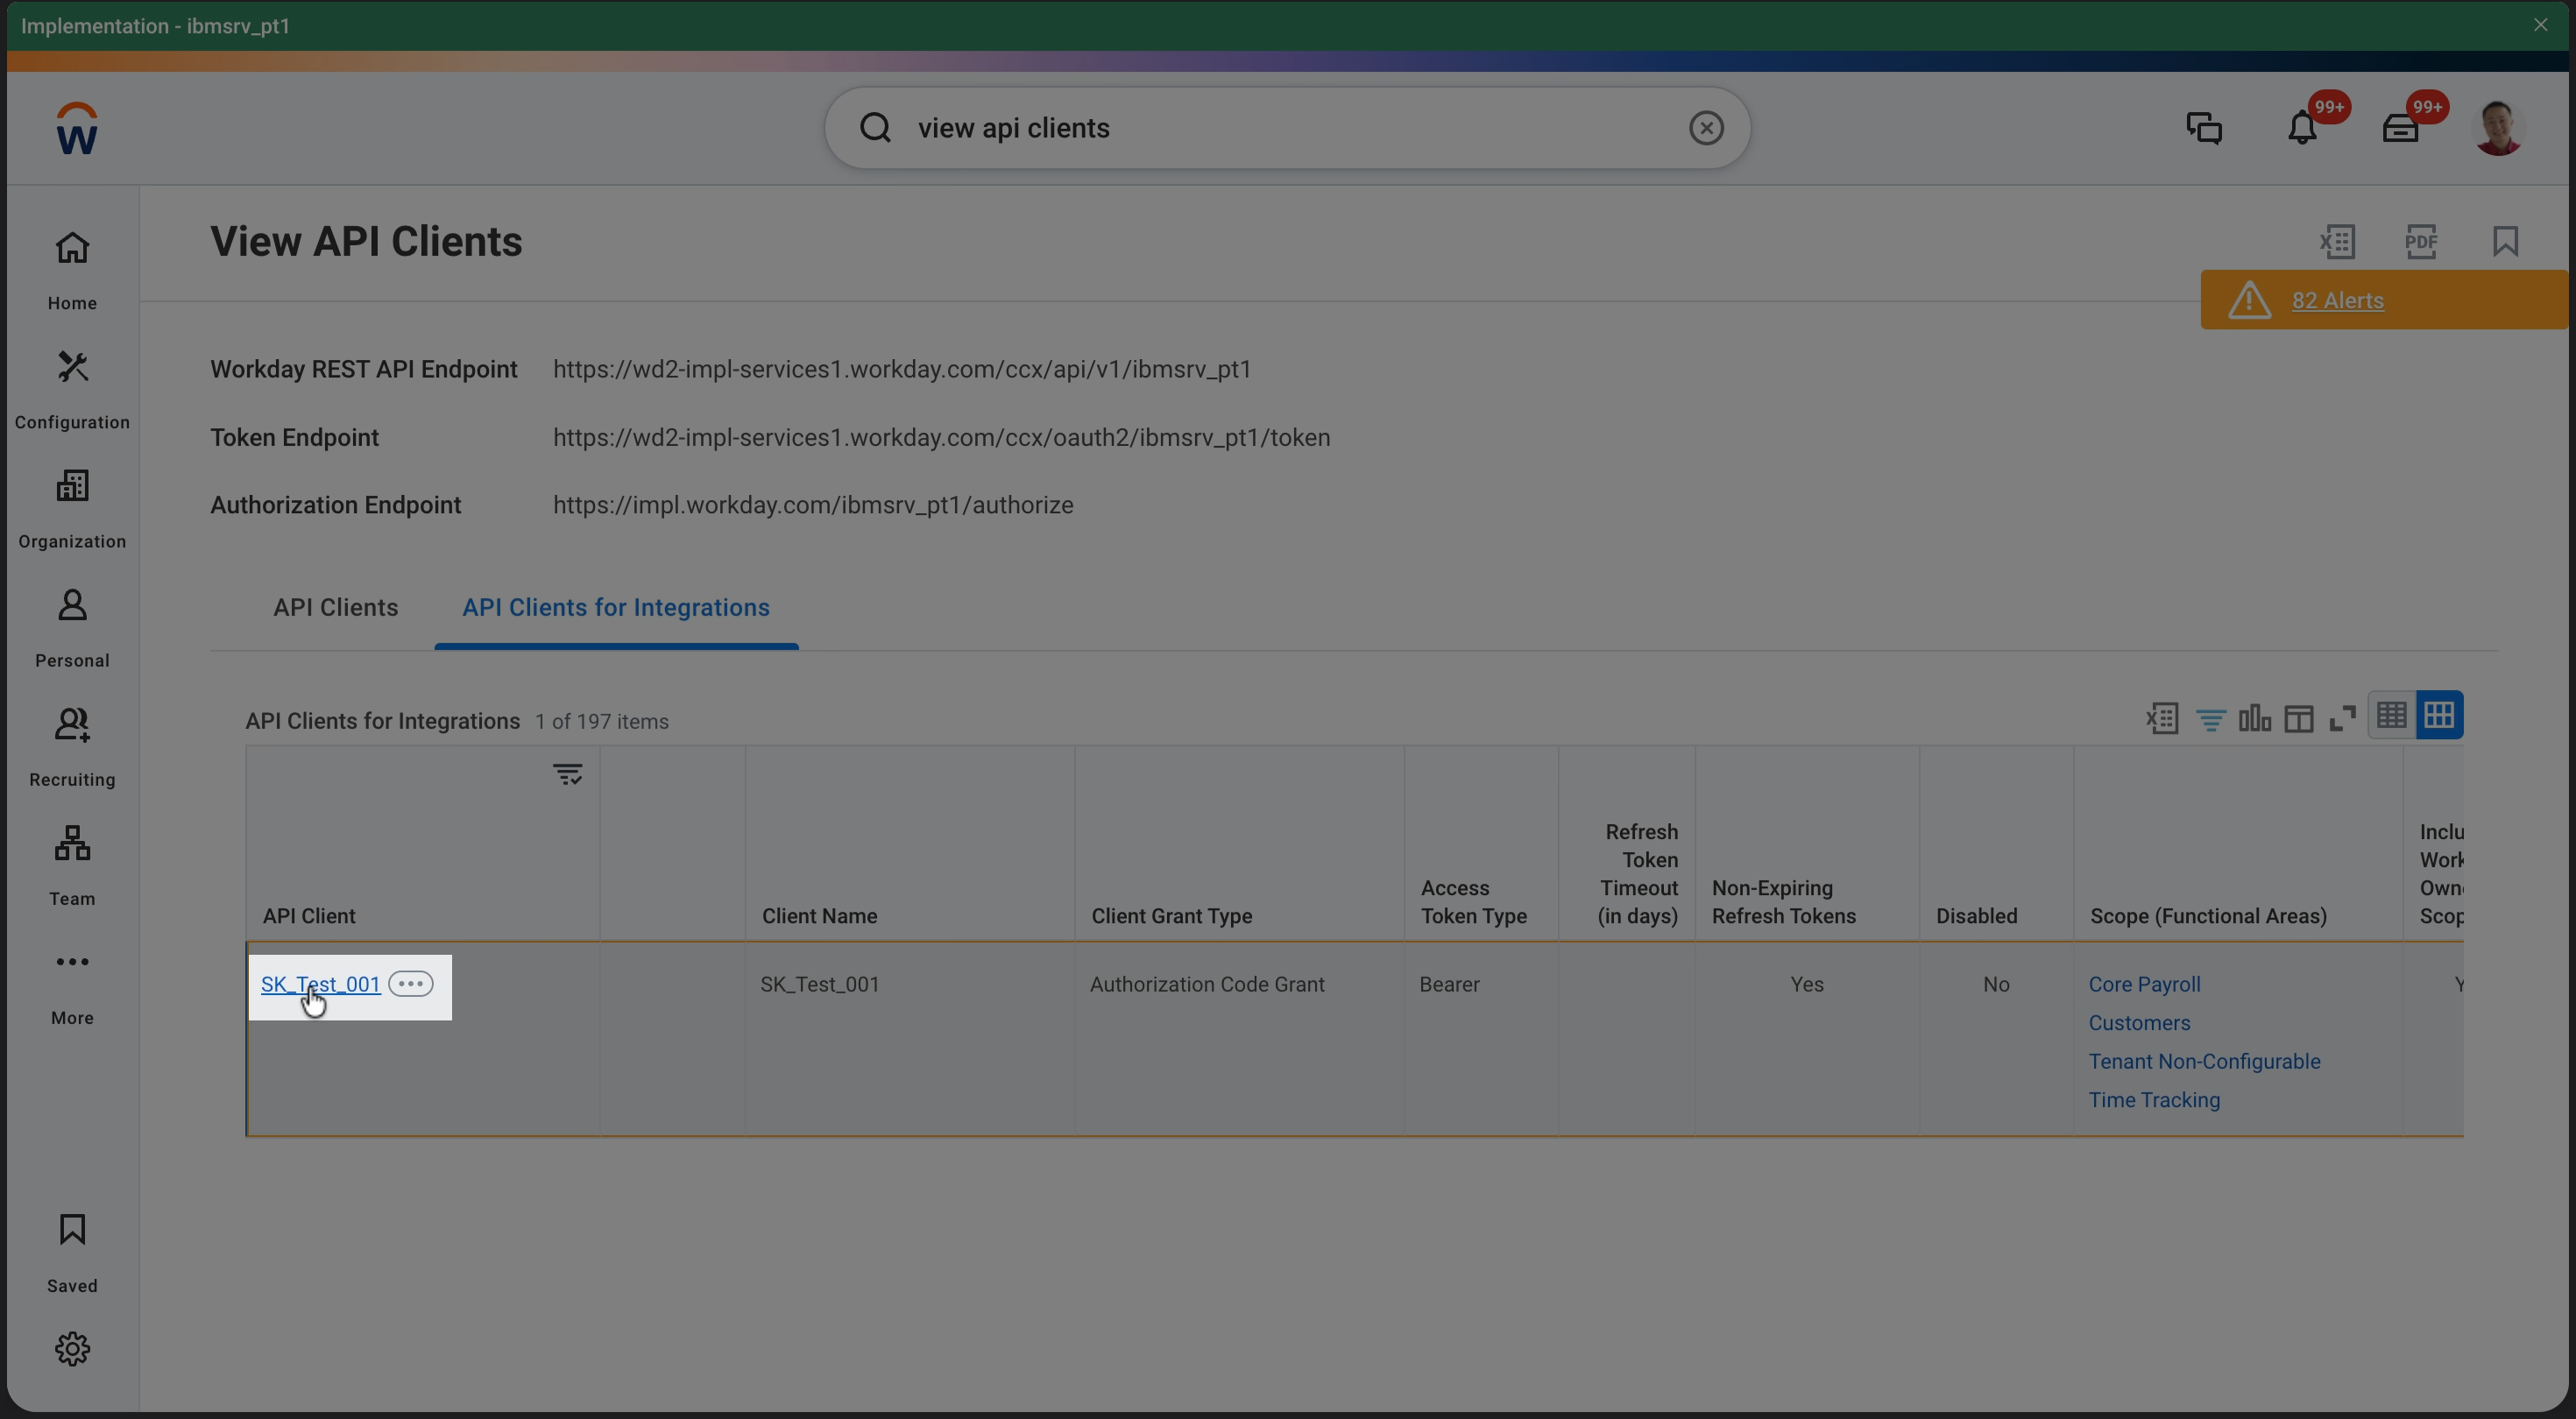
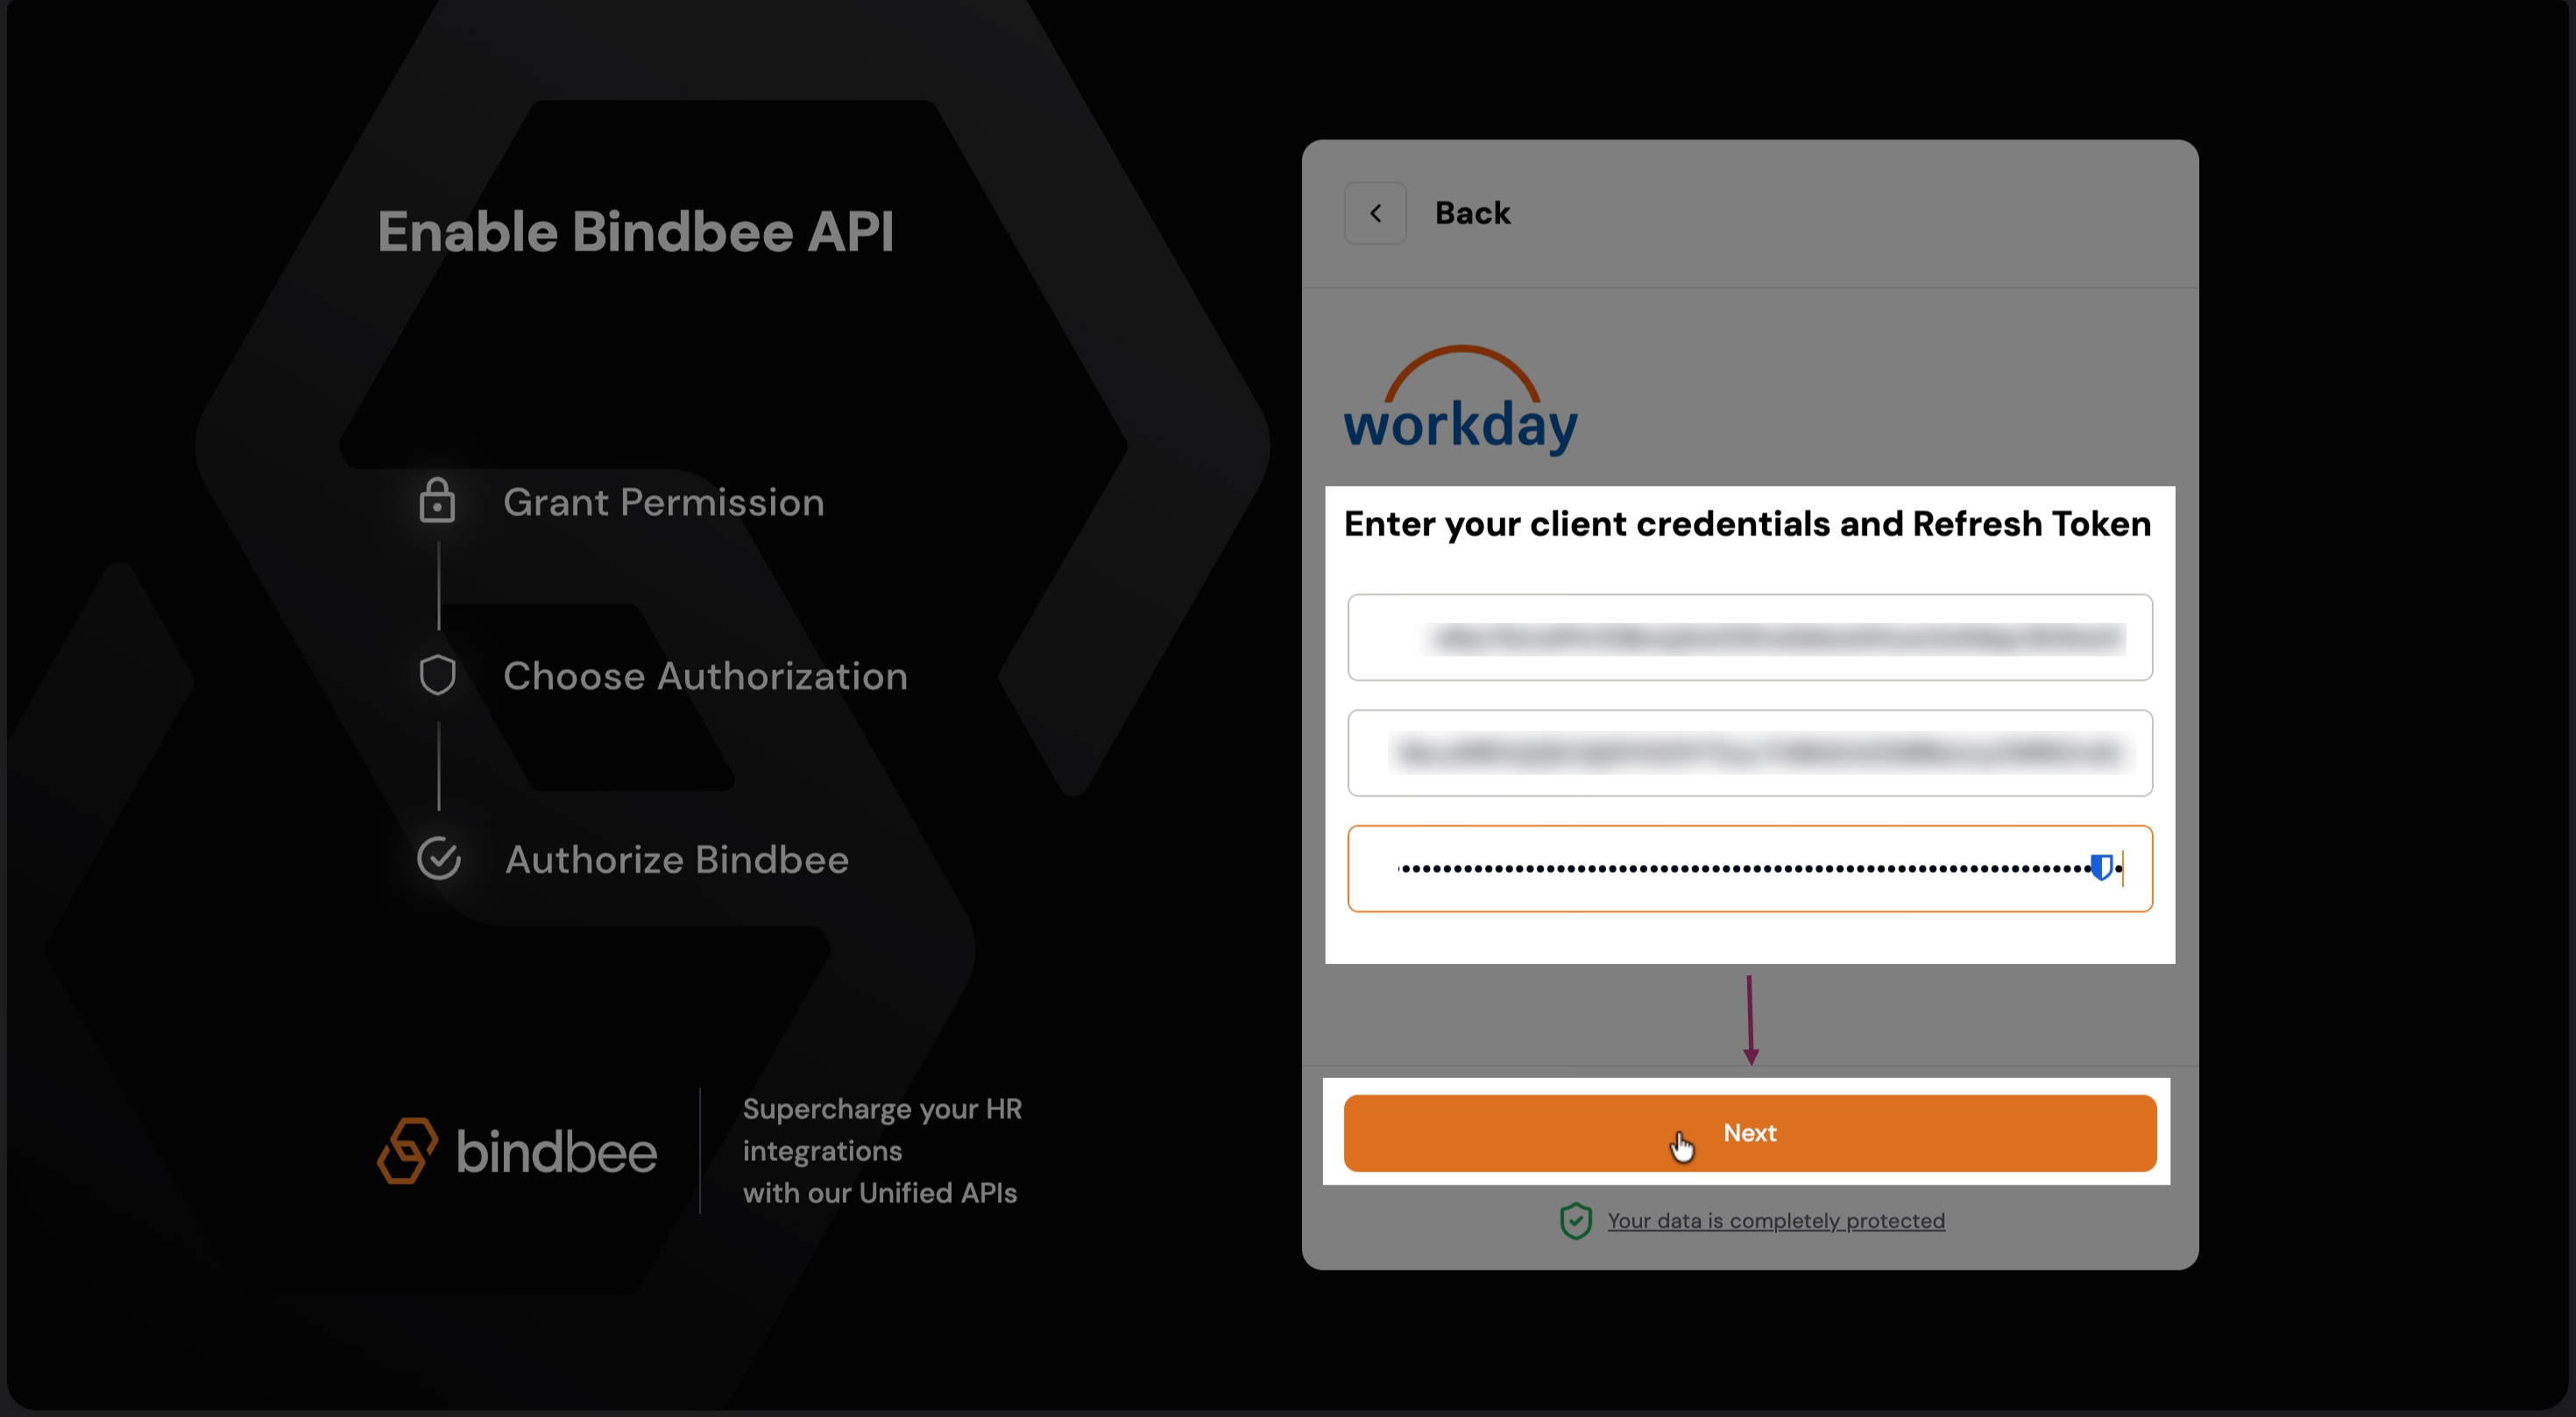
Step 9: Paste your Client ID and Client Secret in their respective sections in the magic link. Click Next.
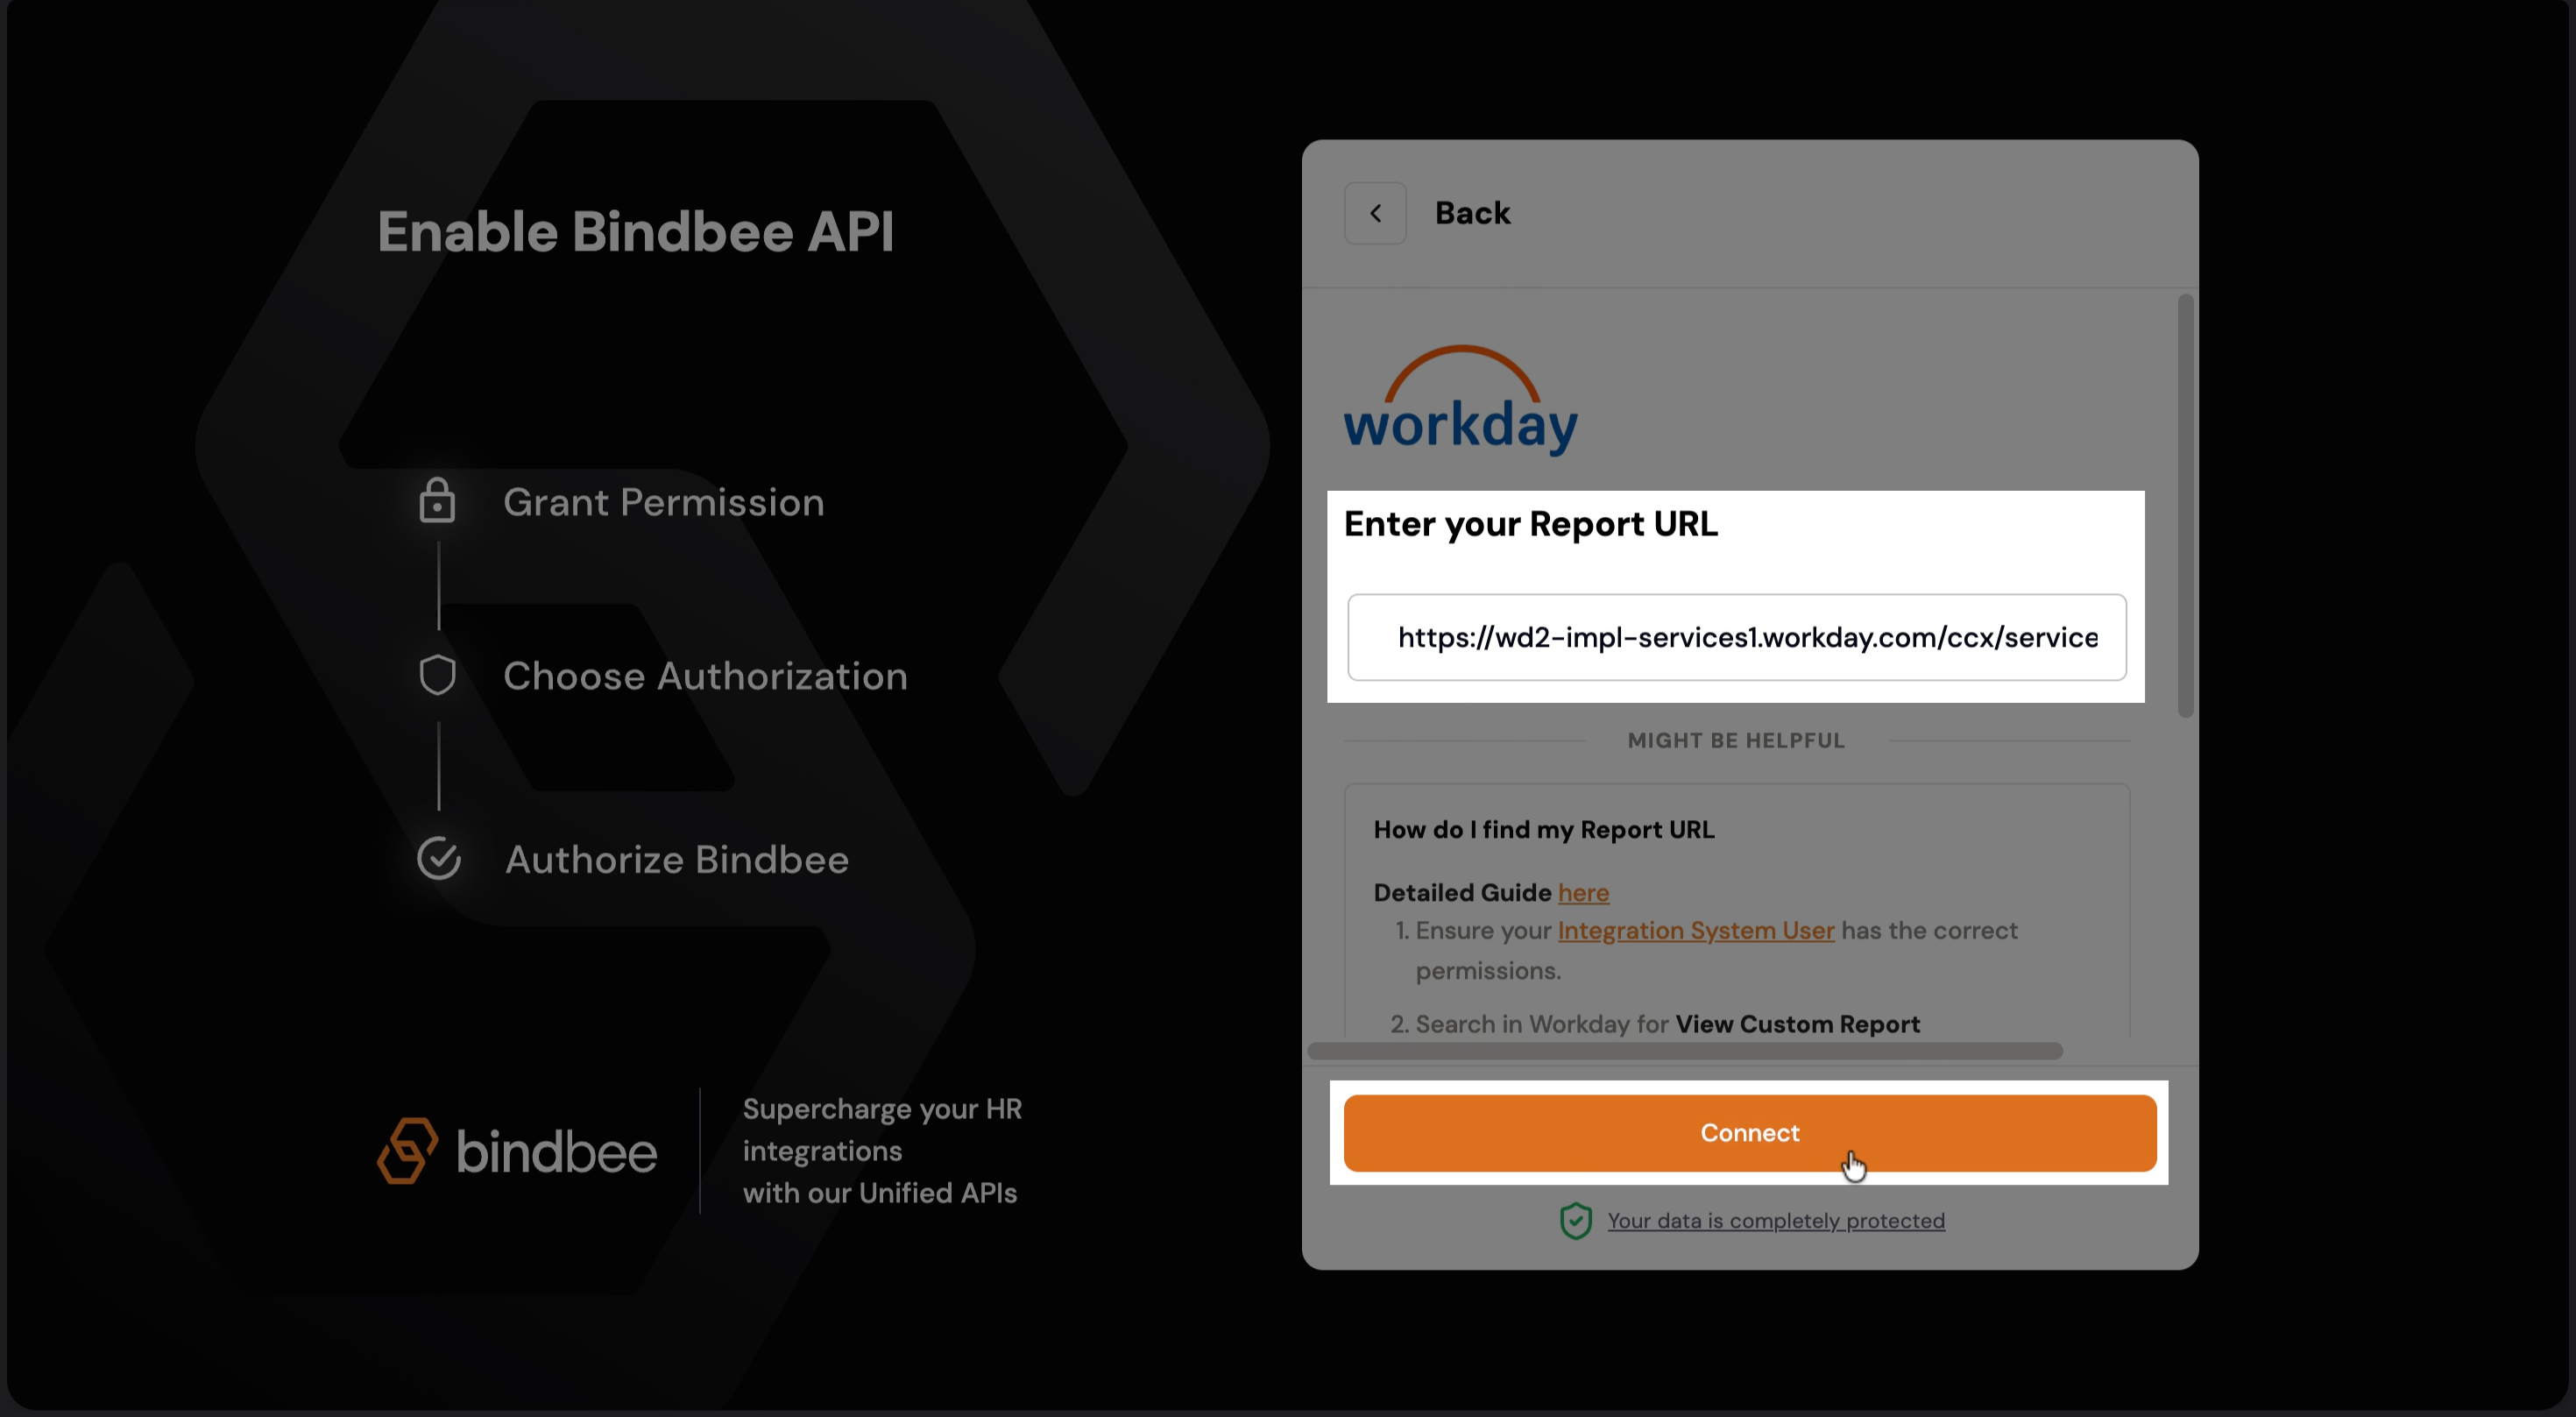
Step 10: Paste your previously saved Workday Report URL in the Workday Report URL section, then click Connect.
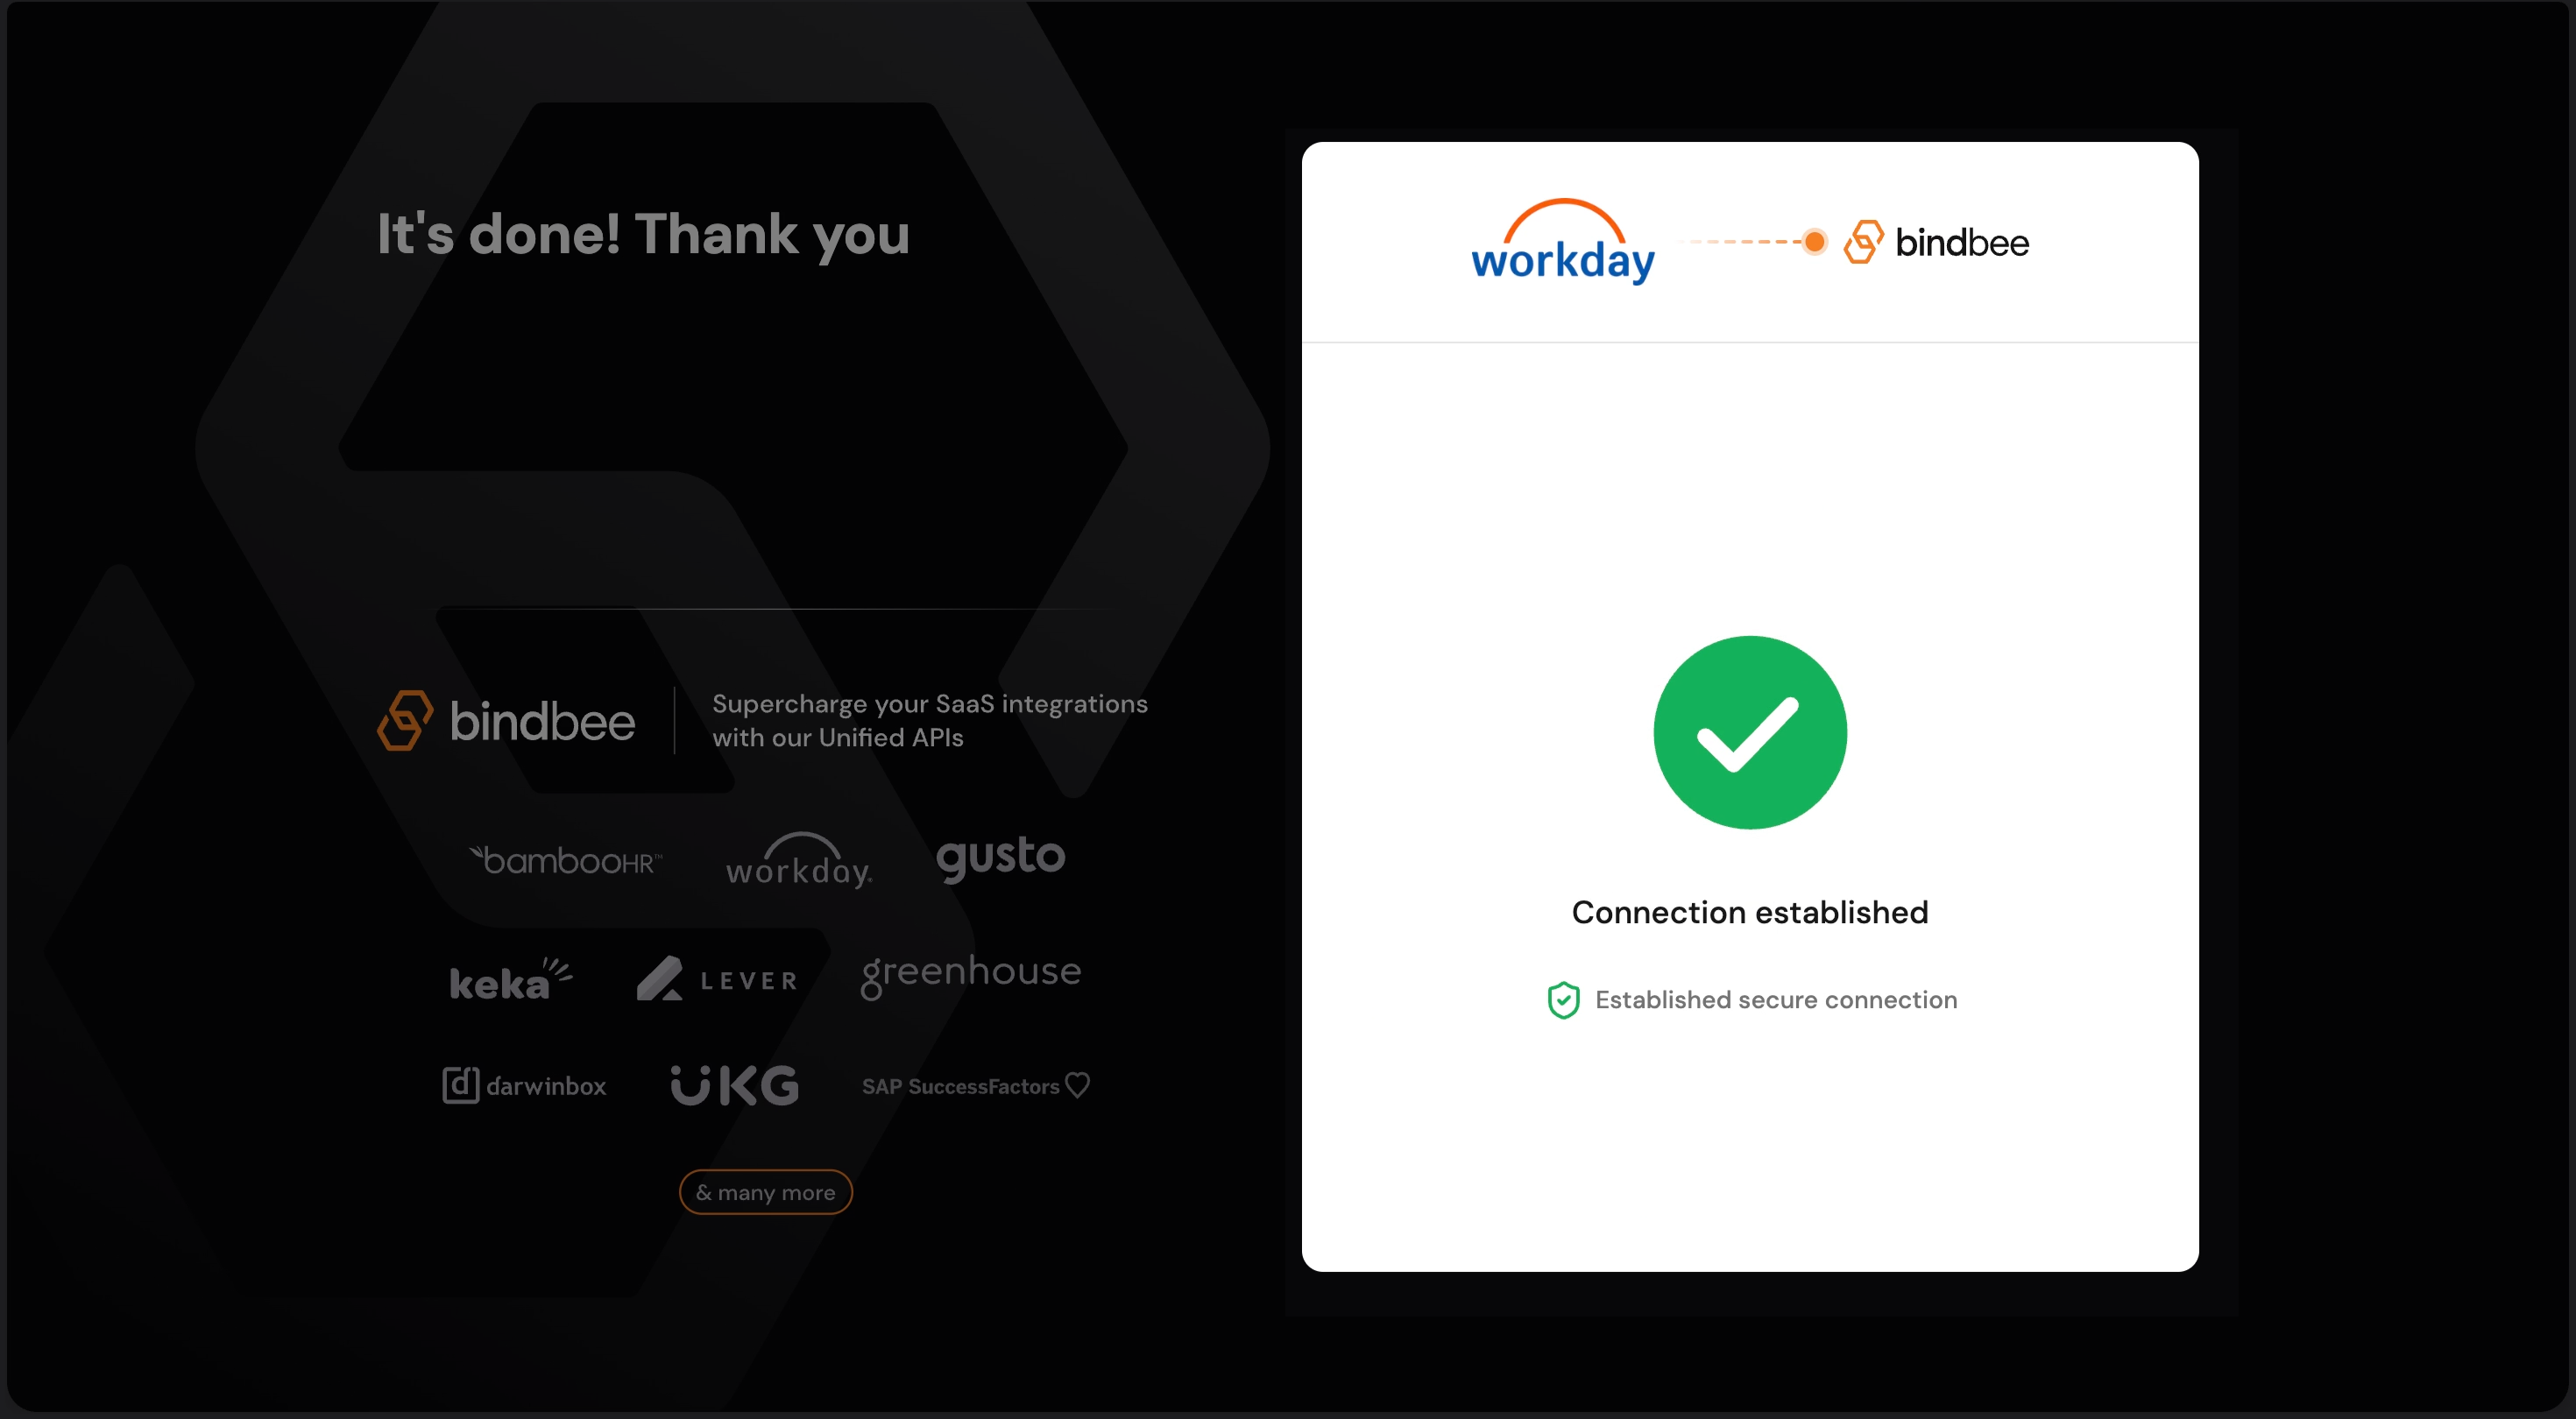
Congratulations! You’ve now successfully established the connection!
Troubleshooting
If you are experiencing issues with the connector or are not seeing the expected data, please review the following common checks to help identify and resolve the issue.
Report Configuration
Ensure the report is Enabled as a Web Service.
Report Sharing
Confirm that the report is shared with the authorized ISU user.
Refresh Token Configuration
Navigate to API Client > Manage Refresh Tokens for Integrations.
Verify that the same authorized user is added in the Workday Account field when generating the refresh token.
If the authorized user is not specified, the generated access token will not have permission to retrieve the report.
Functional Area Access
Verify that the required functional area is included in the API client configuration:
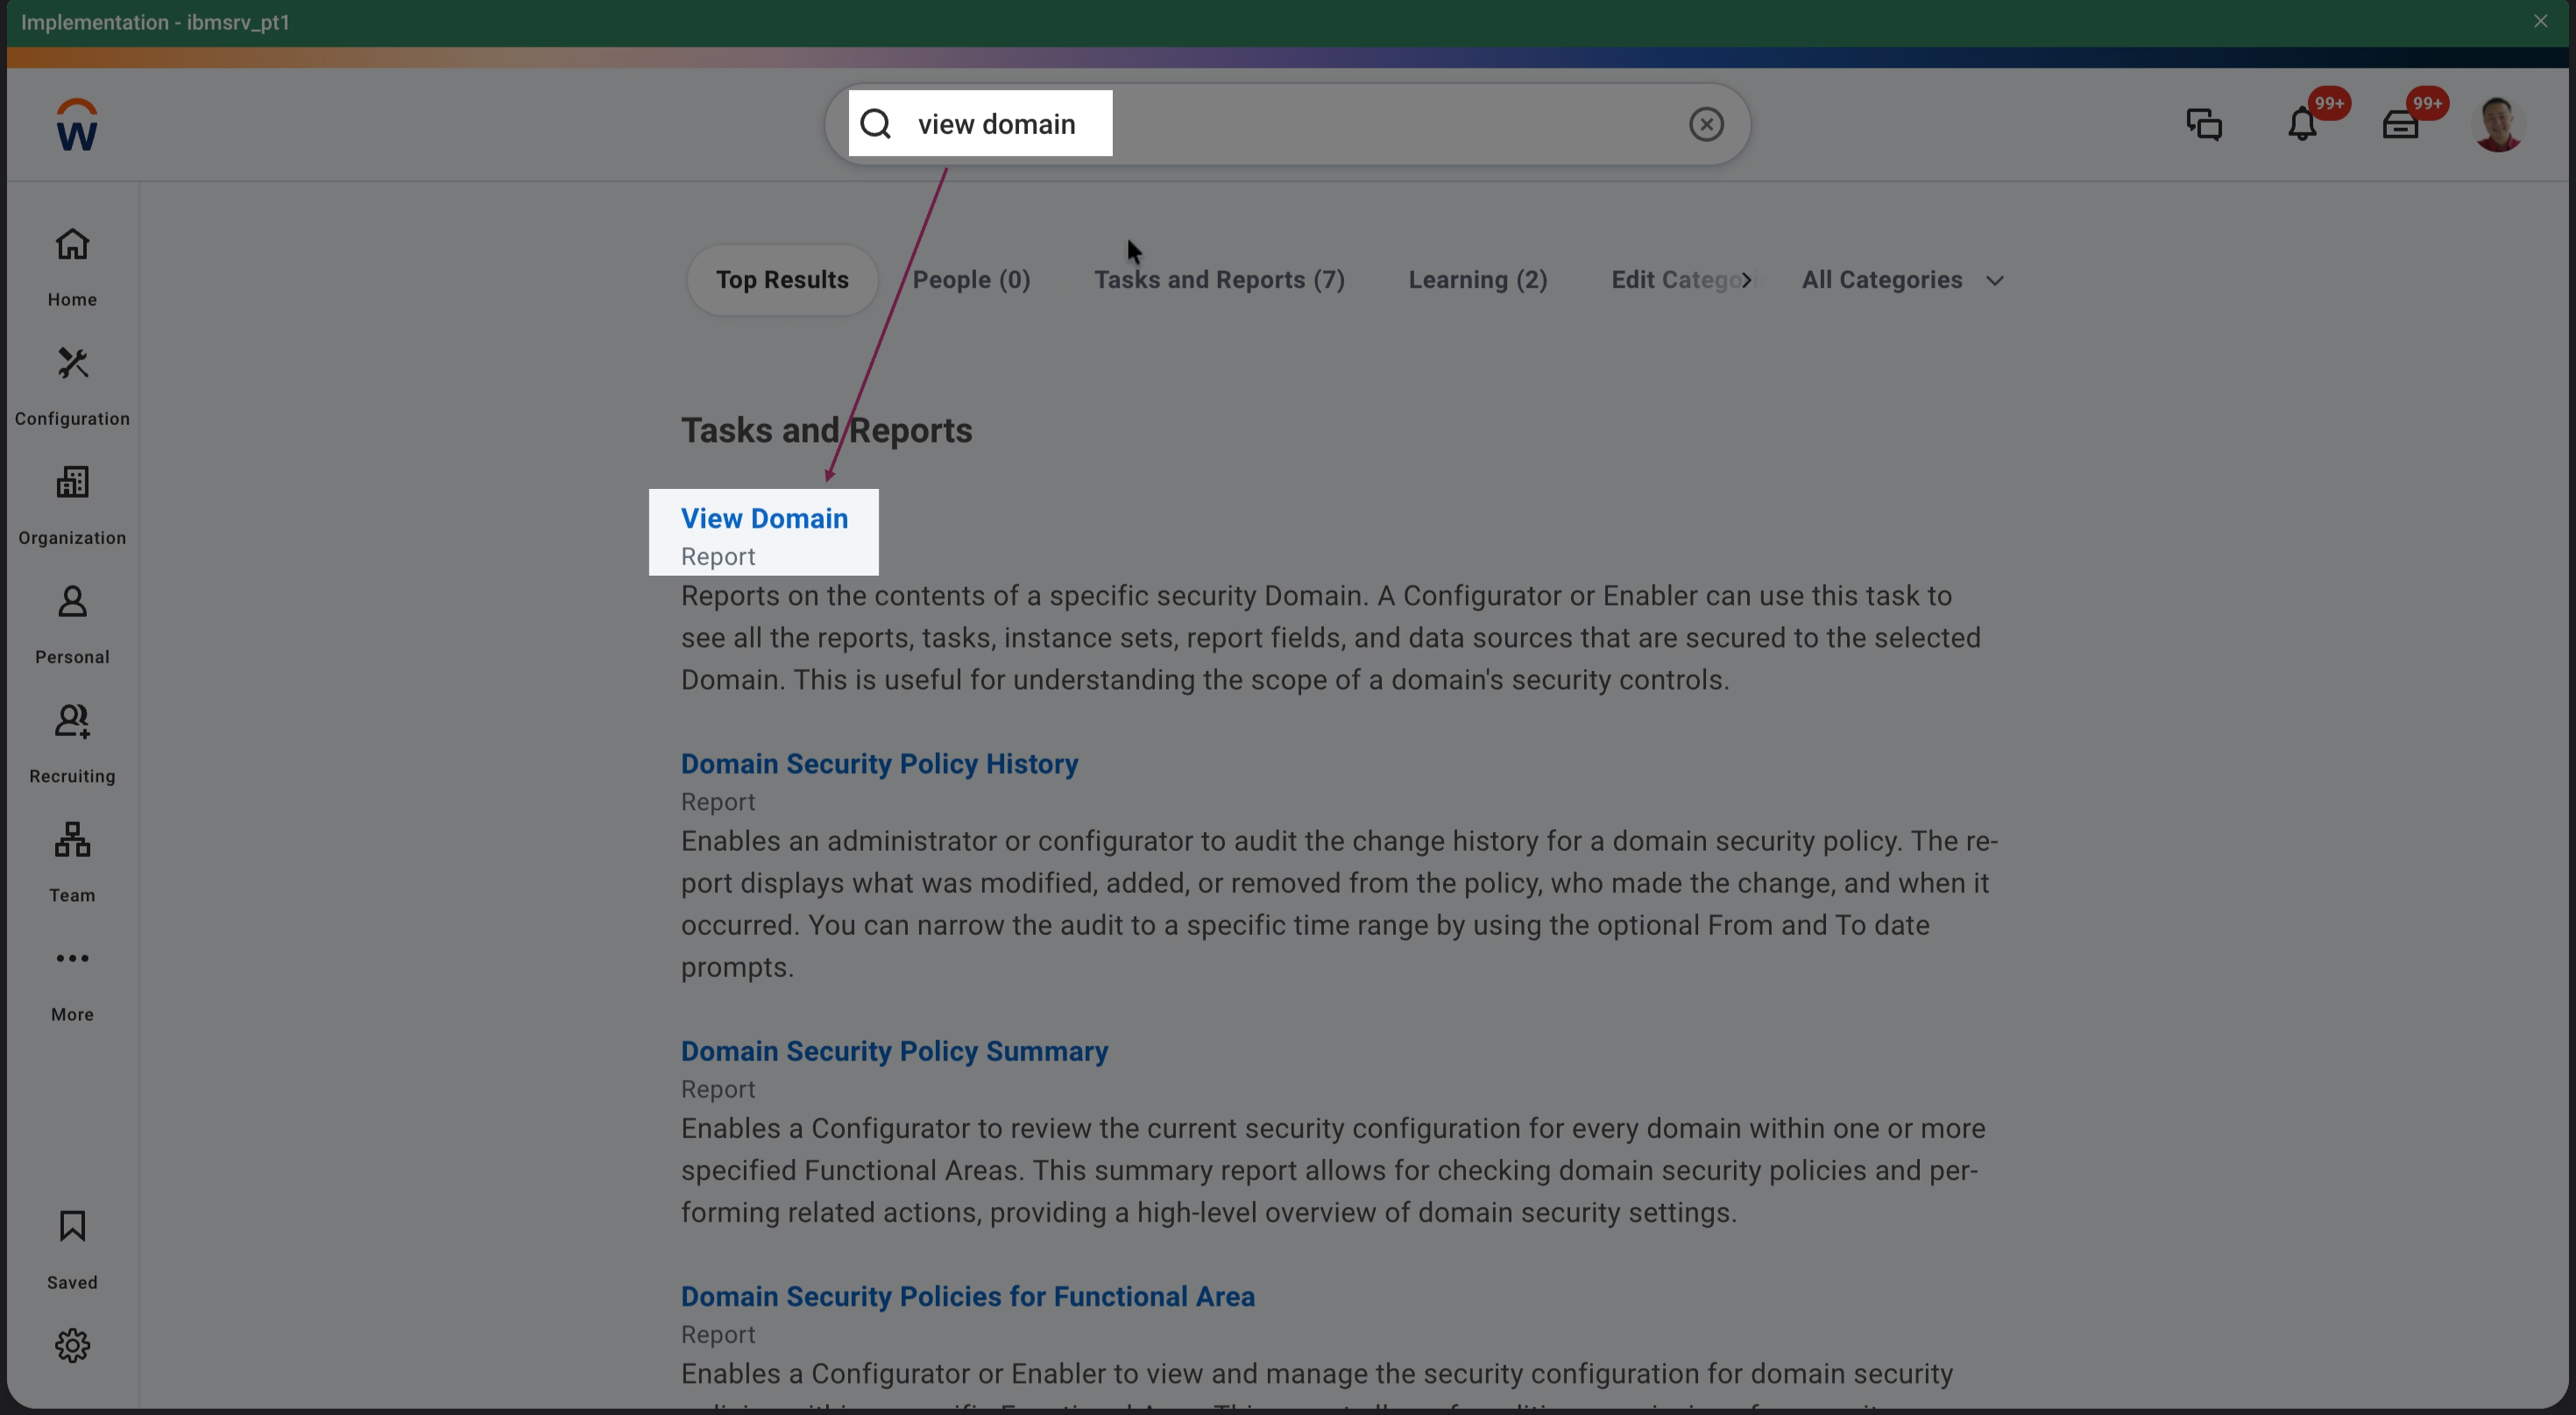
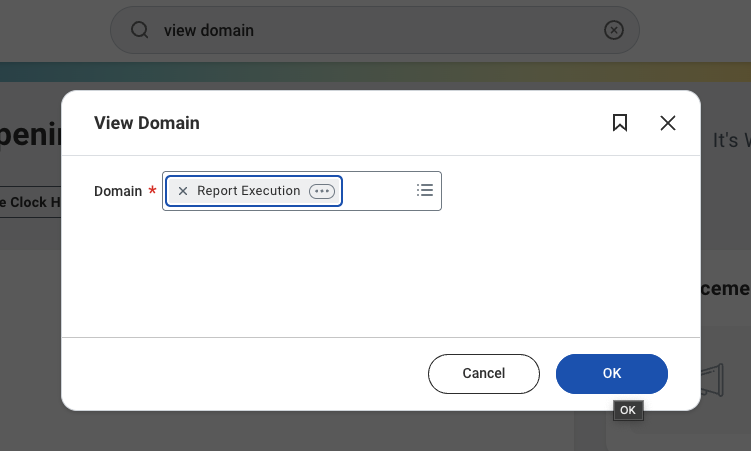
Search for View Domain, enter the domain as Report Execution, and click OK.
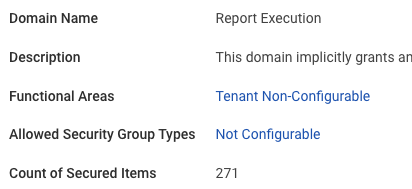
Note the Functional Area configured for this domain.
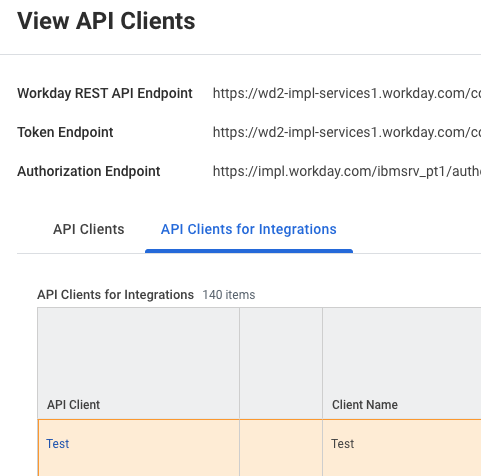
Go to View API Clients → API Clients for Integrations.
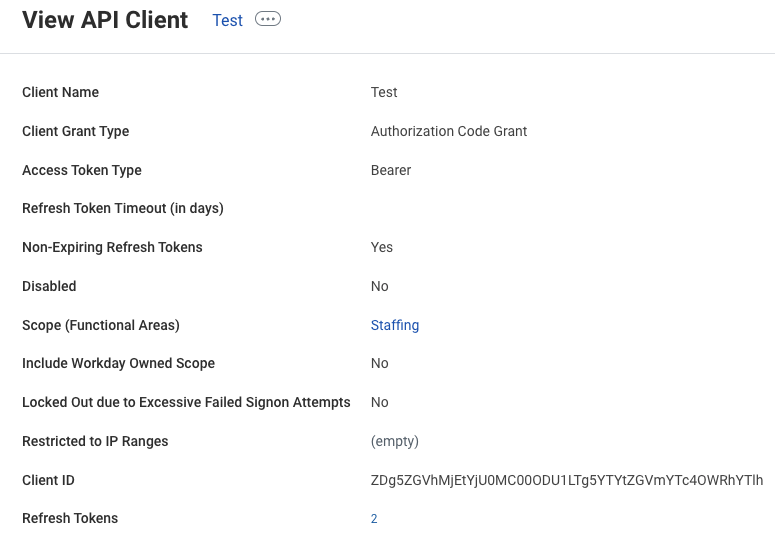
Open the API client registered for this integration.
In the Scope (Functional Areas) field, check whether the functional area noted in step 2 is listed.
If it is not listed, add the required functional area and save the API client (Click the ellipsis (...) next to the client name and choose API Client > Edit API Client for Integrations to add).