

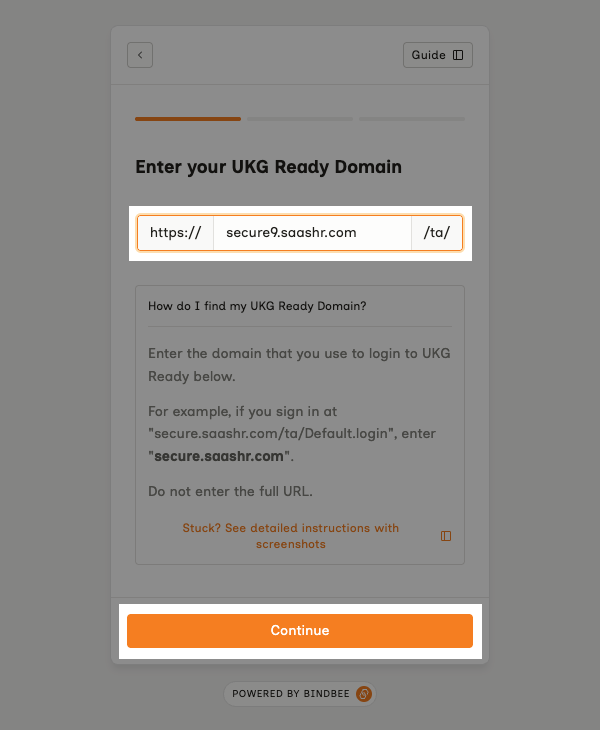
Enter only the domain, without https:// or /ta/. For example, enter secure.saashr.com, not https://secure.saashr.com/ta/.
Connect via OAuth
Updated today
This guide explains how to create a connector with UKG Ready using OAuth (a Client ID and Client Secret).
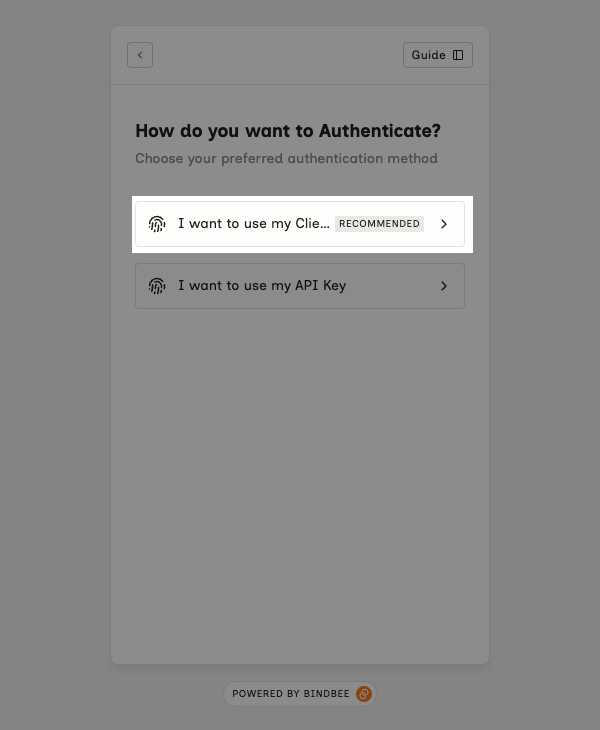
OAuth is the recommended authentication method for UKG Ready.
Before You Begin, you will need:
A UKG Ready account with administrator access.
The Bindbee magic link for this connection.
Steps to Connect with UKG Ready
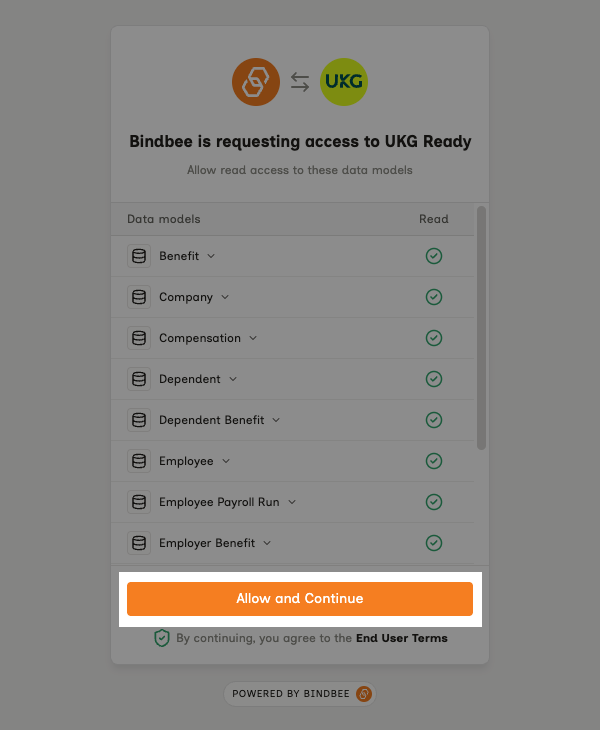
Start by opening the magic link provided. A pop-up window will appear.
Step 1: Click Allow and Continue.
Step 2: Select I want to use my Client ID & Client Secret.
Find Your UKG Ready Domain
Step 1: Sign in to UKG Ready and go to your home screen.
Step 2: Look at the URL in your browser's address bar and copy the part between https:// and /ta/. For example, if the URL starts with https://secure.saashr.com/ta/, copy secure.saashr.com.
Step 3: Paste it into the magic link and click Continue.
Find Your Company Short Name
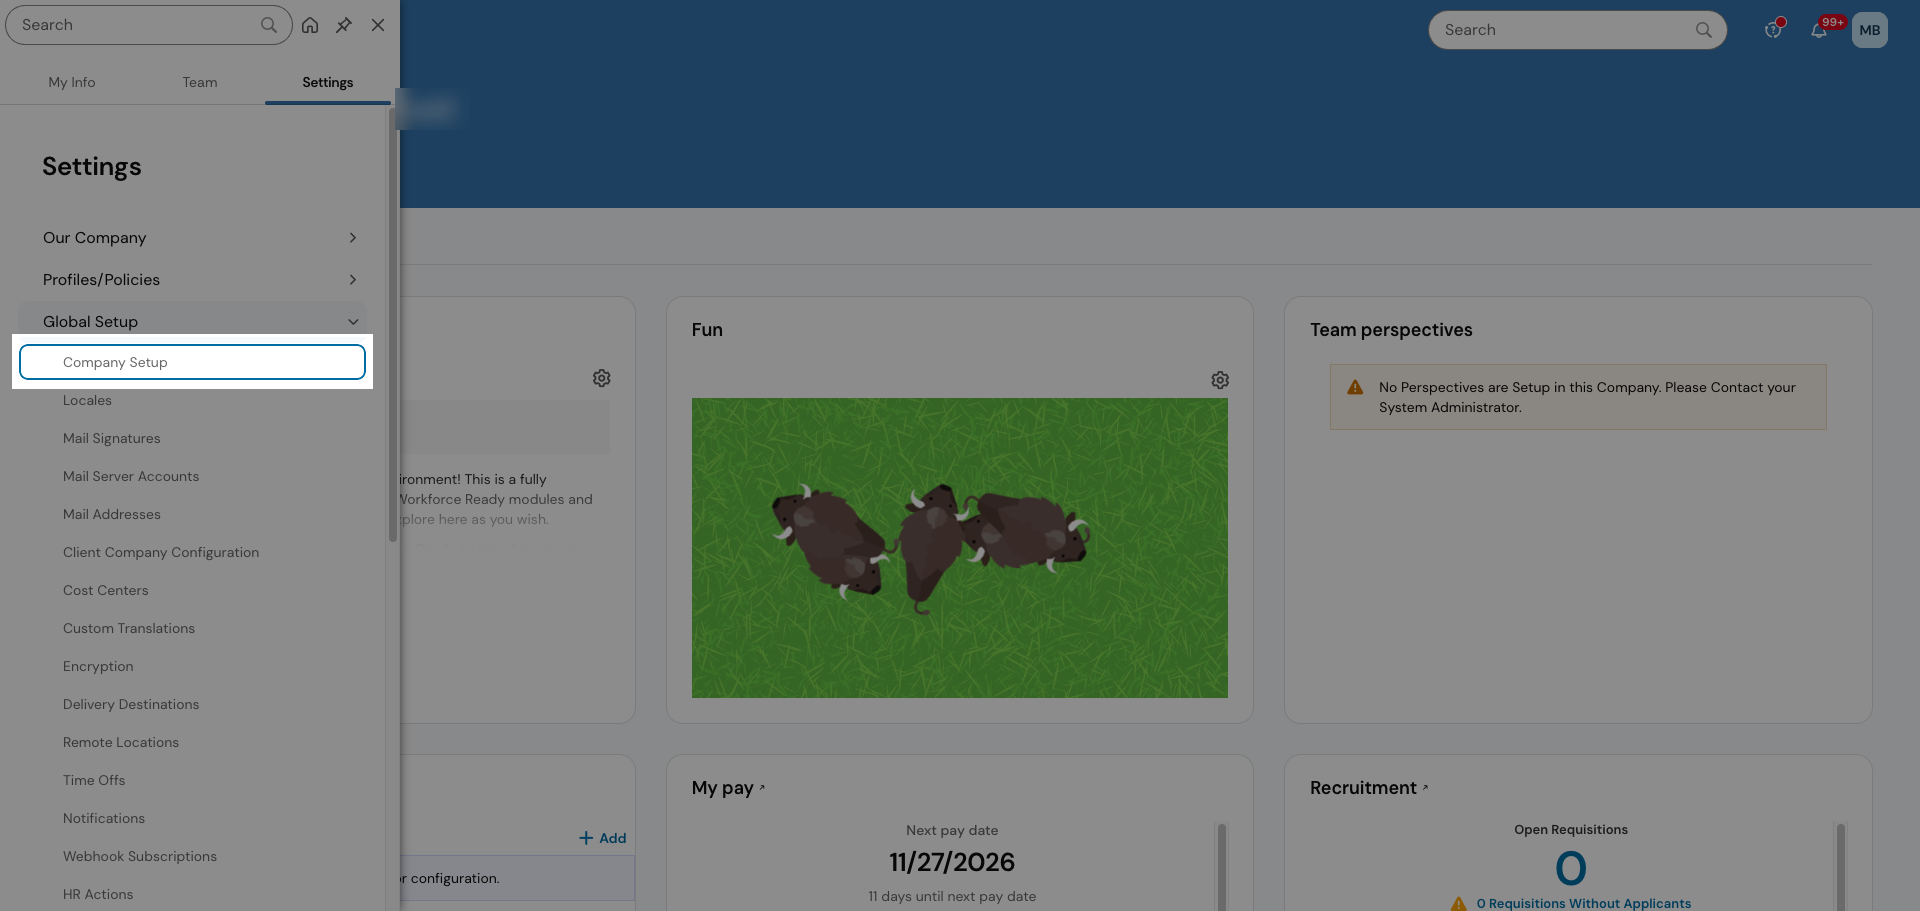
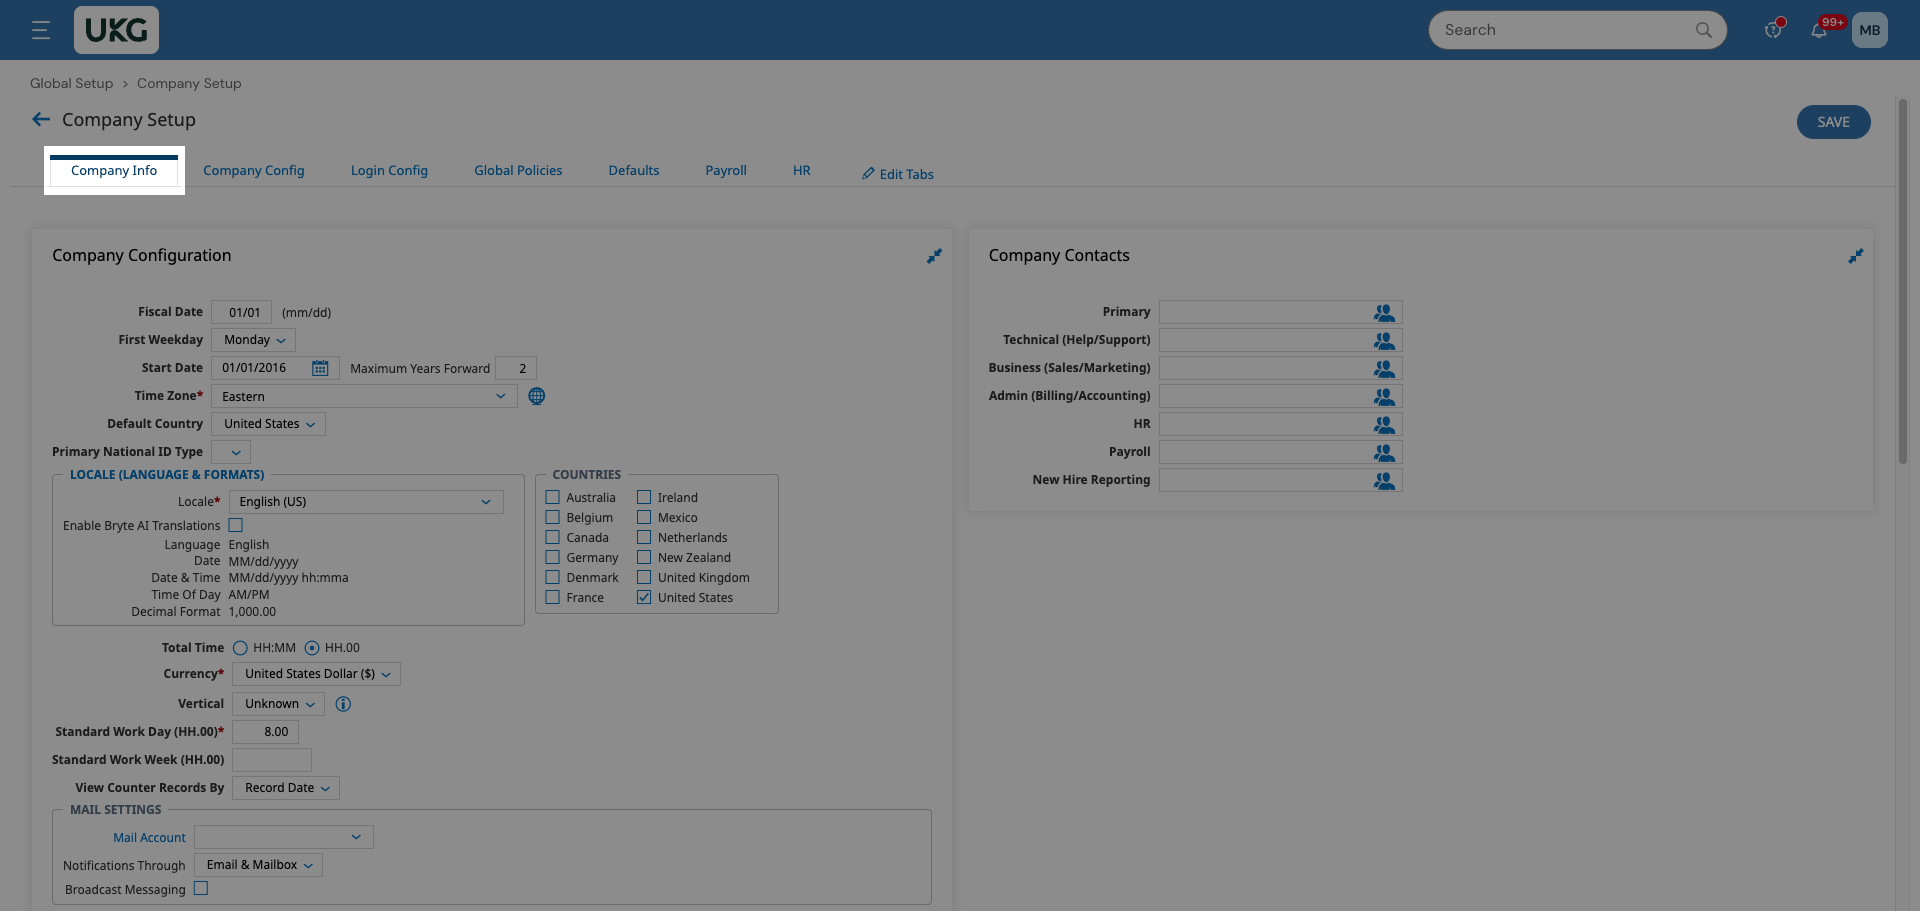
Step 1: In UKG Ready, open the menu in the top left and go to Settings > Global Setup > Company Setup.
Step 2: Click the Company Info tab.
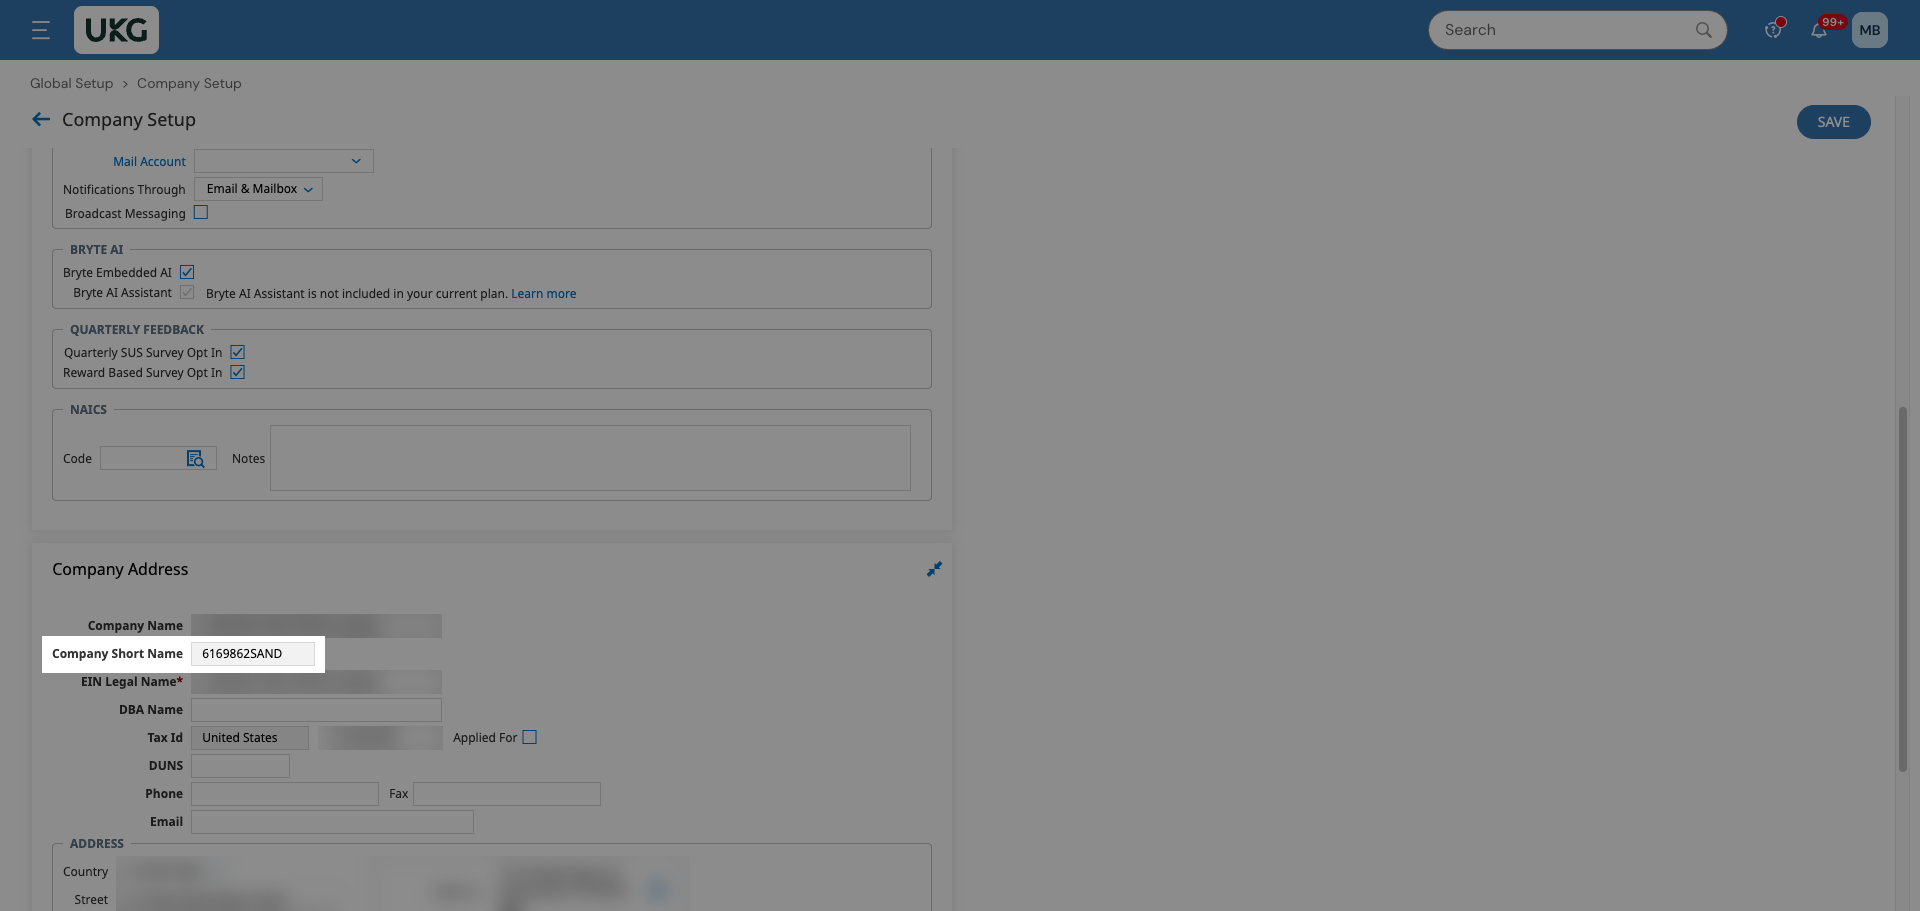
Step 3: Scroll to Company Address and copy the Company Short Name.
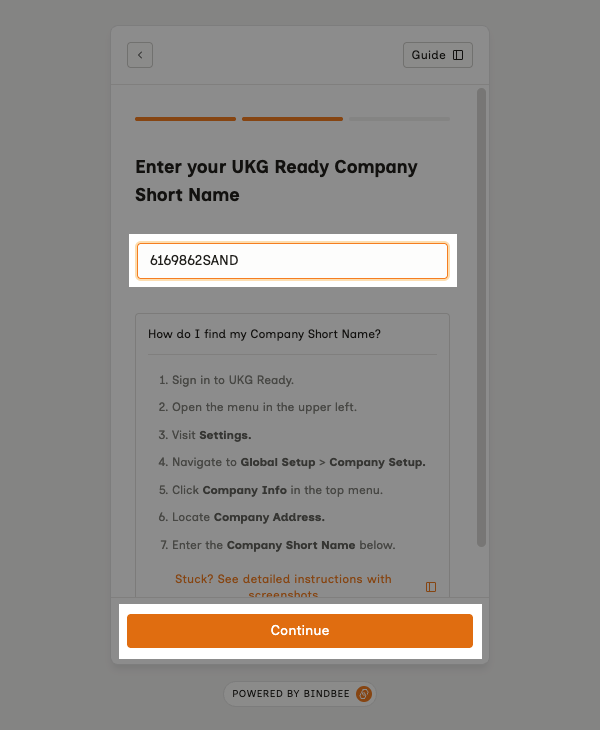
Step 4: Paste it into the magic link and click Continue.
Get Your Client ID and Client Secret
Create a security profile and an OAuth application in UKG Ready, then enter the Client ID and Client Secret in the magic link.
Create a Security Profile
The security profile controls which data Bindbee can read. If you already have a profile with the permissions below, skip to the next section.
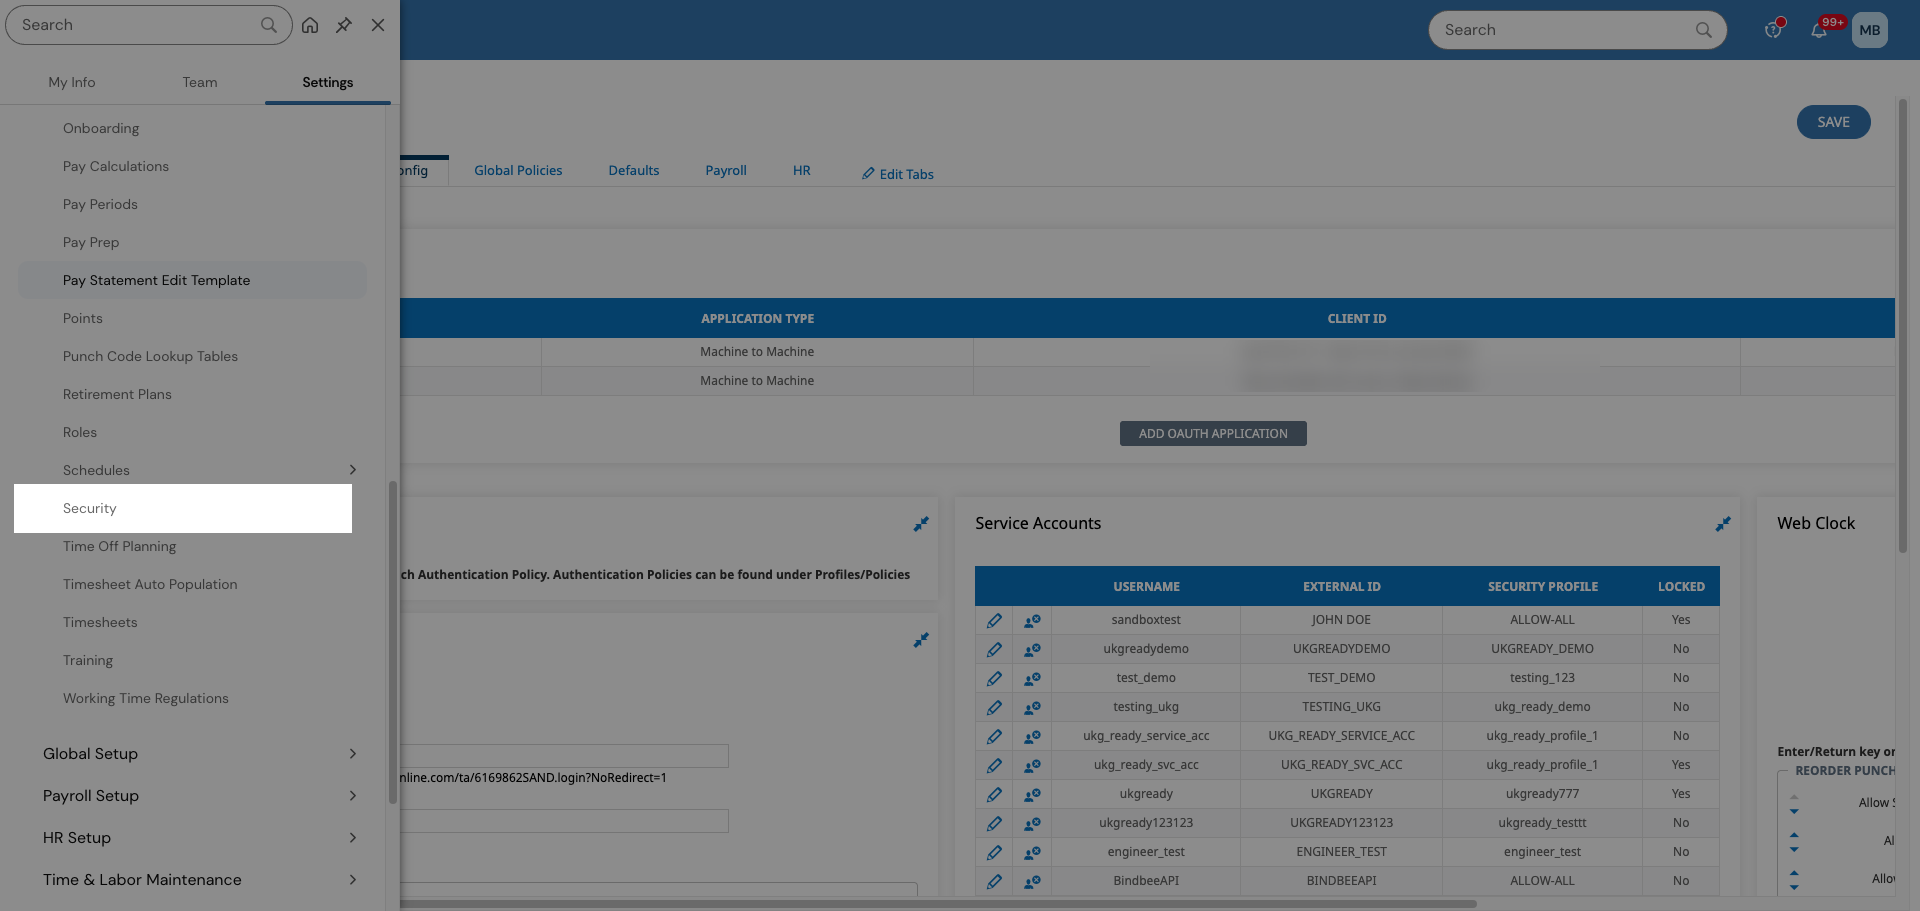
Step 1: Open the menu and go to Settings > Profiles/Policies.
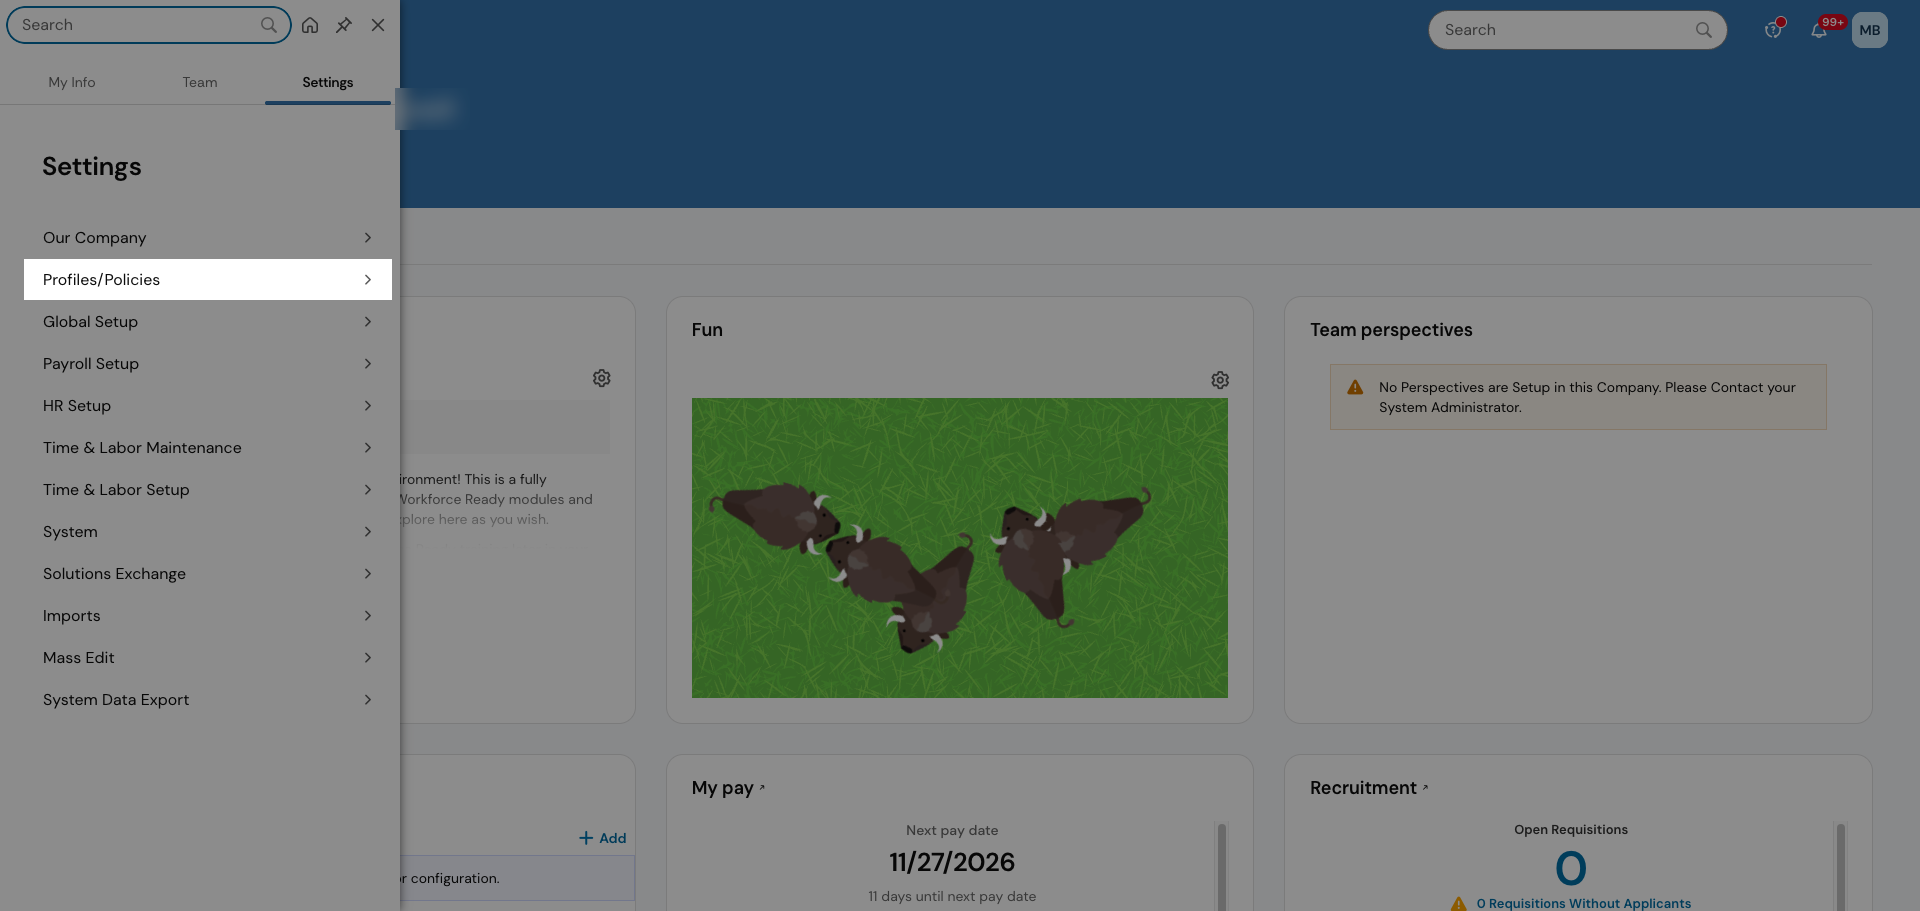
Step 2: Click Security.
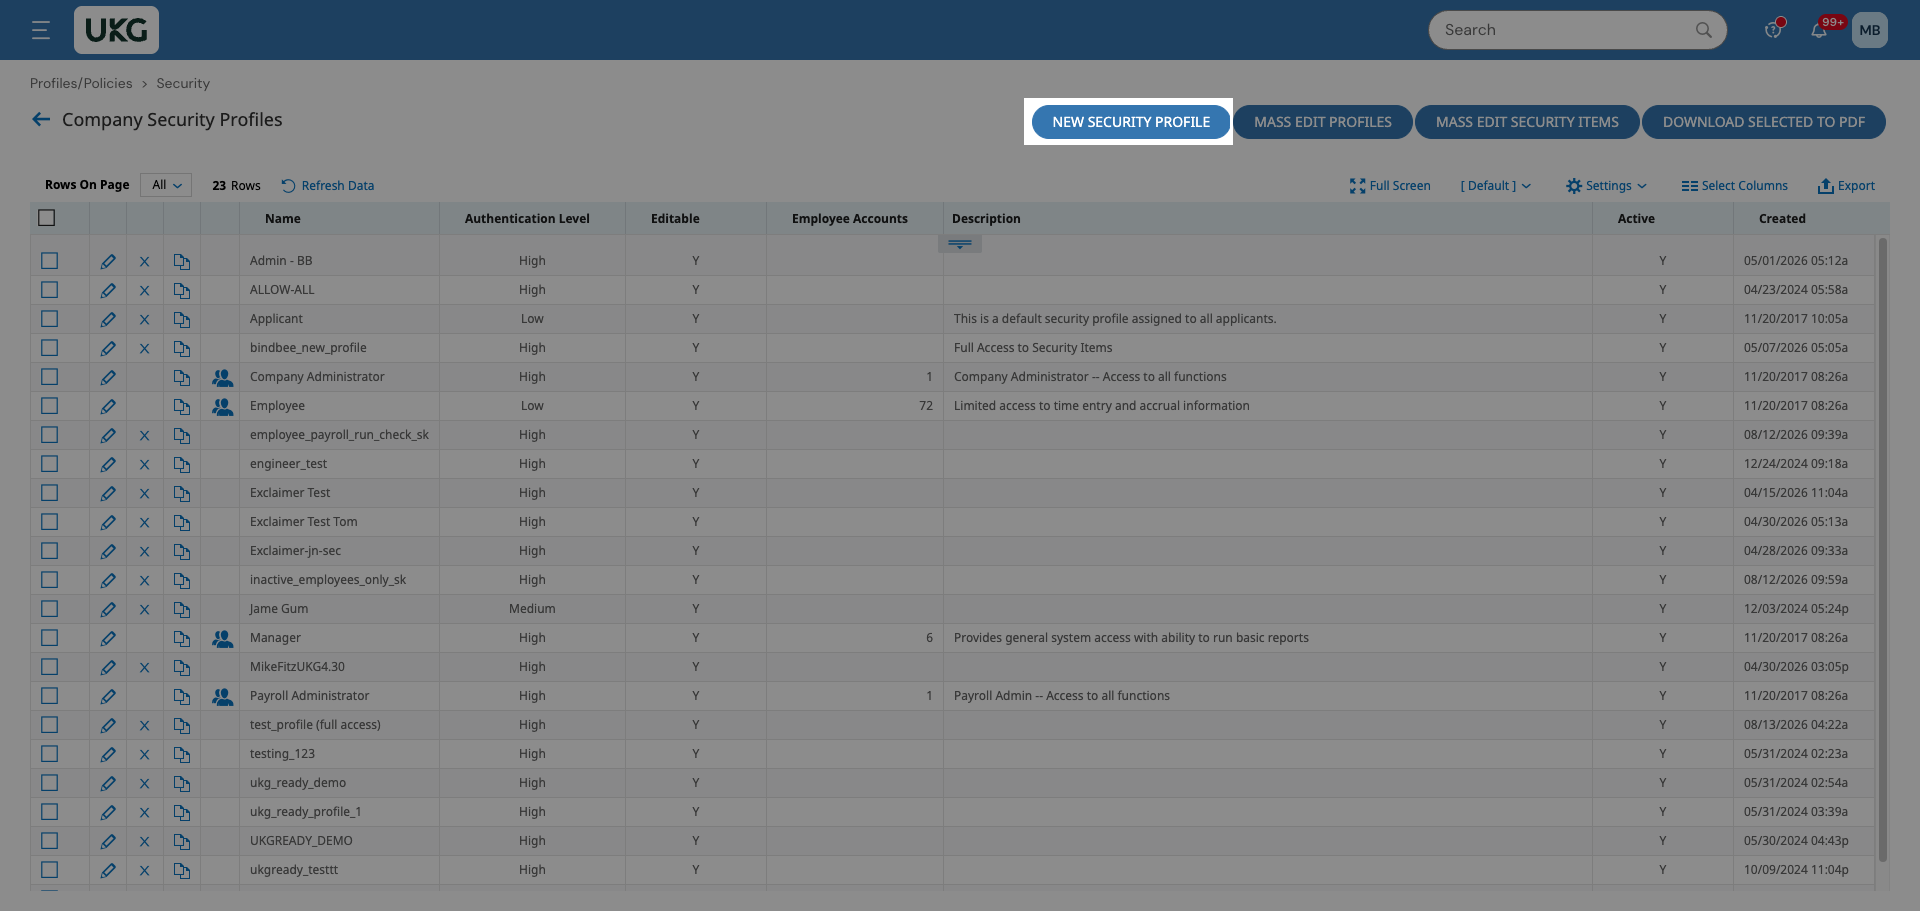
Step 3: Click New Security Profile.
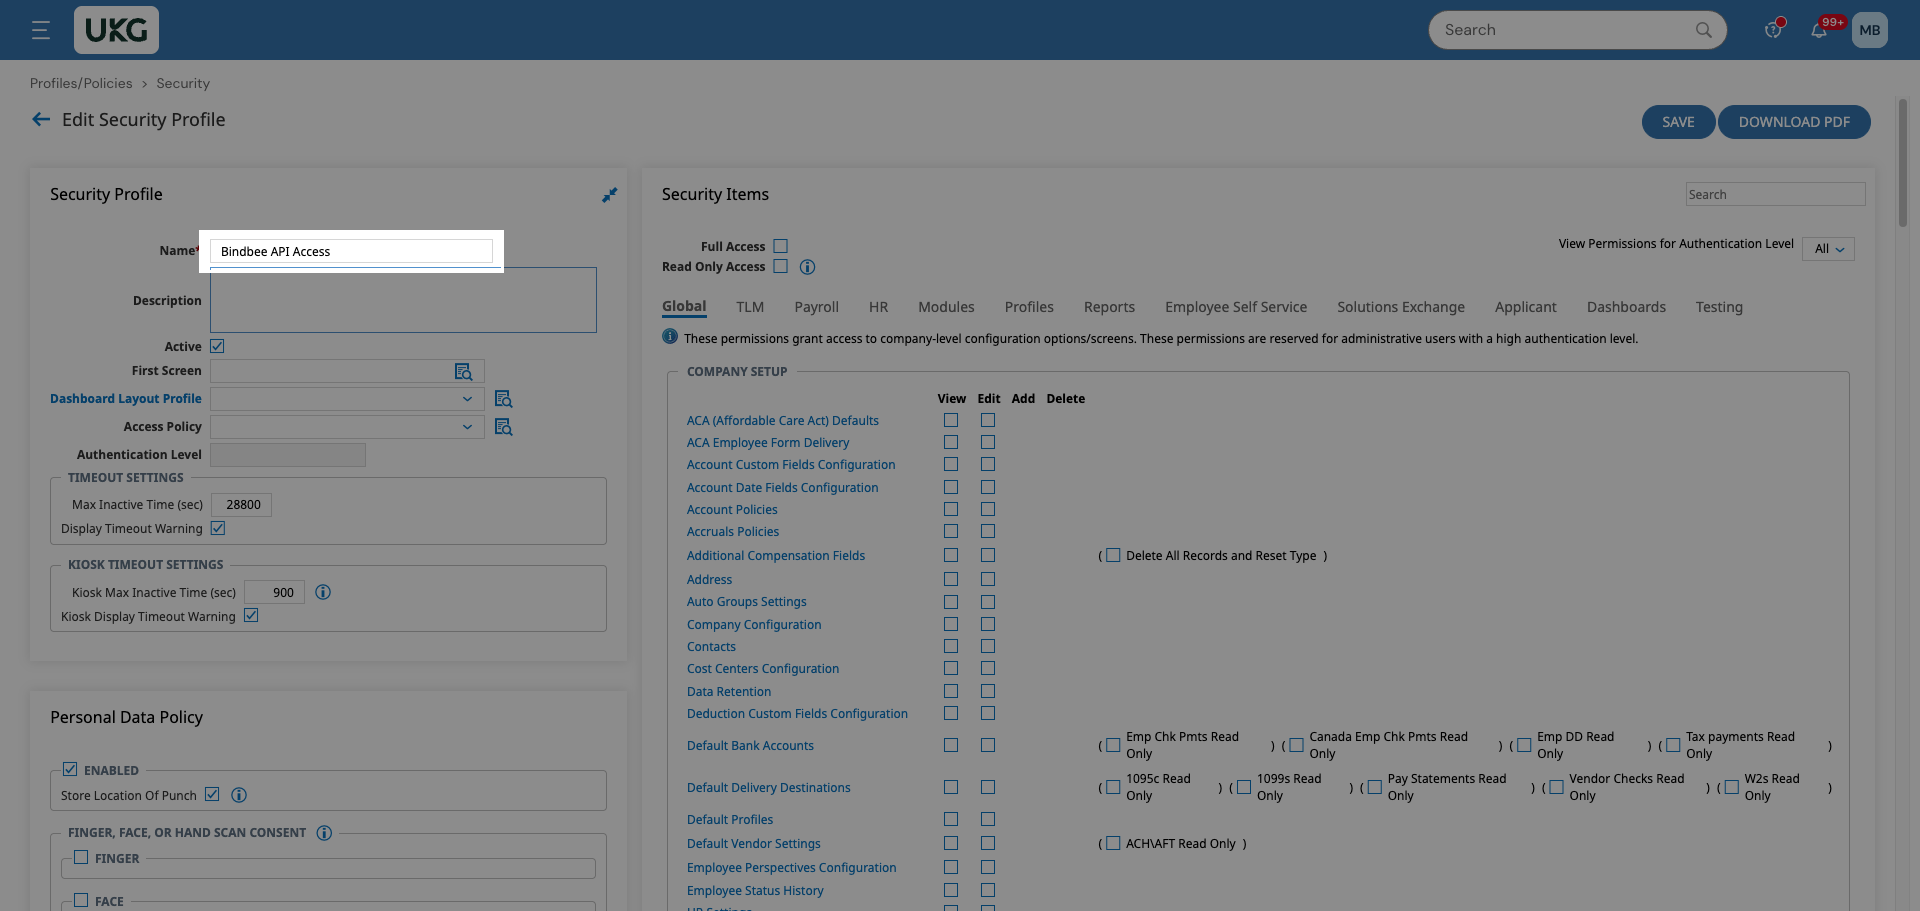
Step 4: Enter a name for the profile, for example Bindbee API Access.
Step 5: Enable the permissions for the data you need.
Employee data (always required)
Modules > REST API Resources: View for Employee Demographics, Employee HR Custom Fields, Employee Pay Information, Employee Profiles and Employees.
Global > Global Setup: View for Company EINs, Cost Center Definitions and Cost Center Trees.
Global > Object Lists: View for Company EINs and Cost Centers.
HR: View for Cost Centers.
HR > Employee Management: View for HR Custom Values, needed for employee custom fields.
Compensation data
HR: View for Base Compensation and Total Compensation.
Benefits data
HR: View for Benefit Management (Plans), on the same screen as Base Compensation above.
Payroll data
Payroll: check Create/Edit Payroll, Payroll Adjustment and Payroll Prep Process.
Payroll > View/Edit/Add: check it, then tick the pay statement types under it (at least Manual; ideally all).
Global > Object Lists: View for Pay Period Profile.
Bank info data
HR > Employee Management: View for Direct Deposits.
Time Off data
Global > Global Setup: View for Leave of Absence Custom Fields Definitions.
Global > Object Lists: View for Leave of Absence Categories.
HR > Leave of Absence Management: check Manage Requests.
Modules > Accruals: check View Employee Balances, for time off balances.
TLM > Time Editing/Approving Functionality: View/Edit/Approve All for time off requests.
Timesheet data
TLM > Time Editing/Approving Functionality: View/Edit for submitted timesheets.
Skills data
Modules > REST API Resources: View for Employee Skills.
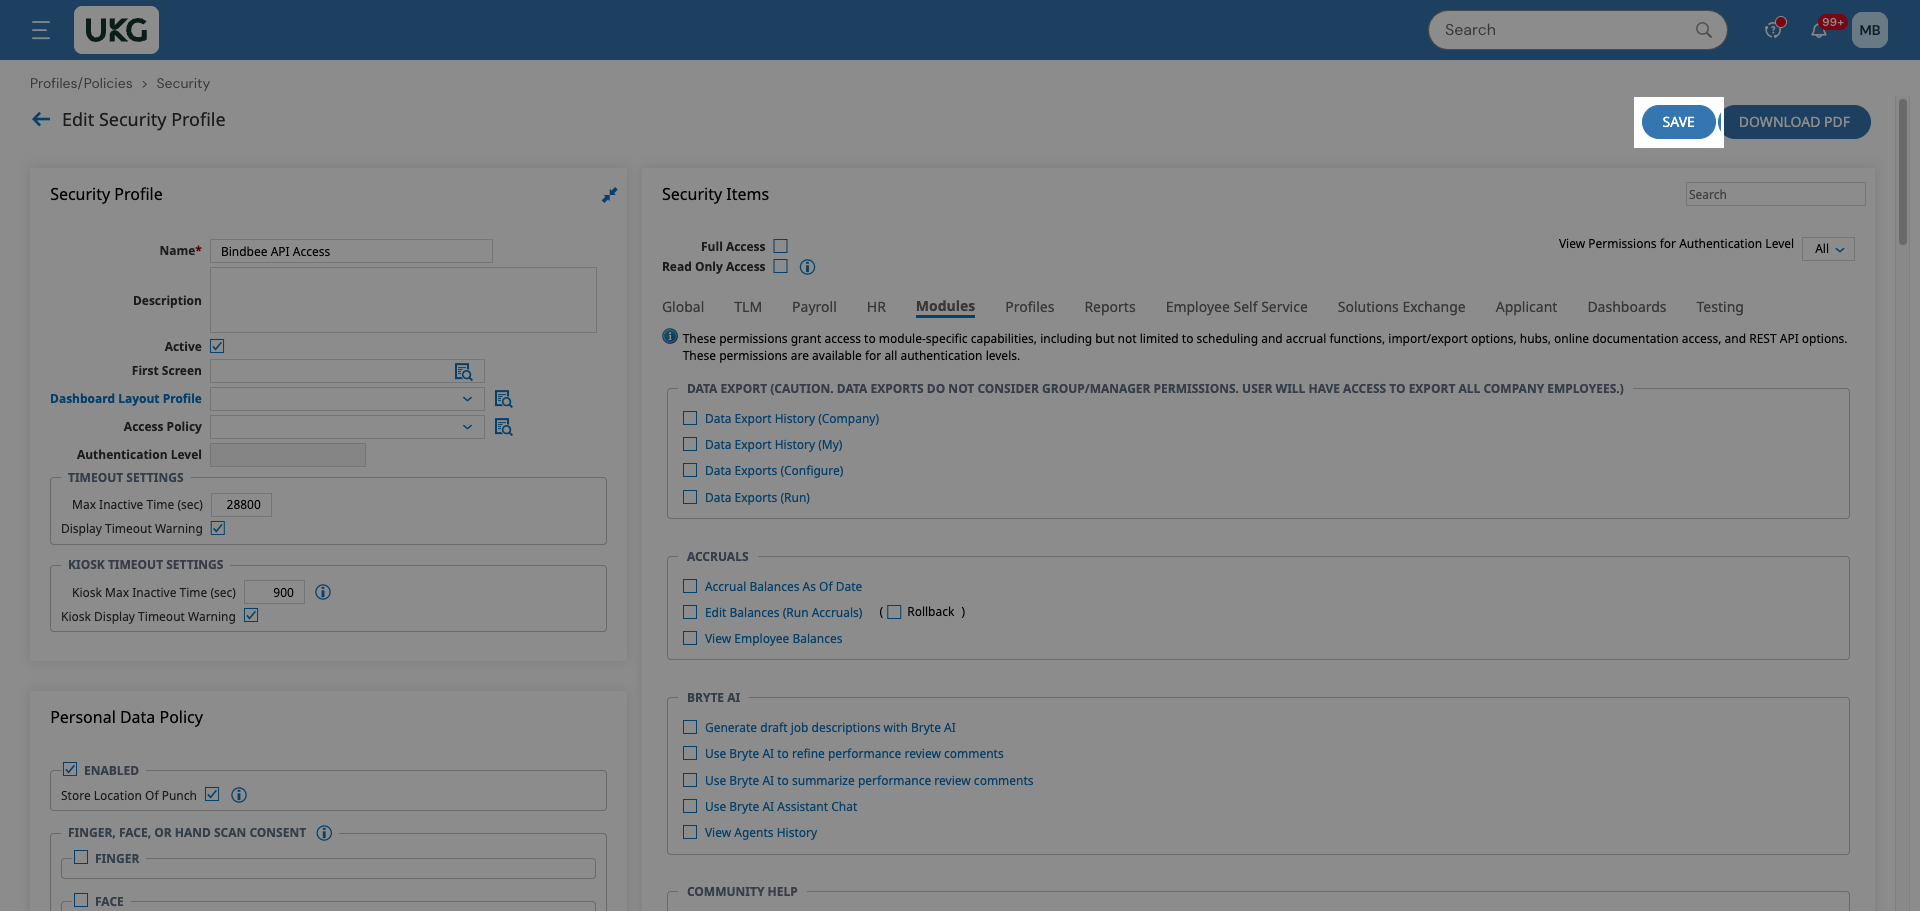
Step 6: Click Save.
Create an OAuth Application
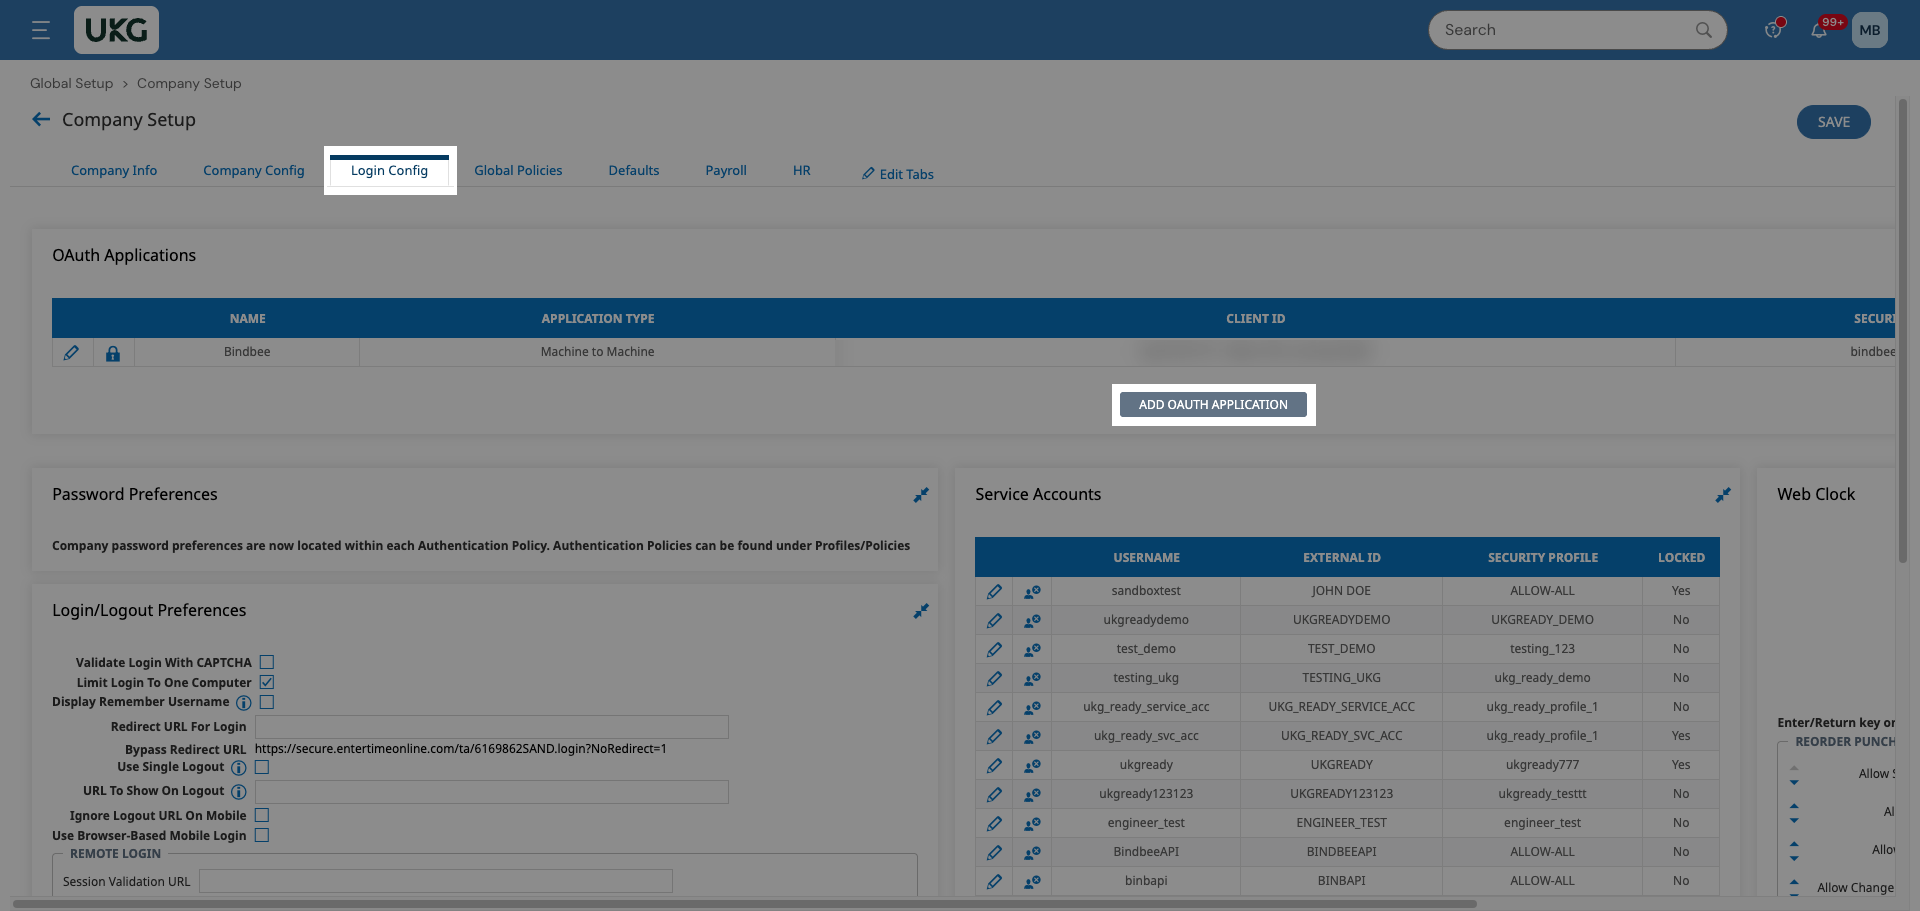
Step 1: Go to Settings > Global Setup > Company Setup, open the Login Config tab and click Add OAuth Application.
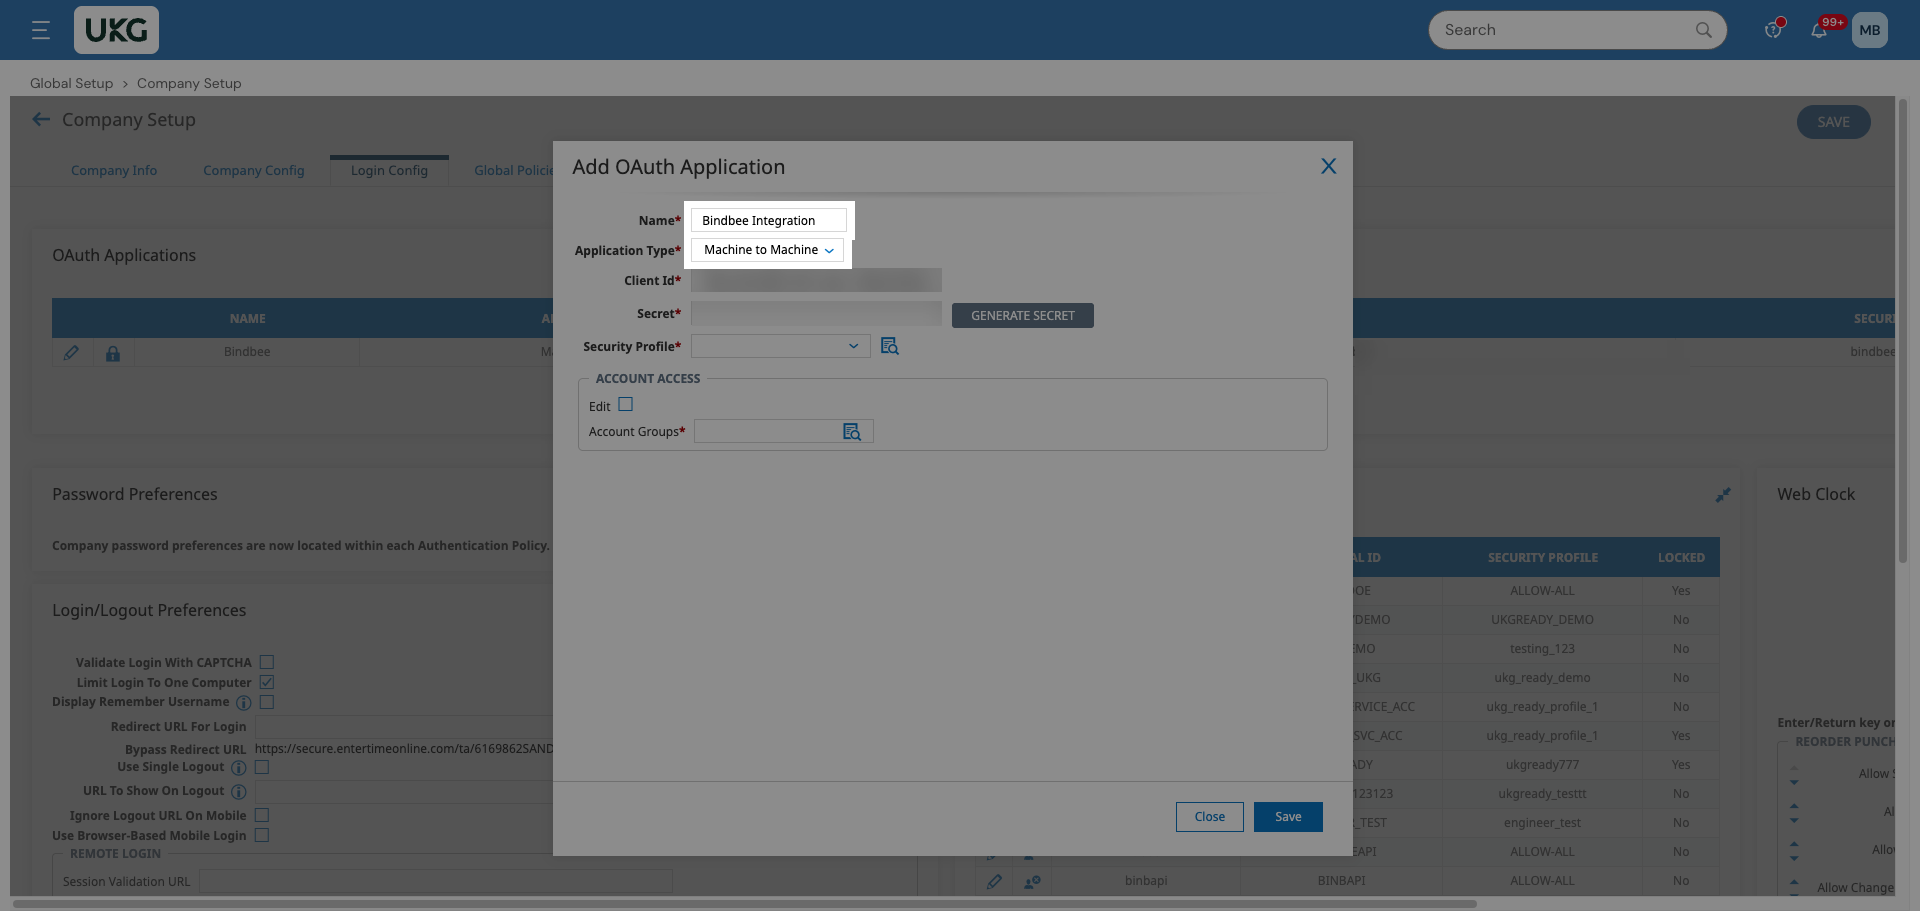
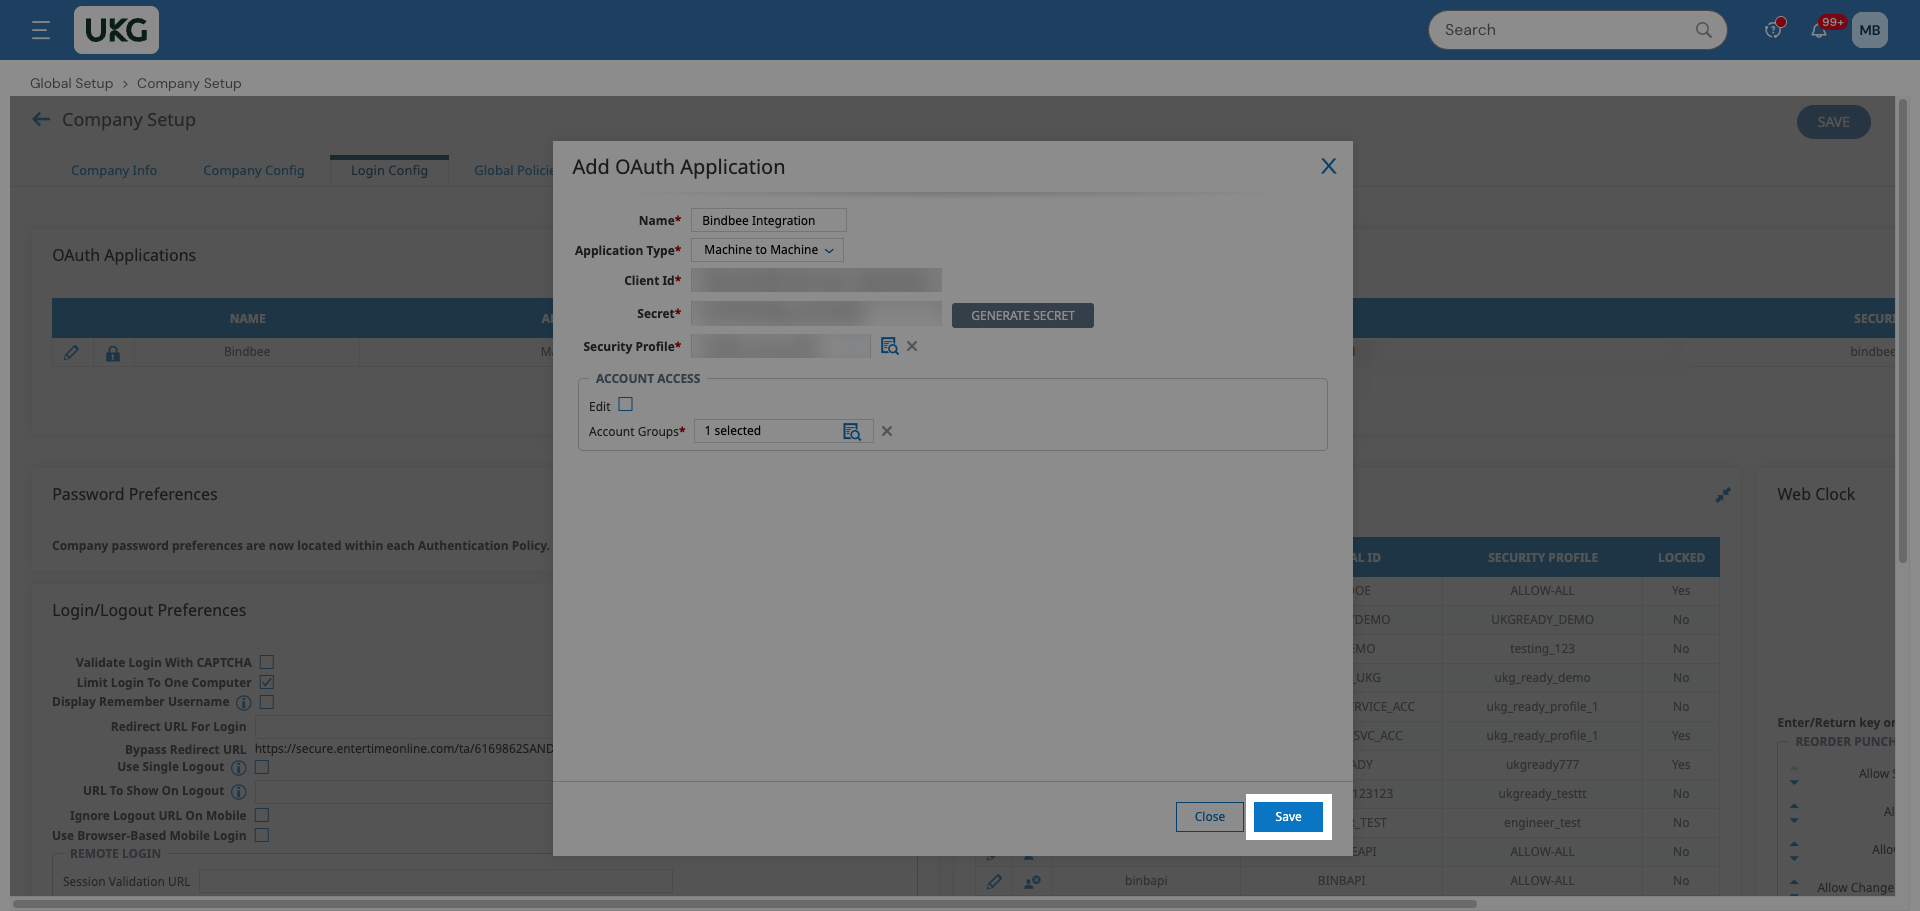
Step 2: Enter a name, for example Bindbee Integration, and keep Application Type set to Machine to Machine.
Step 3: Click Generate Secret. Copy the Client ID and Secret and keep them somewhere safe.
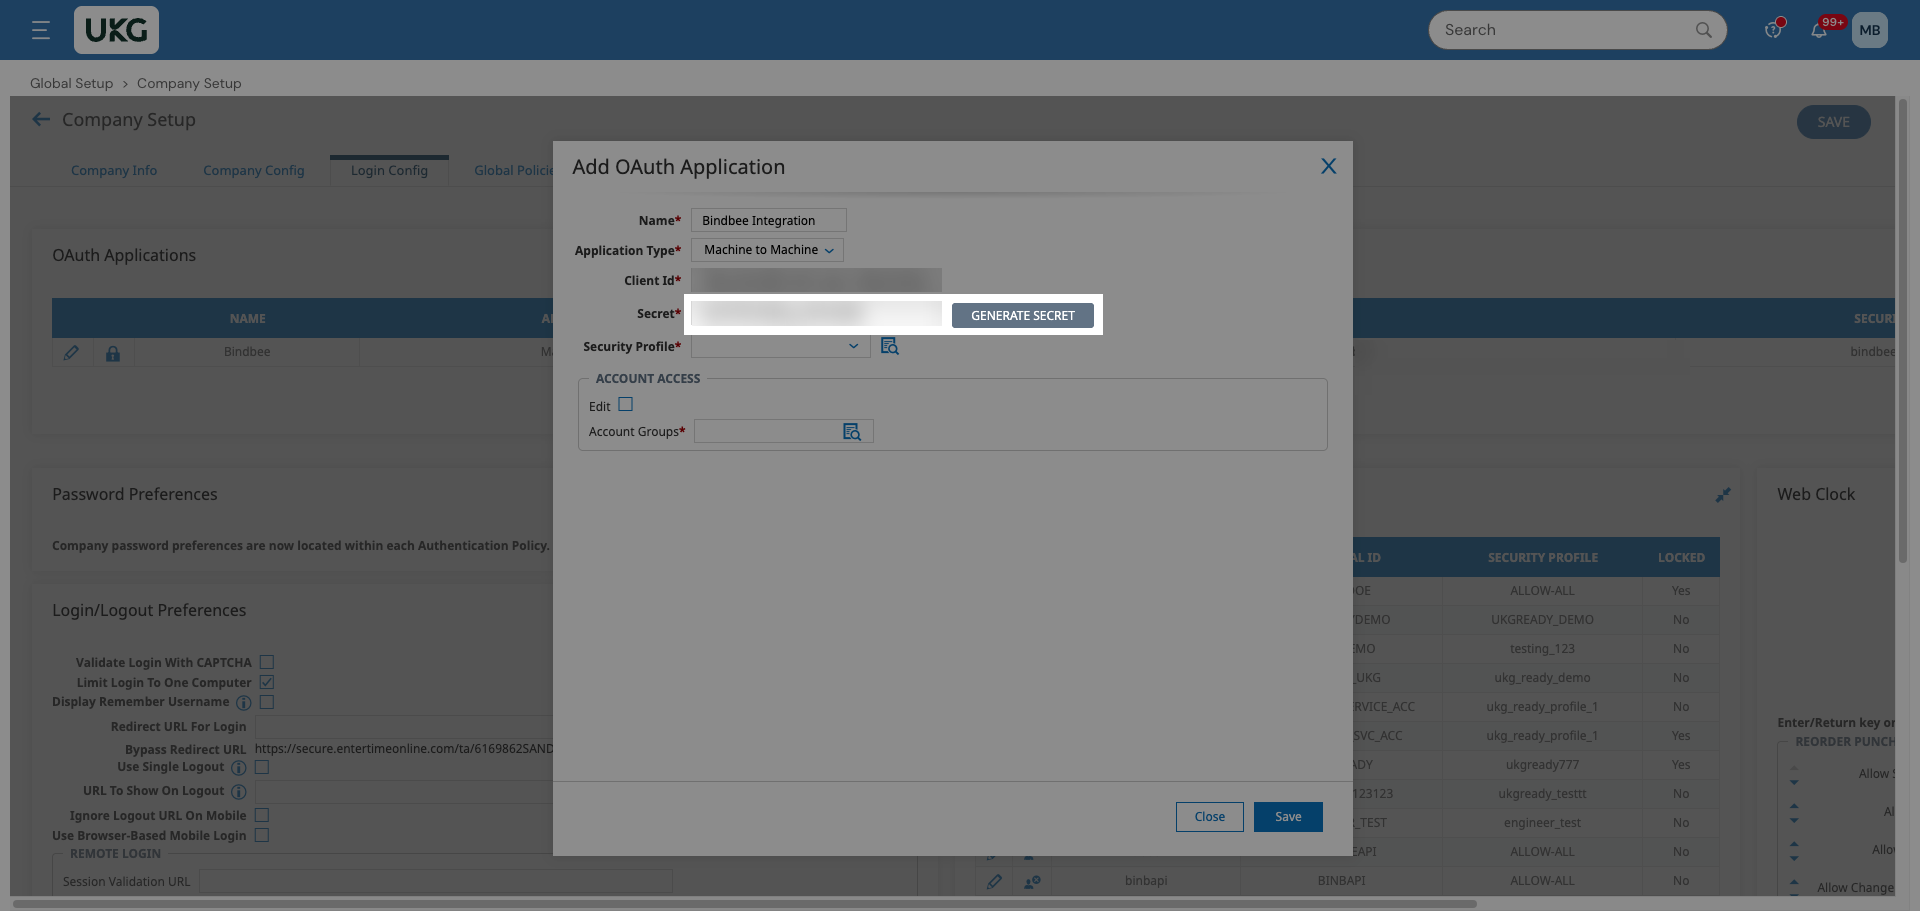
Copy the Secret now. UKG Ready doesn't show it again after you save the application. If you lose it, edit the application and generate a new one.
Step 4: Select the security profile you created earlier.
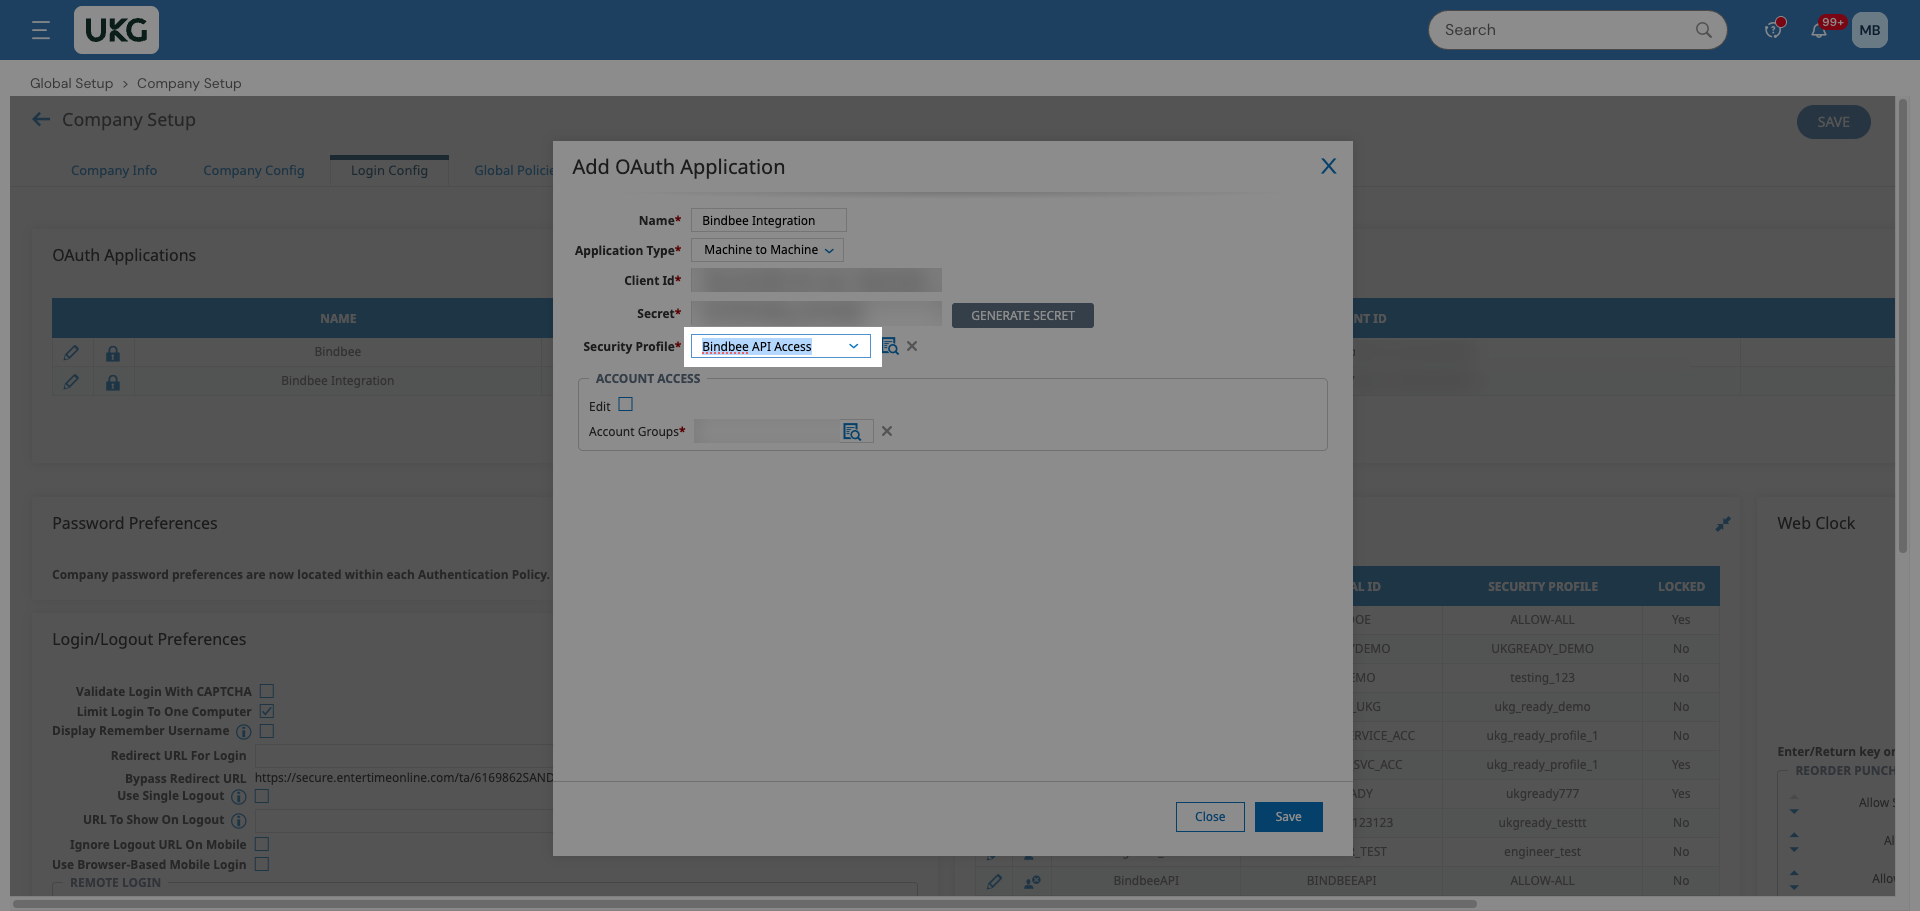
Step 5: Under Account Access, click the magnifying glass next to Account Groups.
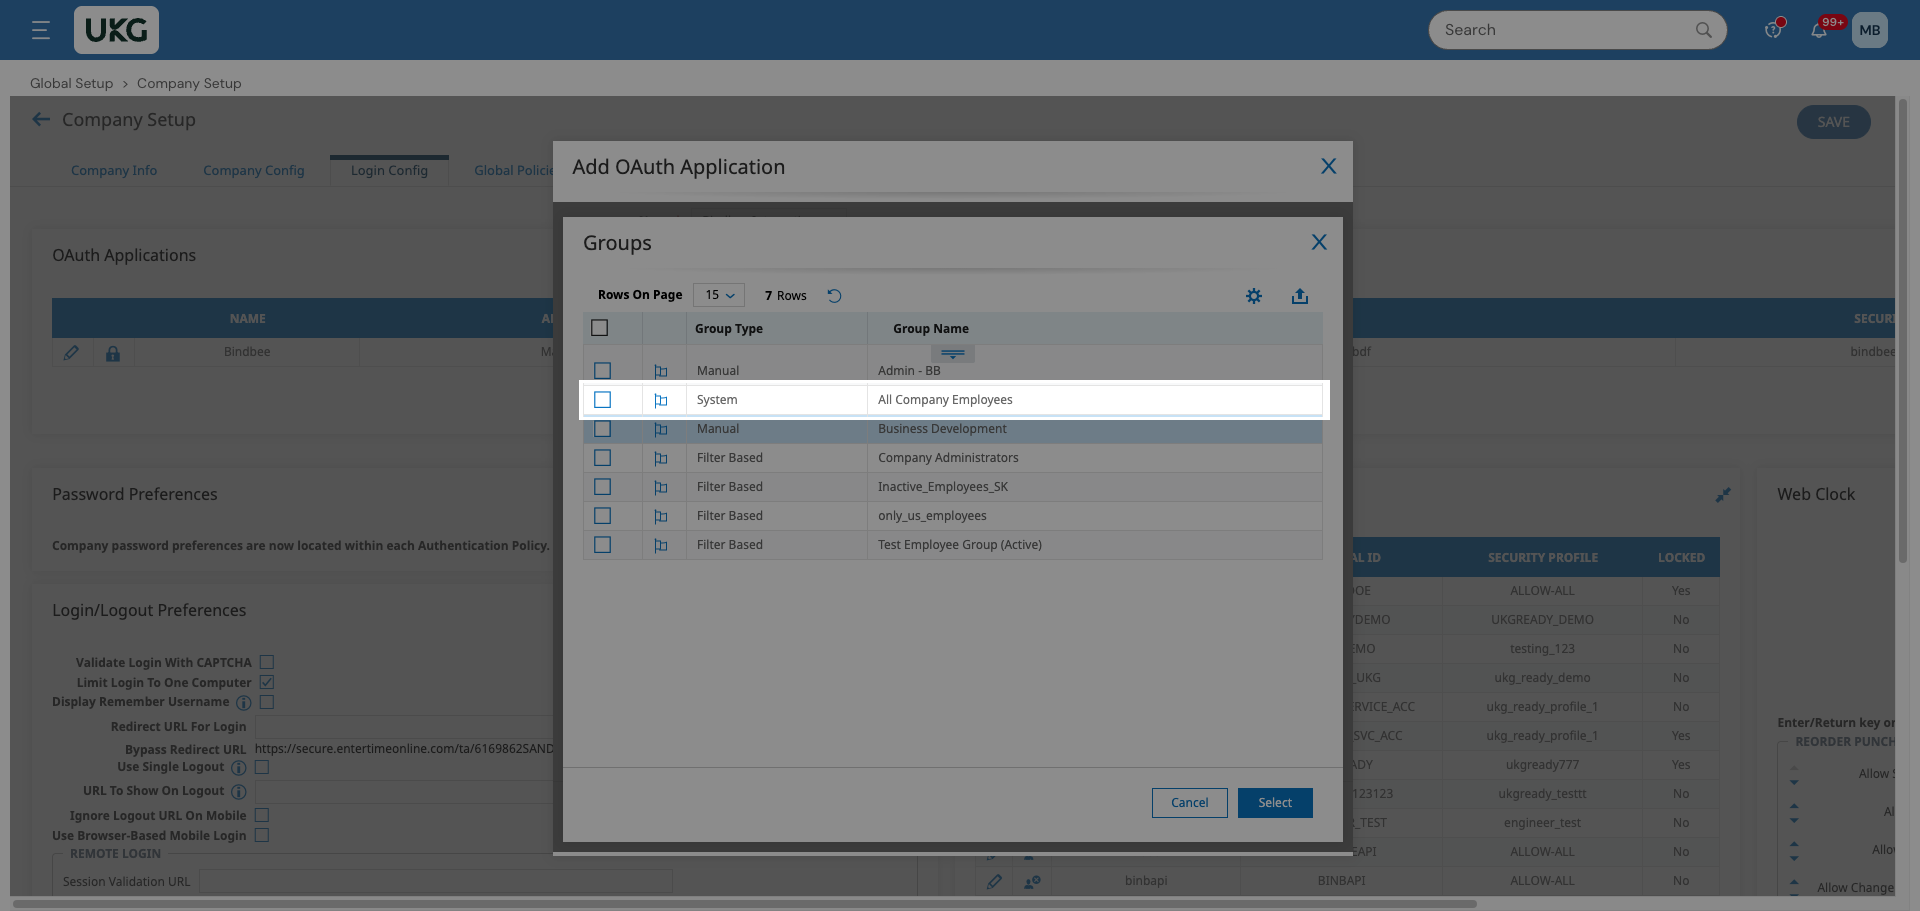
Step 6: Select All Company Employees and click Select.
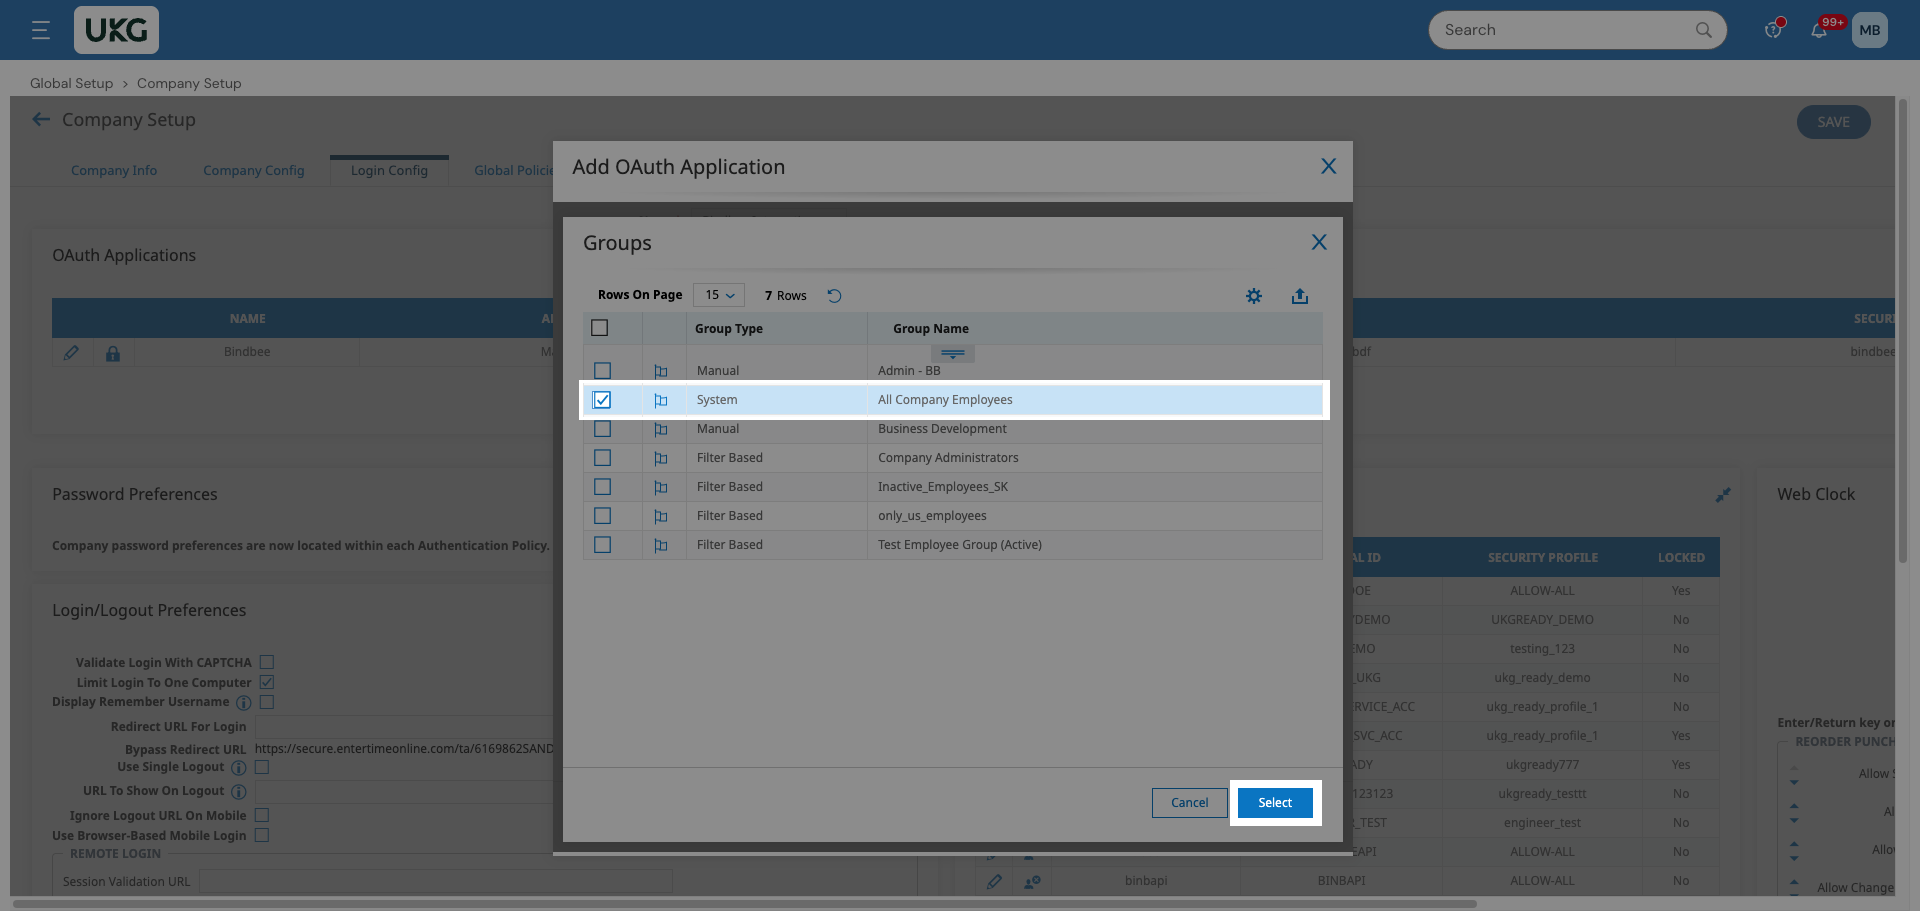
Step 7: Click Save.
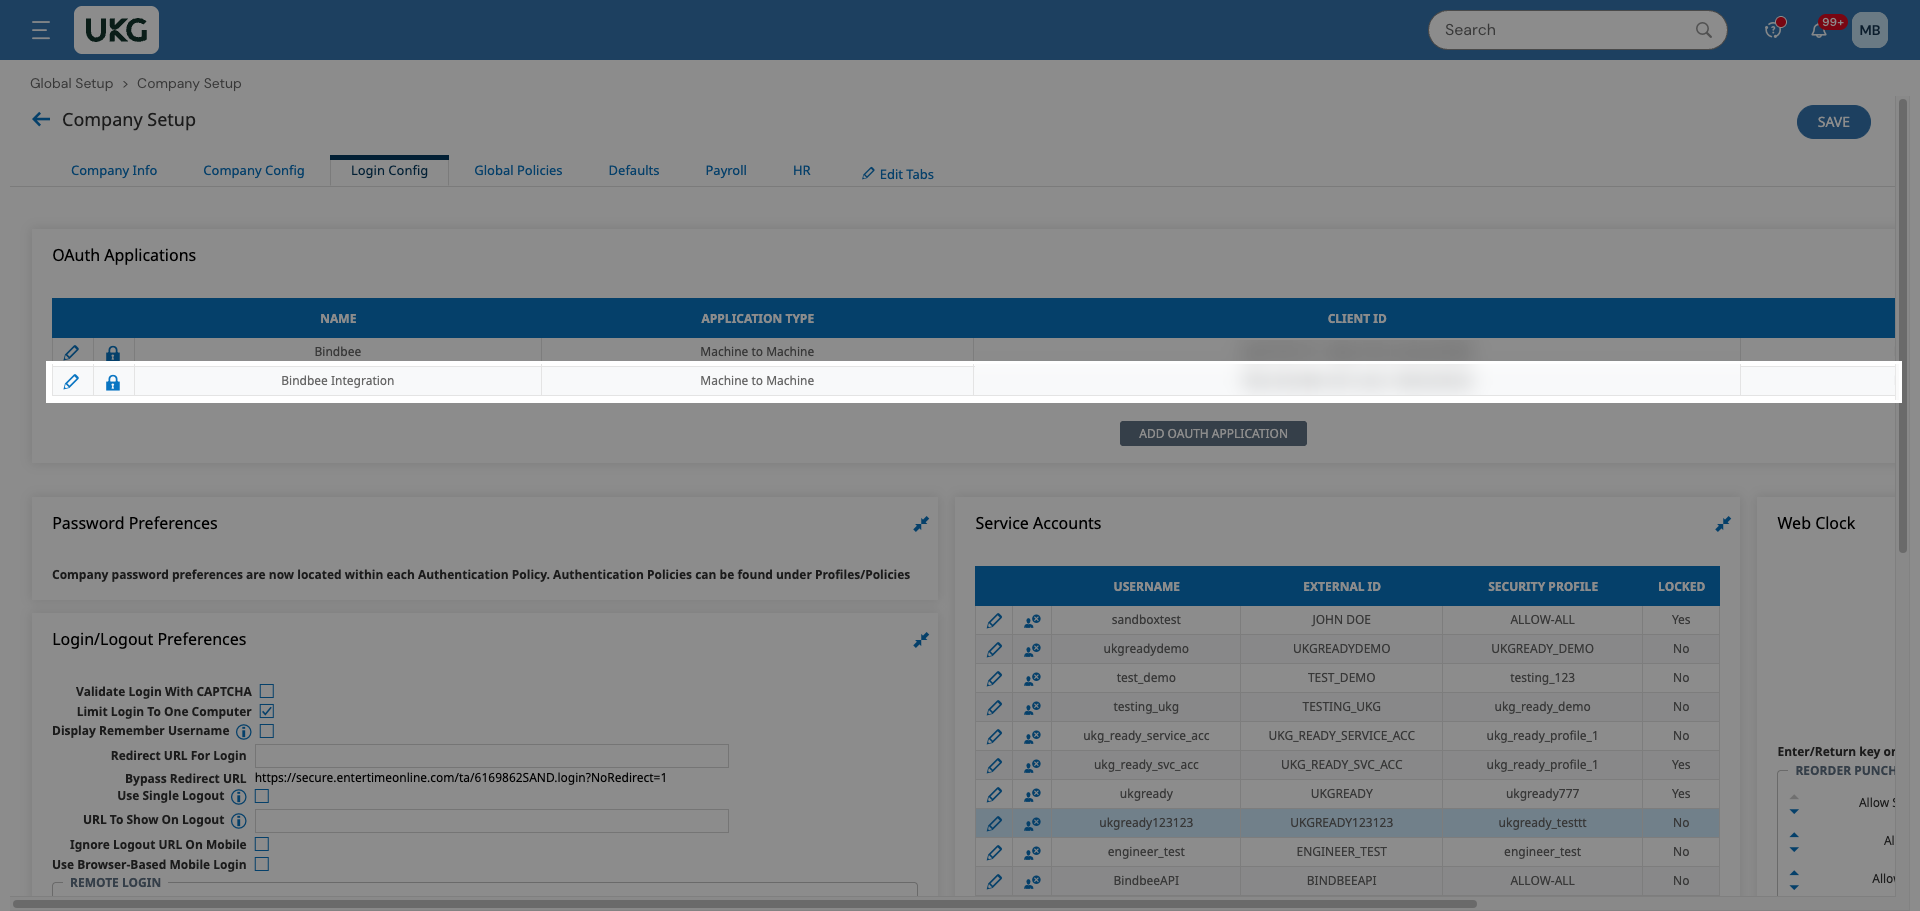
Your new application now appears under OAuth Applications.
Connect in the Magic Link
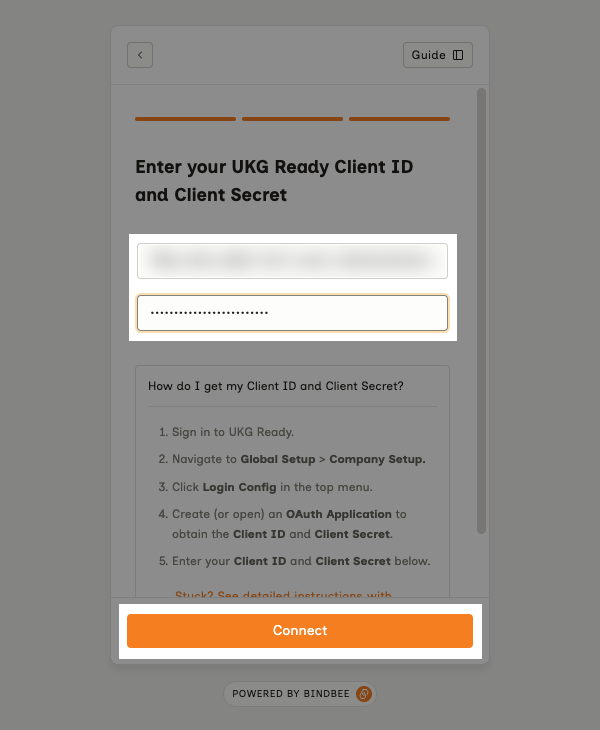
Step 1: Paste the Client ID and Client Secret into the magic link and click Connect.
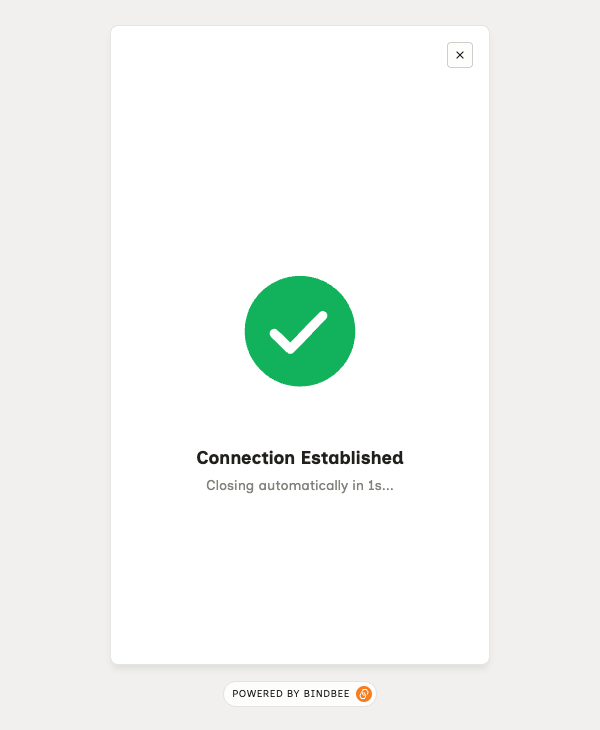
Bindbee confirms the connection. You're all set.
Troubleshooting
The magic link doesn't accept my domain
The magic link doesn't accept my Company Short Name
Copy it exactly as shown in Company Setup > Company Info, under Company Address.
My Client ID or Secret doesn't work
Make sure you copied both values in full. If you no longer have the Secret, go to Company Setup > Login Config, edit the application, generate a new Secret and use that one.
Some data is missing after connecting
Check that the security profile has the permissions for that data, and that the OAuth application uses that profile with All Company Employees as the account group.
Was this helpful?
Was this helpful?