

ADP Workforce Now – How do I write deductions, earnings and taxes?
Updated 2 weeks ago
This guide provides a step-by-step walkthrough on how to add earnings in ADP using Bindbee Write API.
Pre-requisites:
Already have a connector in Bindbee with Payroll Write Permissions
Have a user with Permission to view Employee's Employment information and Payroll information in ADP Dashboard
Step 1: Open the ADP connector
Go to the Bindbee dashboard and open the ADP connector in which you want to create the payroll entry.
Make sure that the connector has completed a successful data sync.
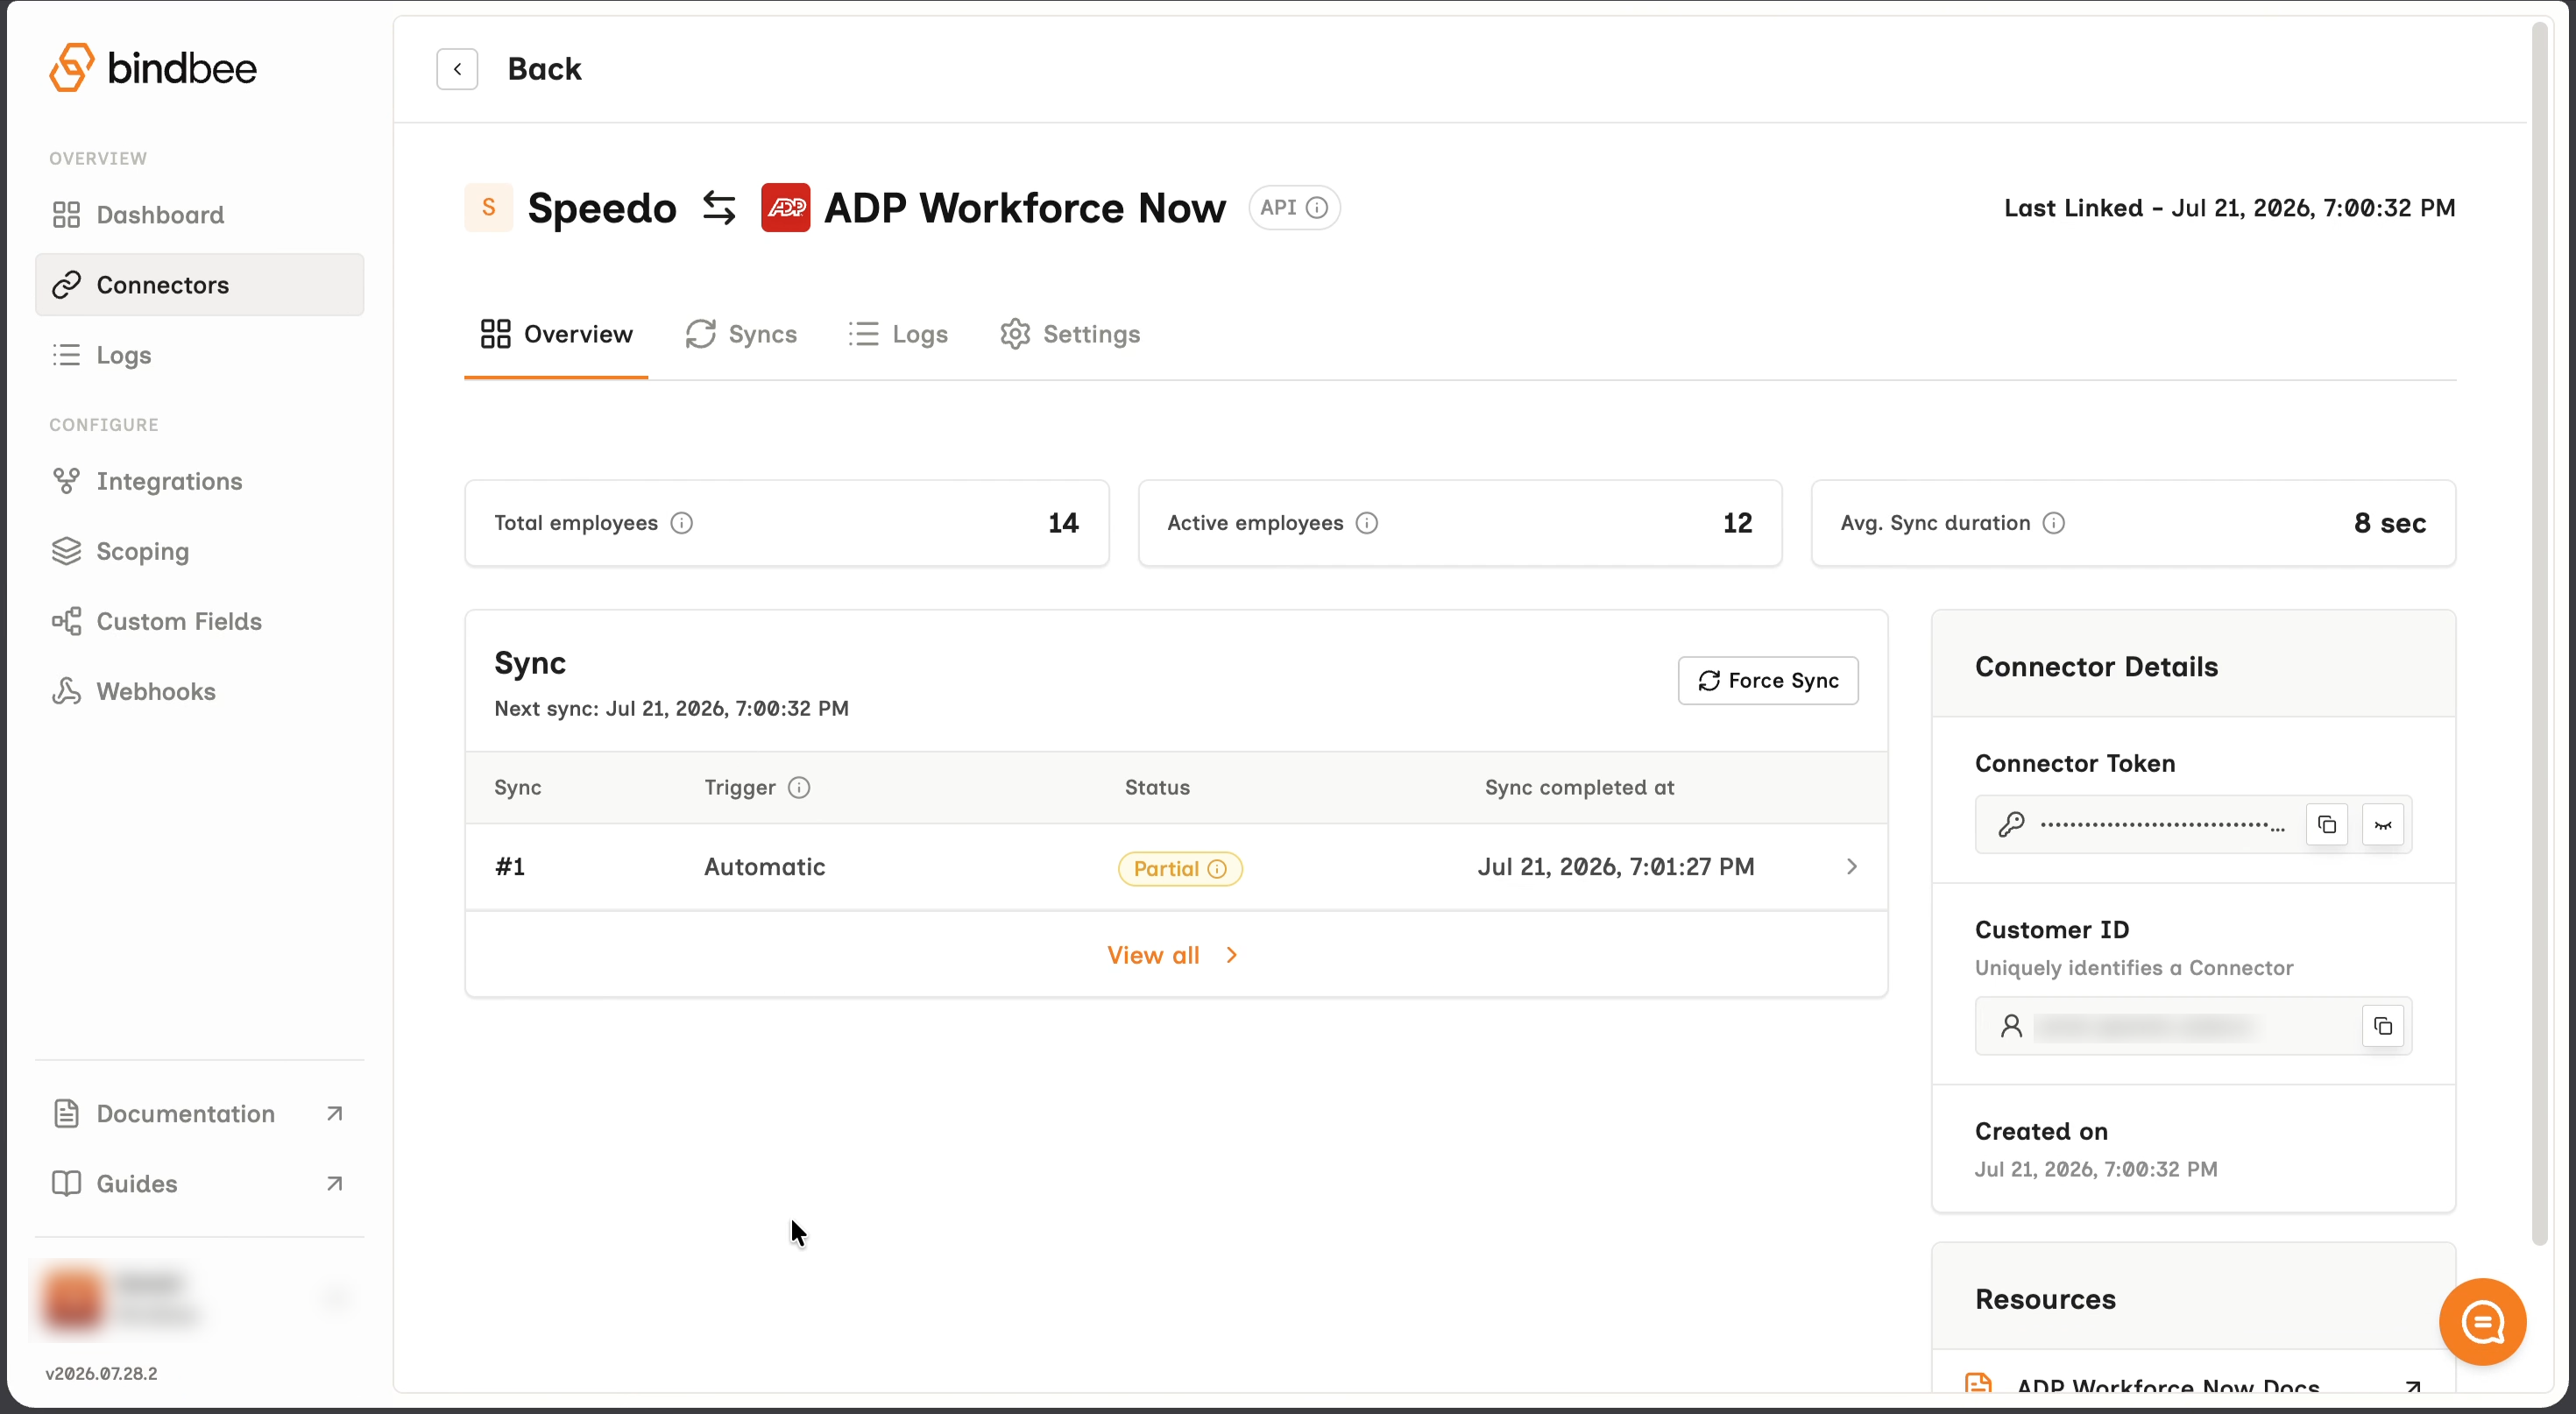
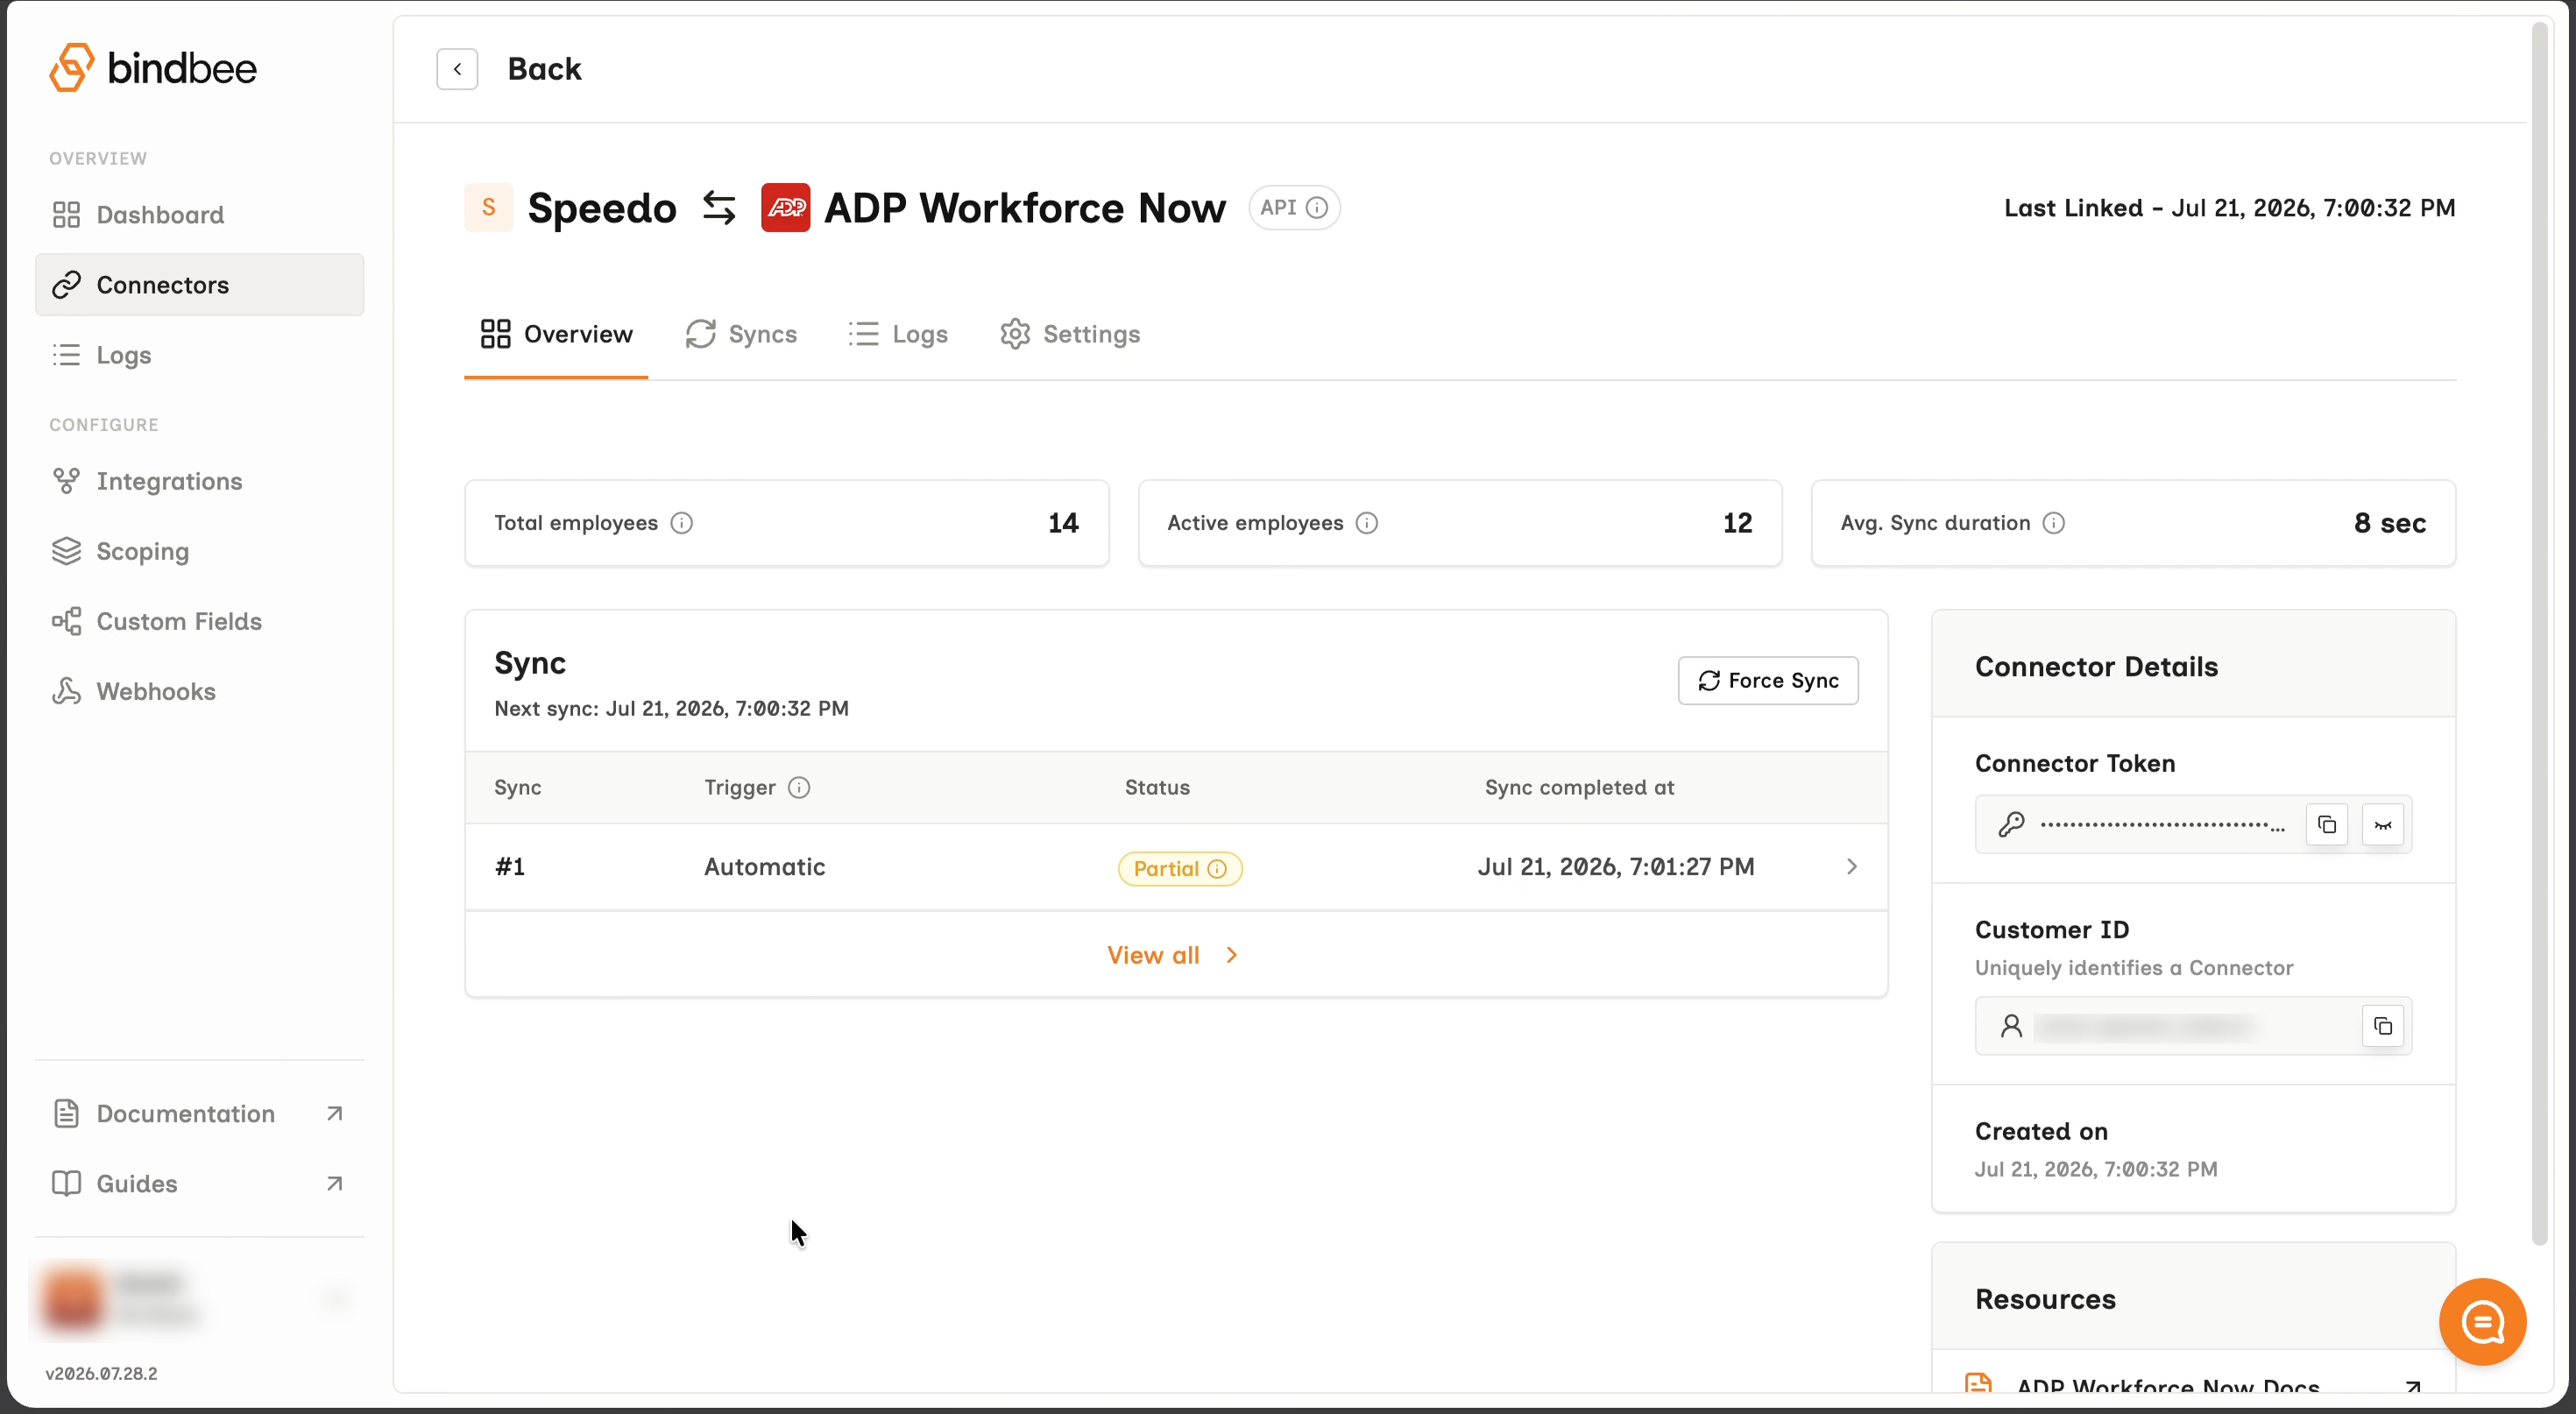
Before creating the payroll entry, open the Get Create Employee Payroll Run Meta API.
To authenticate and authorise the request, provide:
Your Bindbee API key in the Authorization header.
The relevant connector token in the x-connector-token header.
And click Send.
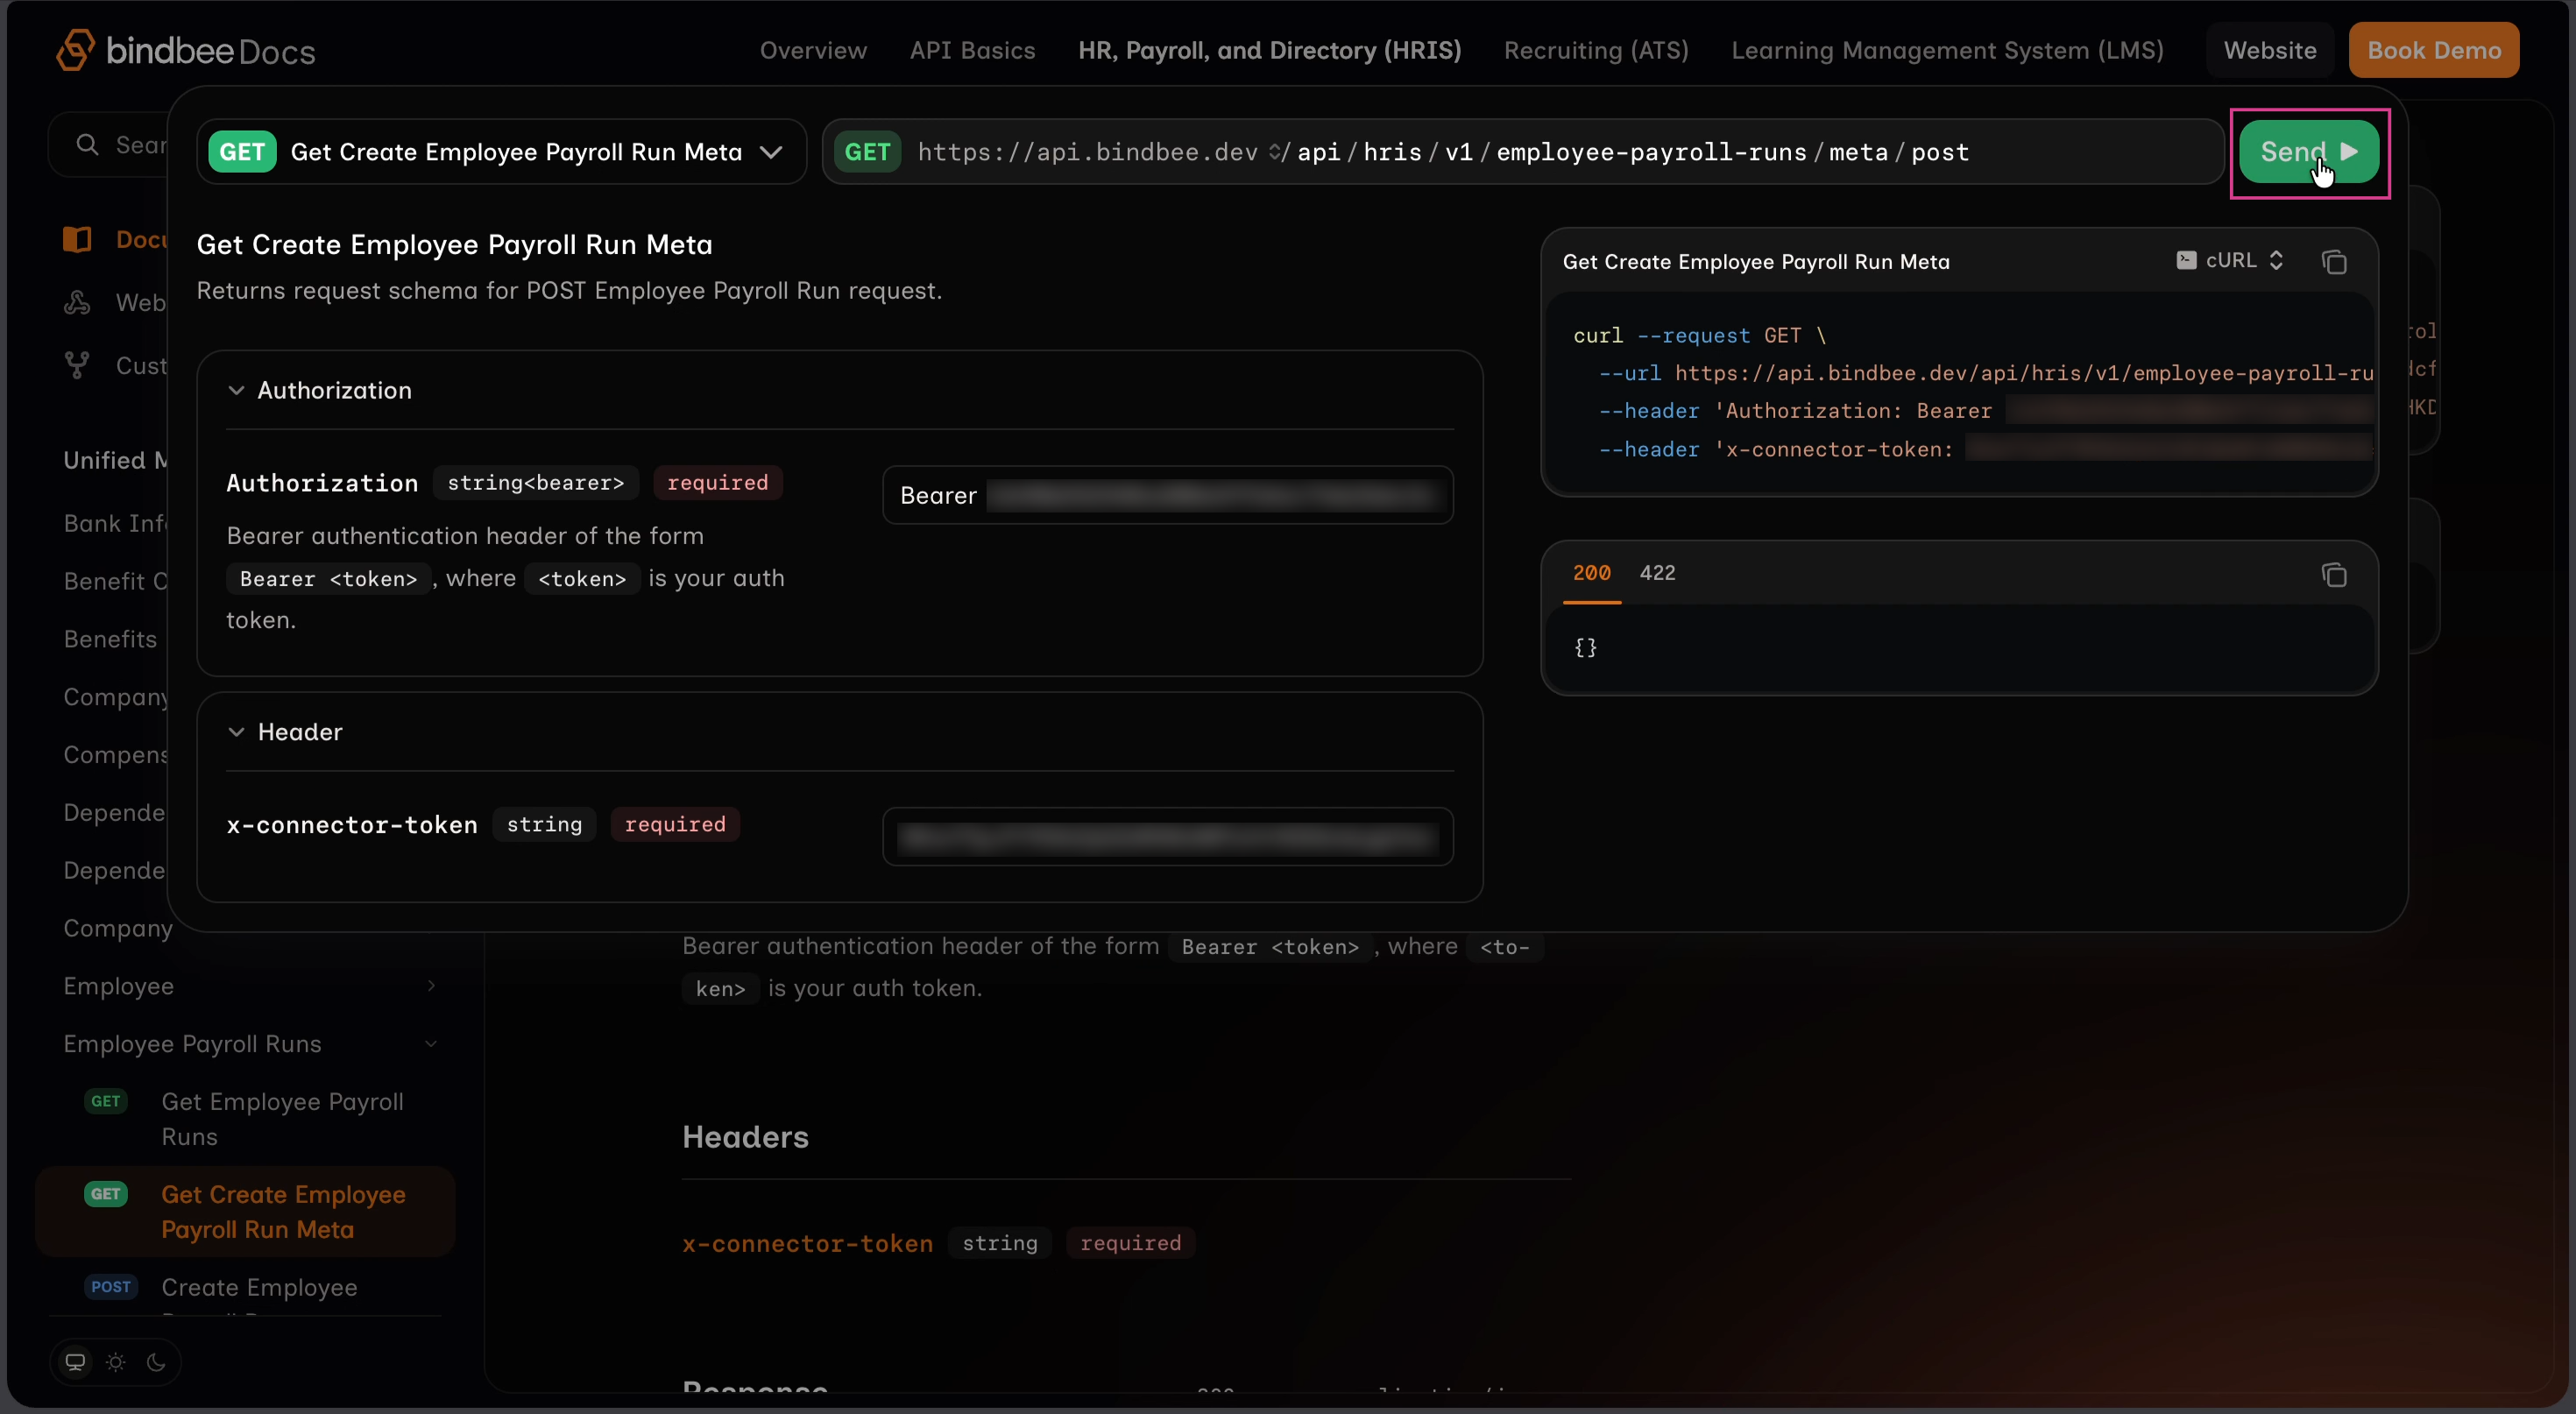
The response returns the request schema and the values supported by the connected ADP account.
Note: The available values can differ between ADP accounts, so always review the Meta API response before creating the payroll entry.
Step 2: Retrieve the employee ID
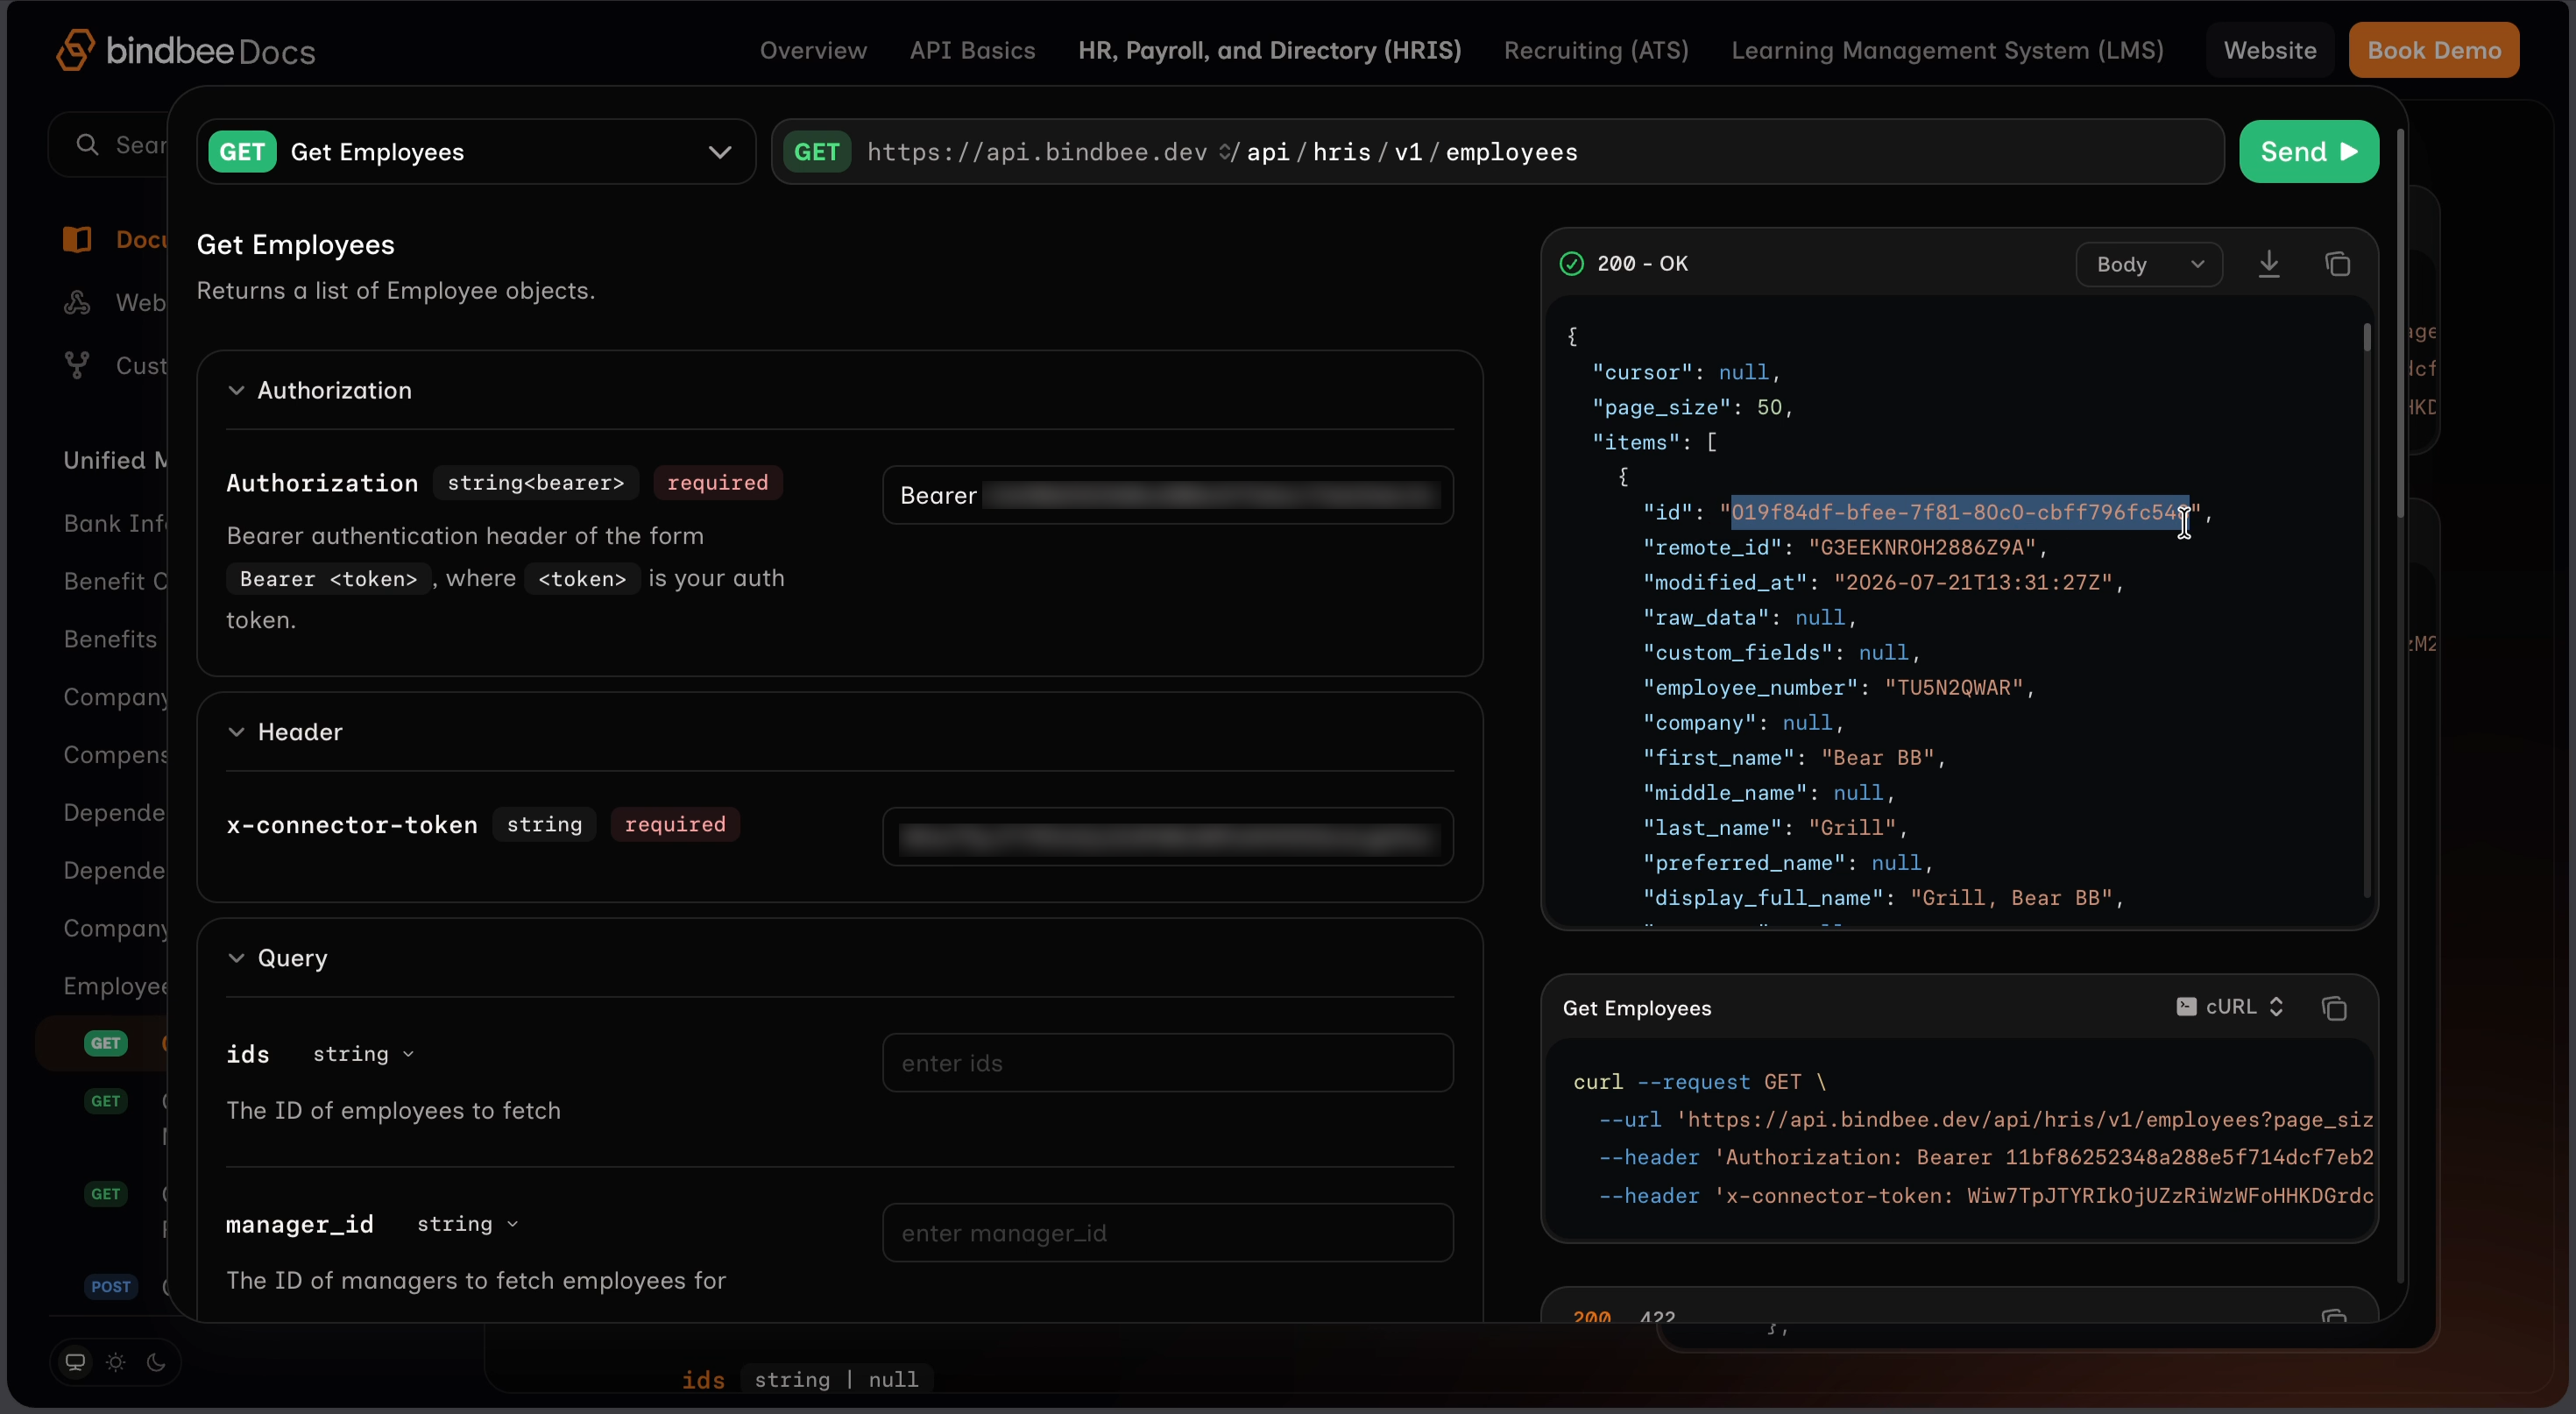
Now we need to get the Bindbee ID of the employee for whom we want to add the earning.
Open the Get Employees API.
Add the same Authorization and x-connector-token headers used in the previous request, and then click Send.
The API will return the employee data available through the connector.
Find the relevant employee and copy the value from the top-level id field.
This is the Bindbee employee ID that will be used in the Create Employee Payroll Run request.
Step 3: Open the Create Employee Payroll Run API
Now that we have the employee ID, open the Create Employee Payroll Run API.
This endpoint is used to add an earning, deduction, or tax entry for an employee in ADP Workforce Now.
Make sure that the request method is POST.
Add the same authentication headers used in the previous requests.
Step 4: Add the employee ID
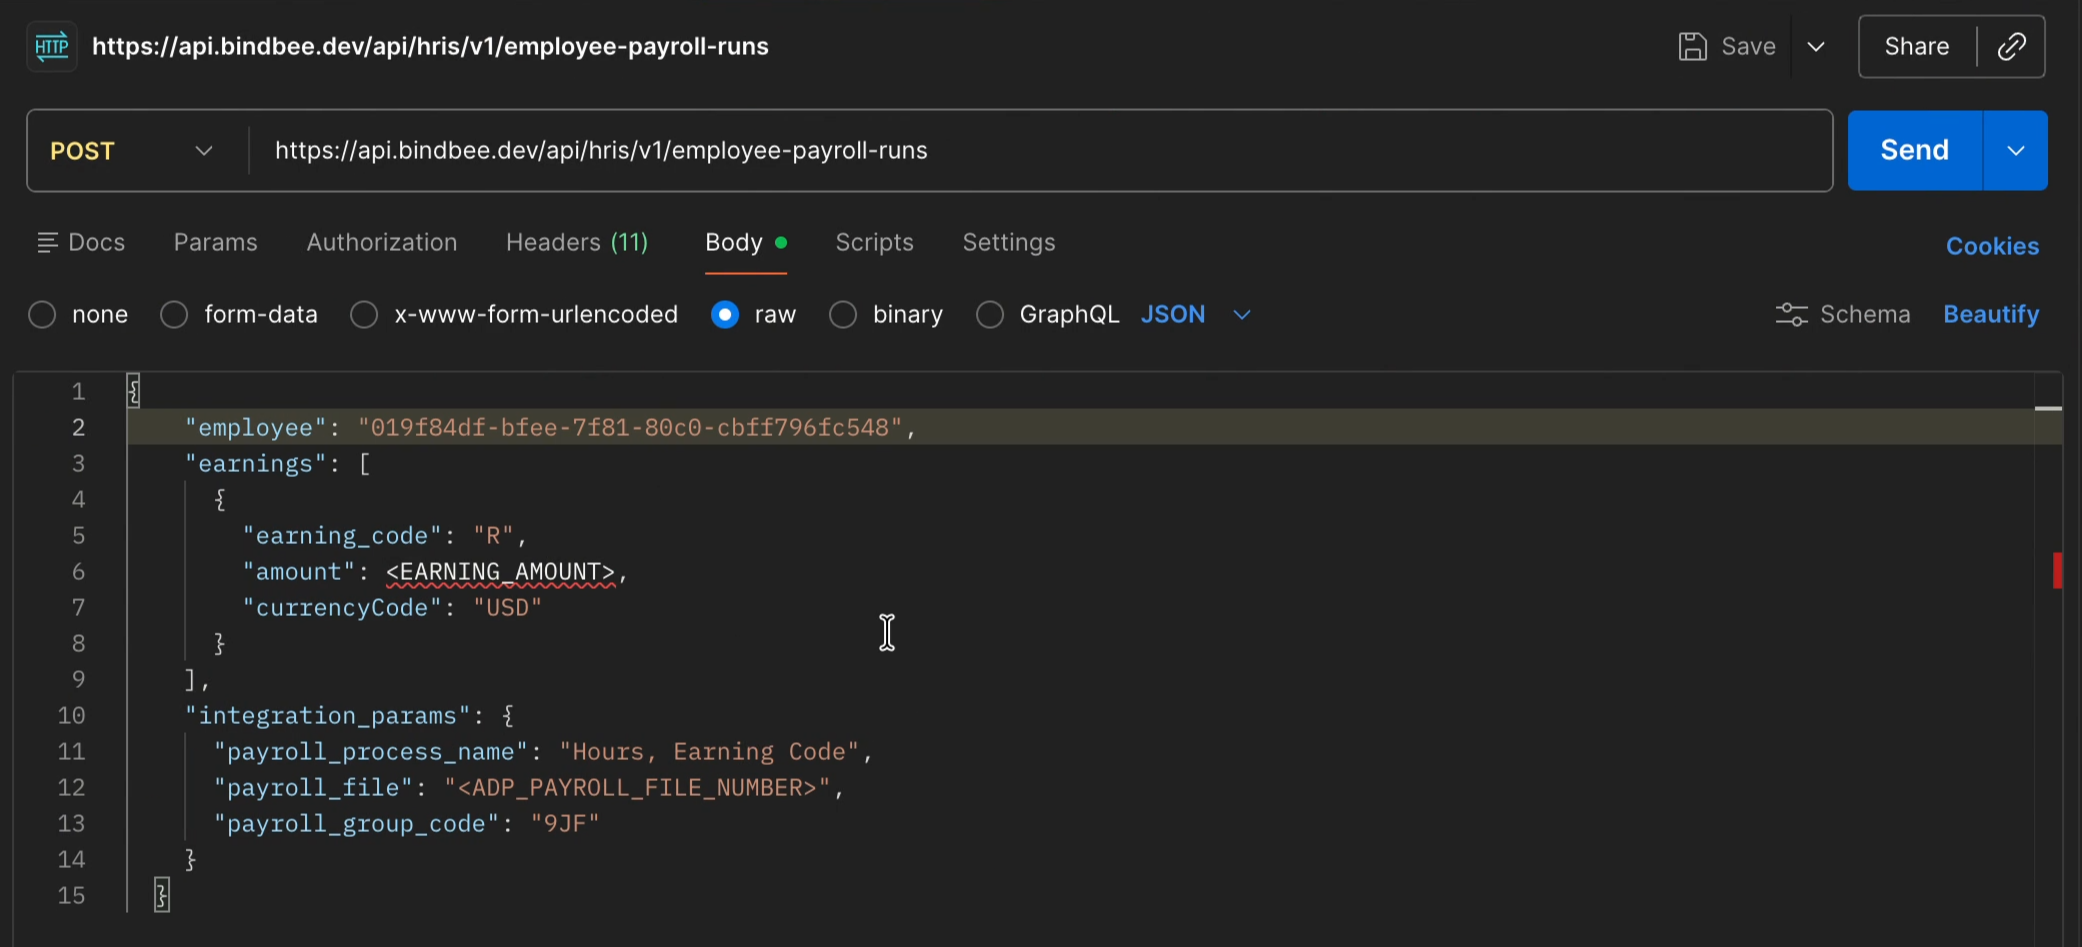
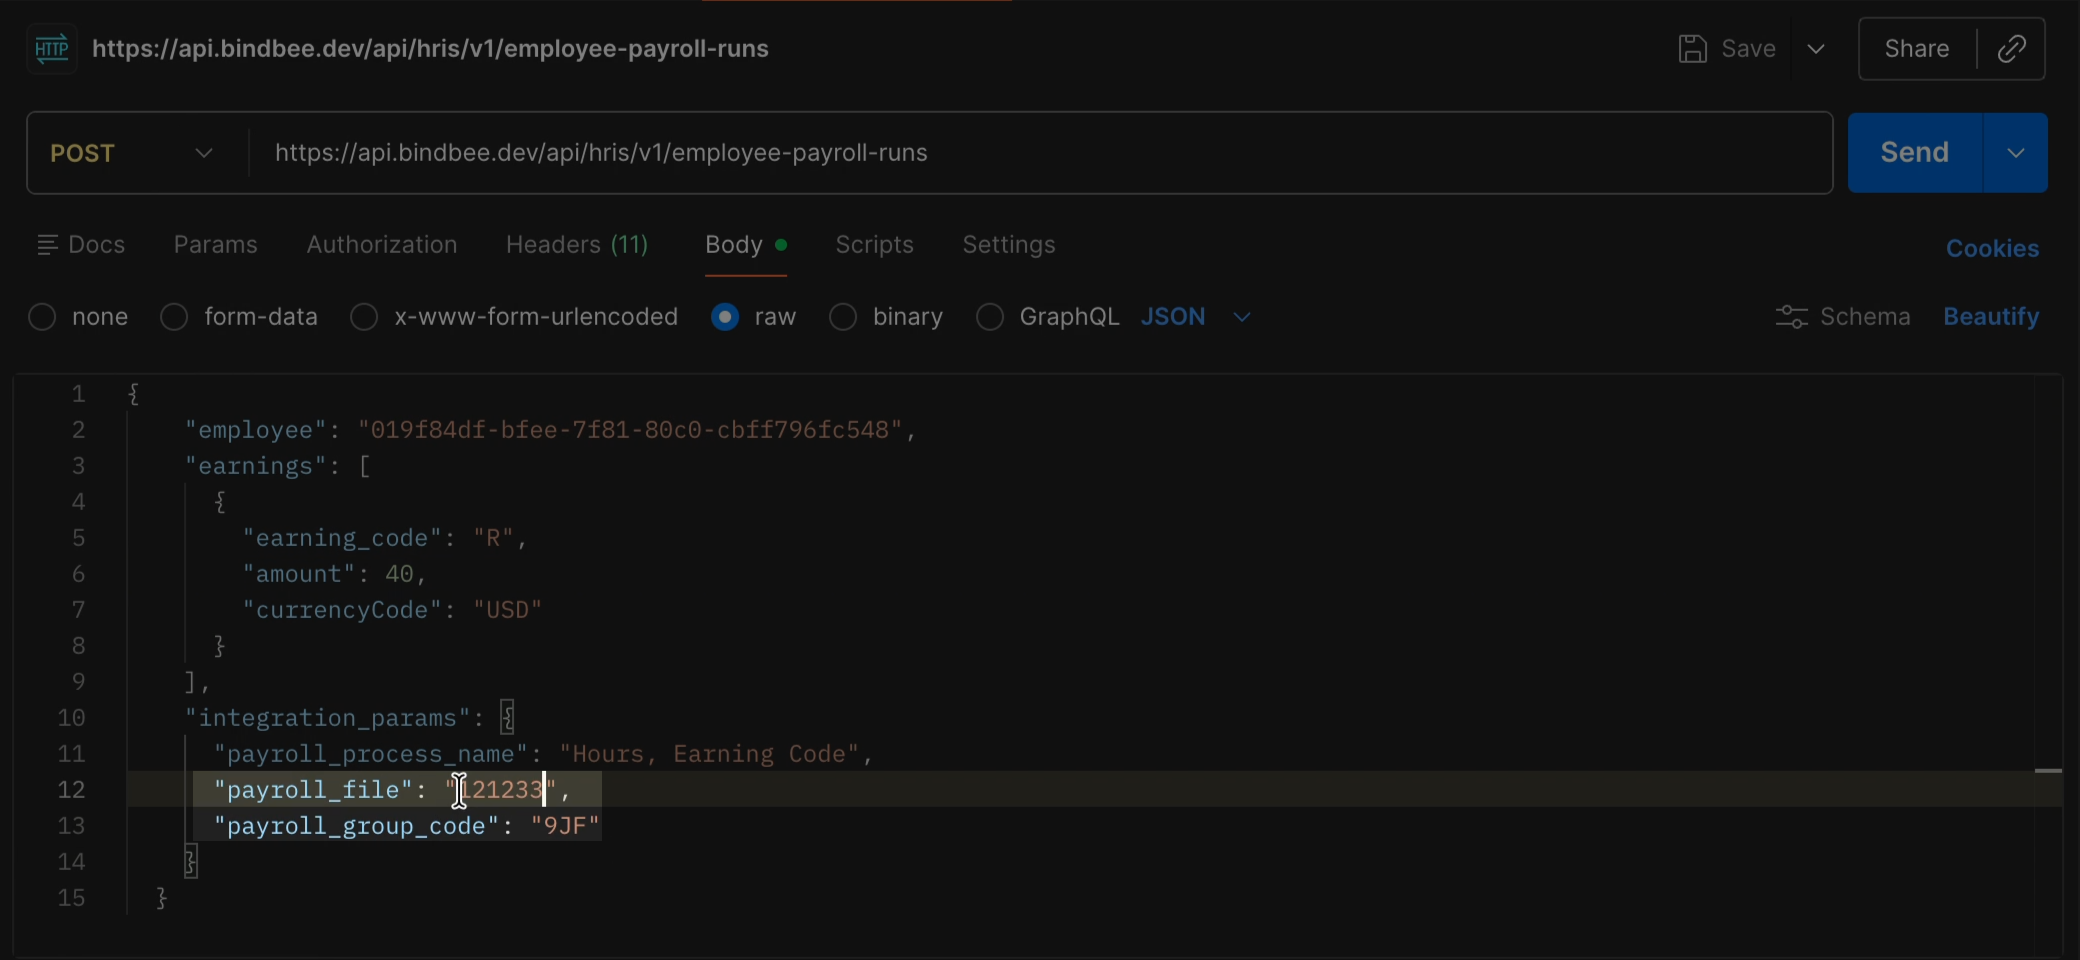
Paste the employee ID copied from the Get Employees response into the employee field.
Step 5: Add the earning details
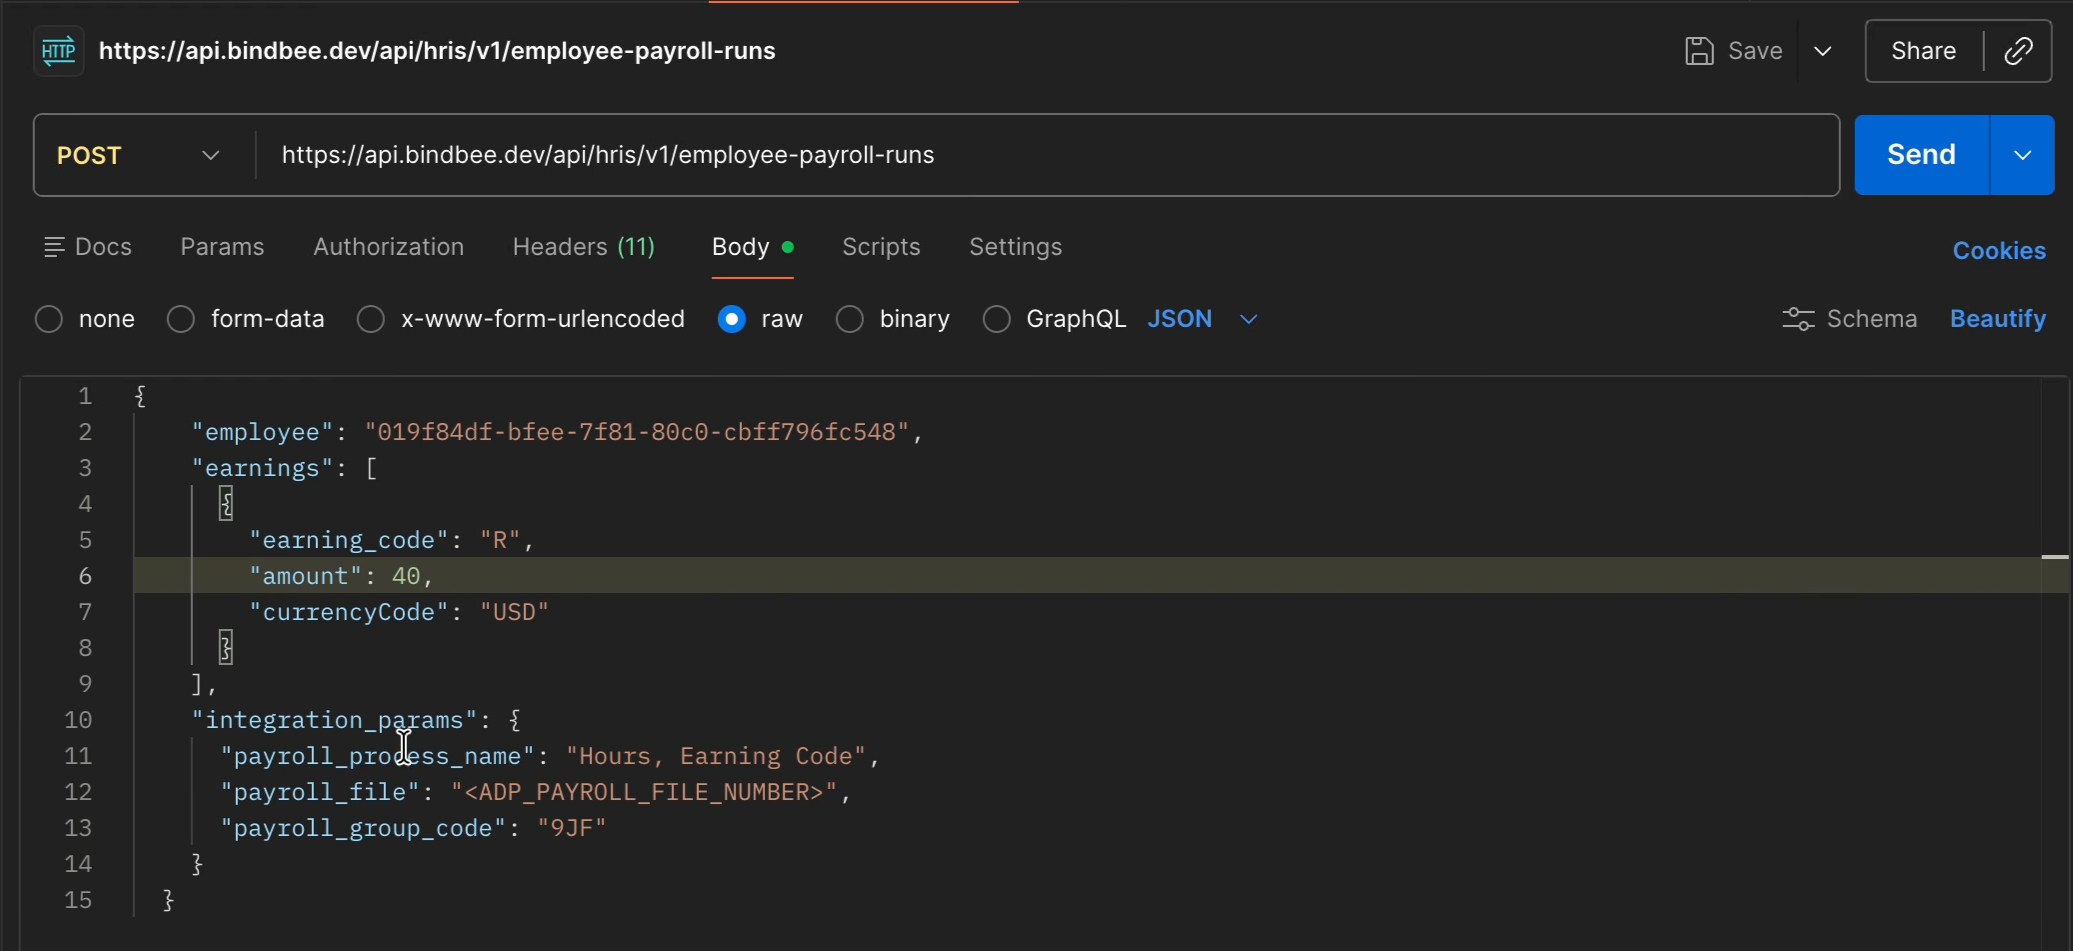
To add an entry to the earnings array, we will create a regular earning entry.
Use the Meta API response to confirm the earning codes available for the connected ADP account.
To create a deduction instead, use the deductions array and provide one of the supported deduction codes returned by the Meta API.
To submit tax-related information, use the supported value returned for the taxes field.
Step 6: Add a payroll process name
Next, provide a recognisable payroll process name. This name will help you identify the entry when verifying it in ADP Workforce Now.
Step 7: Find the employee’s payroll file number
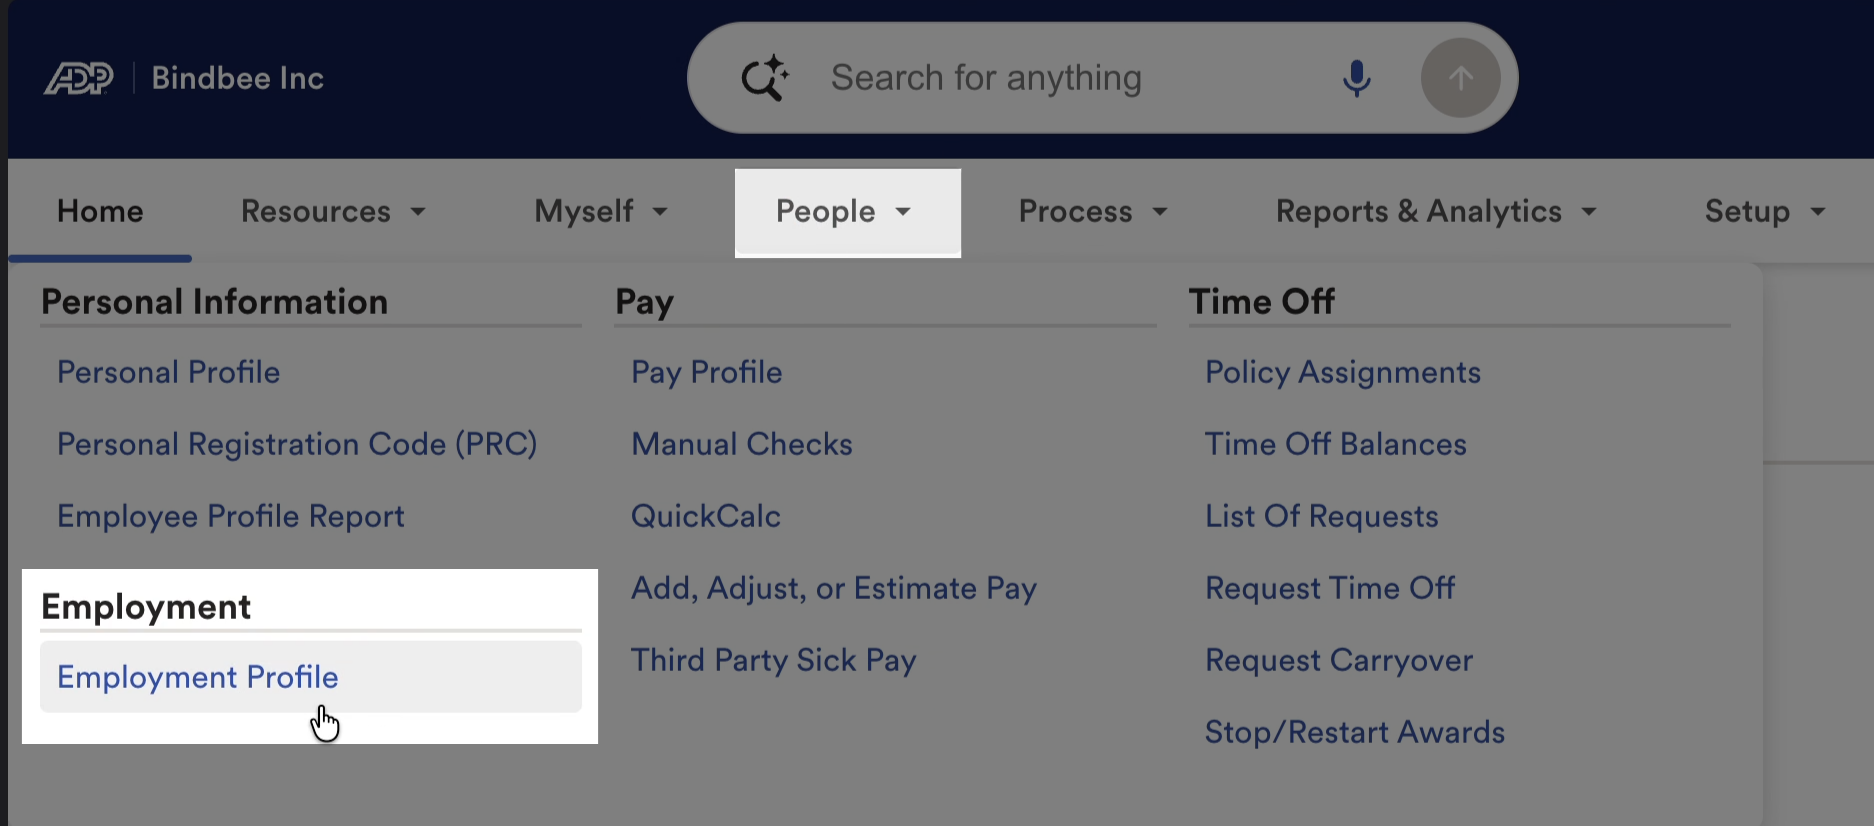
To find the employee’s payroll file number, open the ADP Workforce Now dashboard and go to the People section.
Select Employment Profile and locate the employee for whom you are creating the payroll entry.
Open the employee’s Employment tab and find the Position card.
The employee’s payroll file number will be displayed in this section.
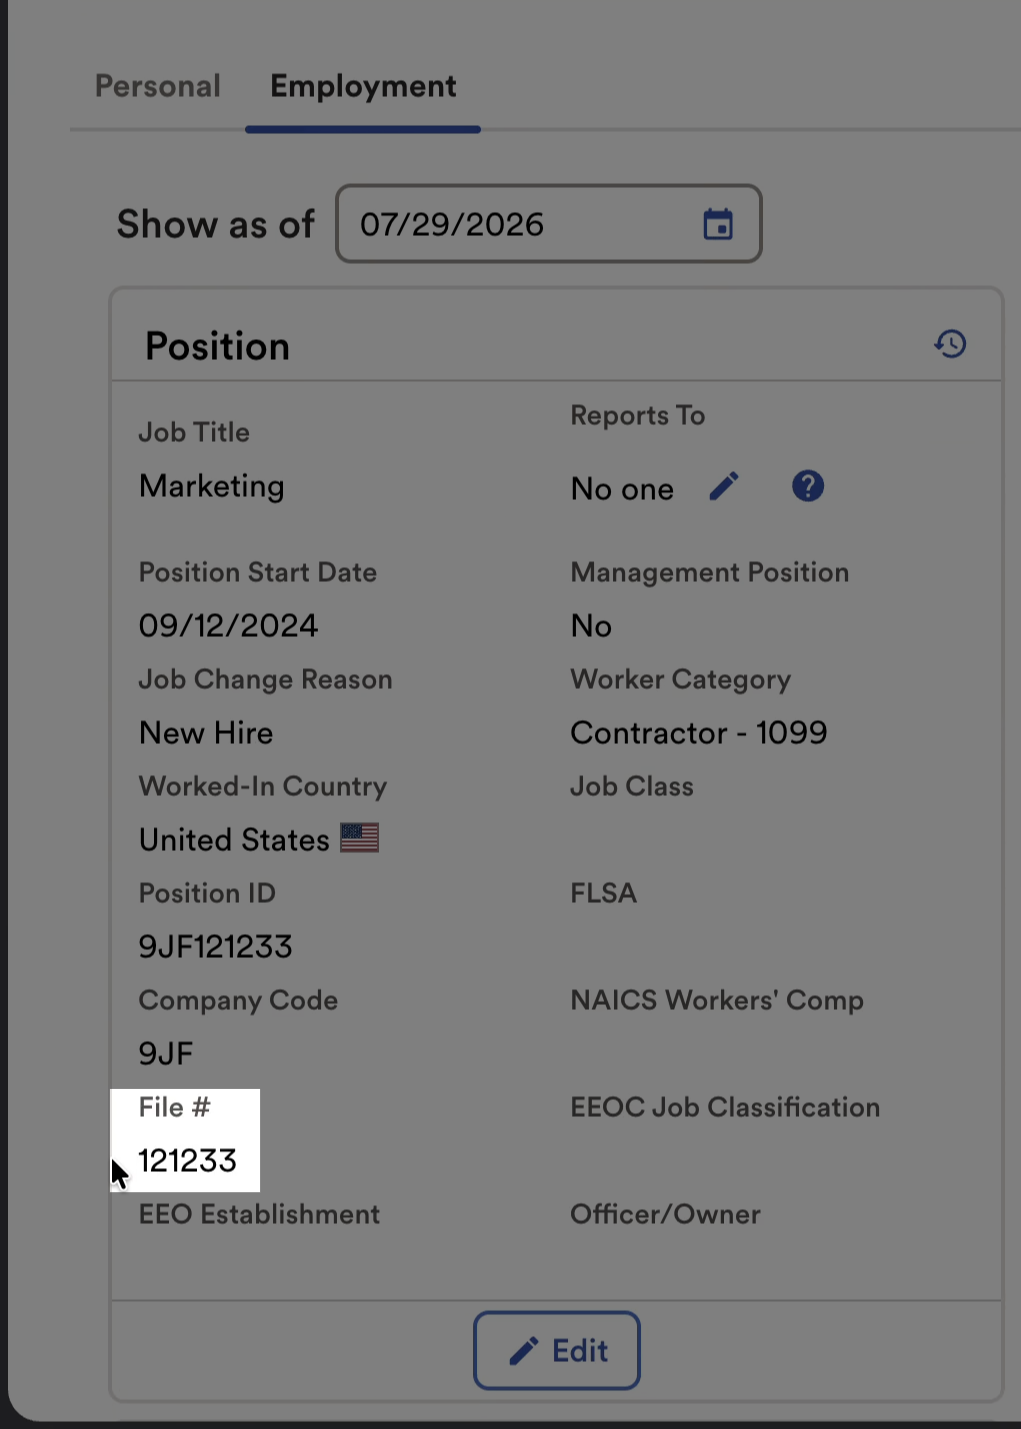
Paste this number into the payroll_file field inside integration_params.
Step 8: Add the payroll group code
You can find the available payroll group codes in the Get Create Employee Payroll Run Meta response.
Add the value to the
payroll_group_codefield insideintegration_params.
Step 9: Submit the payroll entry
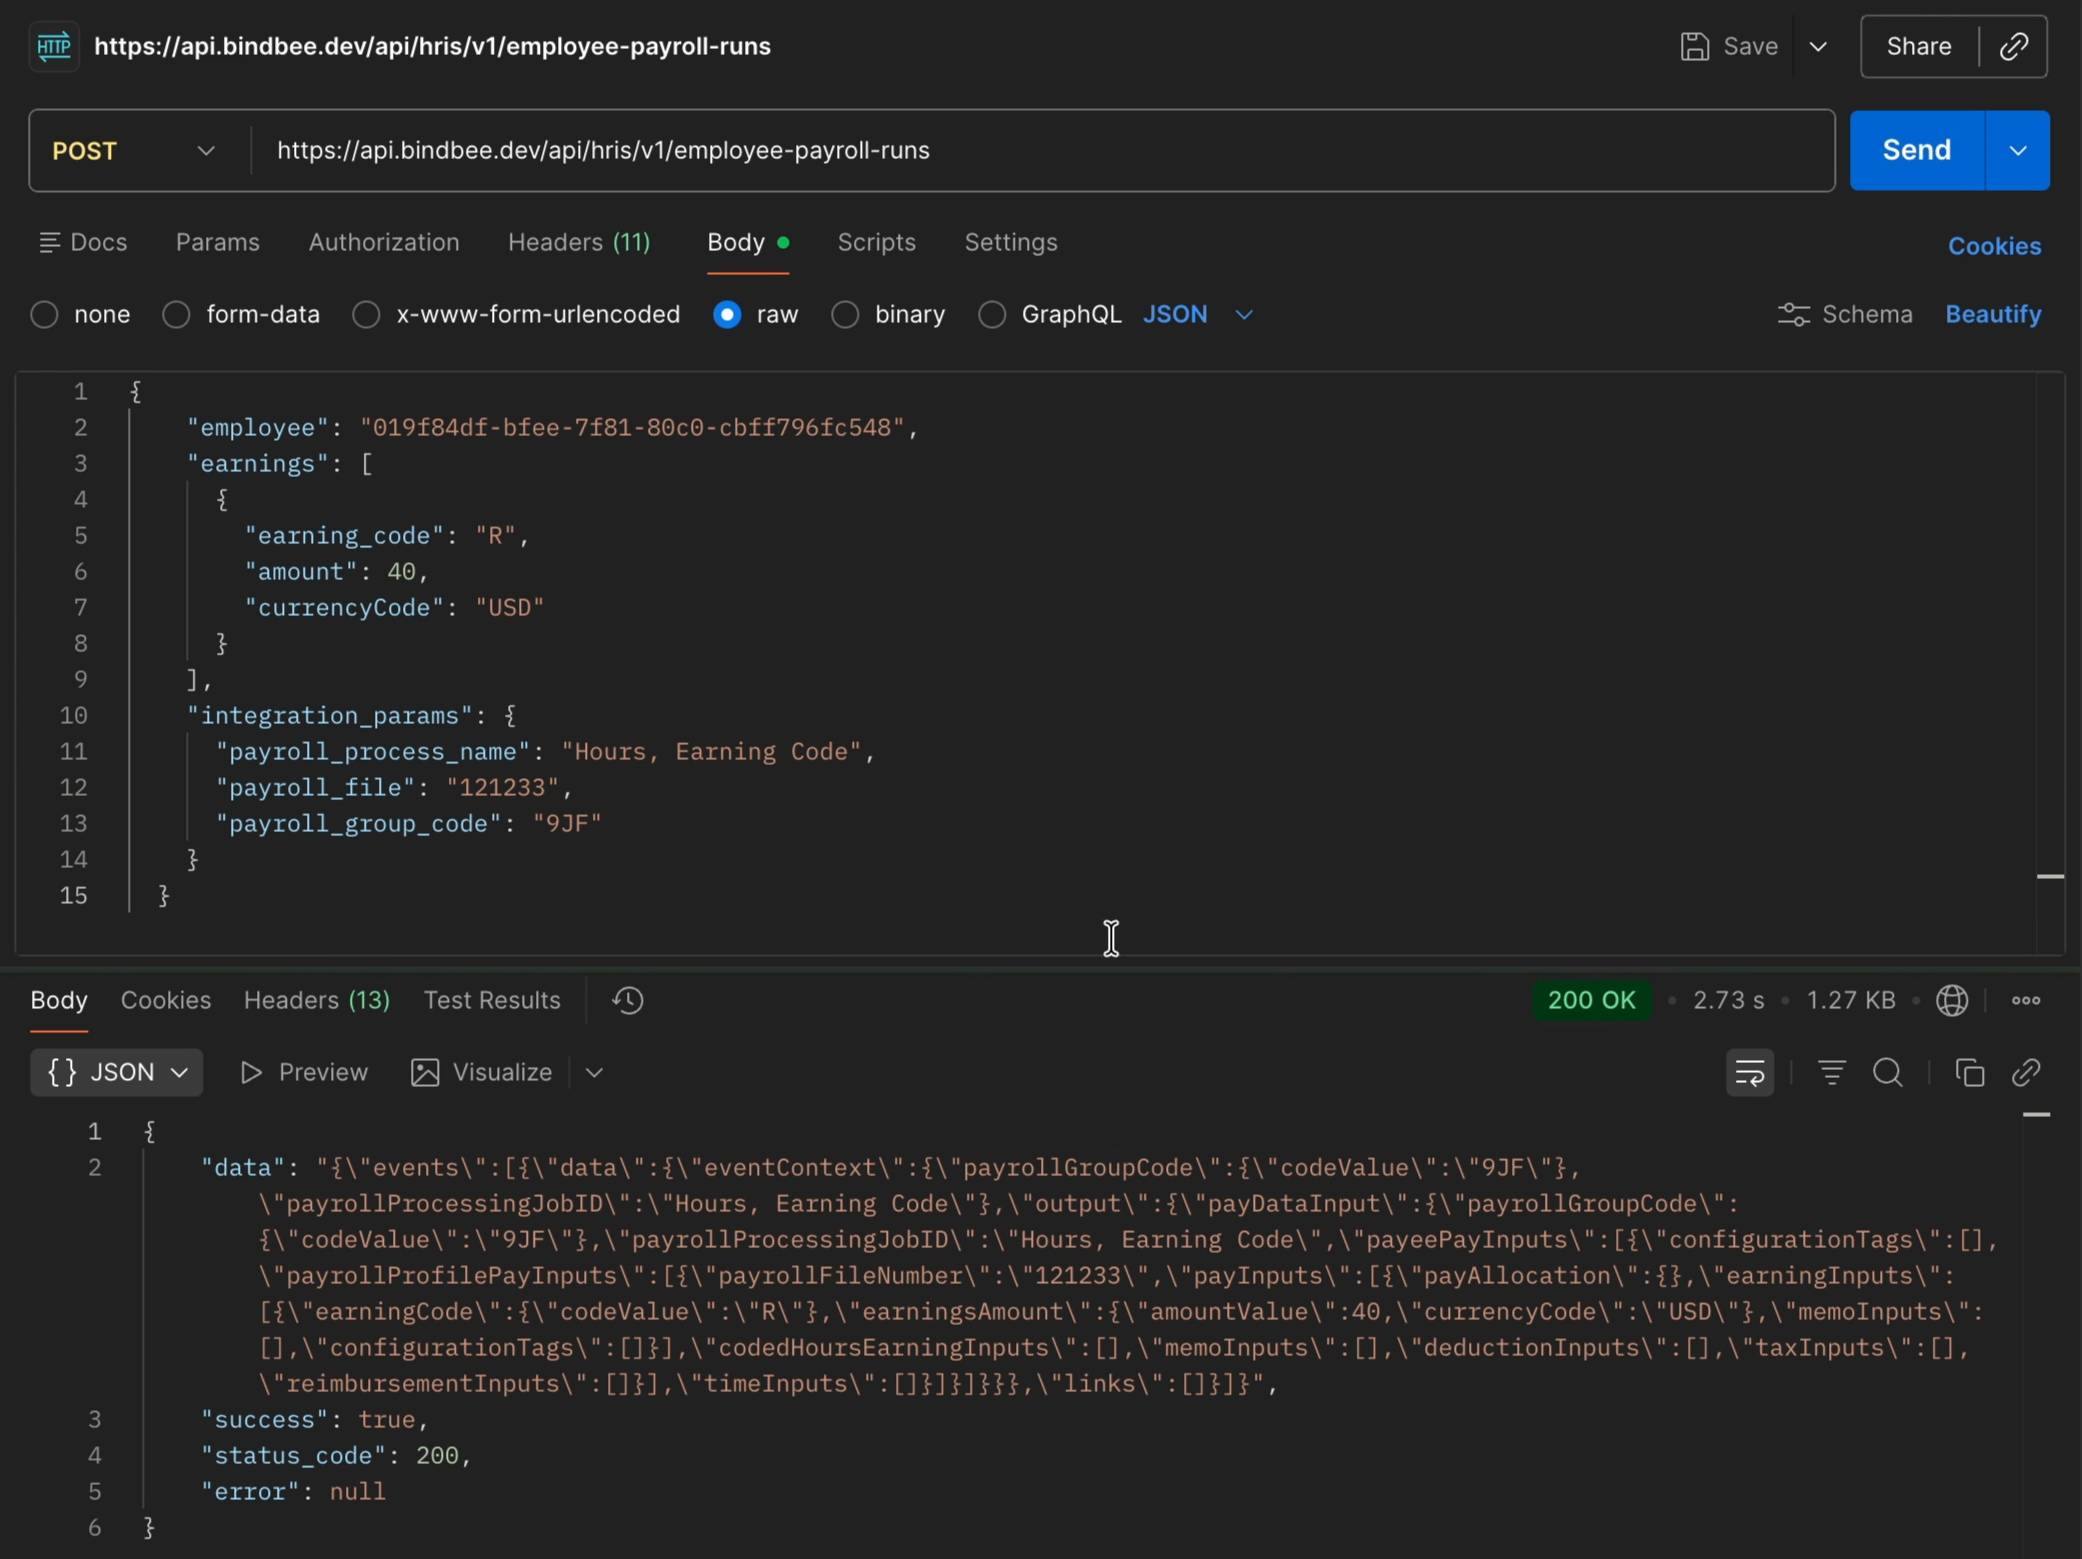
Once all the required information has been entered, click Send.
A successful API response confirms that the employee payroll entry has been submitted to ADP Workforce Now.
Step 10: Verify the entry in ADP Workforce Now
To verify that the earning has been added, return to the ADP Workforce Now dashboard.
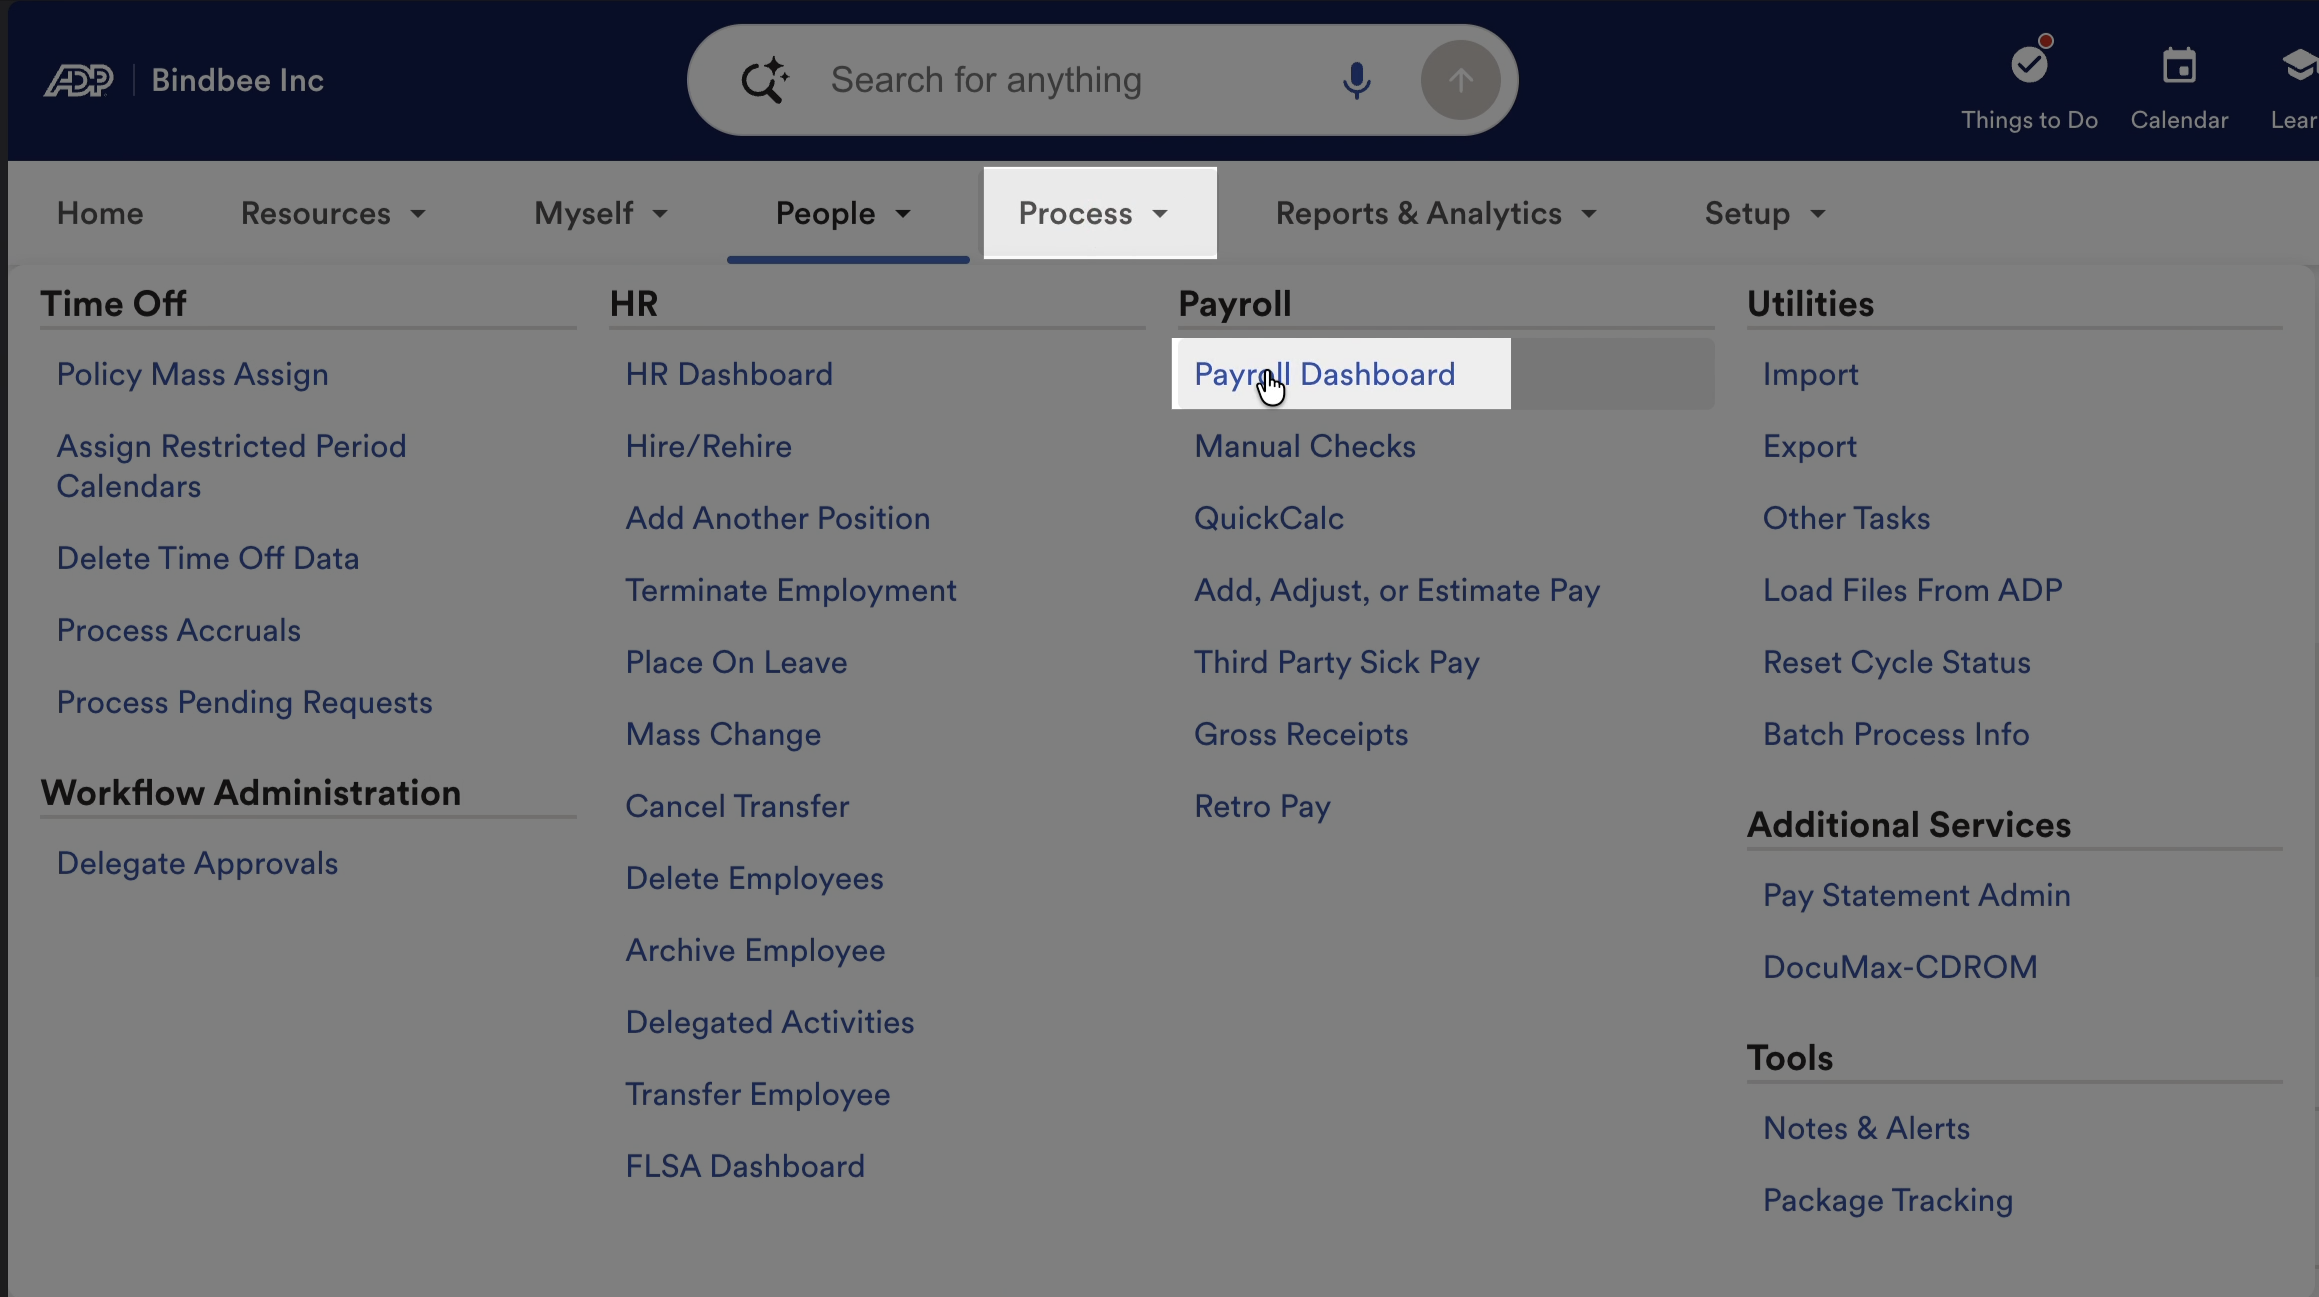
Go to the Process tab and open Payroll Dashboard.
Click Manage Payroll.
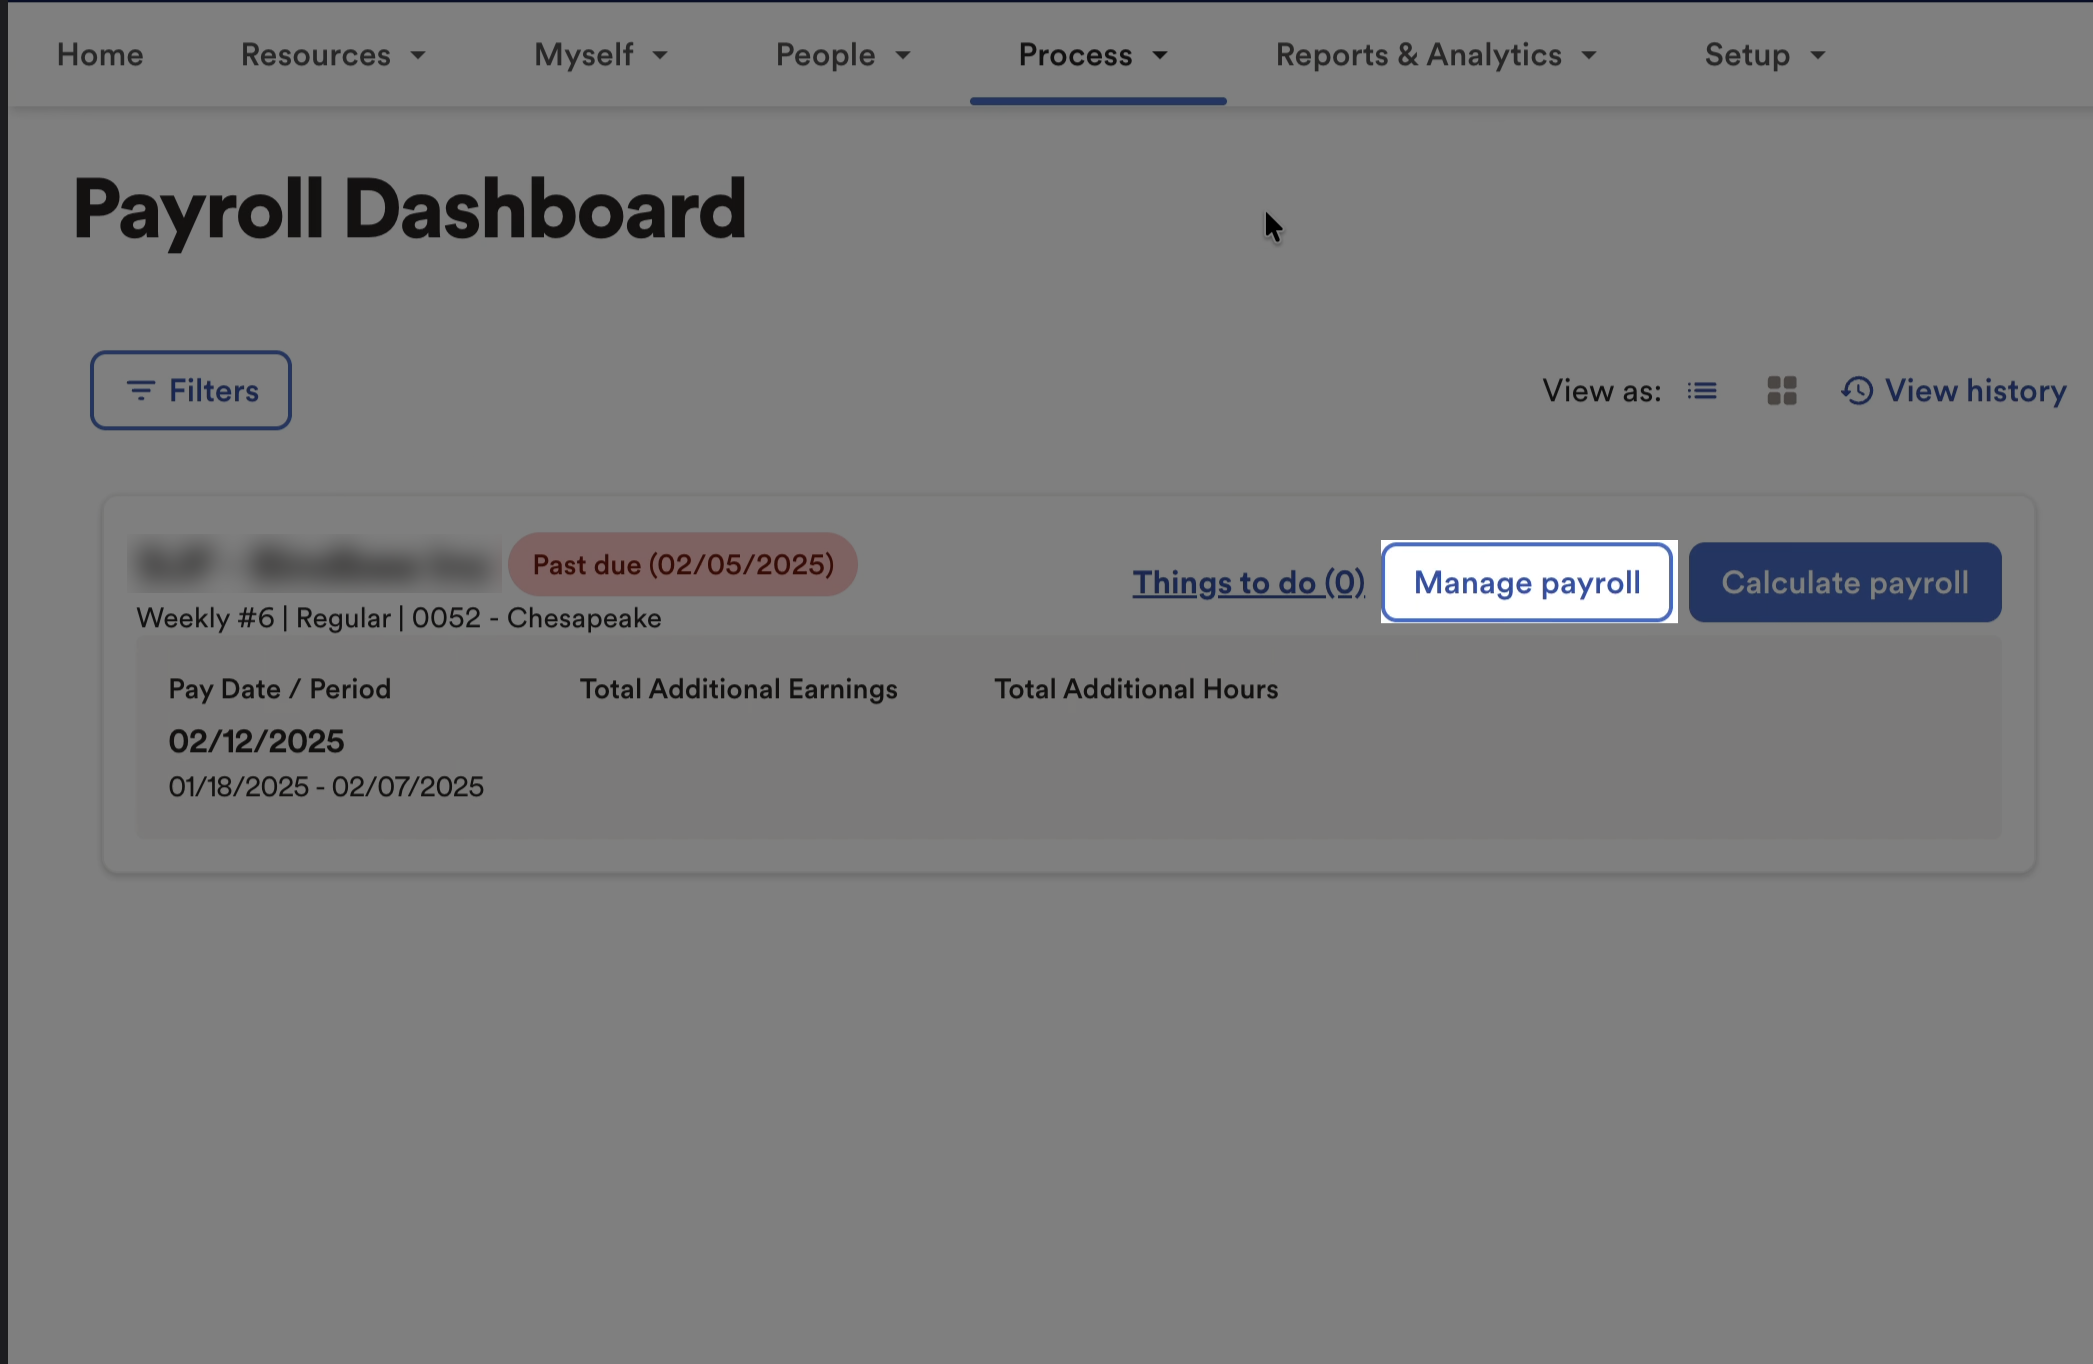
Find the payroll entry using the payroll process name provided in the request.
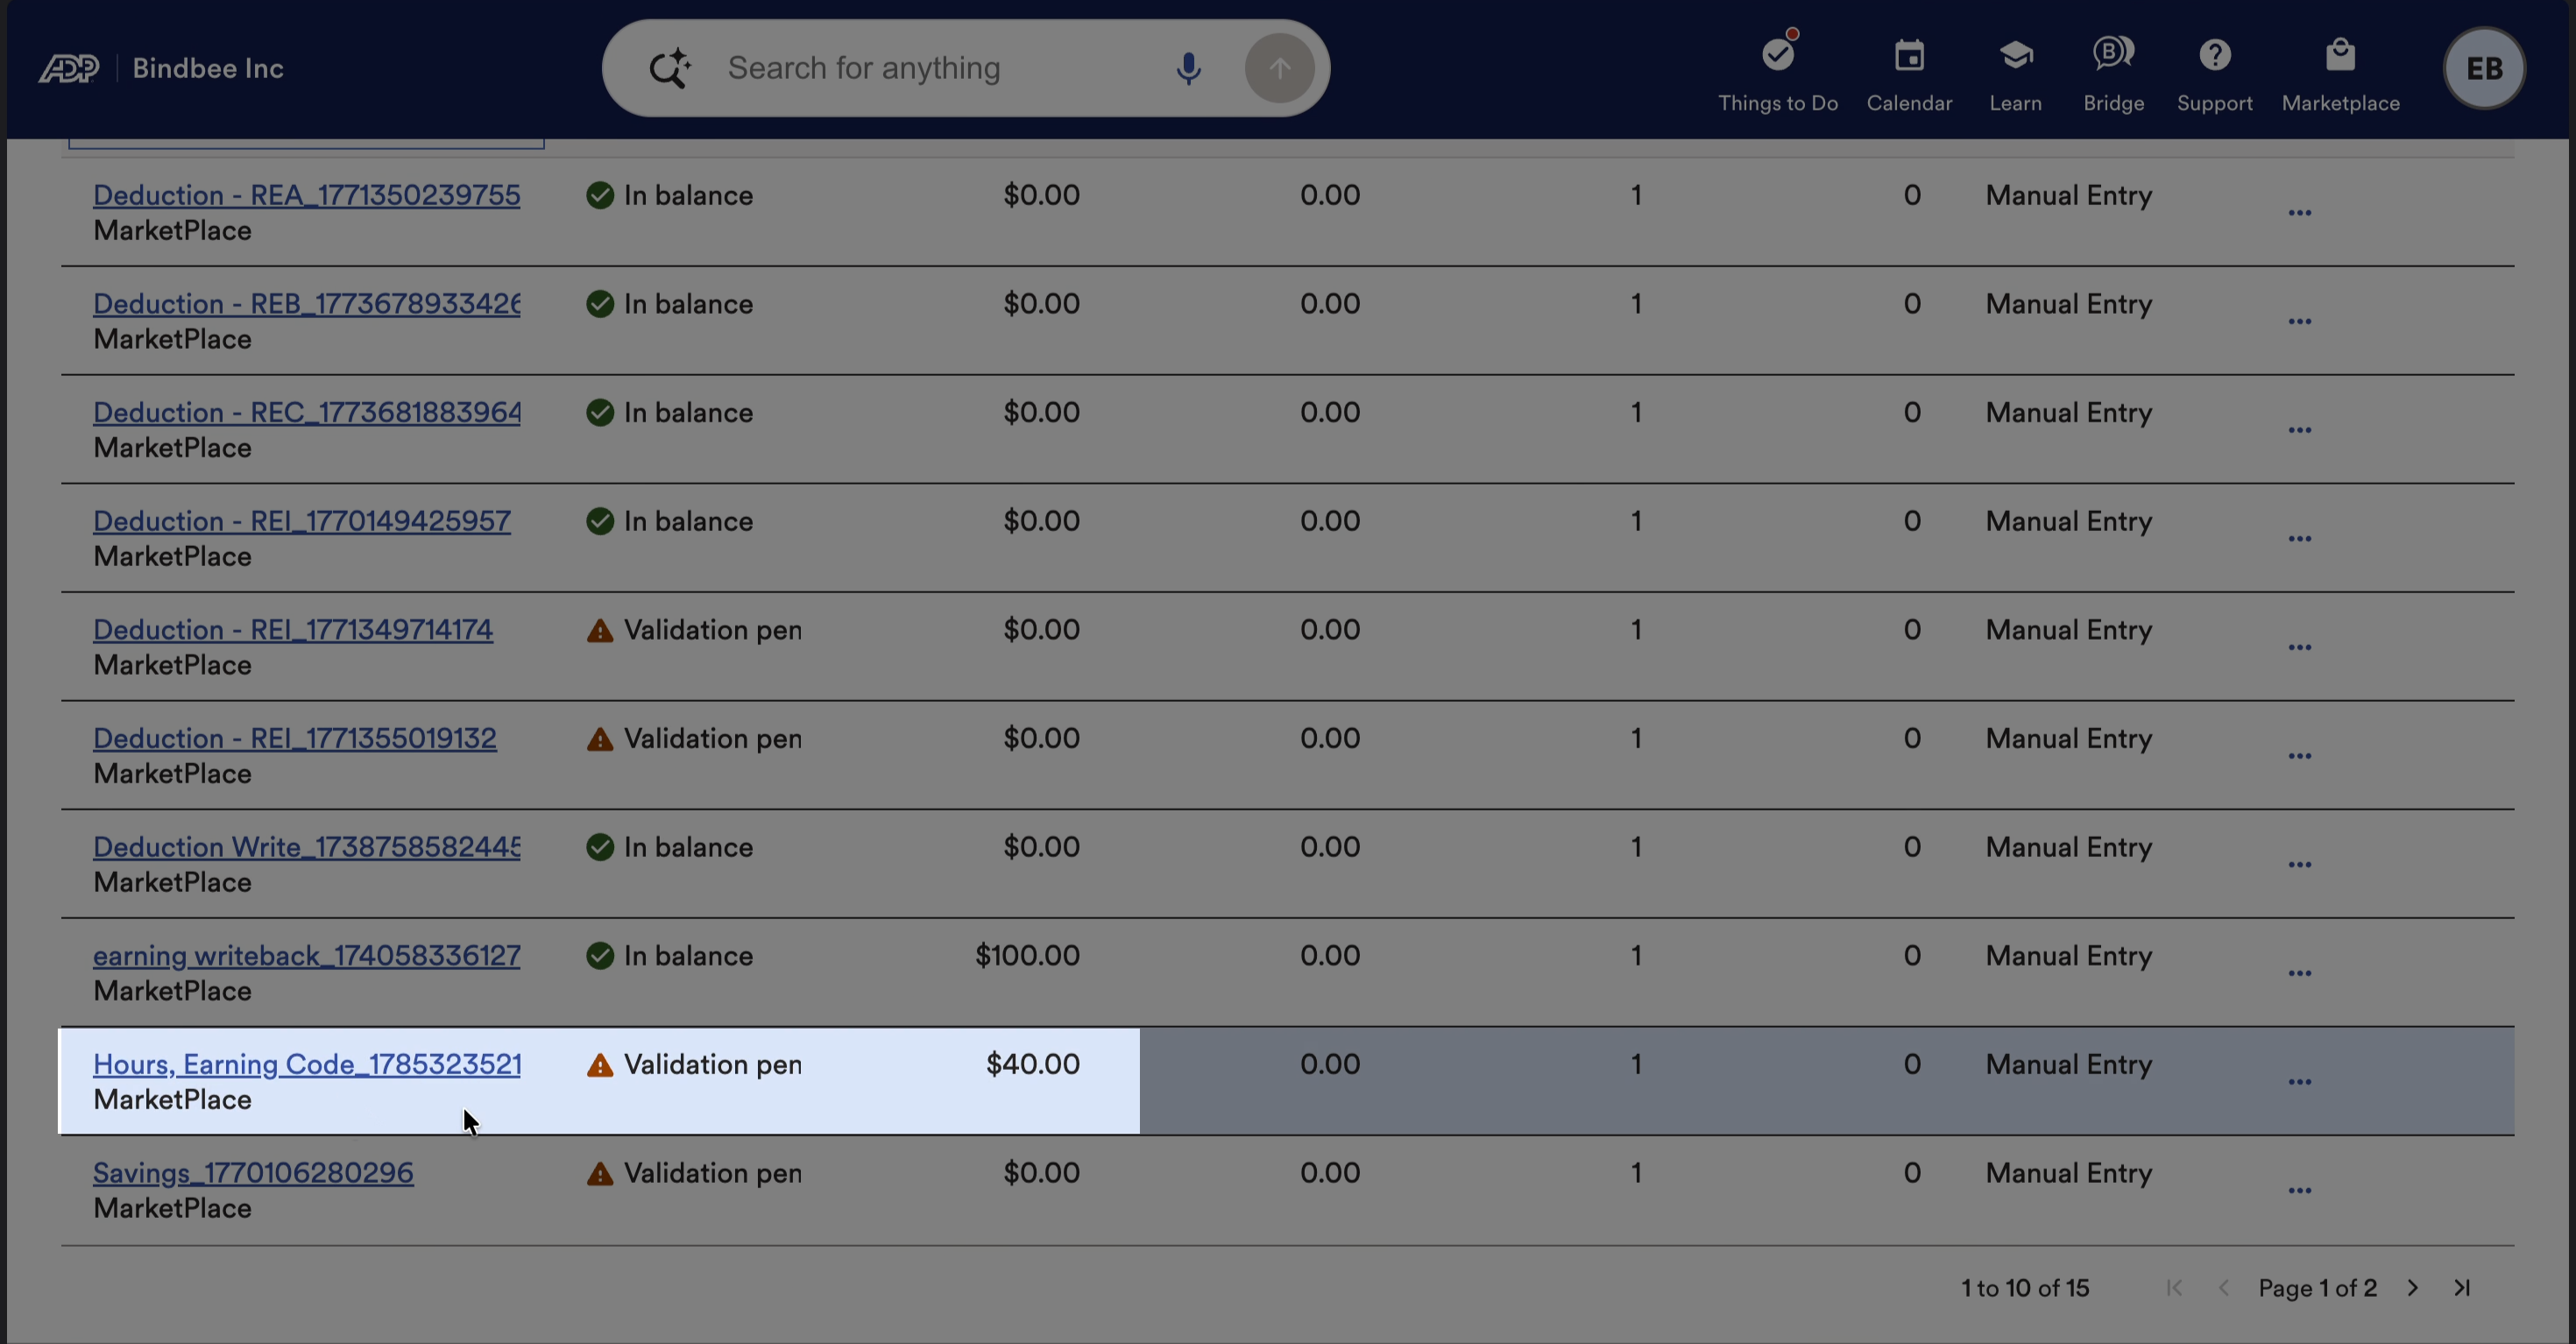
You have now successfully created and verified an employee payroll entry in ADP Workforce Now using Bindbee’s Create Employee Payroll Run API.